 Your Privacy Choices
Almost two years ago I wrote about the PAS-29 COTI. It is a clip-on thermal imager that projects a thermal image into the objective lens of your night vision goggles. Well, now there is a newcomer to the market – the Jerry-C aka Chinese ECOTI. It is smaller and higher resolution than the PAS-29. Let’s take a look.
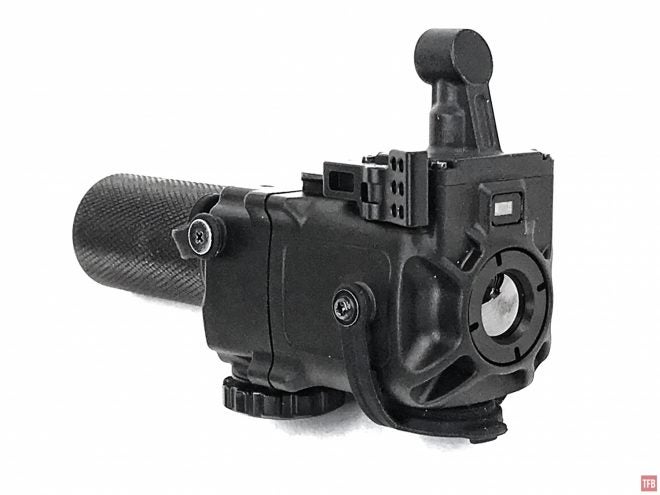
Jerry-C aka Chinese ECOTI
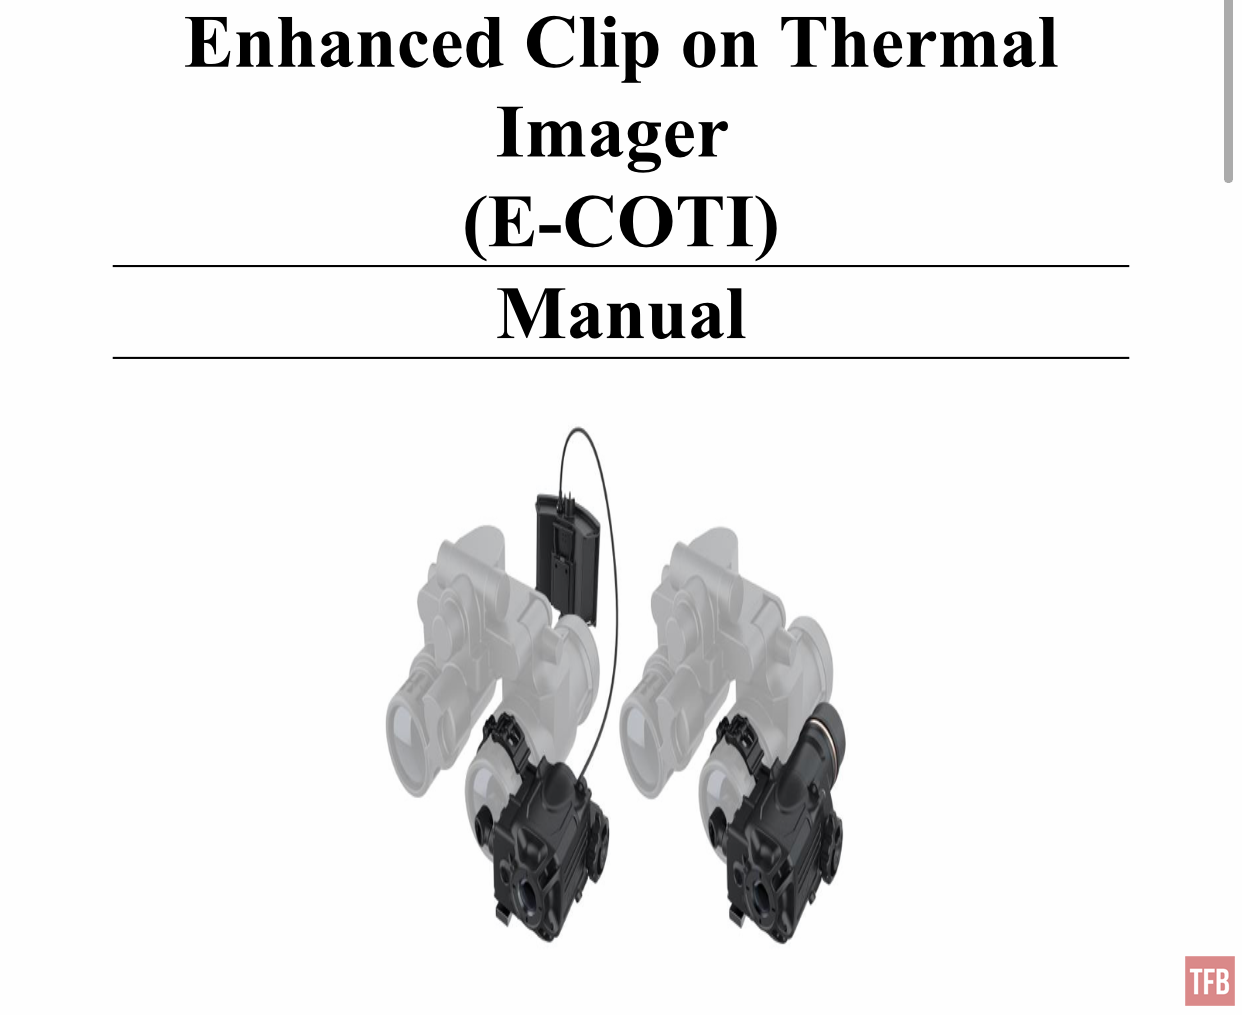
ECOTI stands for Enhanced Clip-On Thermal Imager. Optics 1, the makers of the PAS-29 COTI have their own ECOTI. The Jerry-C is a cheaper alternative.


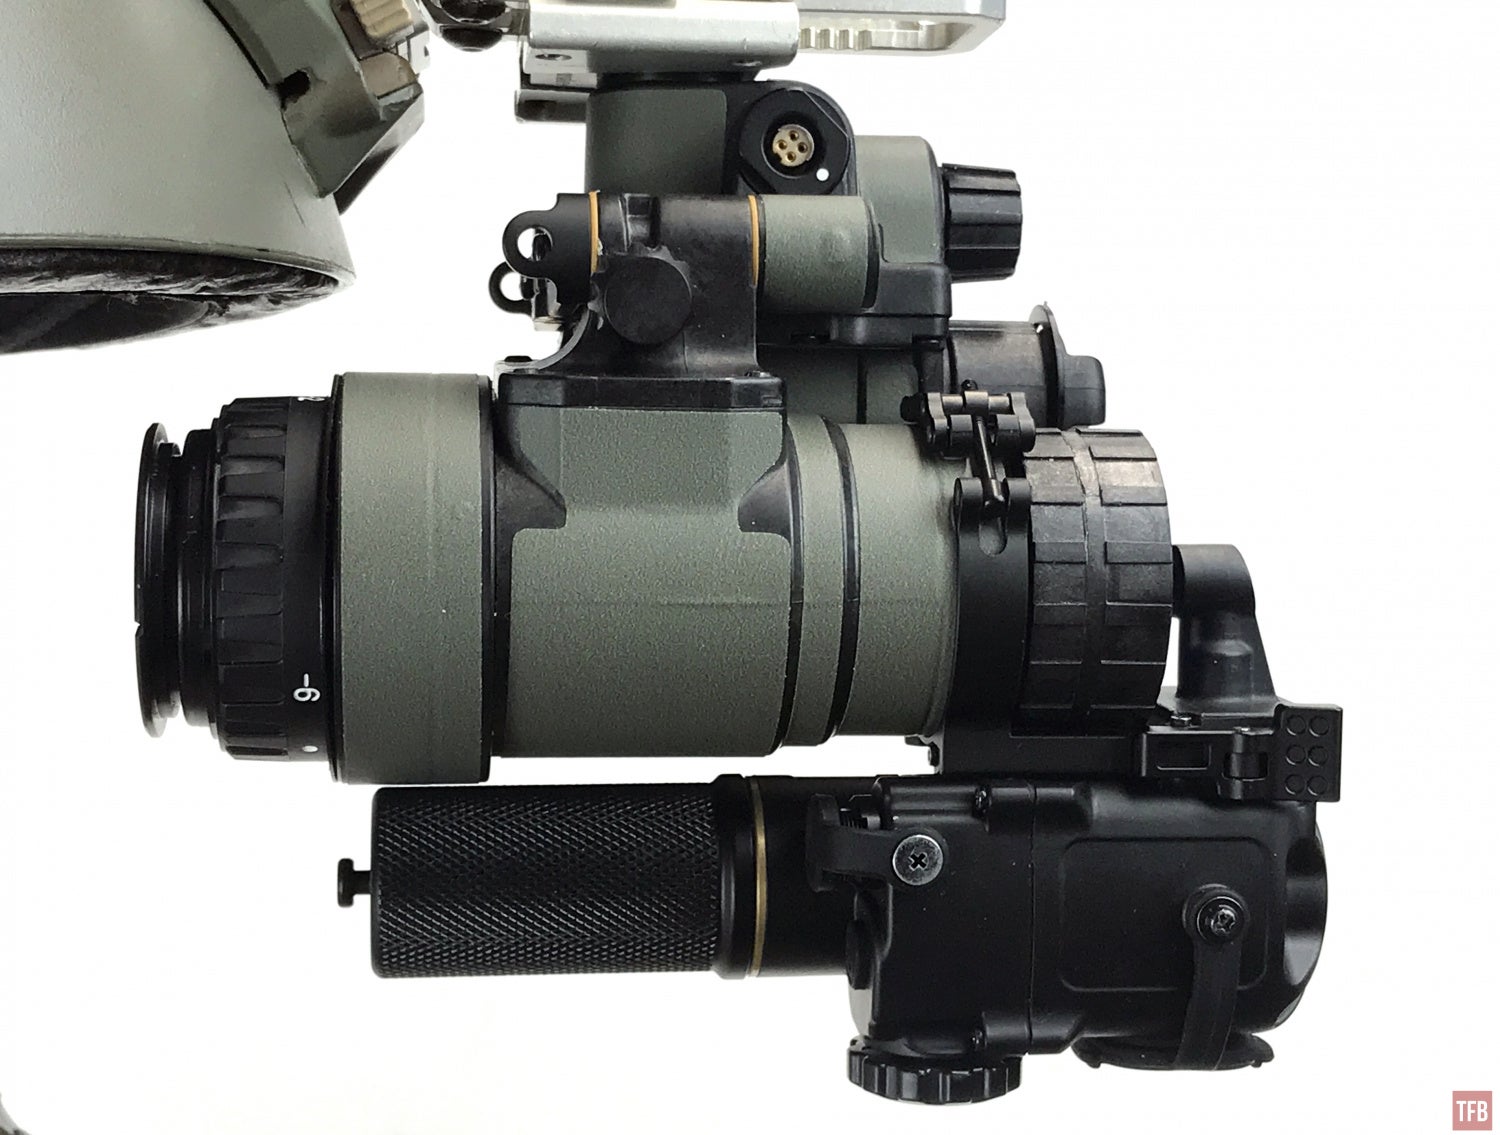
Here is the Jerry-C with 18650 battery cap next to a PAS-29 COTI.
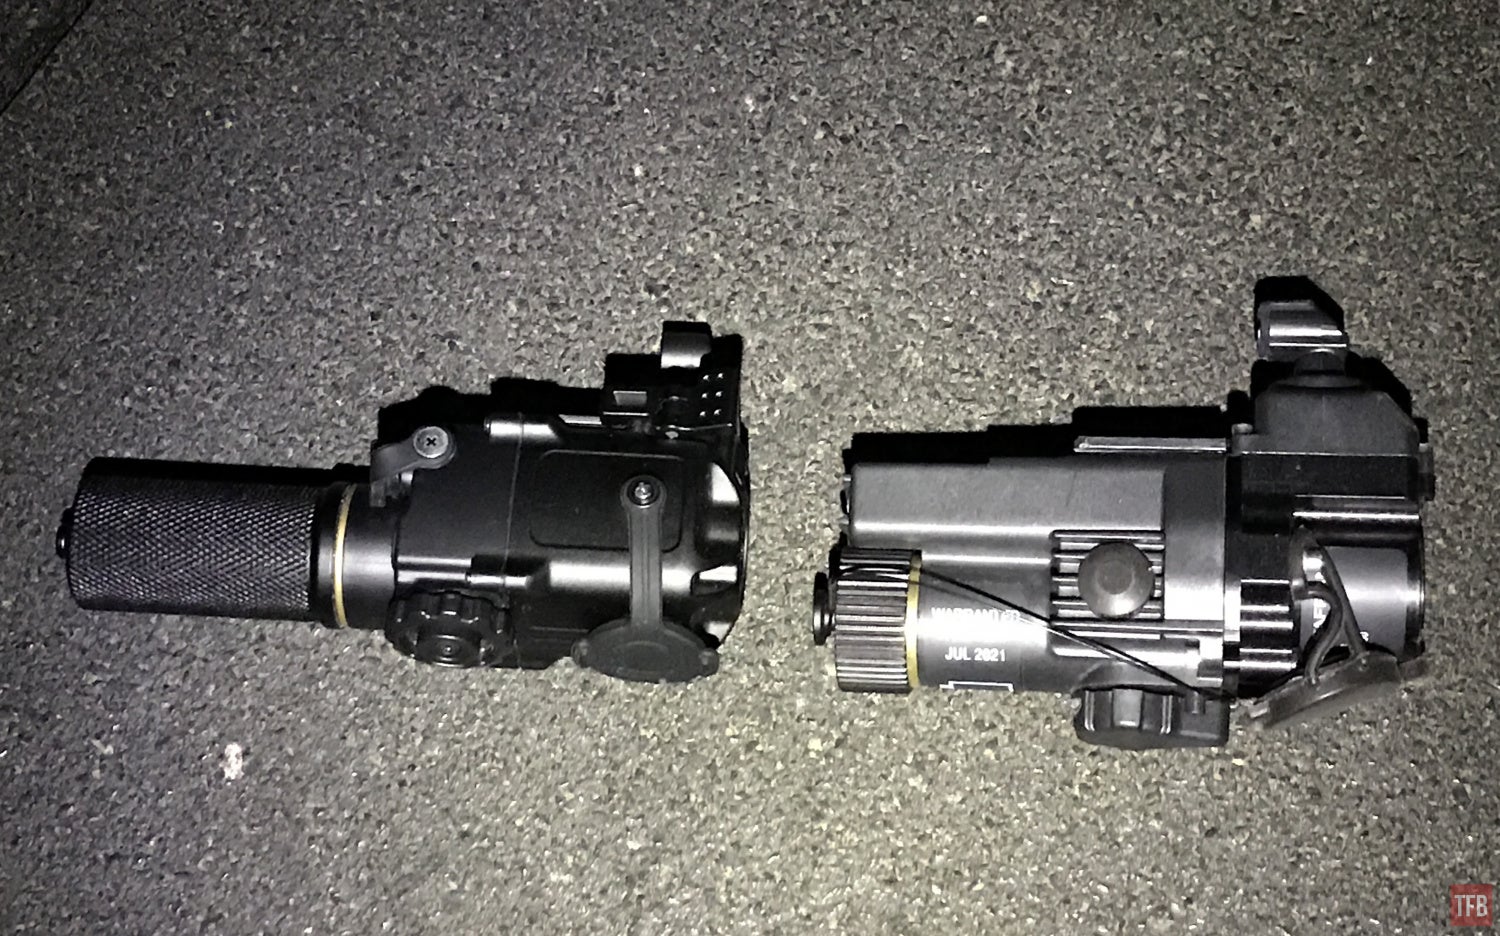

Even though the objective germanium lens of the Jerry-C is smaller than the COTI, it produces a cleaner image.
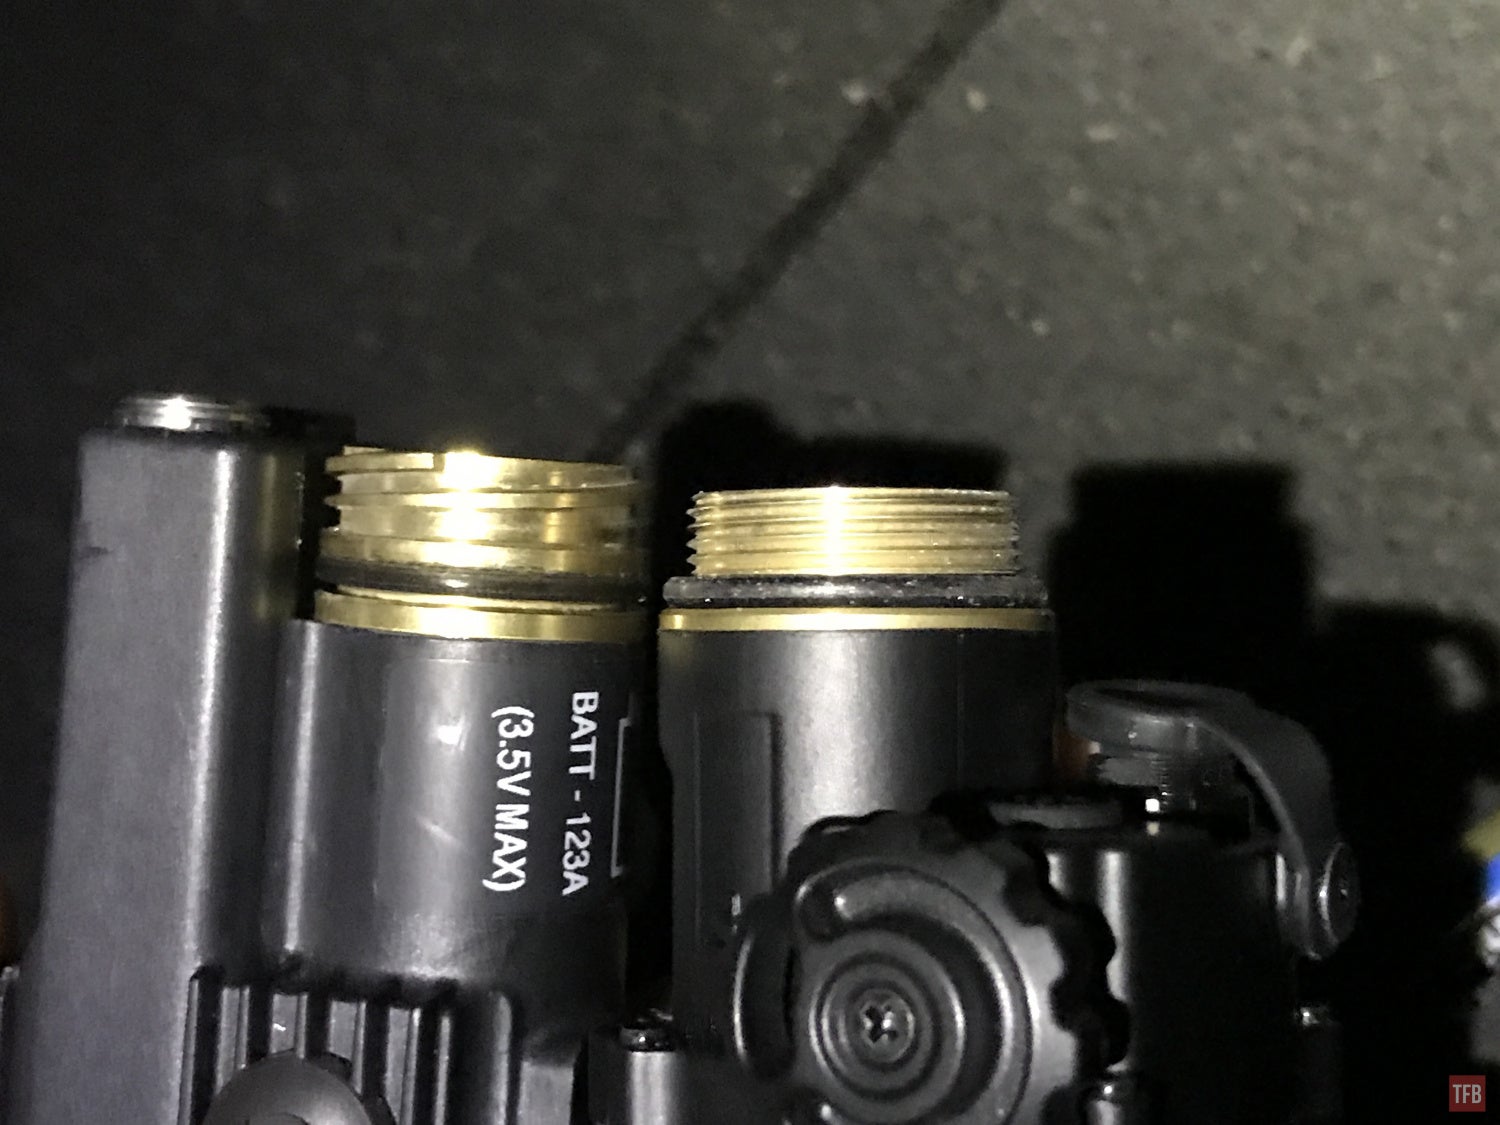
Unfortunately, the thread pitches for the tail caps are not the same so you can’t upgrade your COTI.
The PAS-29 COTI is 320×240 pixel 8-12μ wavelength, whereas the Jerry-C is 640×512, 12 μm pixel sensor with 50Hz resolution. Operational range: 1100m man-sized target, 270m recognition, 140m identification. One of the biggest differences you will notice right away is the 30.5º FOV versus the 20º FOV of the PAS-29 COTI.
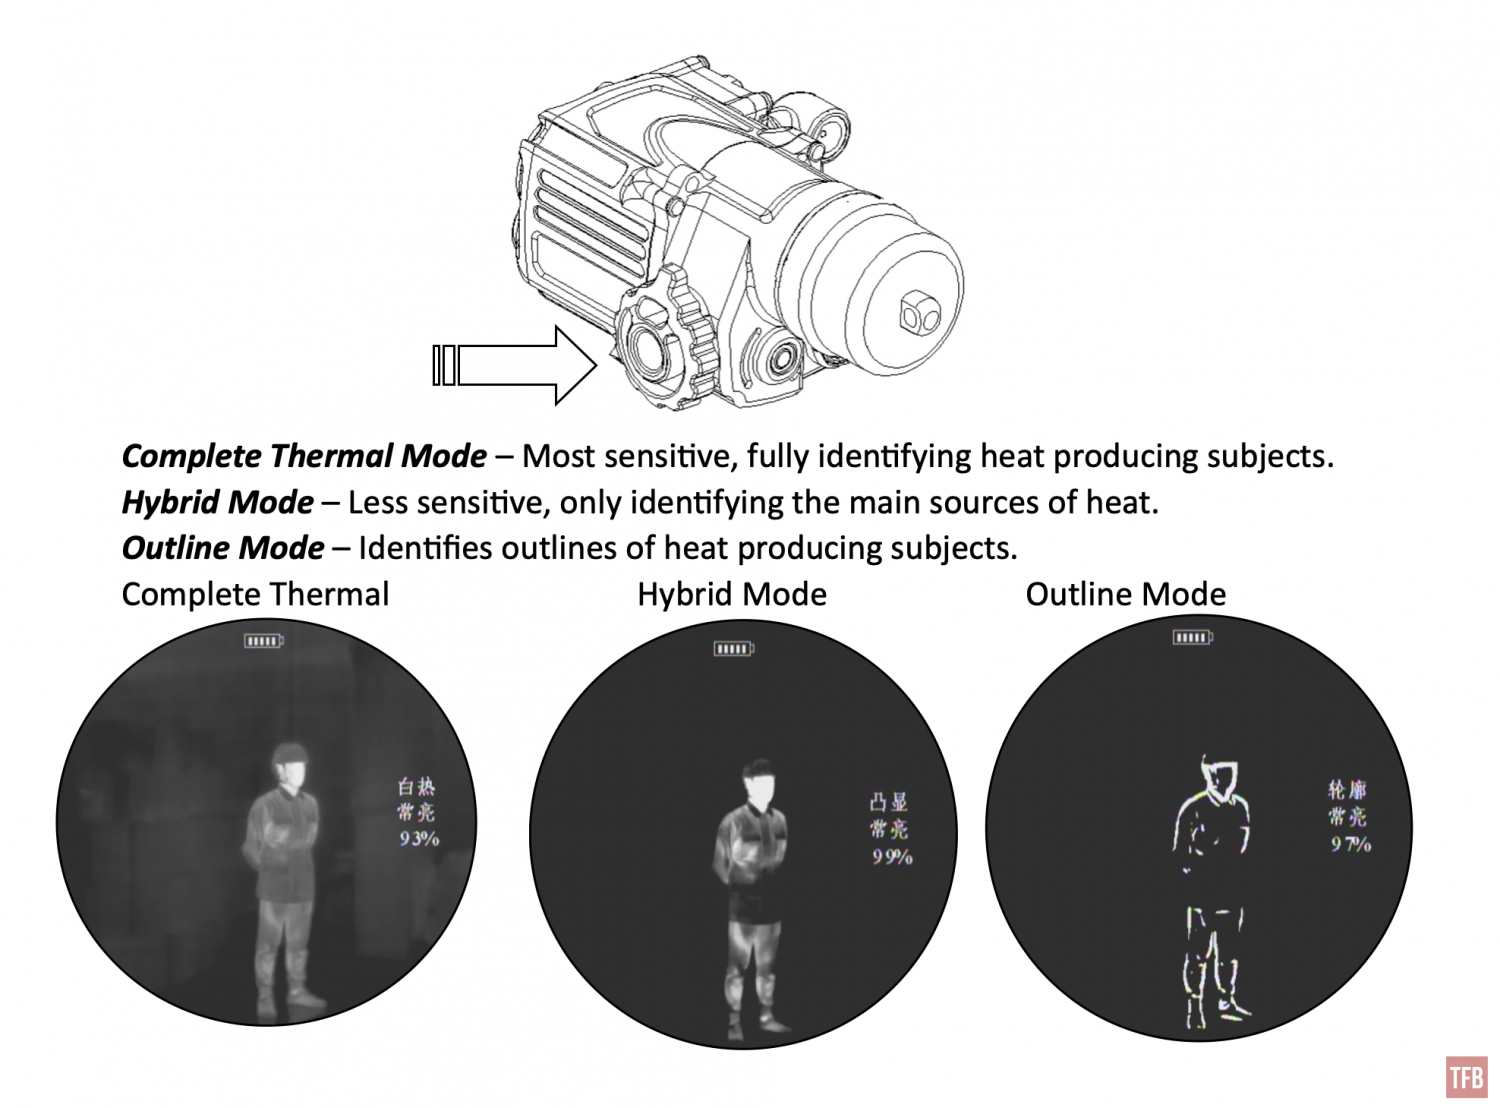
The controls are somewhat similar to the PAS-29 COTI. There is a control wheel on the bottom of the Jerry-C. When you rotate it you can feel an immediate click for positive tactile feedback that the unit has turned on. The wheel controls the brightness of the thermal image. Just like the PAS-29, you can push the control wheel up towards the housing. This switches palettes from Full Thermal, Patrol and Edge Detection.
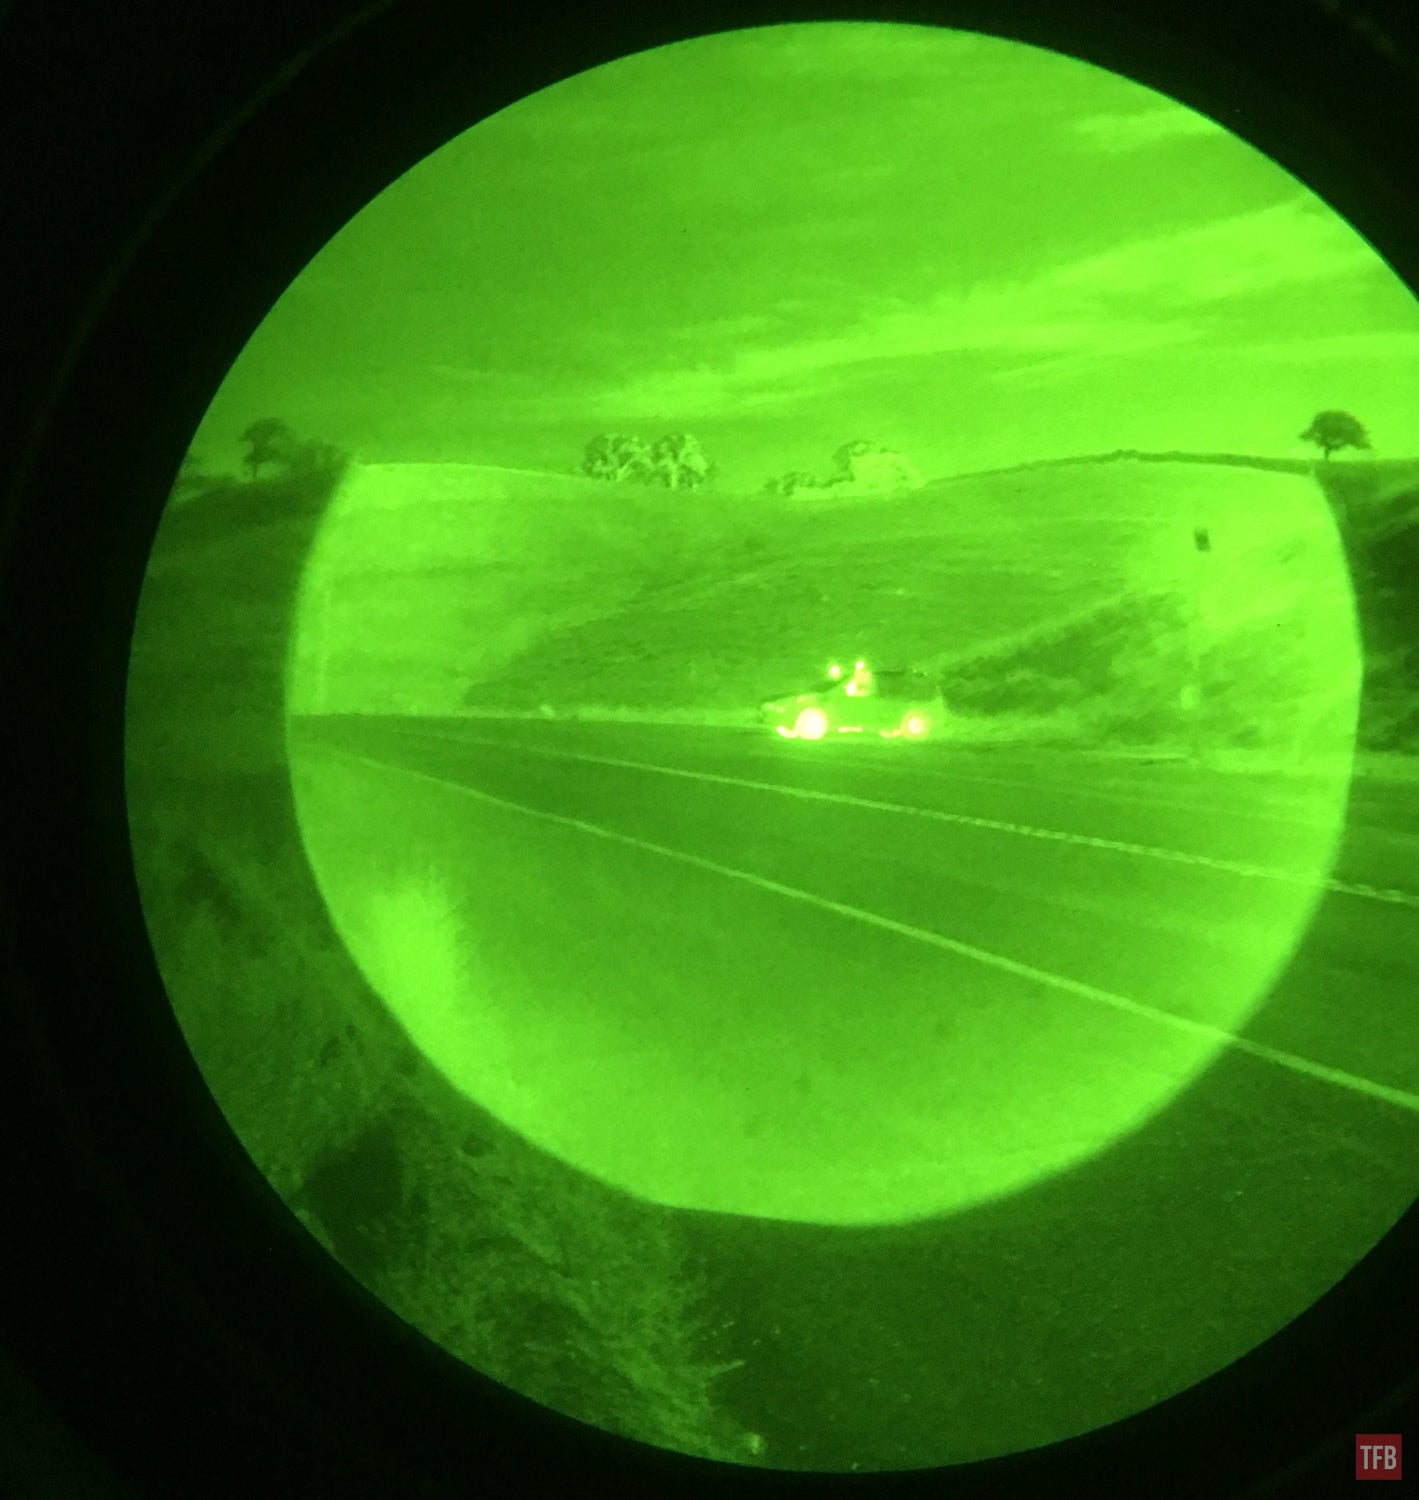
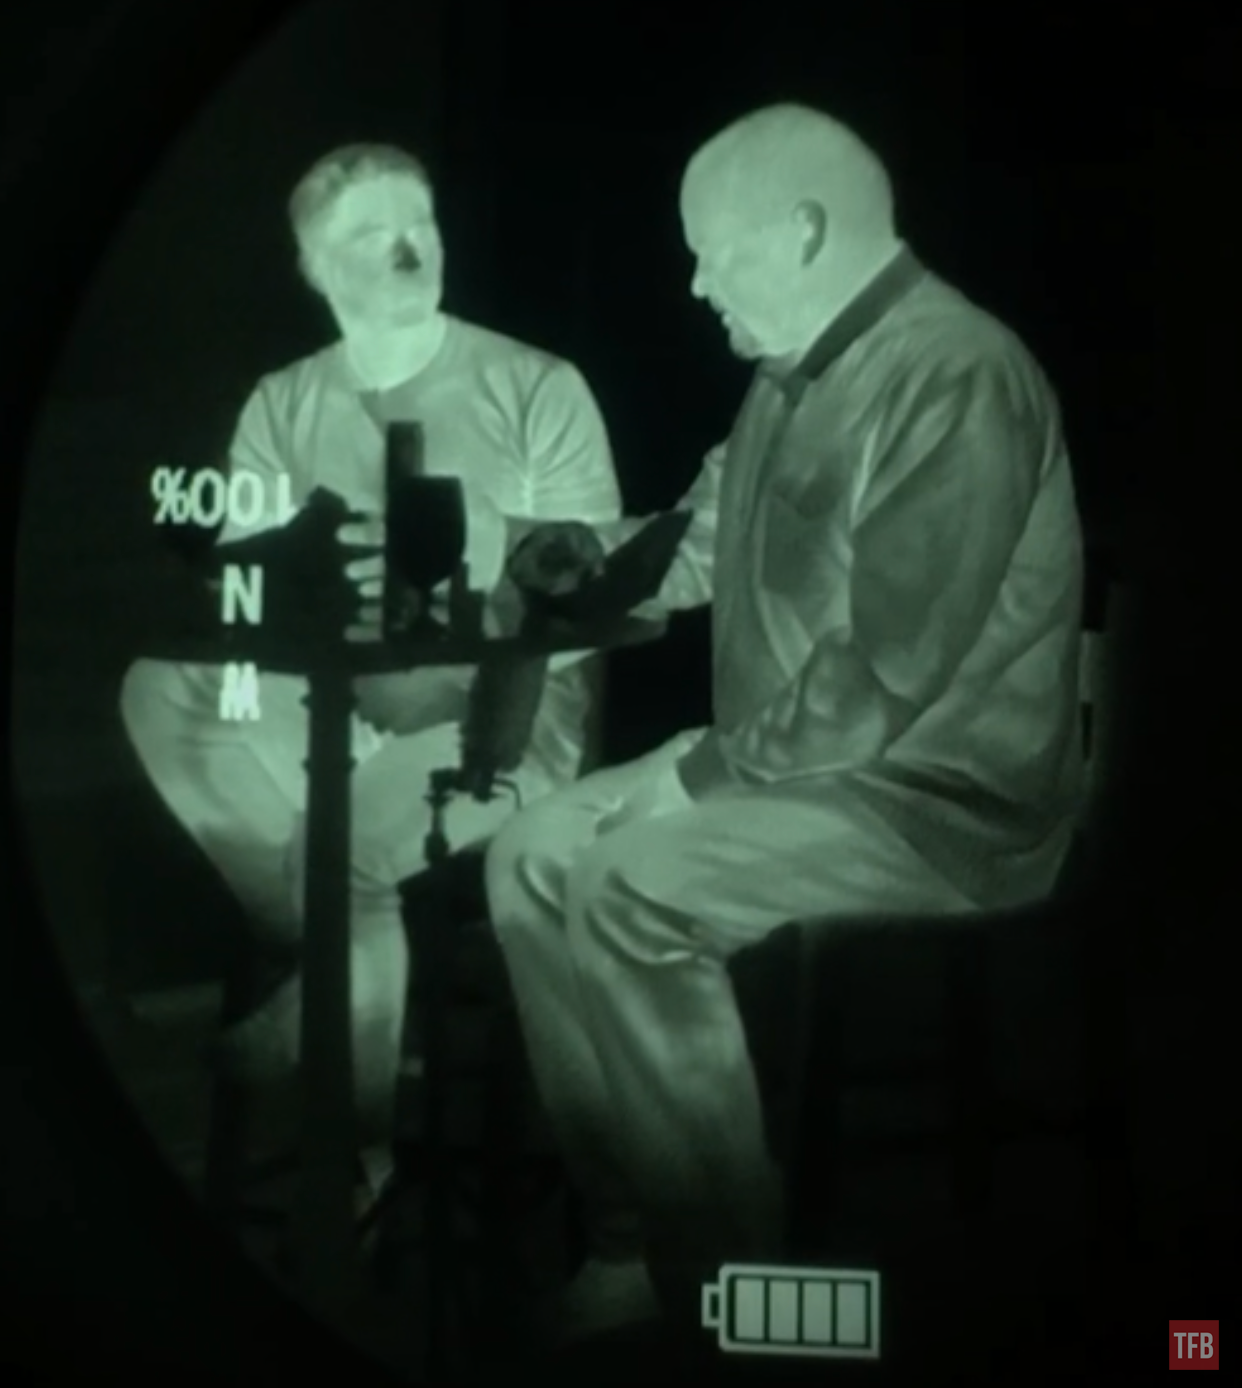
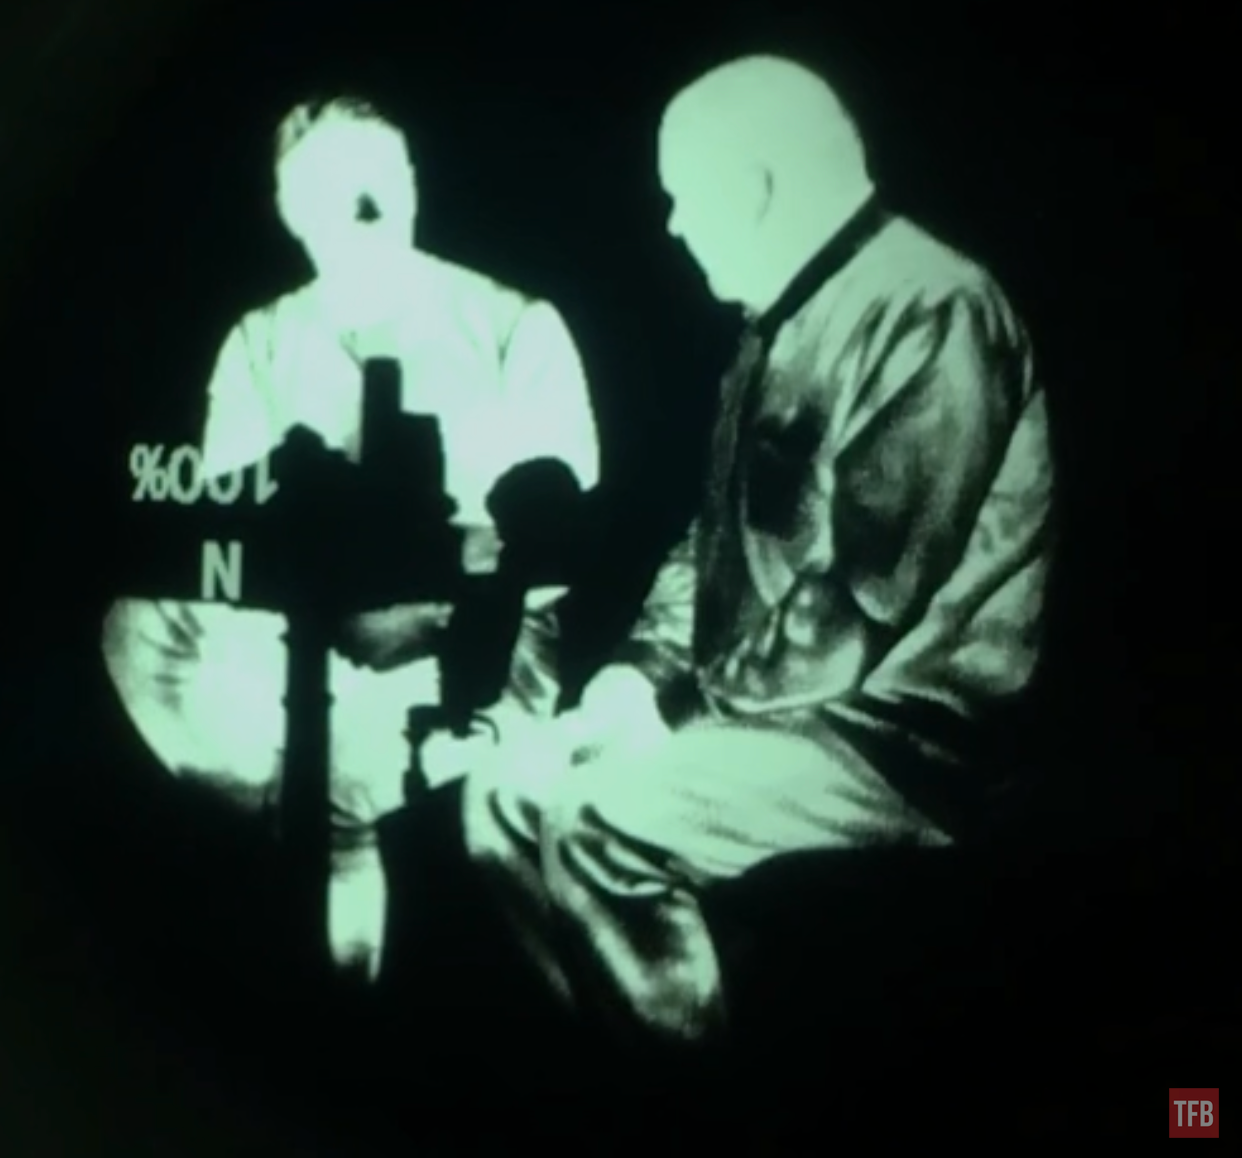
The images below were captured through my iPhone. I held the Jerry-C periscope up to the camera lens to photograph the thermal image it produces.
Ful Thermal
Patrol Mode shows anything over 98ºF
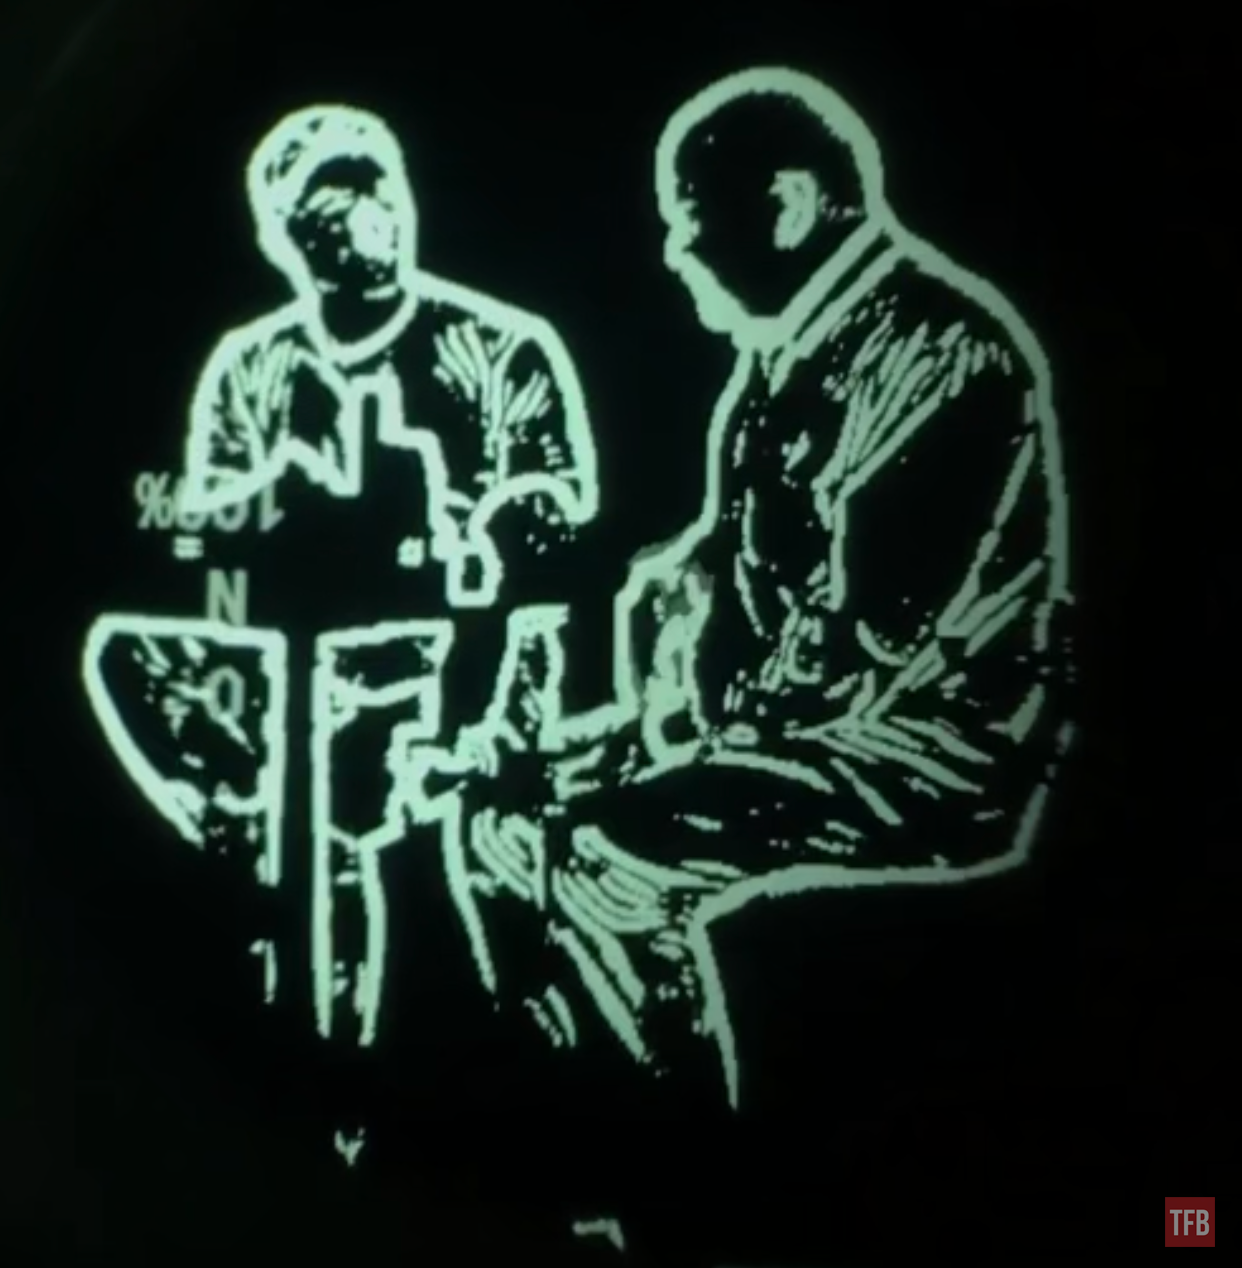
Outline Mode
PAS-29 COTI has a button on either side of the housing. The Jerry-C only has an auxiliary button at the rear. Press it quick and it engages pulse mode. This pulses the thermal image on and off. When this mode is on, the control wheel will control the frequency of the pulsing. If you press the button again it will stop pushing and project a thermal image all the time.

If you press and hold down this button you will bring up the onscreen menu.

- CA Contrast of the thermal image in full thermal.
- TA Thickness of the outline mode lines
- LANG Language (Chinese or English)
- ROL Rotation of display
- AUTO Automatic brightness
- PAL Video output
- MOD Clip on or Handheld rotates image 90º
- Reset Reset to default settings
- Exit menu
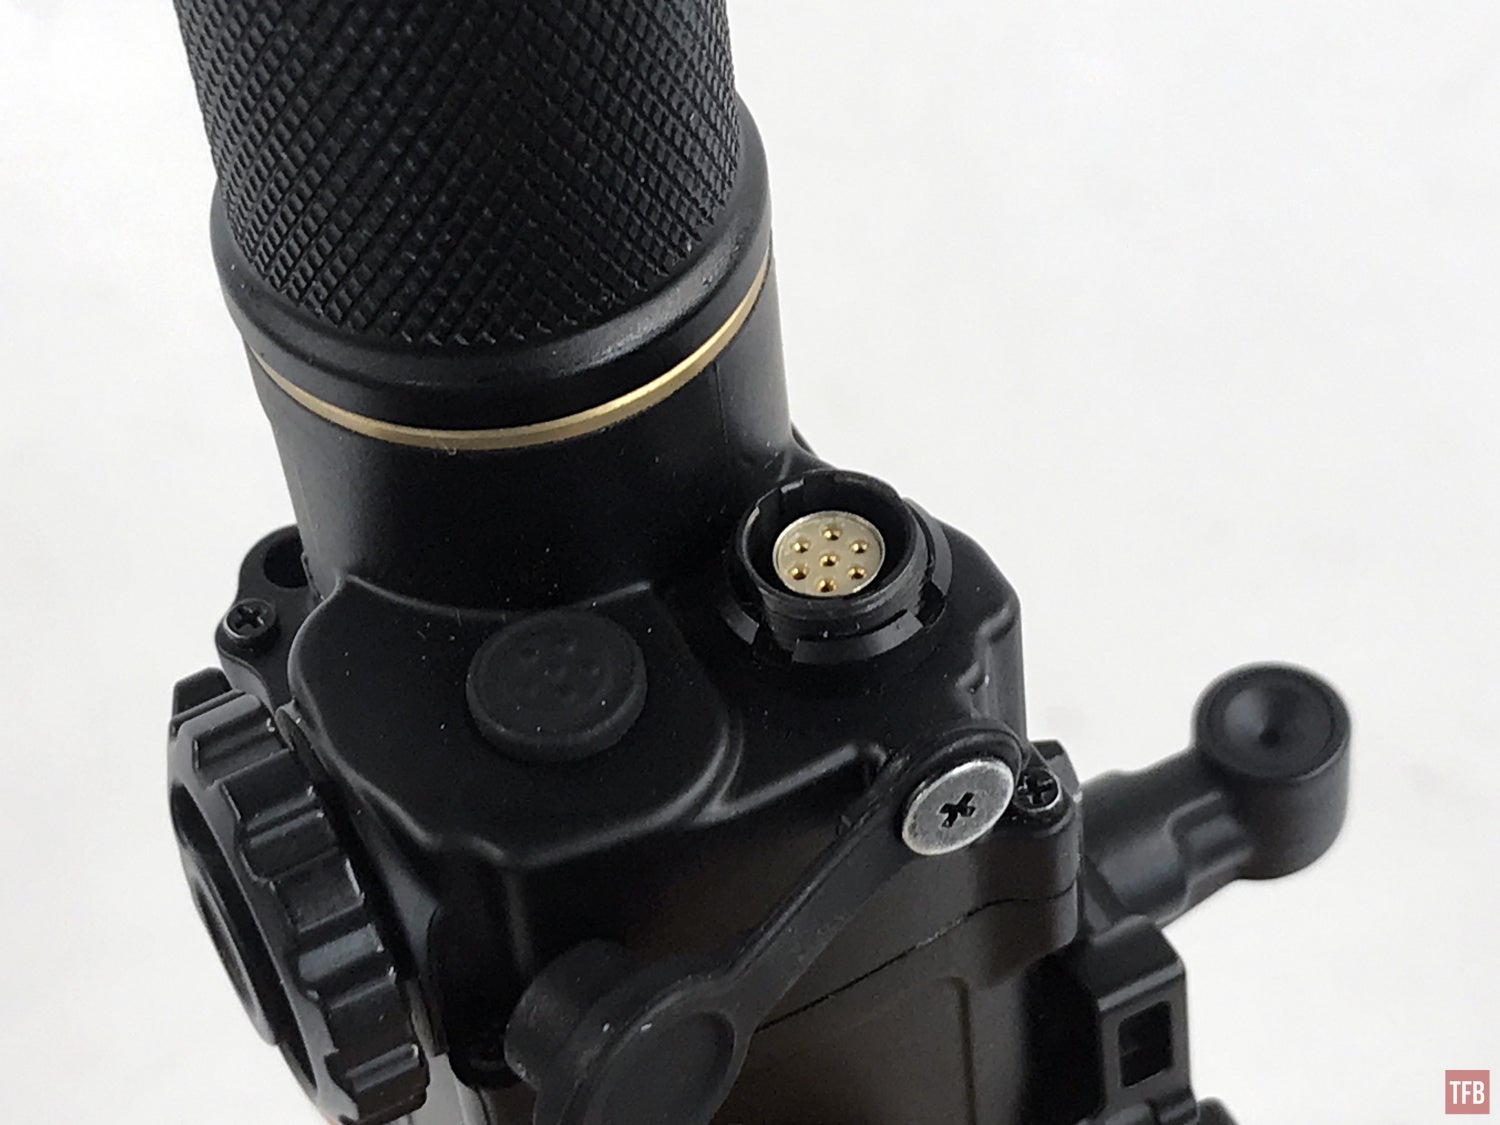
Just above the menu button is a 7 pin auxiliary port. This is for video out so you can record the thermal image using a mini DVR. There is also a rumor of a battery backpack being developed for the Jerry-C.
Powering The Jerry-C
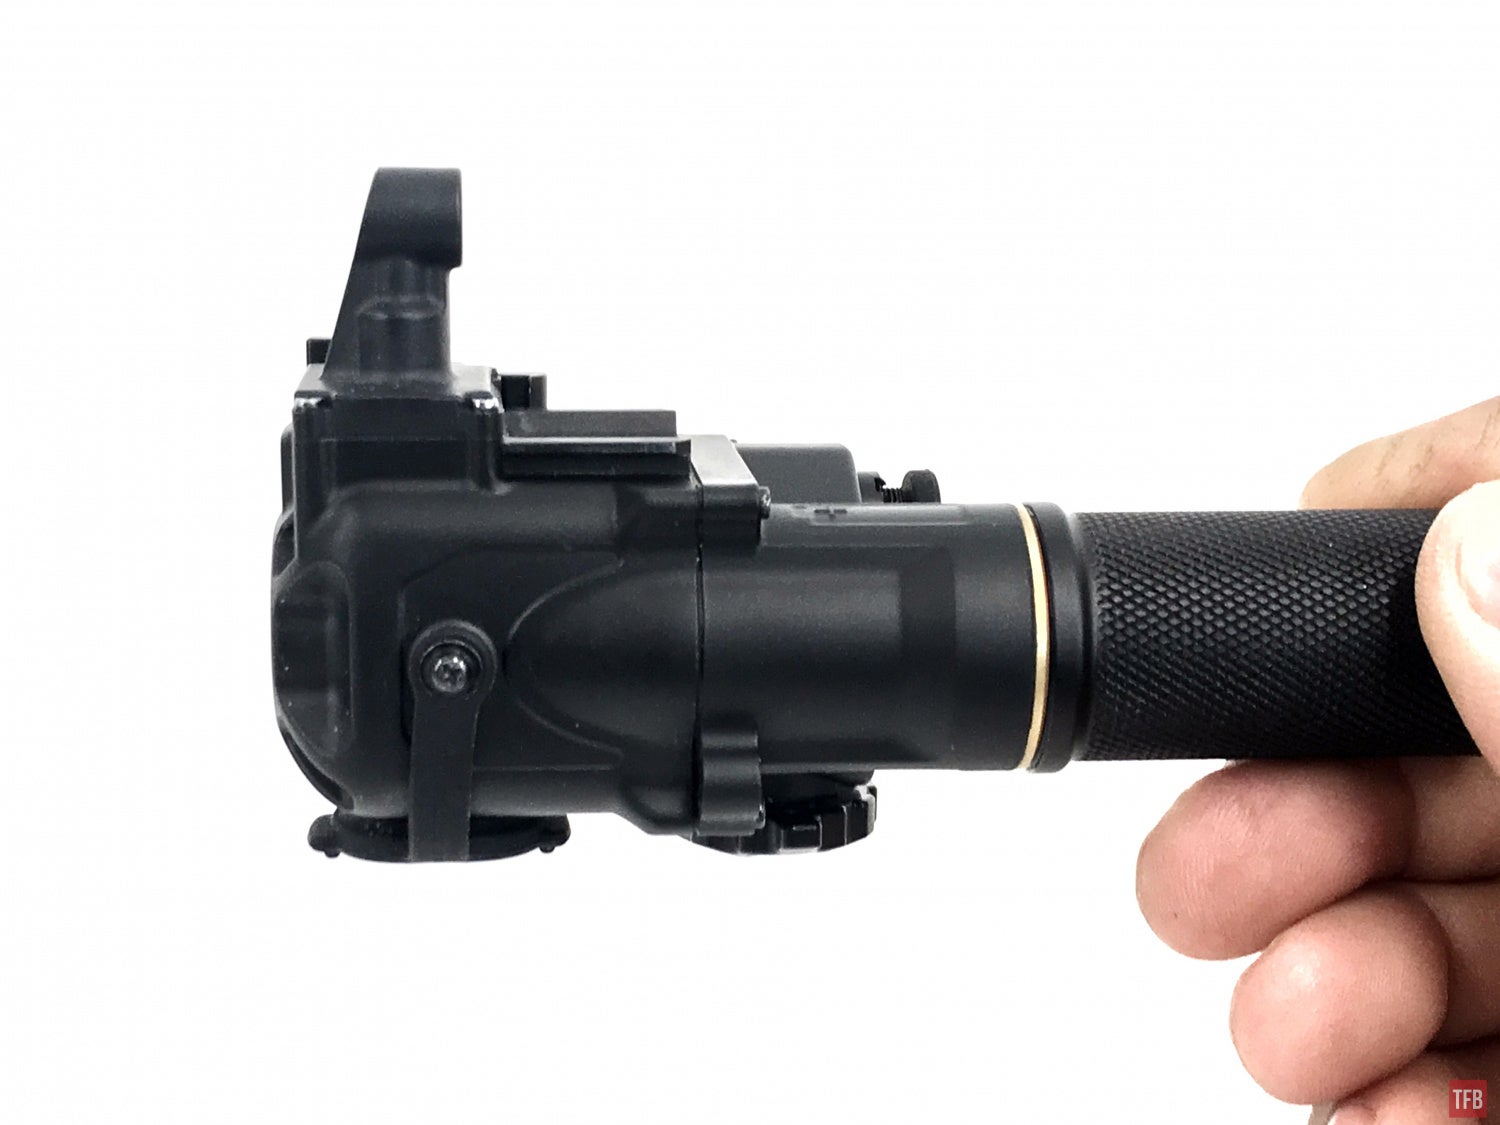
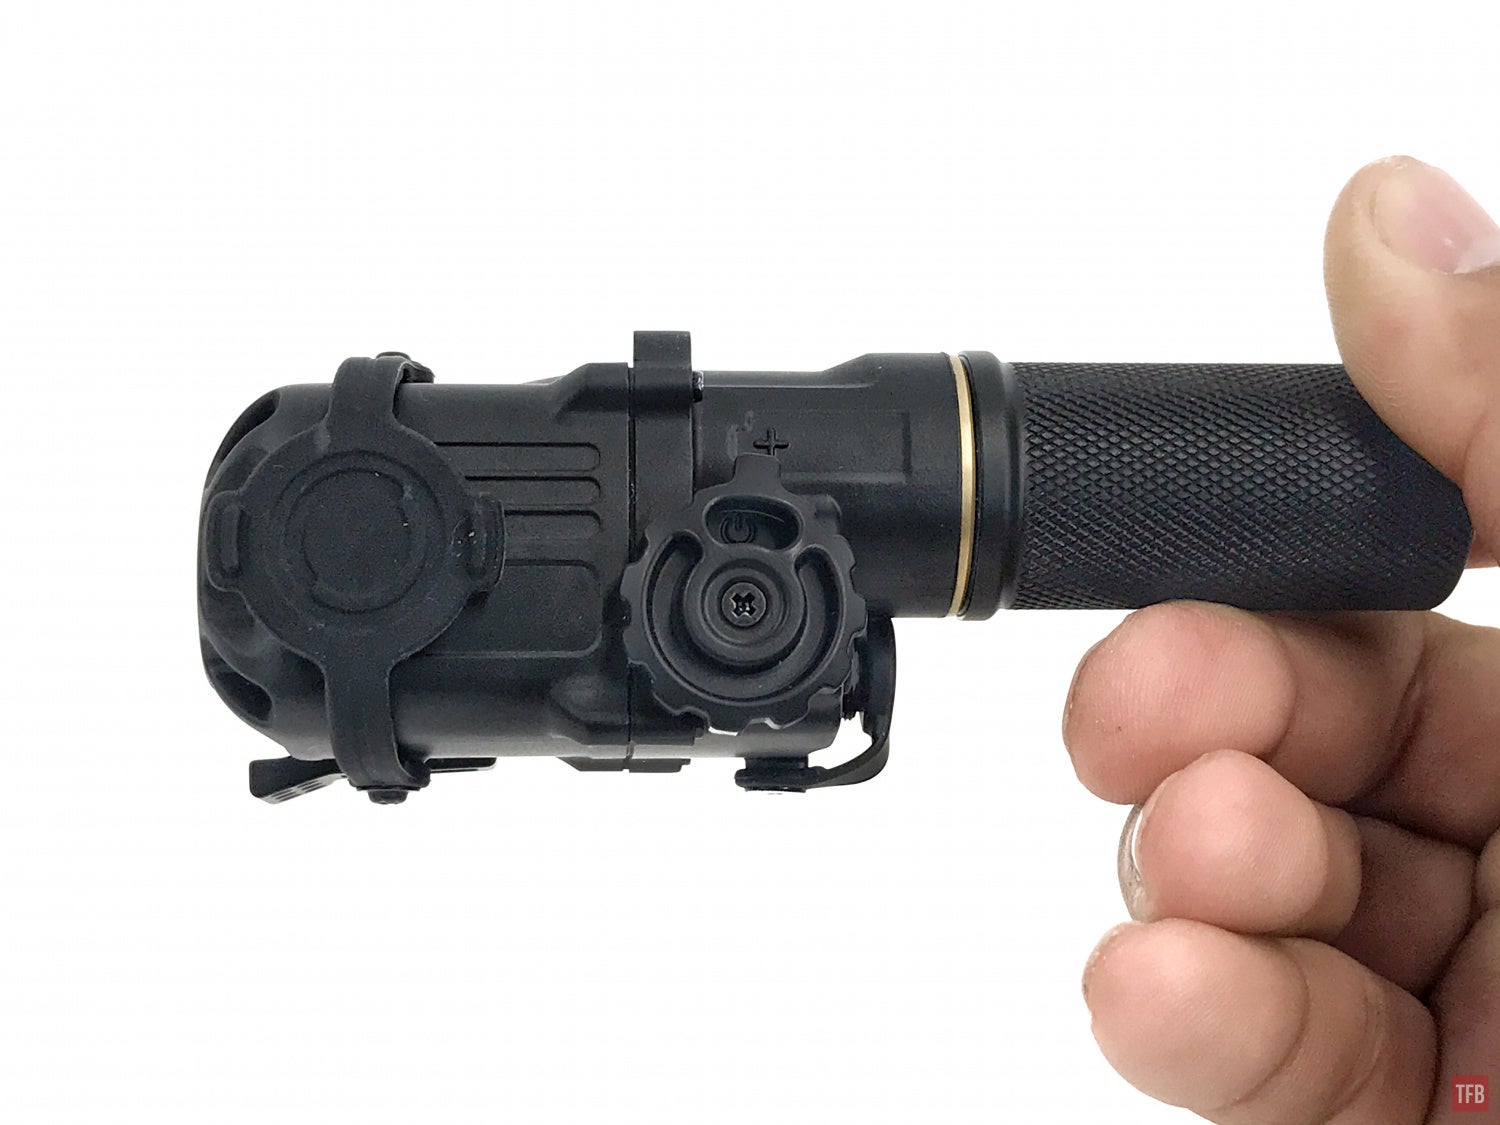
The Jerry-C comes with two different tail caps. This is for two different sized batteries. The Jerry-C only uses rechargeable Li-Ion batteries. Normal CR123A will not power up the ECOTI. The shorter battery cap allows you to use RCR123 (Rechargeable CR123). This will power the ECOTI for two hours.
The longer battery cap is for use with flat top 18650 batteries. Just like the ones used in the Cloud Defensive OWL. If you use button top 18650, they are too long and won’t fit inside, the battery cap can’t screw onto the housing. Once you get the right battery, the Jerry-C will run for 8 hours on an 18650.
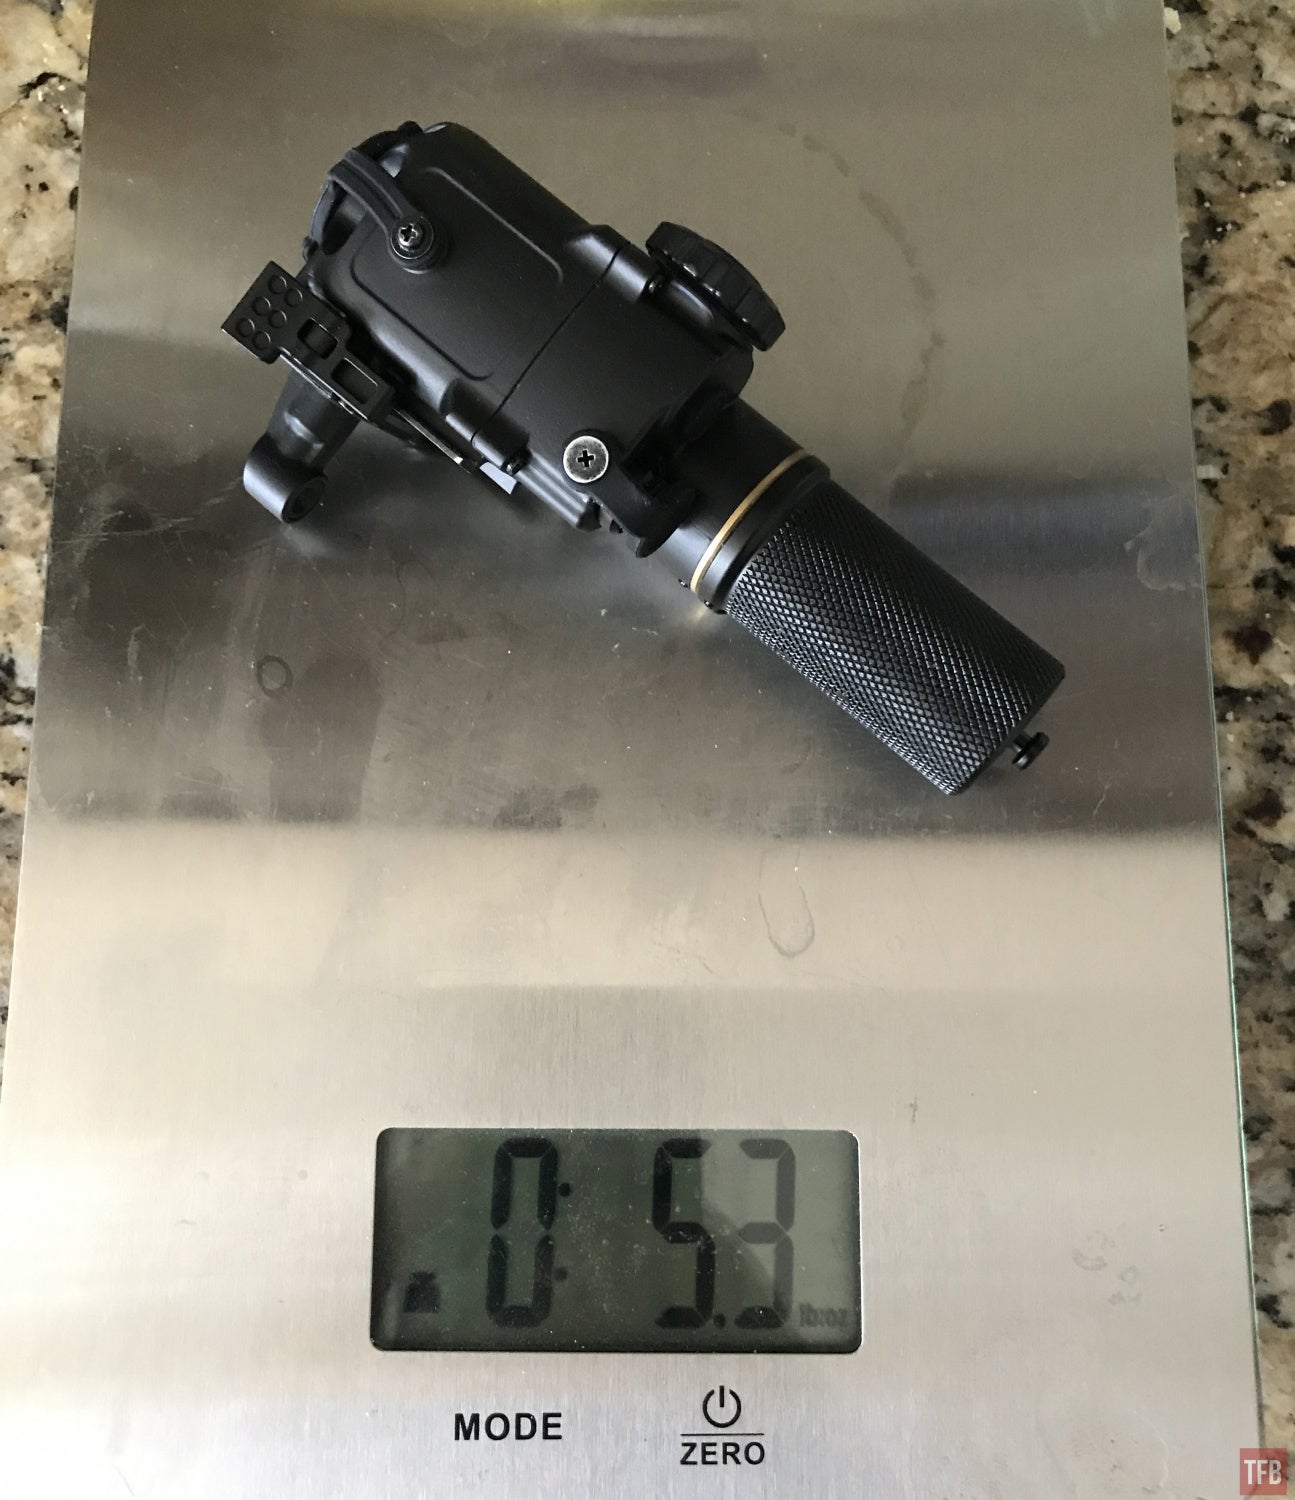
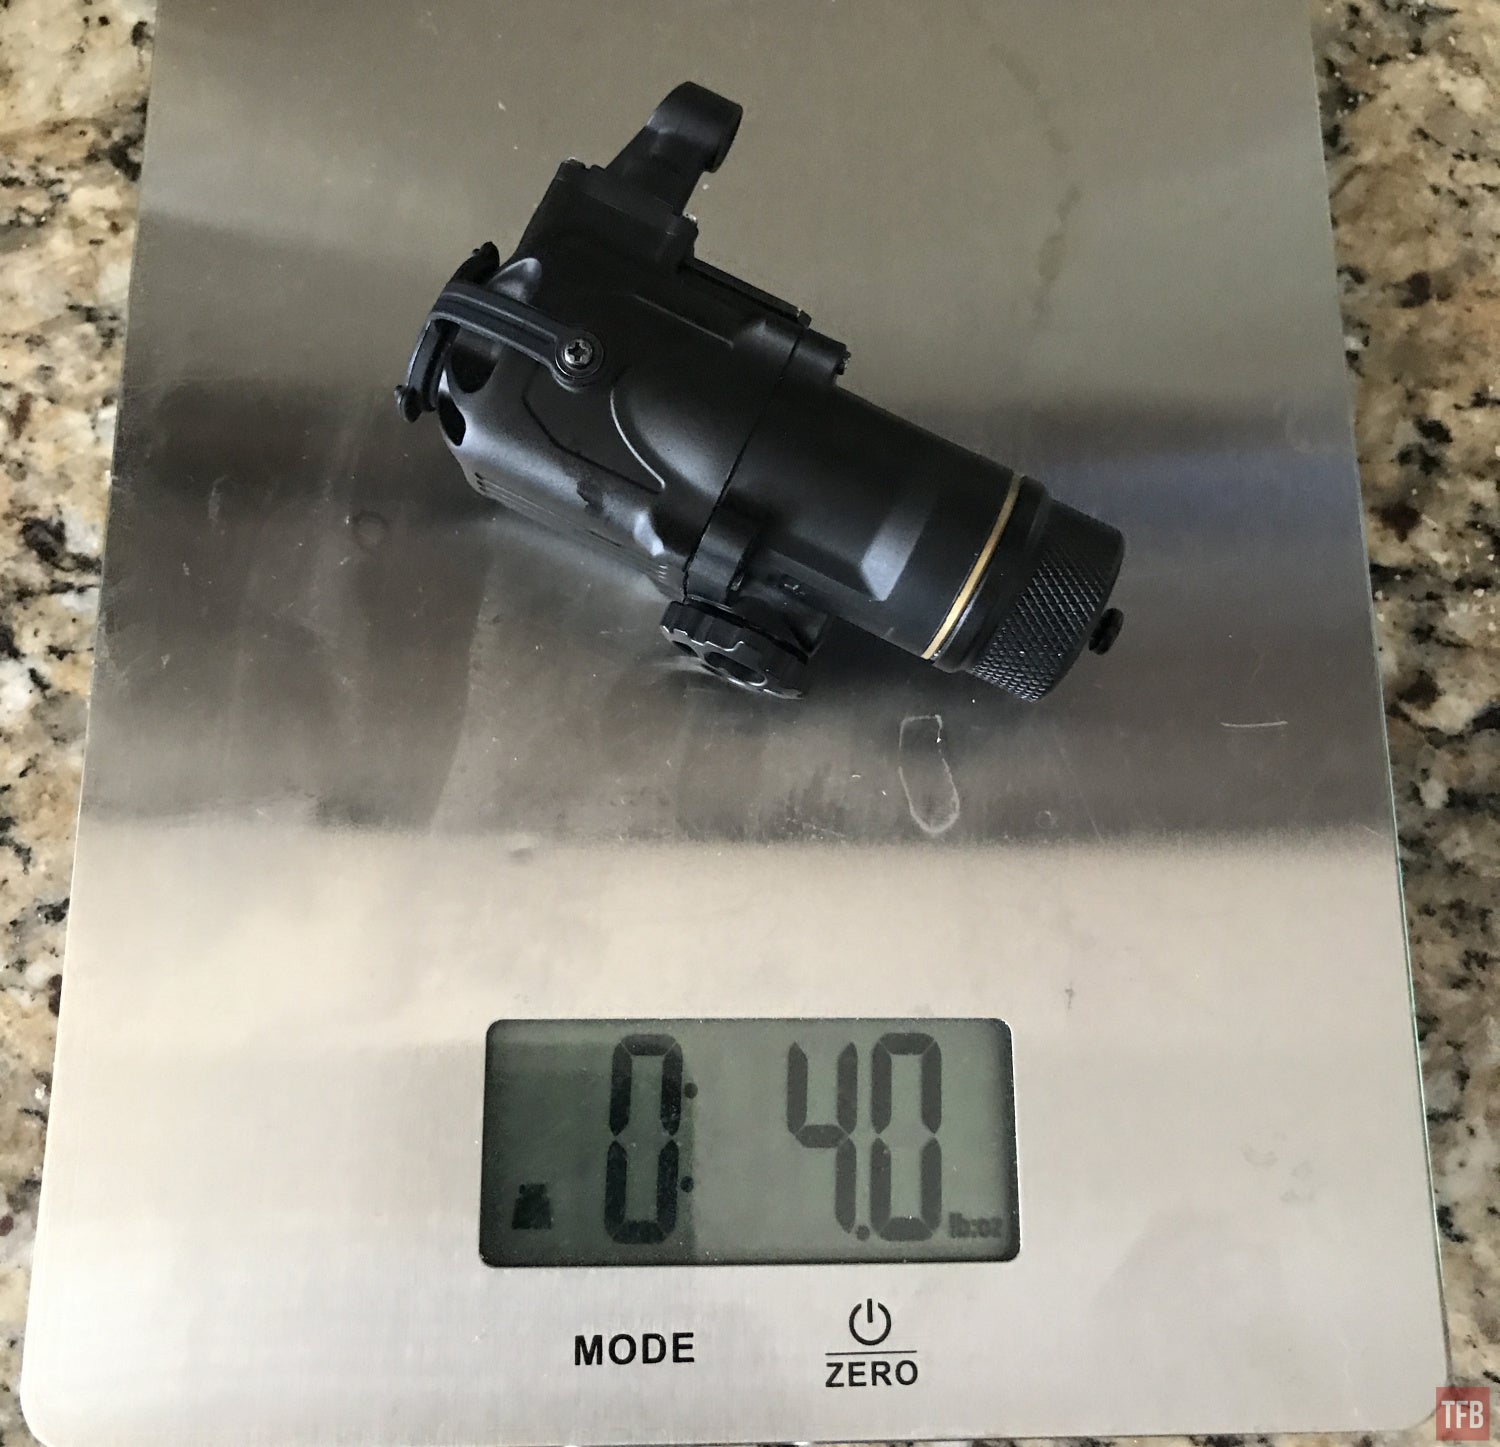
There is a weight difference if you use an RCR123 or 18650. A PAS-29 COTI weighs 5.8 ounces. The Jerry-C is lighter even with the larger 18650 battery.
18650 and long tail cap
RCR123 with the short tail cap
The instructions depict a remote battery pack but it is not out yet. The CAD drawing reveals that the battery tube has been deleted. It looks like it will be a dedicated remote battery pack. Unlike the PAS-29 COTI that has a port in the back to attach a remote battery pack for a longer run time.
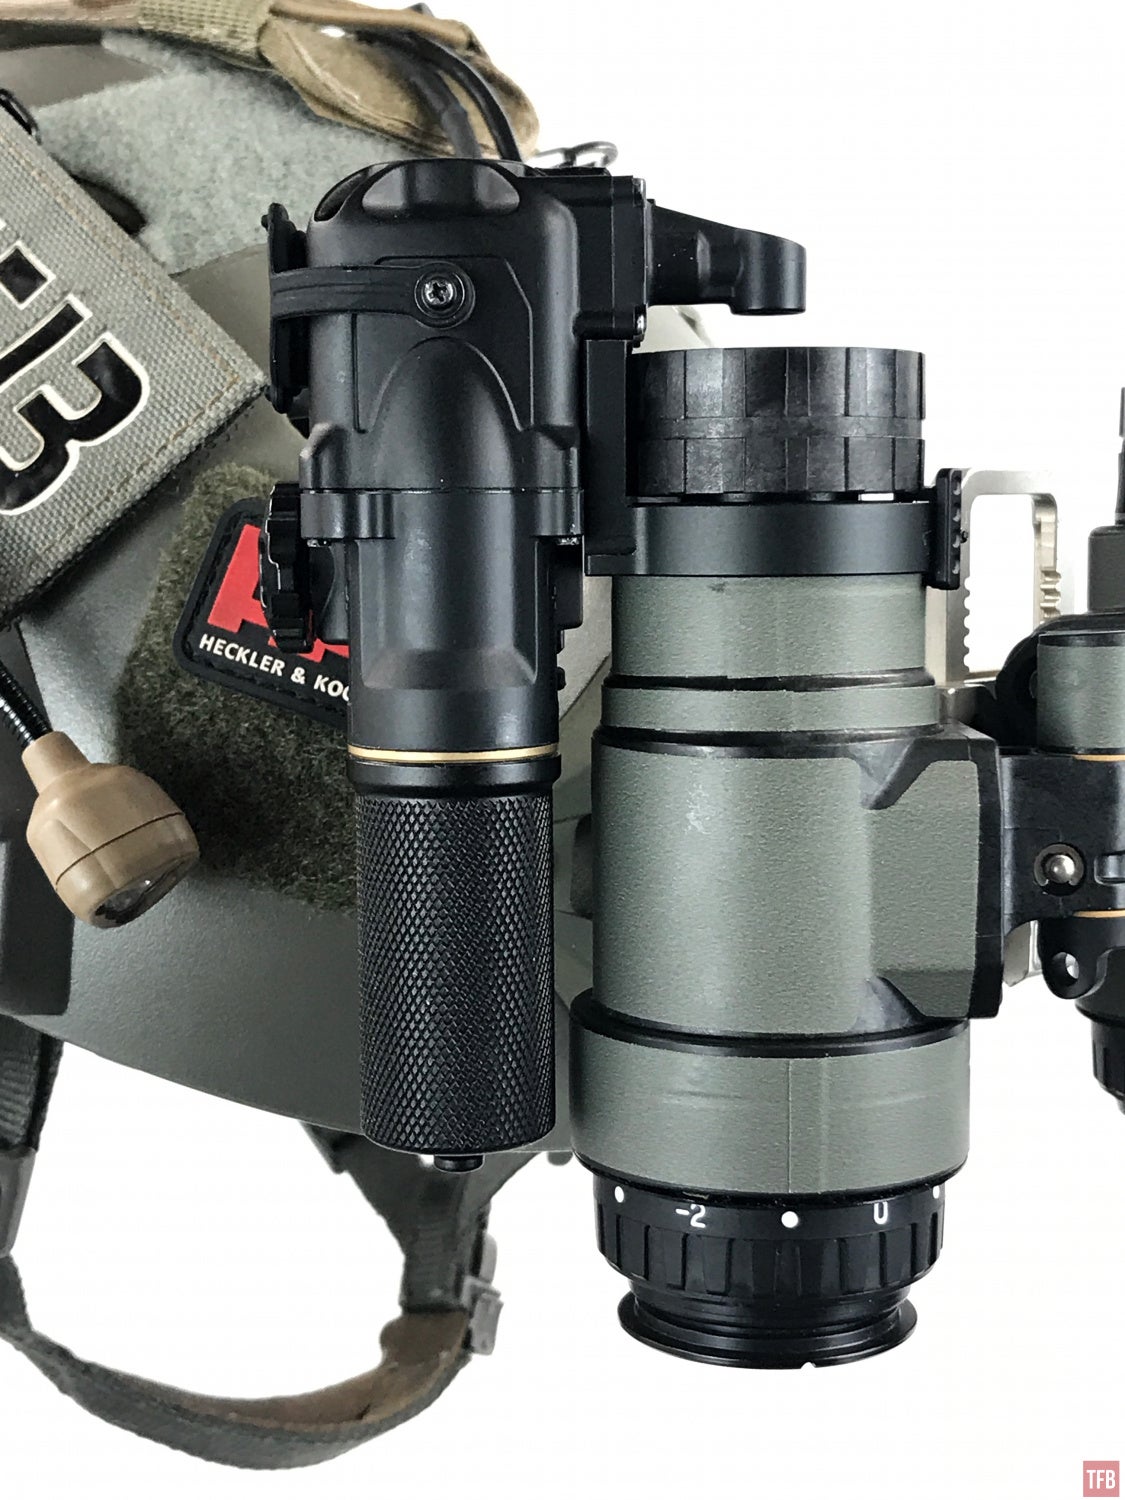
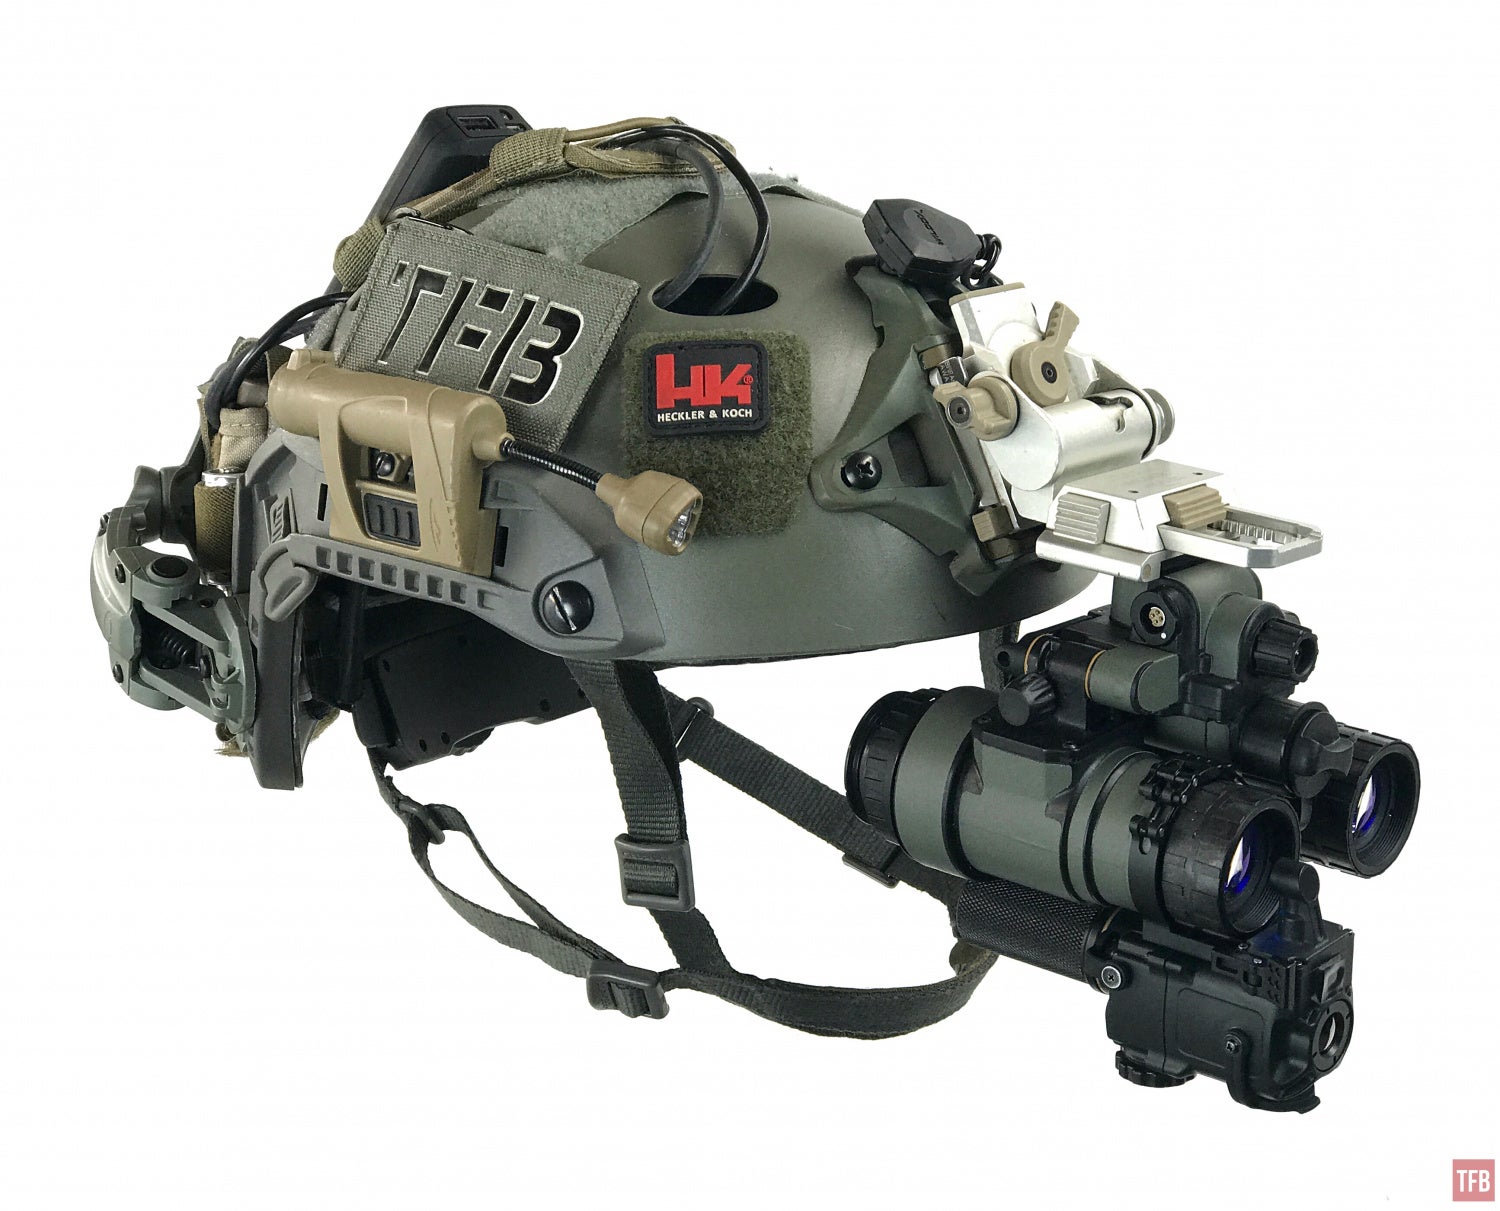
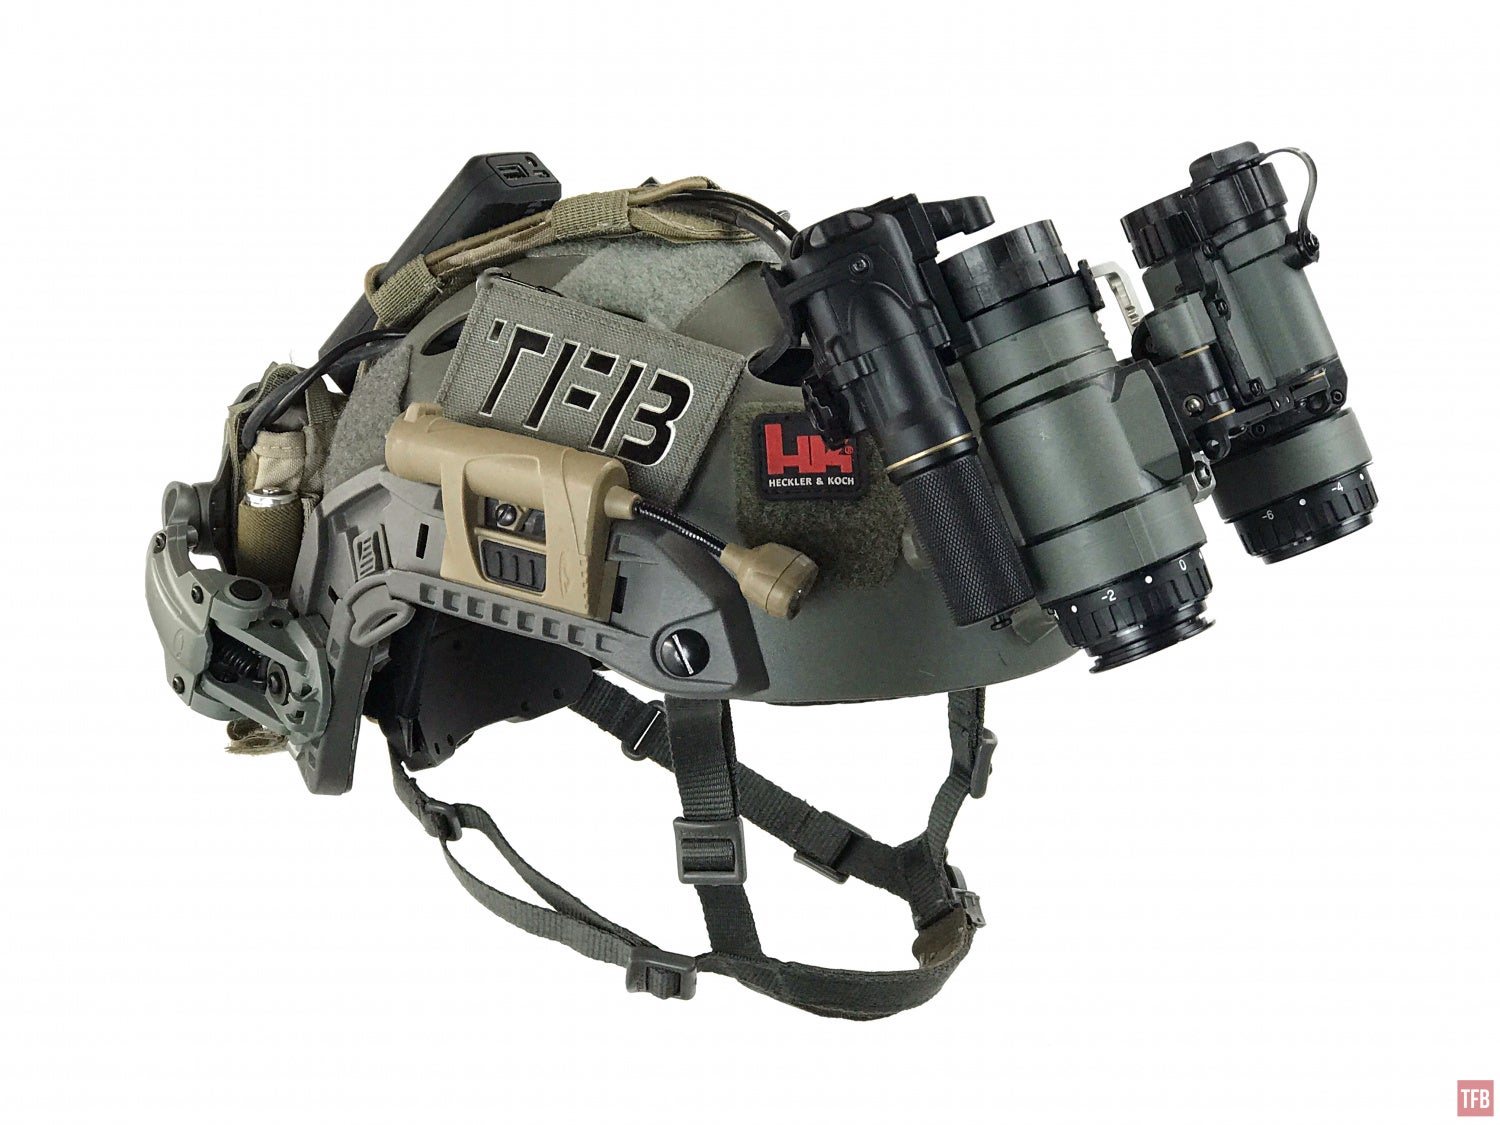
Mounting The Jerry-C

The Jerry-C has a mount similar to the PAS-29 COTI however they are not interchangeable. The notch for the clamp is on the opposite side. Also, the dovetail on the Jerry-C is wider than the PAS-29 COTI. The clamping mount is designed just like the PAS-29 COTI and is adjustable. One downside to the Jerry-C mount is that it sits extremely close to the objective lens making it impossible to install the day covers over the objective lenses without modification.


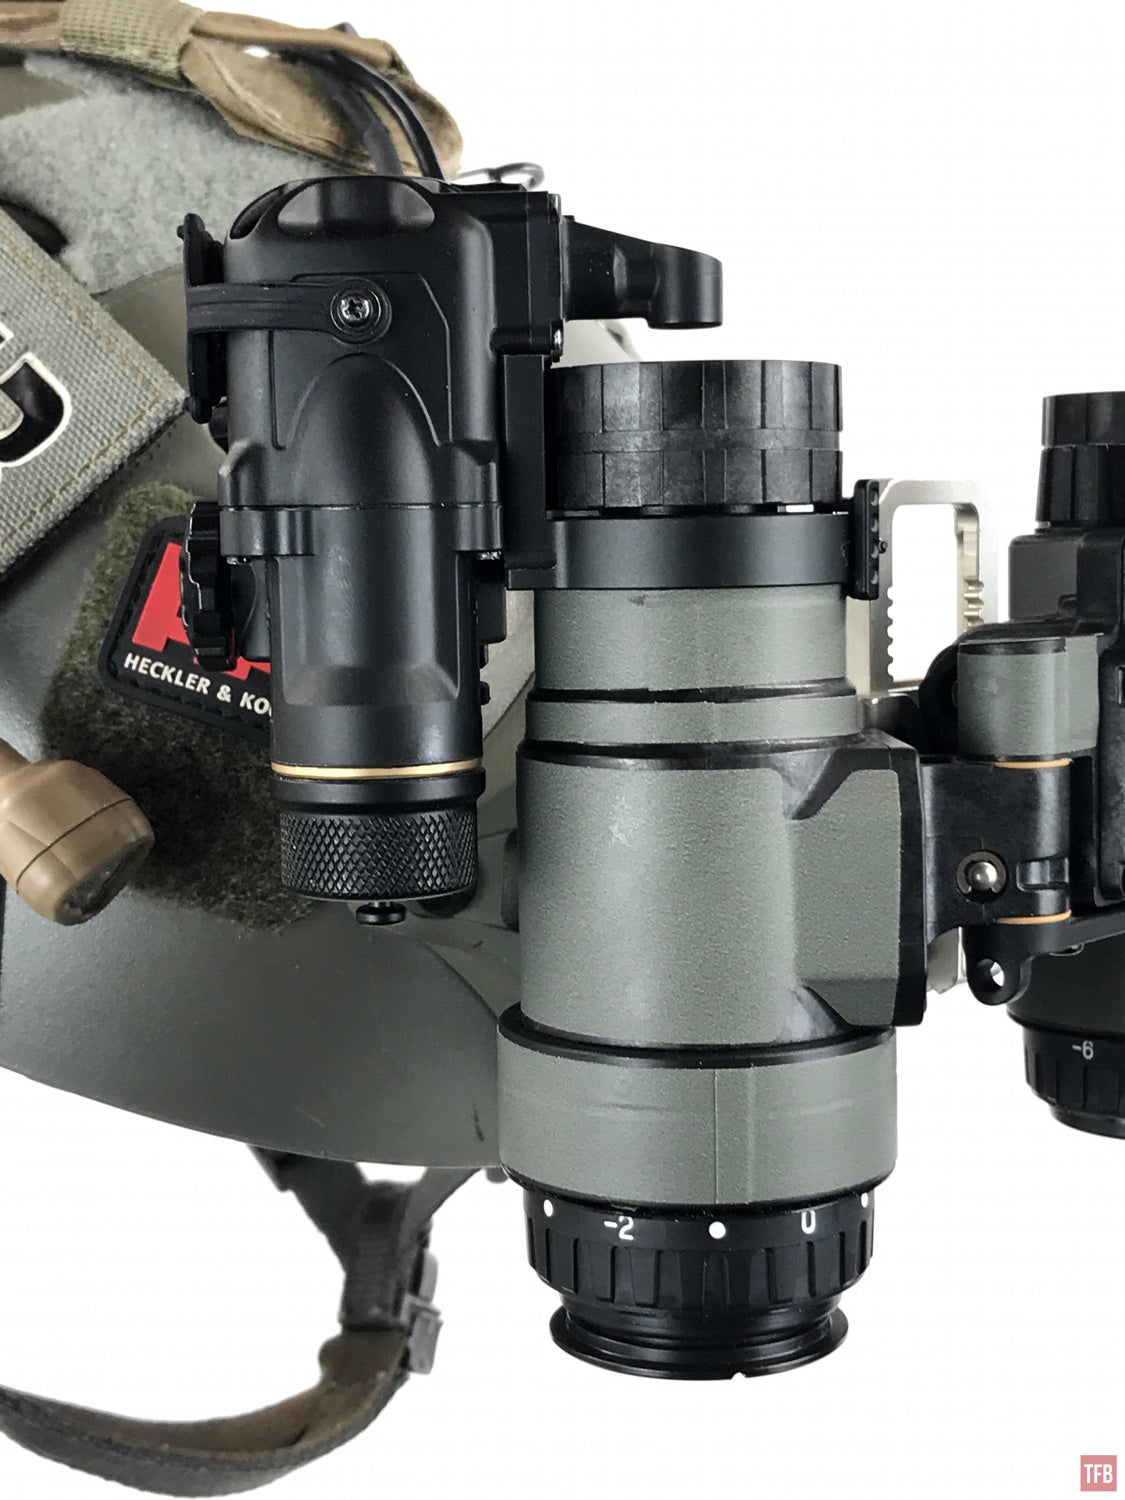
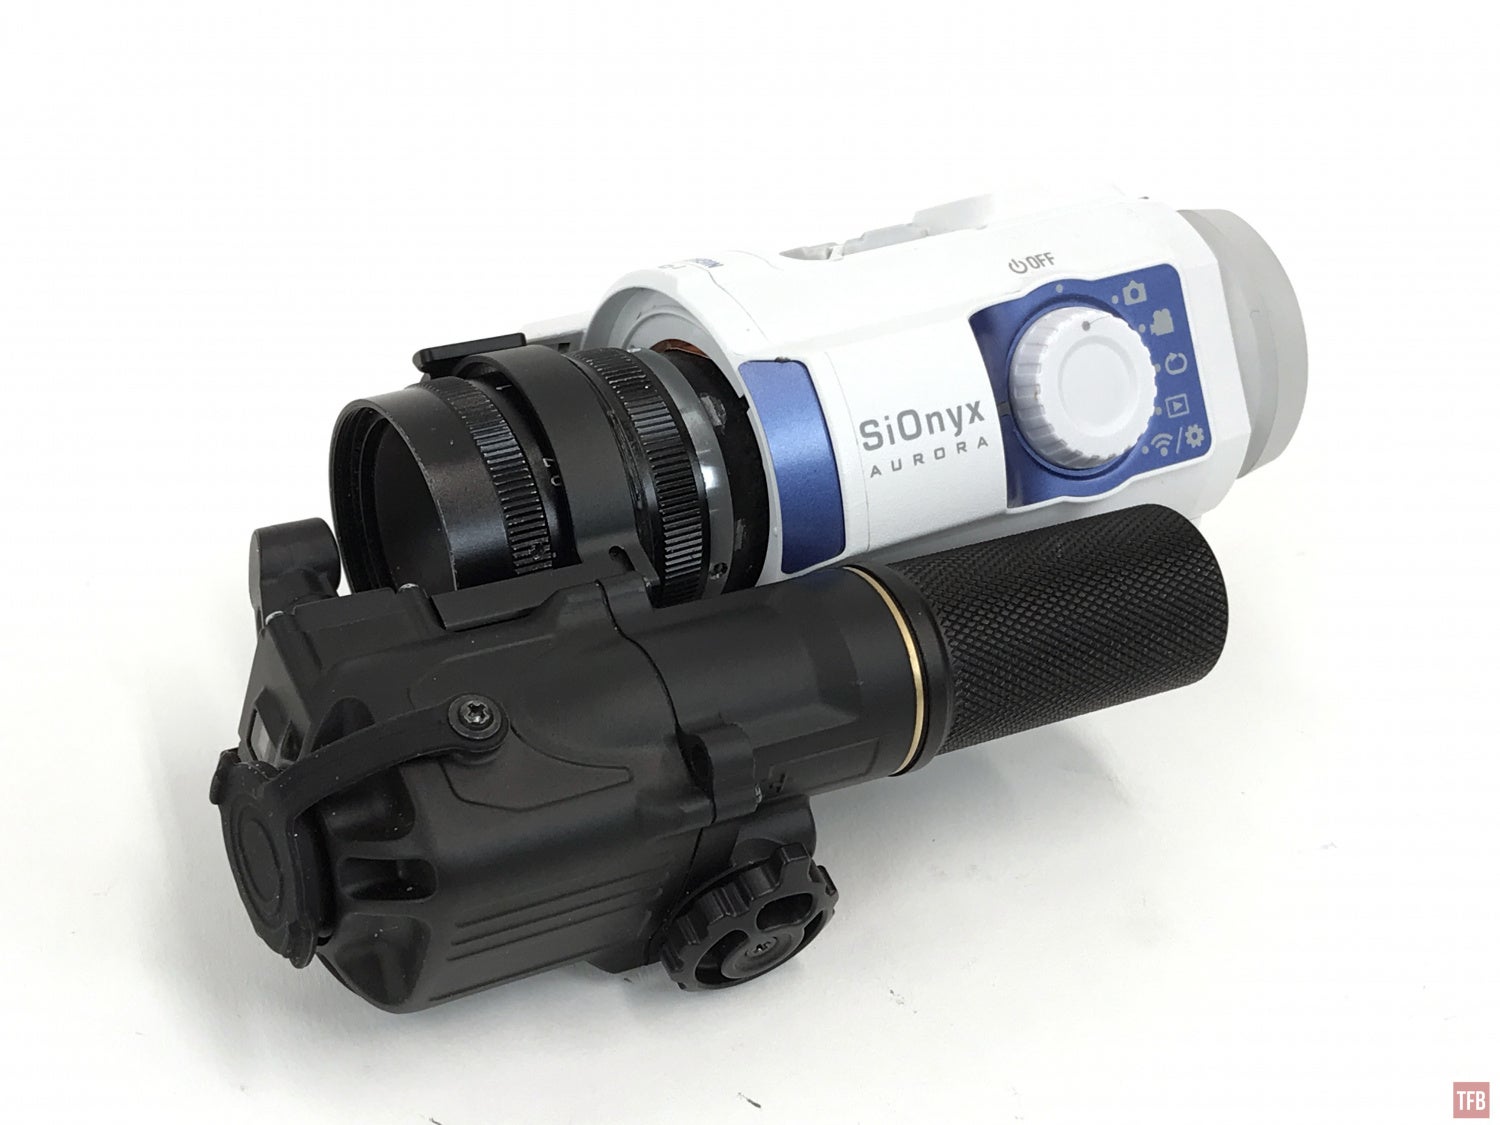
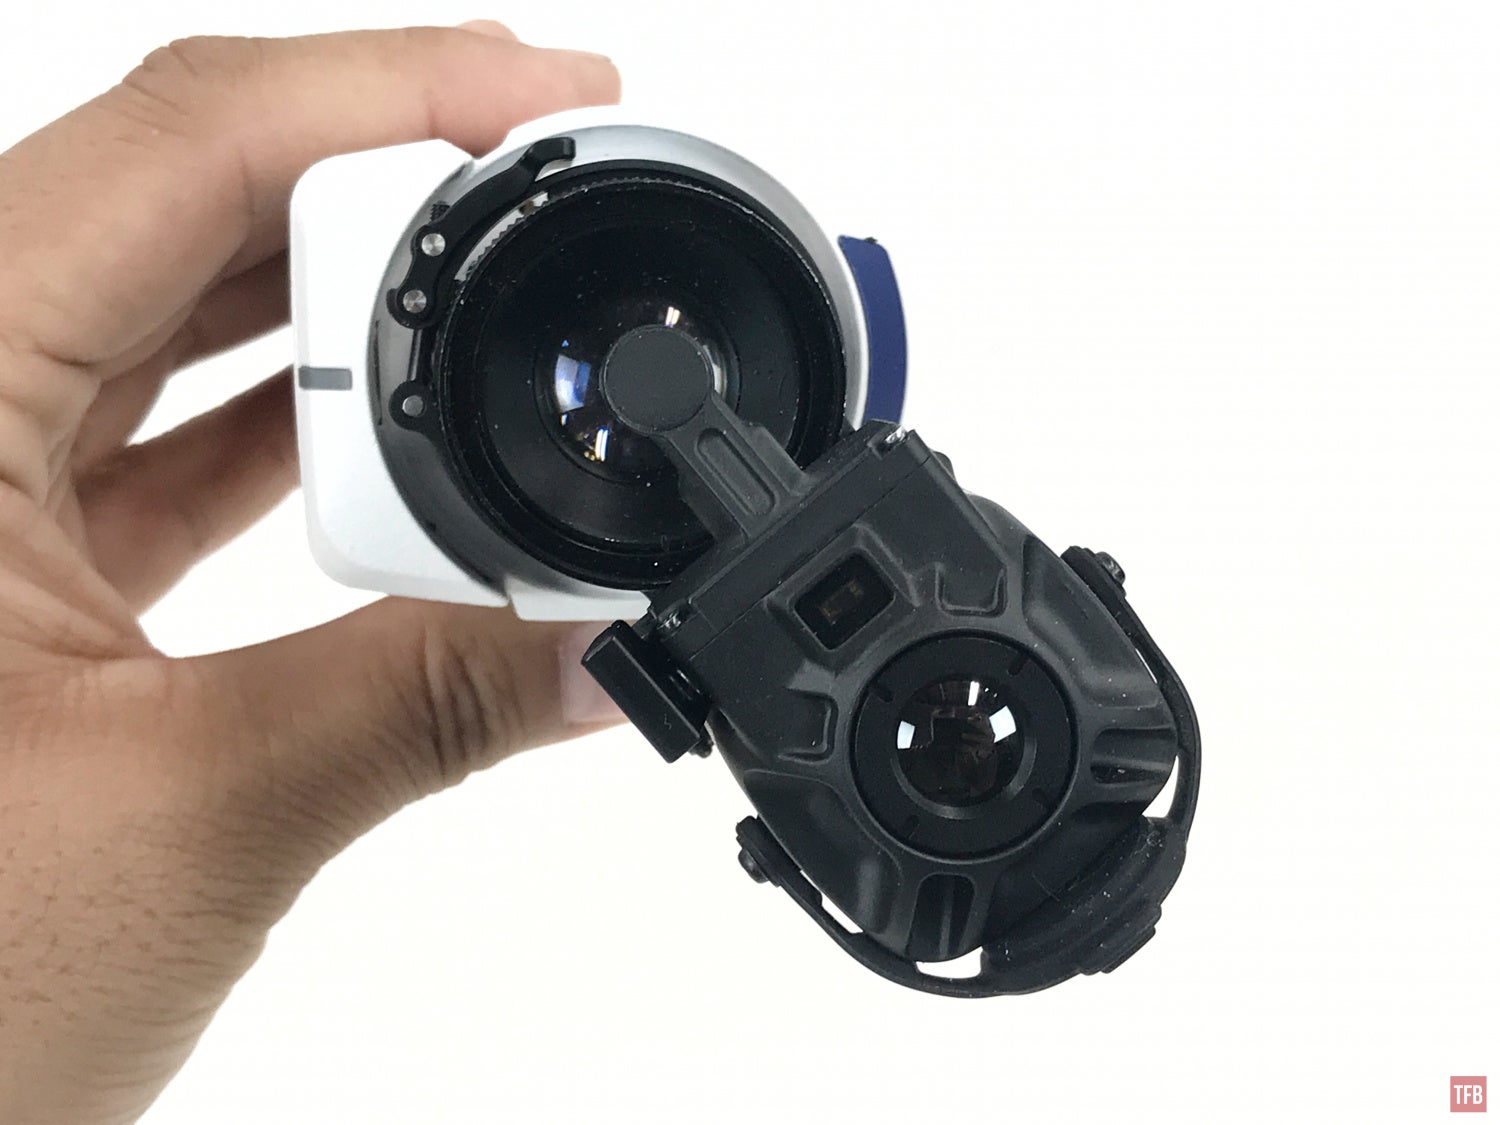
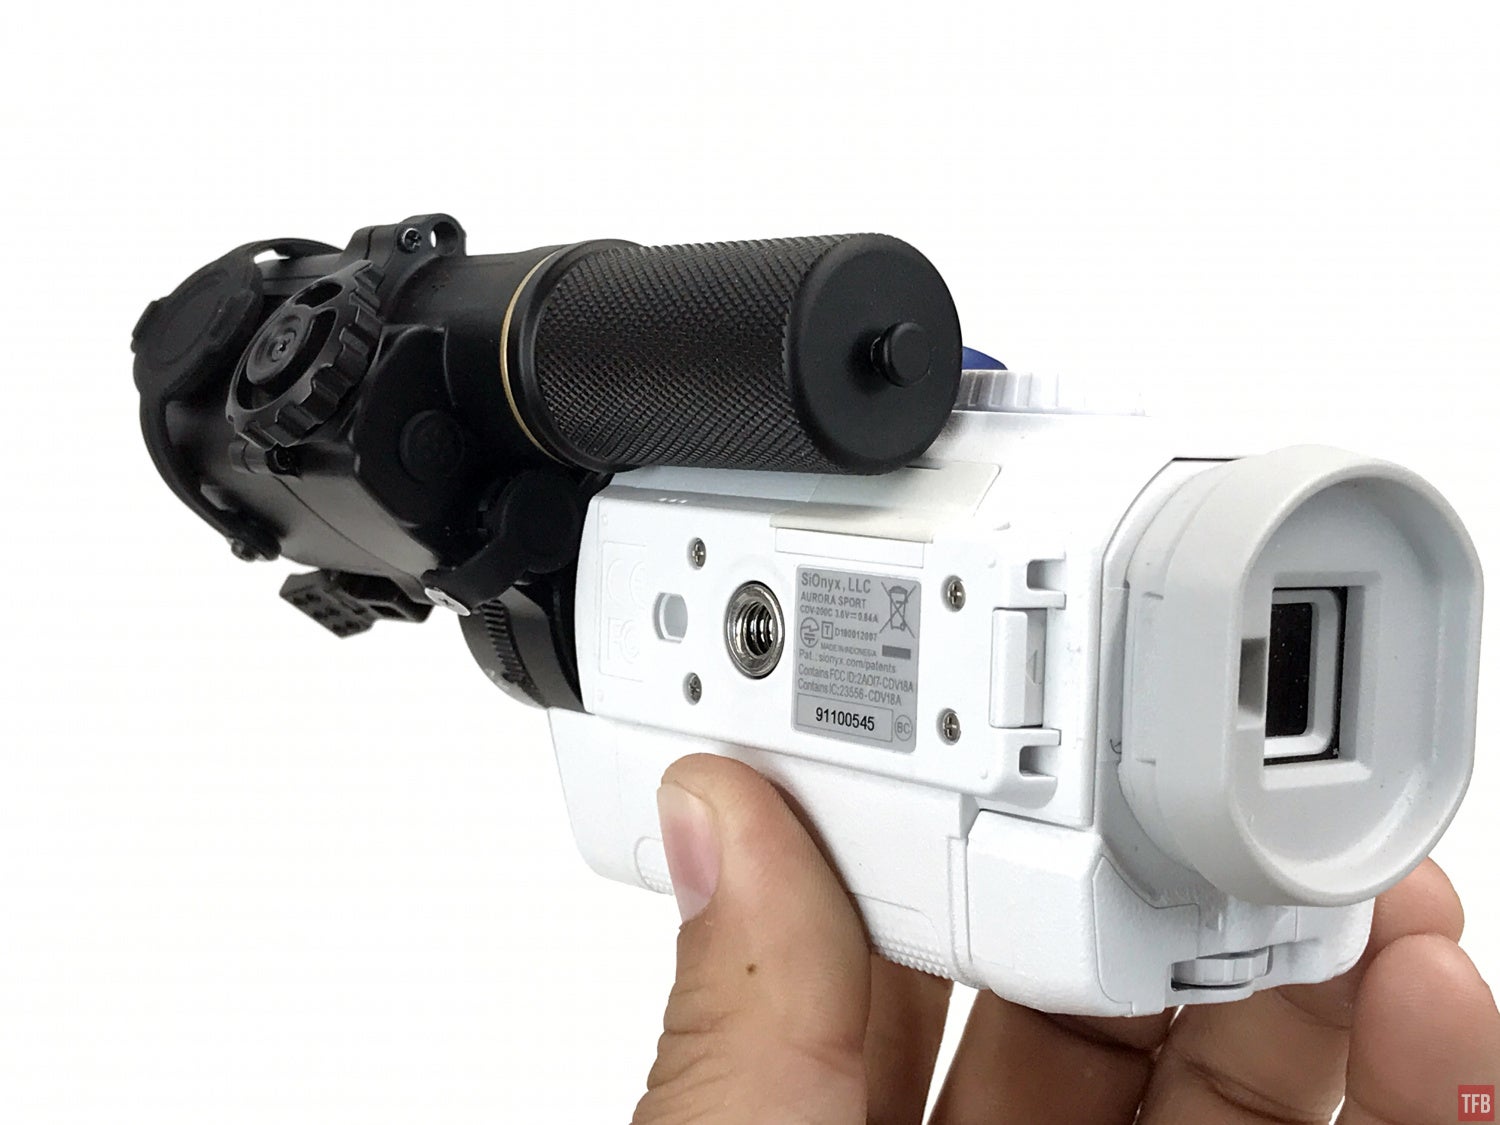
SiOnyx Aurora With Jerry-C
Last Fall, I hacked and modified my SiOnyx Aurora to use better lenses and to be able to mount a PAS-29 COTI and have a night vision camera with thermal fusion. Well, the Jerry-C works just as well on the modified Aurora Sport. The PAS-29 COTI projects an orange thermal image whereas the Chinese ECOTI produces a pale green image.

Due to the dimensions of the clamping mount, the only way to fit the ECOTI is to offset it so the battery cap clears the angled corner of the Aurora body.

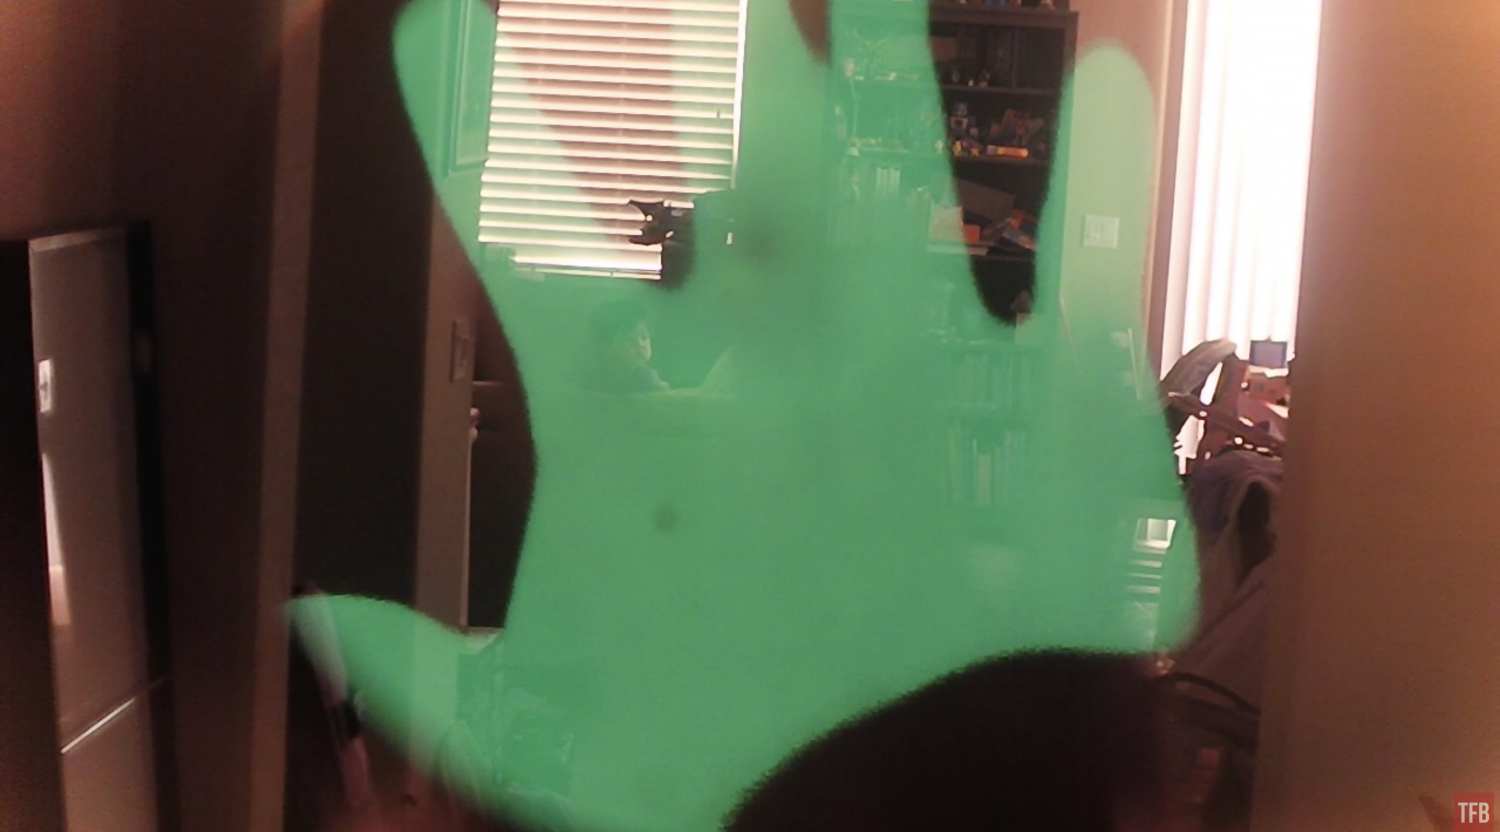
How Does The Chinese ECOTI Image Look?
I could tell immediately that the image was higher resolution. Look at the picture below of my hand. Look how clean the edges of the thermal image are.
Below is a video with sample video clips using the ECOTI with traditional night vision and later the modified Aurora Sport.
Here is an alternate look at the thermal image. The first video clip is my friend Alex breathing through his face mask. Then I filmed through the ECOTI direly using my iPhone.
Final Thoughts On The Jerry-C
The image it produces is very nice and the wider 30.5º FOV is much better than the small 20º FOV of the PAS-29 COTI. One thing we noticed with the Jerry-C is the contrast is much better. When comparing the PAS-29 COTI side by side with the Jerry-C, the PAS-29 COTI image was somewhat muddied. We had to raise the brightness to see thermal signatures which results in seeing a lot of superfluous thermal noise in the image. It’s like a big gray circle of light. The Jerry-C would show the thermal signatures much better and not have to crank the brightness that much.
One issue I have with the Chinese ECOTI is that menu system choices are not saved when you turn off the unit. The display rotation is the most annoying. For some reason the Chinese thought you should mount the Jerry-C on your left side monocular and sticking out to the side. I prefer to mount COTIs over my right eye and hang it vertically which means I have to go into the menu every time and rotate the display. I don’t have to do this, I could just ignore the display orientation, but it would be nice if it remembered my settings even if I turn off the unit.
One thing the Chinese ECOTI lacks that the PAS-29 COTI has is a digital compass. That is rather handy to have if you are doing land navigation under NODs. Also, the PAS-29 COTI has both black hot and white hot thermal options. The Jerry C does not have this. The PAS-29 COTI has a very complex menu system with a lot of features. Like the offset between your I2 image and thermal image. You can adjust this offset. The Jerry-C cannot do this. The Jerry-C also lacks environment settings like the PAS-29 COTI but to be honest, I never used those in the old COTI.
The 7-pin port in the Jerry-C is supposedly for exporting out video. I wonder if you could input video signals into the Jerry-C? While I have only been comparing the Jerry-C to the old COTI, the real test is to compare it to the Optics 1 ECOTI. The real ECOTI can input a video signal and display information like a HUD. My friend Kevin R. has one on order and I plan to review that and compare it to the Jerry-C. Look at the video below, the Optics 1 ECOTI has a lot of features.
The PAS-29 COTI is rumored to be discontinued and being sold on sale for just under $3,000. The Jerry-C goes for $5,000 but I have seen listings on Alibaba for $7,000. This is cheaper than the Optics 1 ECOTI which retails for $8,199 or $8,399 with the mounting bracket.