 Your Privacy Choices
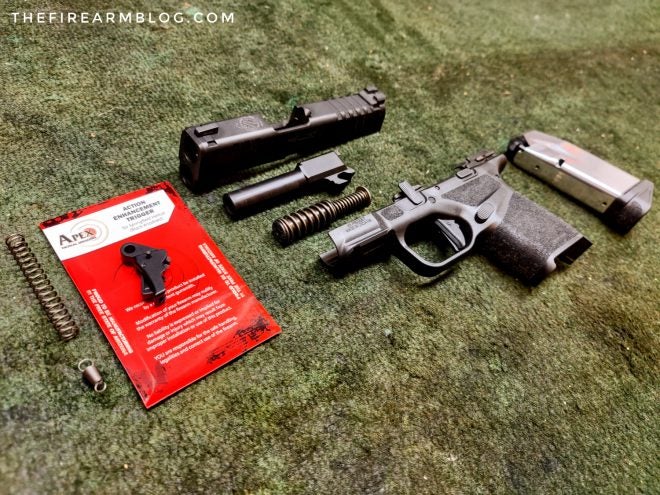
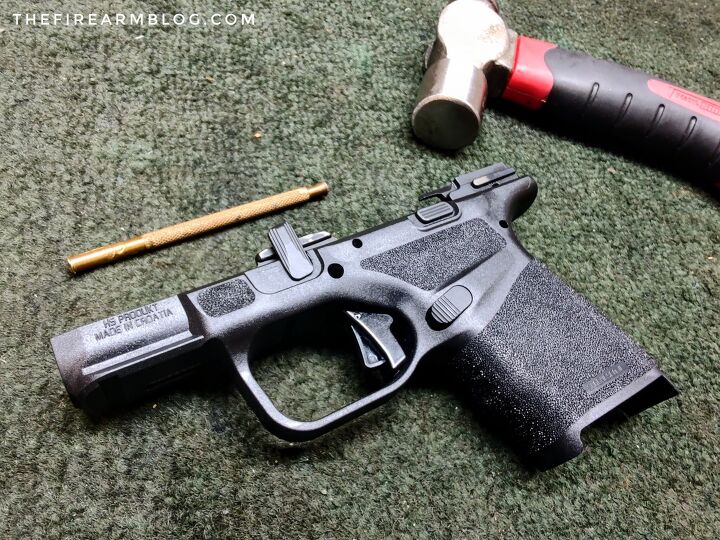
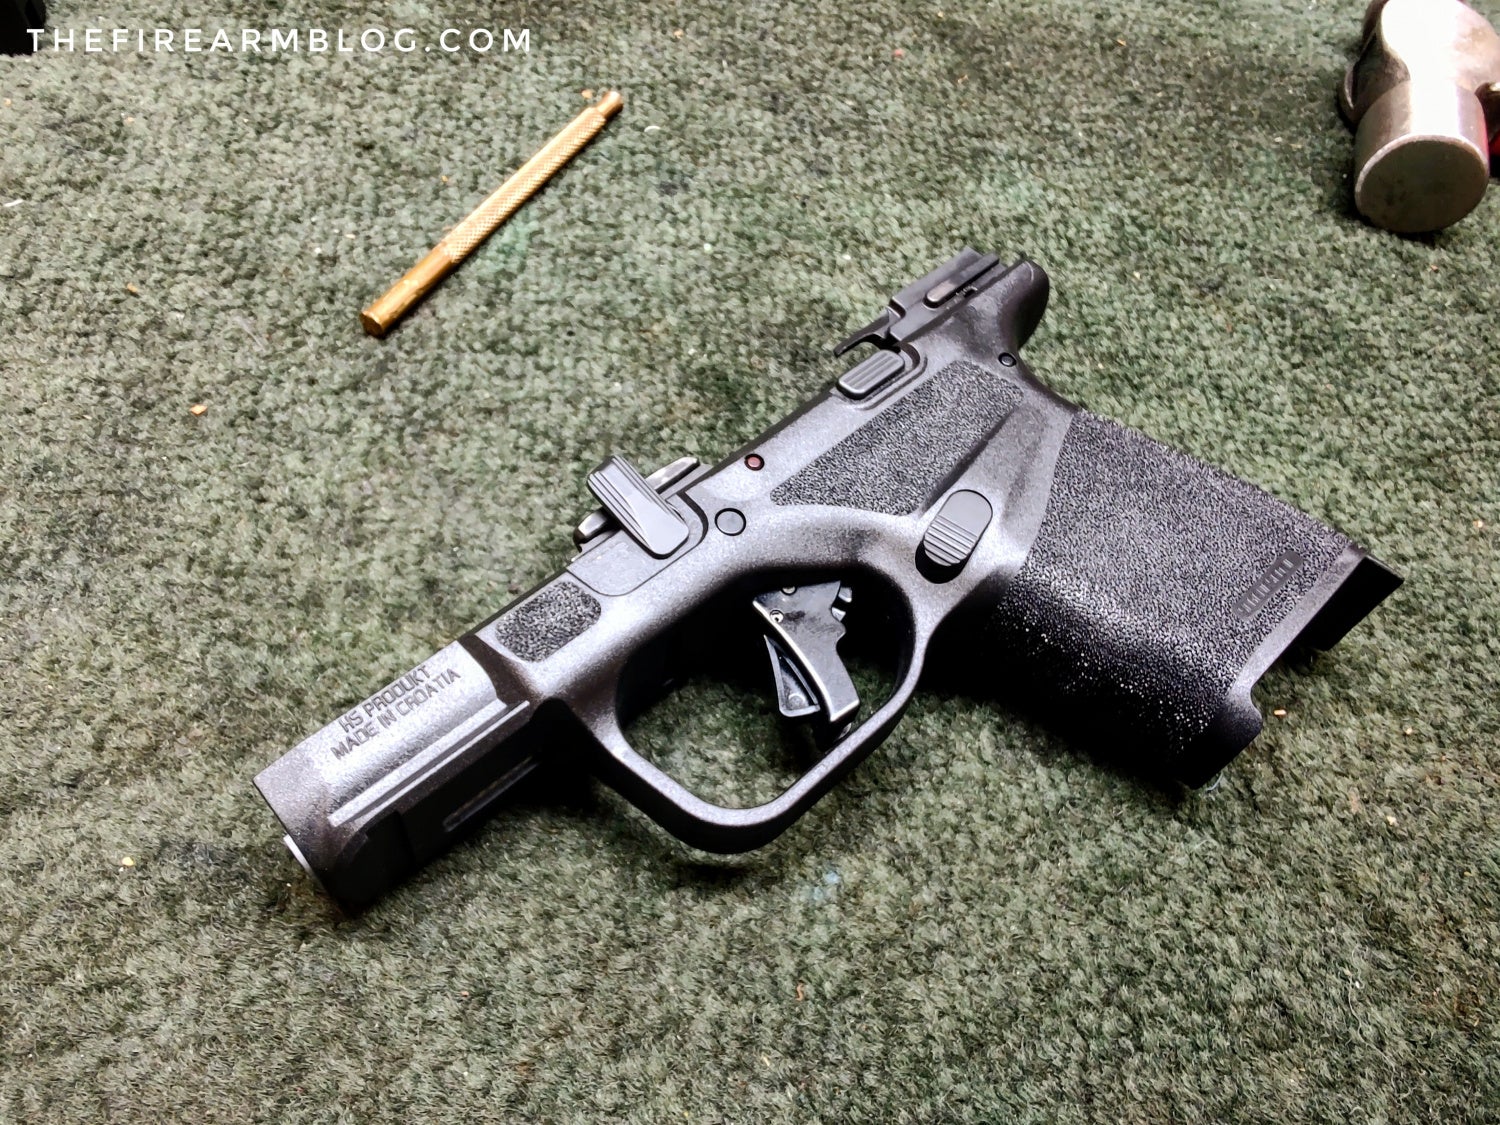
Today, we will walk you through the elaborate process of installing an Apex Tactical Action Enhancement Trigger into a Springfield Armory Hellcat. This should not only improve your Hellcat’s trigger pull, but also help you become more deeply familiarized with your pistol’s internal workings. Full disclosure, I am not a gunsmith and I do not moonlight as a pretend one either. I am a lover of firearms like yourself and am a Certified Armorer (certified tinkerer) for several manufacturers – but ironically – not Springfield Armory. While upgrading and installing a new trigger is very elaborate, I assure you, it is not difficult if you take your time and ensure you follow all of the steps.
I was given the opportunity to test out one of Apex Tactical’s NEW Action Enhancement Trigger sets for the Springfield Armory Hellcat when it was announced late last year. I am a glorified Springfield Armory fanboy, but I can put my bias aside to realize that the Hellcat trigger is very basic at best. Yearning for an upgrade for my Springfield Hellcat, it was perfect timing to be able to test out one of Apex Tactical’s new triggers. So, if you have the same trigger or are curious about the guts of your Hellcat, follow us along on this journey and surgery we are about to embark on.
Tools & warnings: Apex Tactical action enhancement trigger install
To start off, let’s get all the training wheels and warning labels out of the way: always wear safety glasses when working on firearms, and quadruple check that your firearm is not loaded. After that, check a 5th time to be sure. The tools you are going to need for the proper install of your Apex Tactical Action Enhancement Trigger are listed below, but if you don’t have all of these pieces don’t fret. On my best day, I am a poor shadetree gunsmith and I improvised my way through this whole install not having perfect tools myself. Simply go slow and don’t get crazy with mallets and hurt yourself or others.
- 1/16″ Pin Punch
- 3/32″ Pin Punch
- Small Hammer (6 Oz. – 8 Oz.)
- Roll of Tape (any improvised punch block)
photo tour: Apex Tactical action enhancement trigger install
Step #1 – To begin our disassembly, we want to field strip our pistol so the slide assembly is off of the frame, and the magazine is removed from the firearm. Then, we are going to punch/push out the Sear Housing Pin (furthest frame pin from the muzzle), the Locking Block Pin (middle frame pin), and finally the Trigger Pivot Pin (frame pin closest to muzzle).
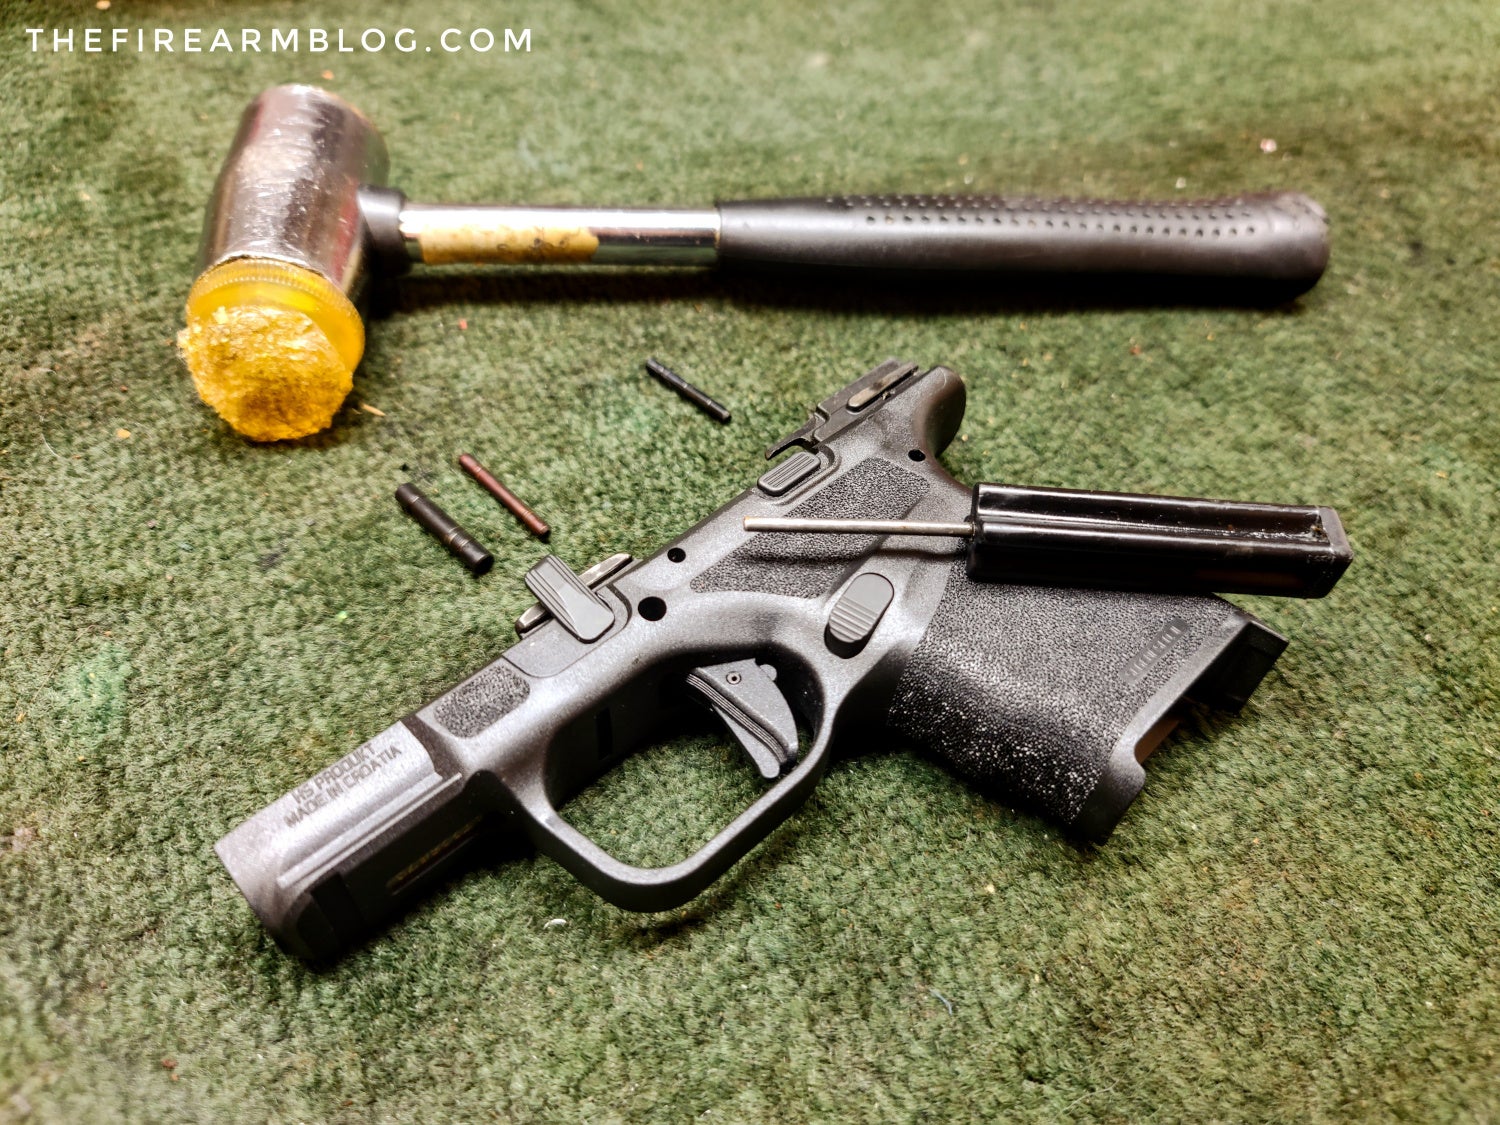
Step #1
Step #2 – With all of the frame pins now removed from the frame you can pull out the Locking Block. While this occurs, you can also pull the Takedown Lever out of the Locking Block. Once the Locking Block and the Takedown Lever are completely removed from the frame you can also remove the Slide Lock Lever Spring: the squirrelly, T-shaped spring simply laying in the left-hand side of the Locking Block.
Step #2
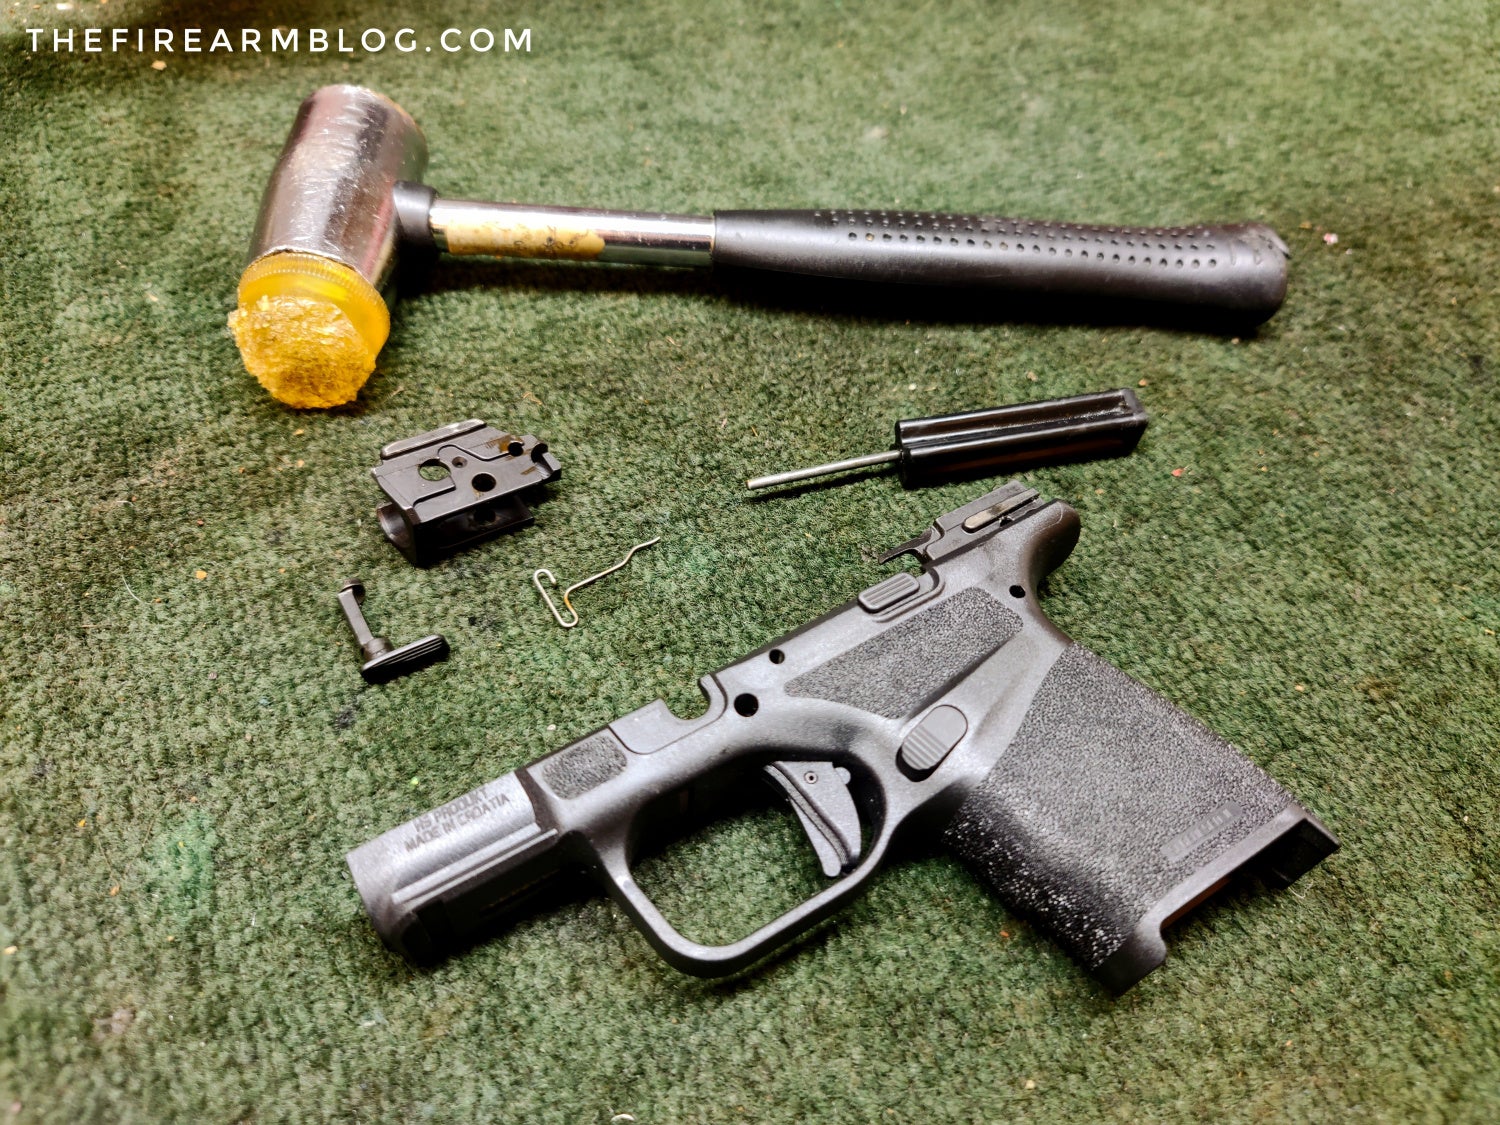
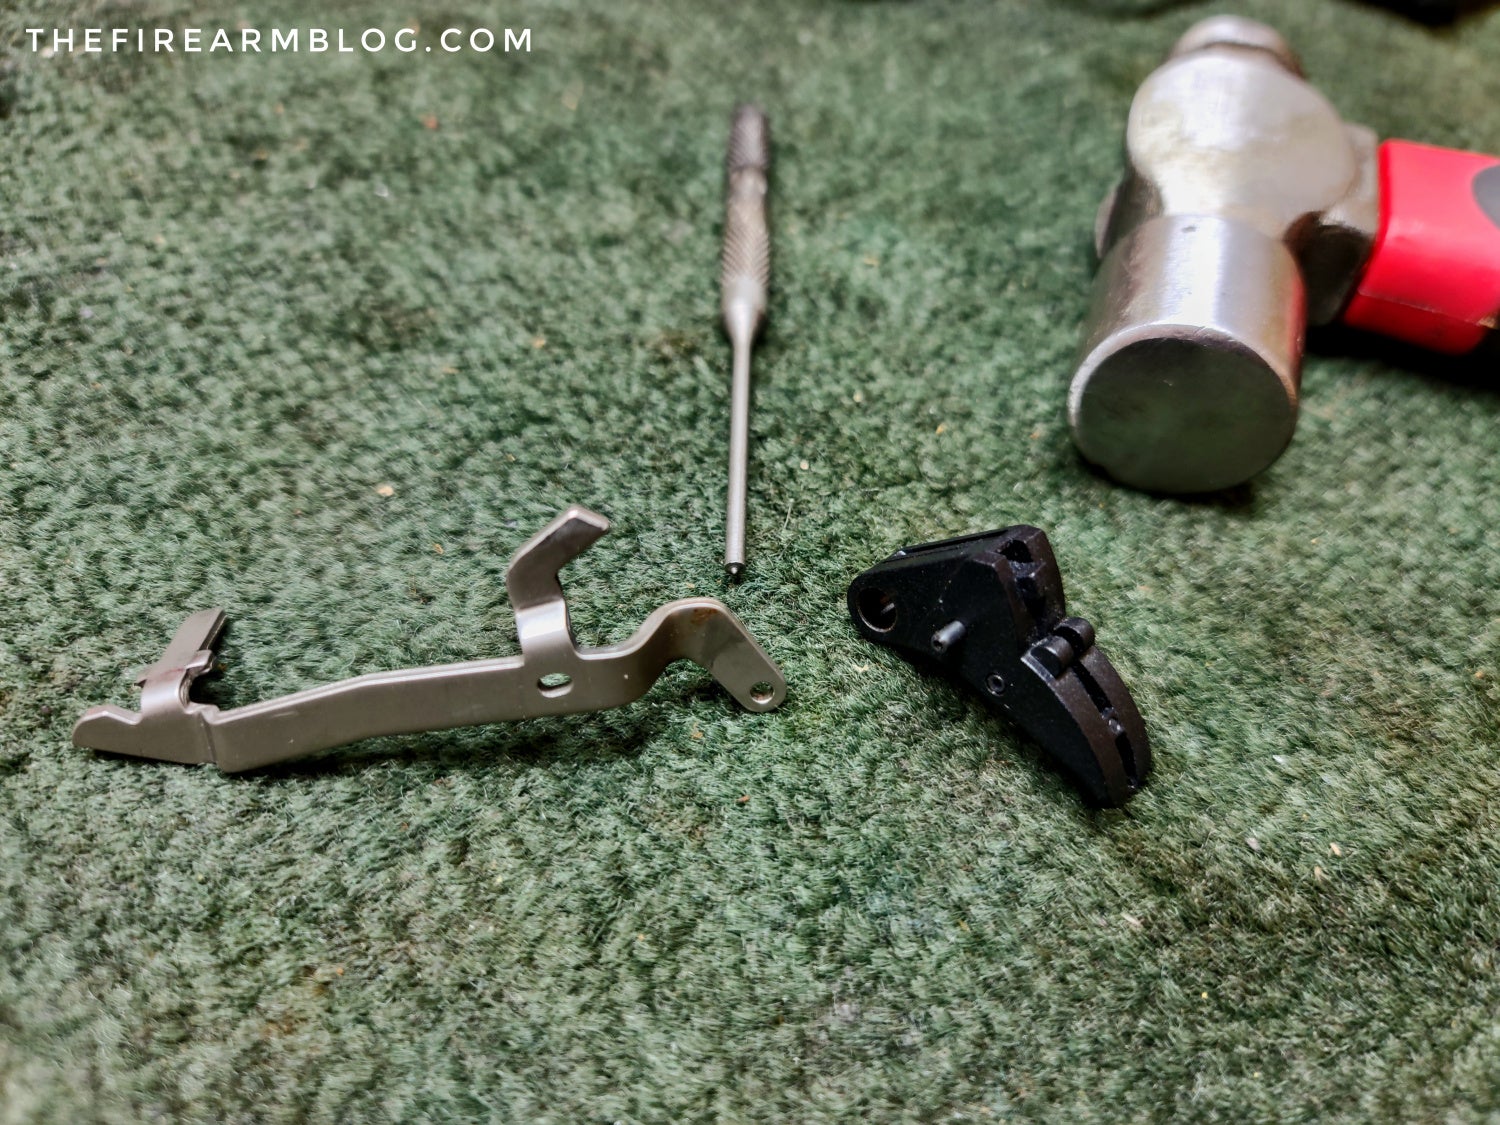
Step #3 – Next, the Slide Lock Lever simply lifts out of the frame with no resistance. Then, the Sear Housing in the rear of the frame needs to be removed. To assist with this, wiggle and shift the Sear Housing forward (towards what would be the muzzle) so it removes in one collective piece. This will carry with it the Trigger and Trigger Bar as well. Finally, the Magazine Blocking Lever can simply lift out without resistance as well.

Step #3
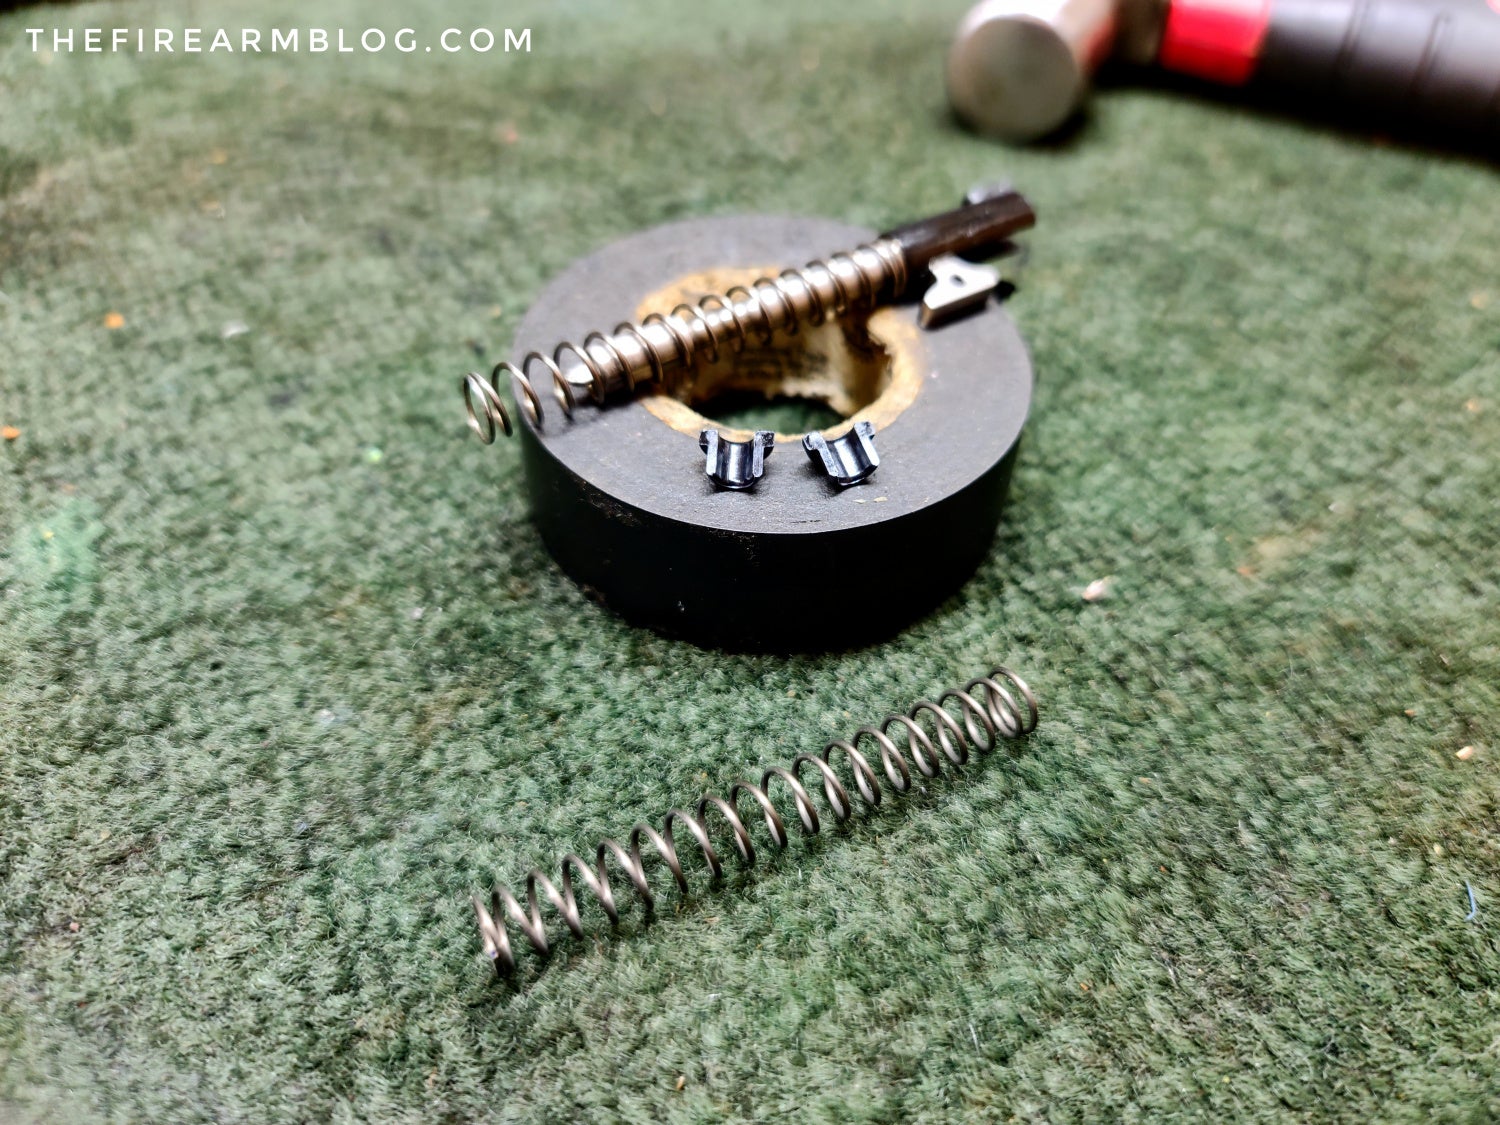
Step #3
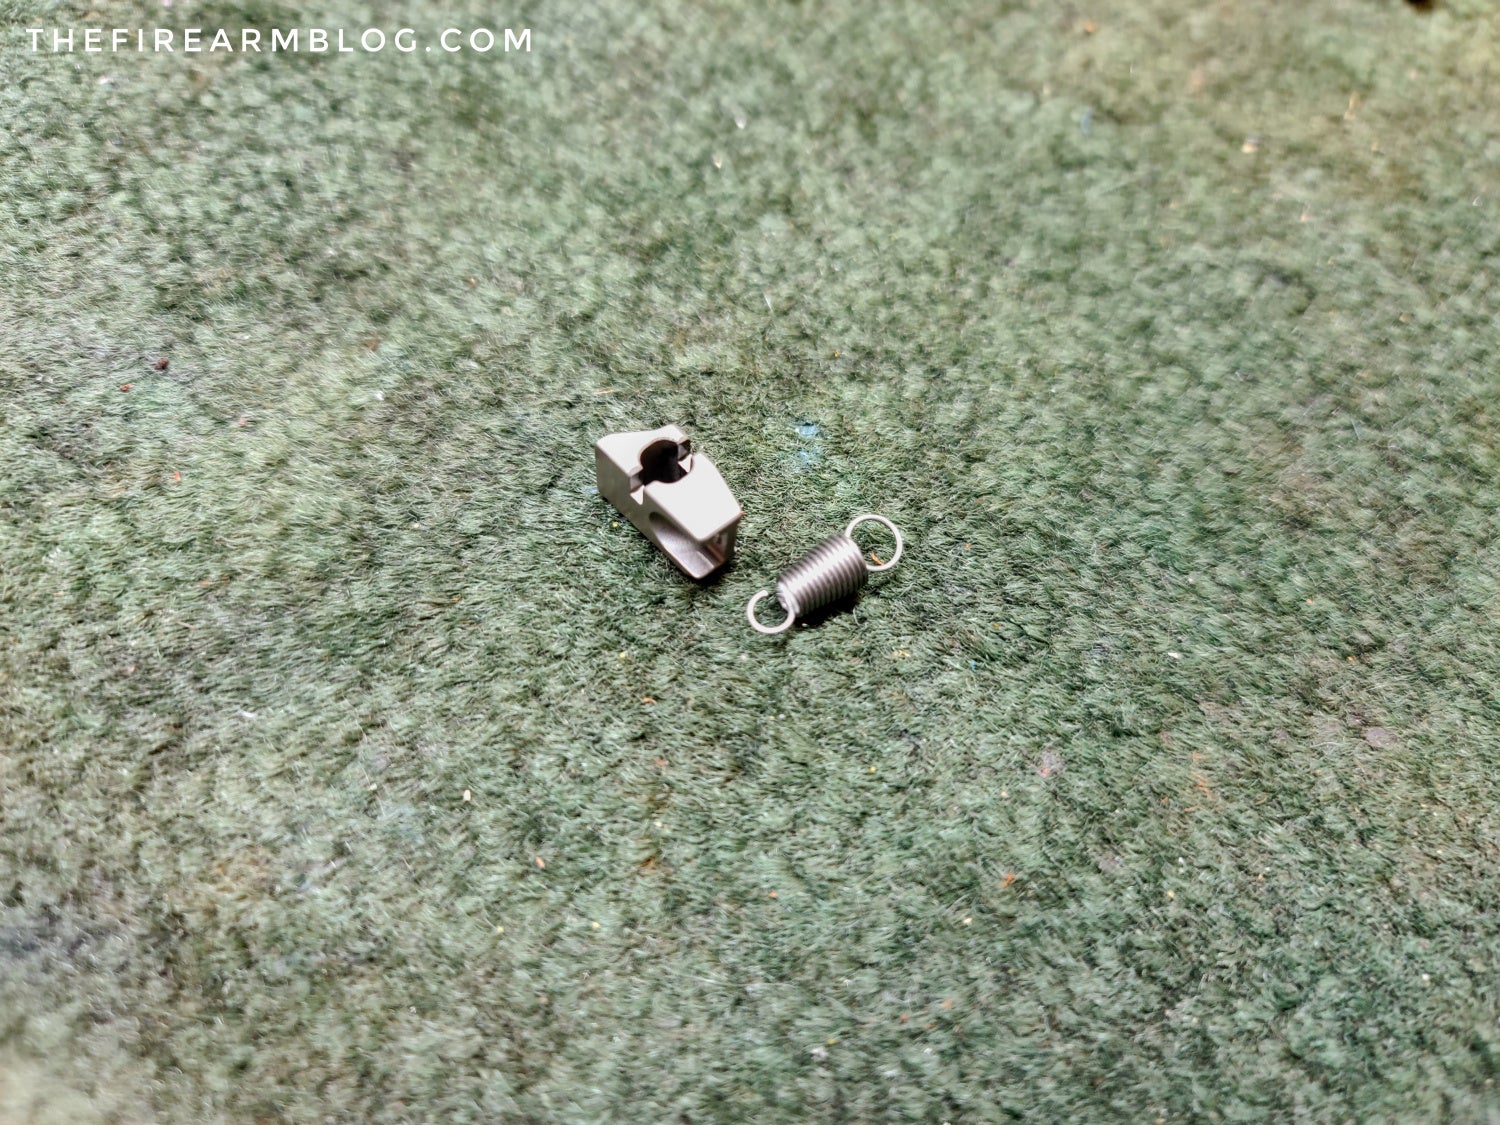
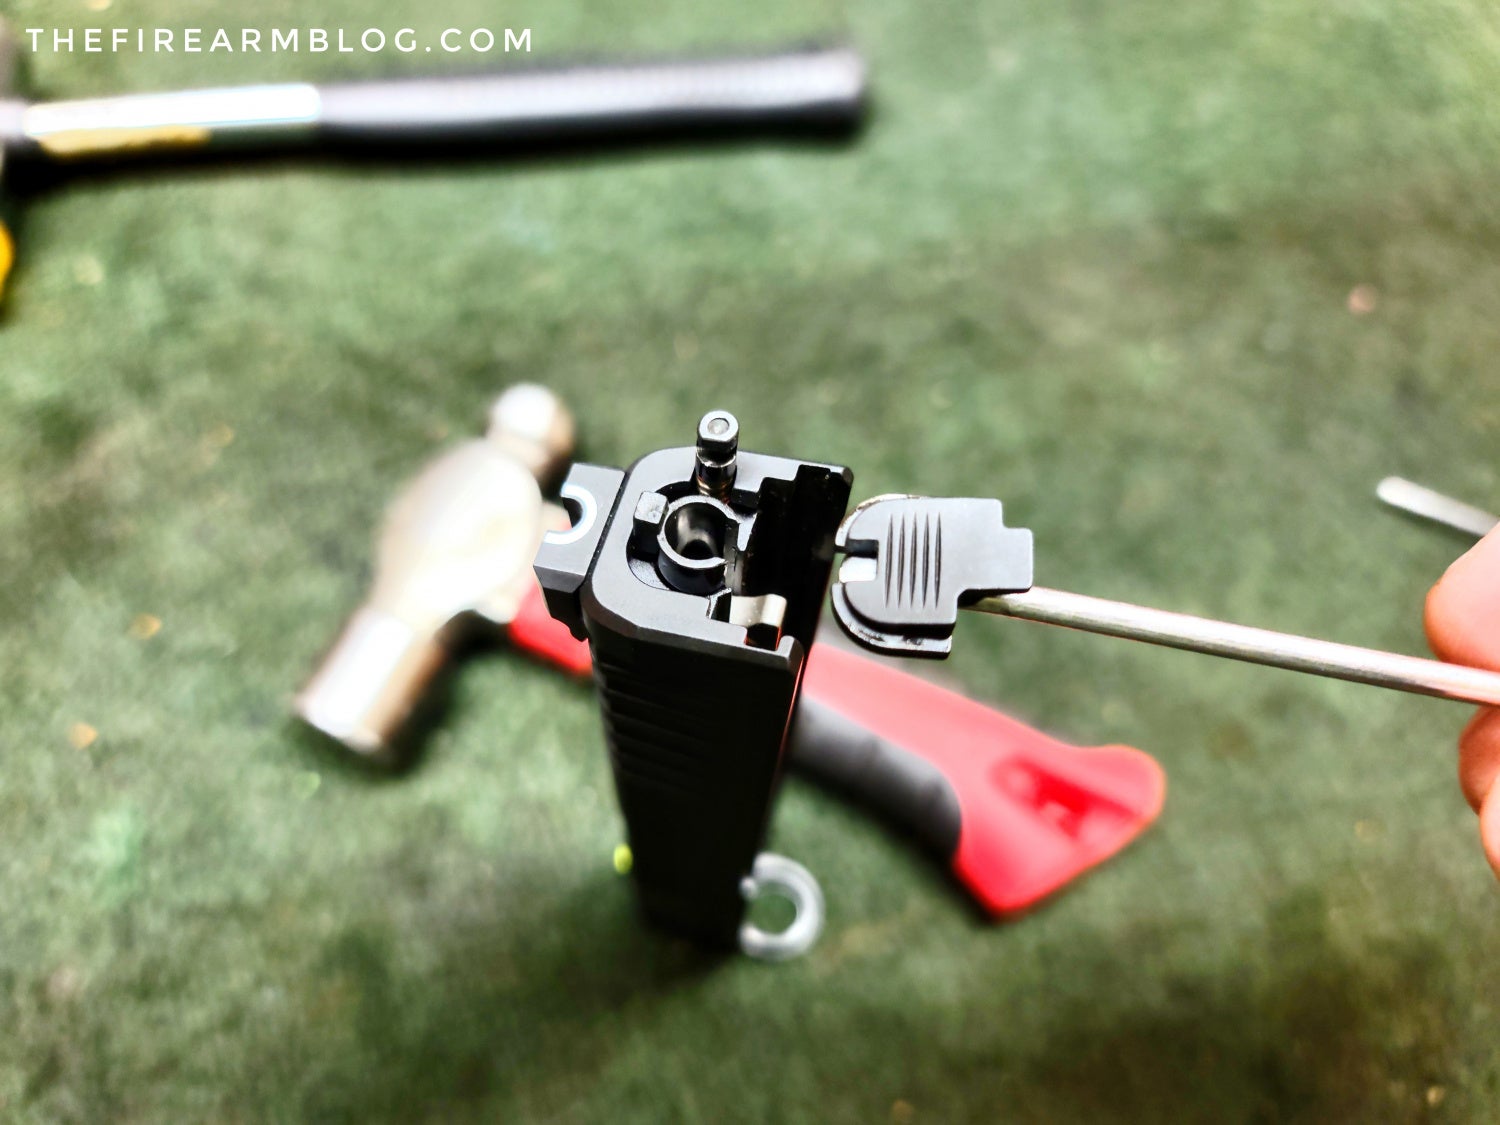
Step #4 – The next component to be removed is the Sear Housing Pin Safety from the Sear Housing Block. A lot of crazy names getting thrown around, right? The Sear Housing Pin Safety is a small C-clip that you will want to purposefully remove and set aside for safe keeping. If you don’t, you will inevitably lose it throughout our surgery and might not find it again because it is so little.
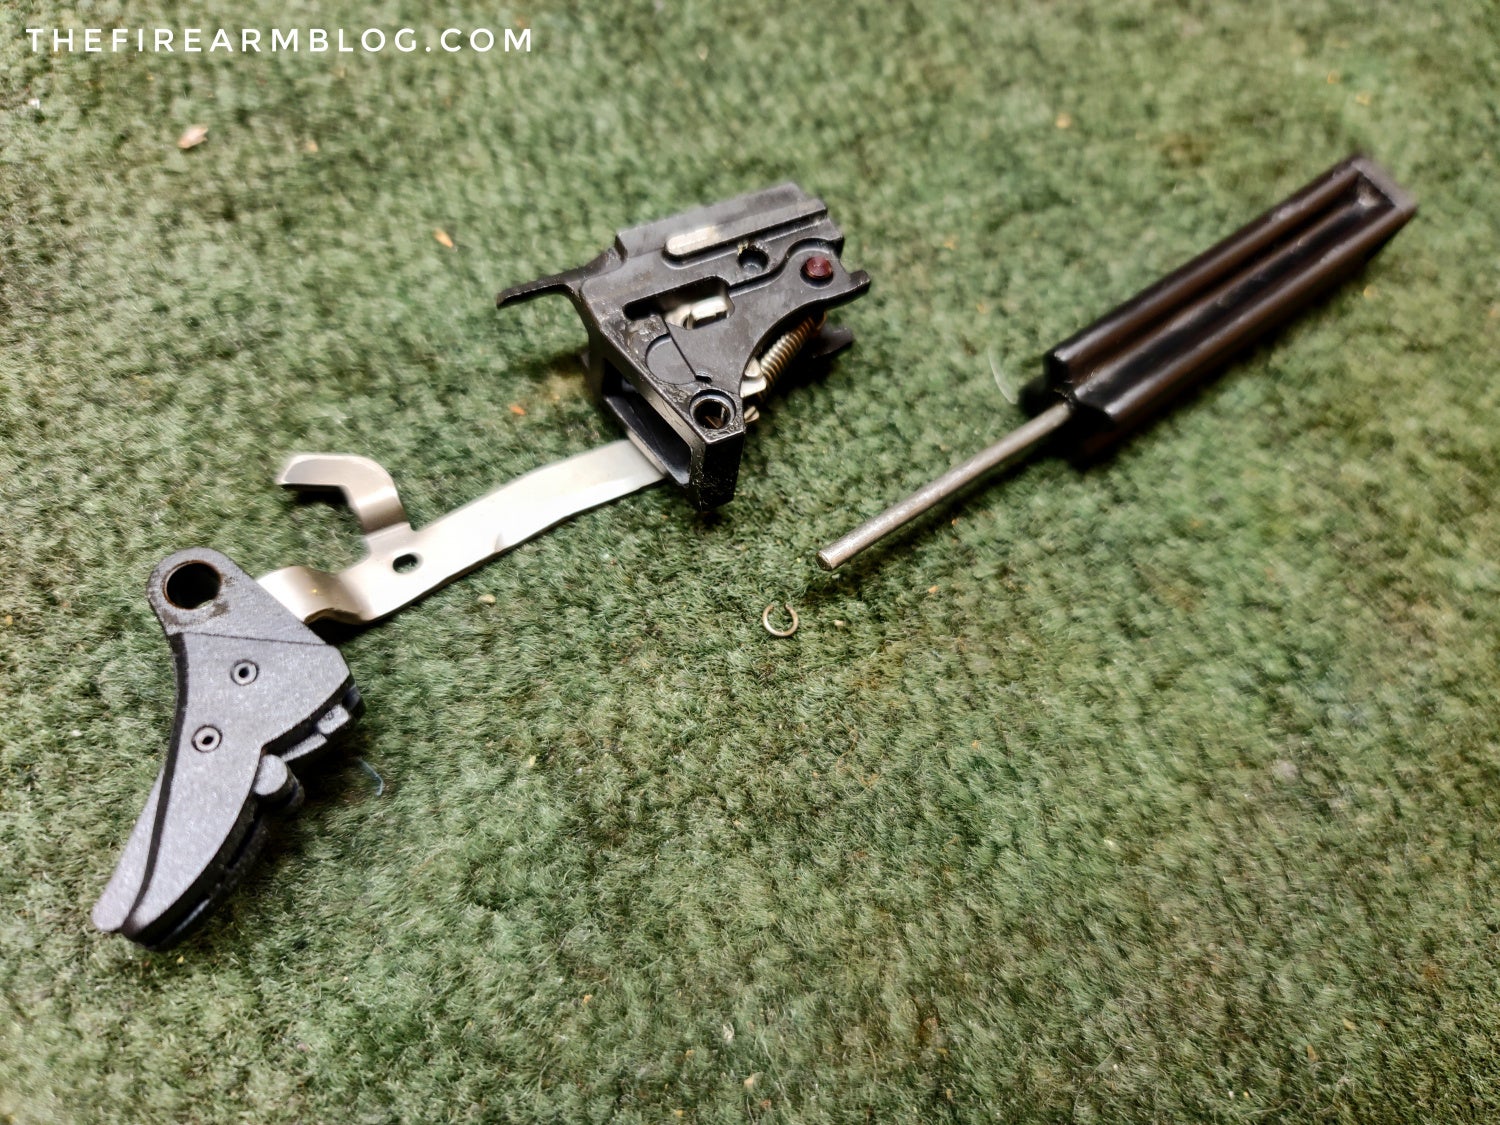
Step #4
Step #5 – The next stop along our journey is to remove the Trigger Bar from the Sear Housing Block. To do this, you will want to firmly hold the Sear Housing Block in place while wiggling the Trigger Bar upward and out towards the right-hand side of the Sear Housing Block. This should not take Herculean strength. Simply slowly and methodically wiggle upward and out, and it will come out of the Sear Housing Block.
Step #5
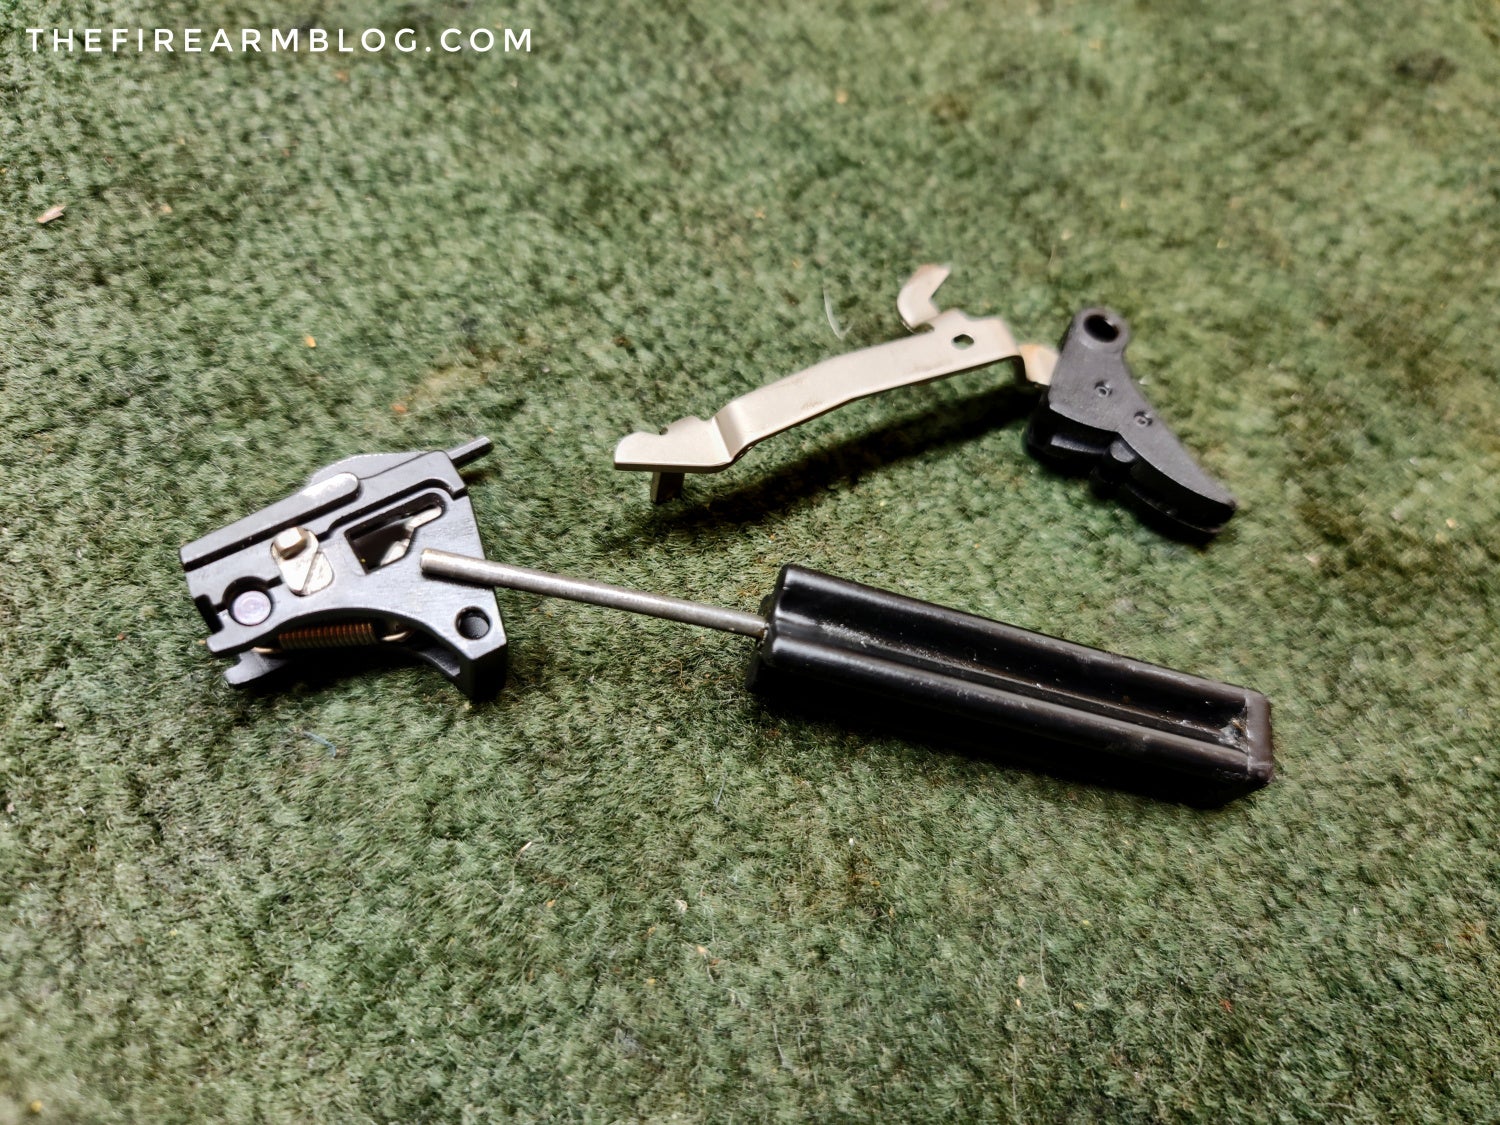
Step #6 – Then, we will want to flip the remainder of our Sear Housing Block upside down. The rearmost pin you will want to simply push out of the Sear Housing Block. As a result, the Sear and Sear Spring will also fall out of the Sear Housing Block for you to examine.
Step #6
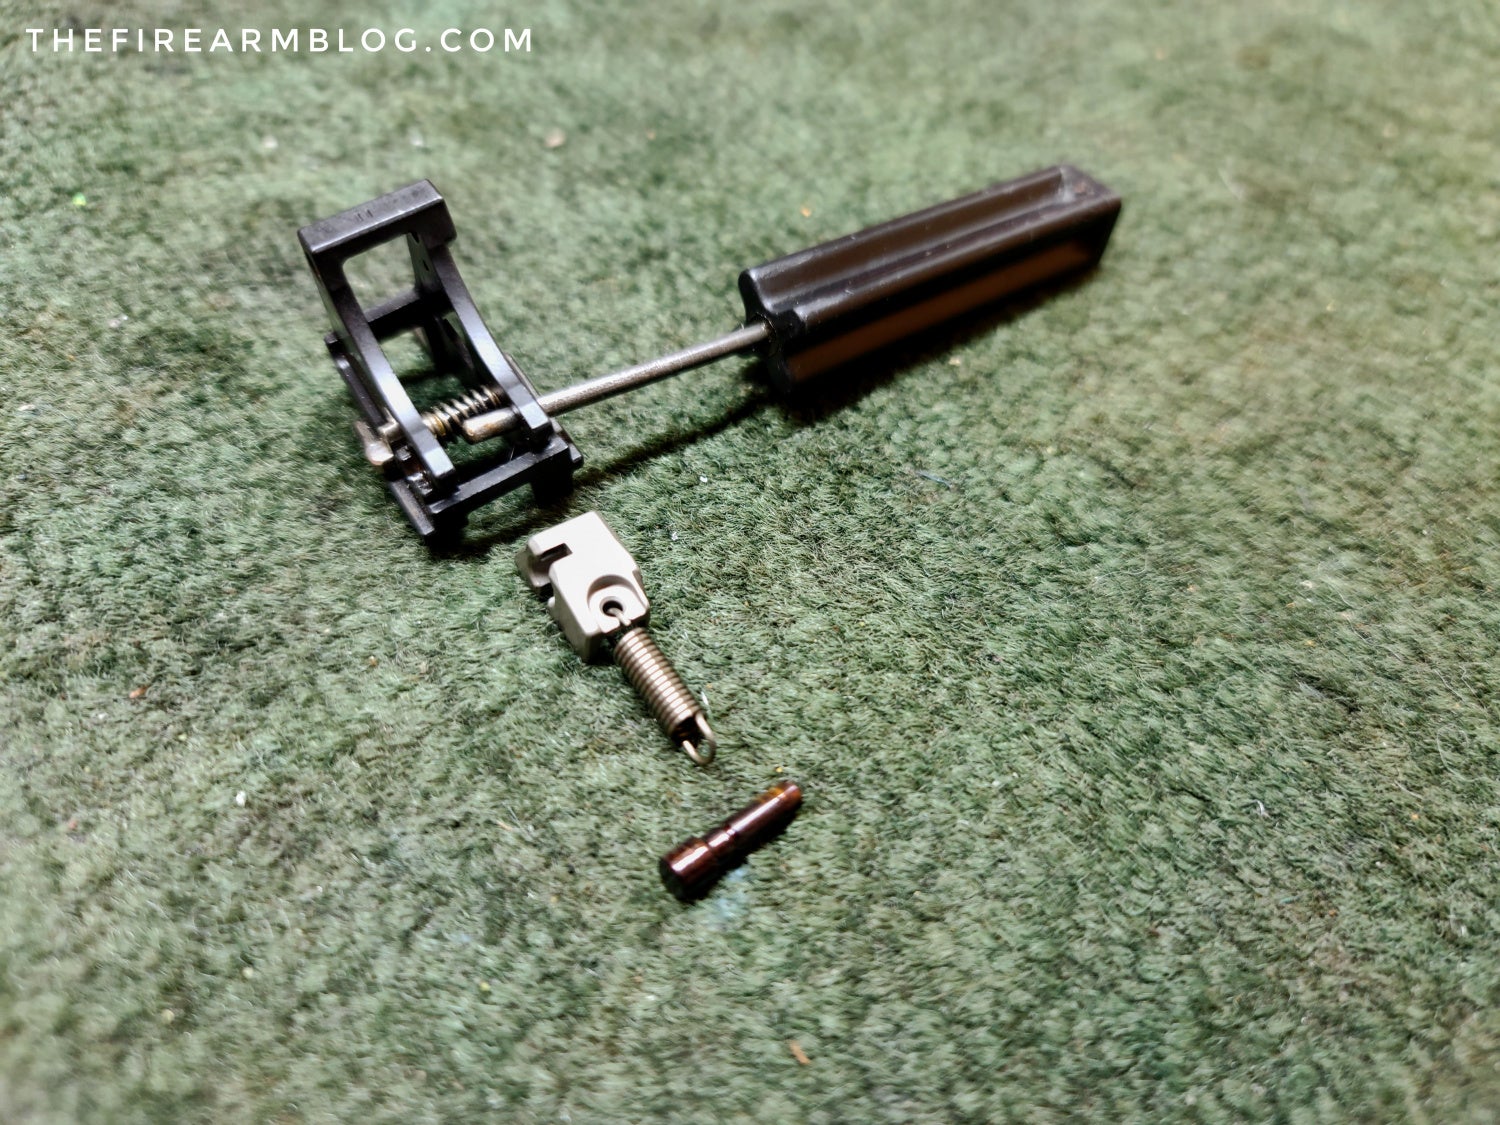
Step #7 – With the Sear and Sear Spring out of its housing, we will now separate them from each other. You can see there is a split or cut in the Sear Spring and you will need to utilize that gap to pop the Sear Spring free from the Sear. You can use a punch to create leverage if necessary.
Step #7
Step #8 – Next, we will remove the Trigger Bar from our Trigger body. For this, you will want to deploy your Roll of Tape or improvised punch block. Remember when I said earlier that you can improvise a lot of the tools you will need? During this step, it is ultra-handy if you actually have the correct 1/16″ punch. You will want to drive out the pin holding the Trigger Bar into the Trigger Body only halfway. This way the tiny pin stays in the Trigger Body yet releases the Trigger Bar.
Step #8
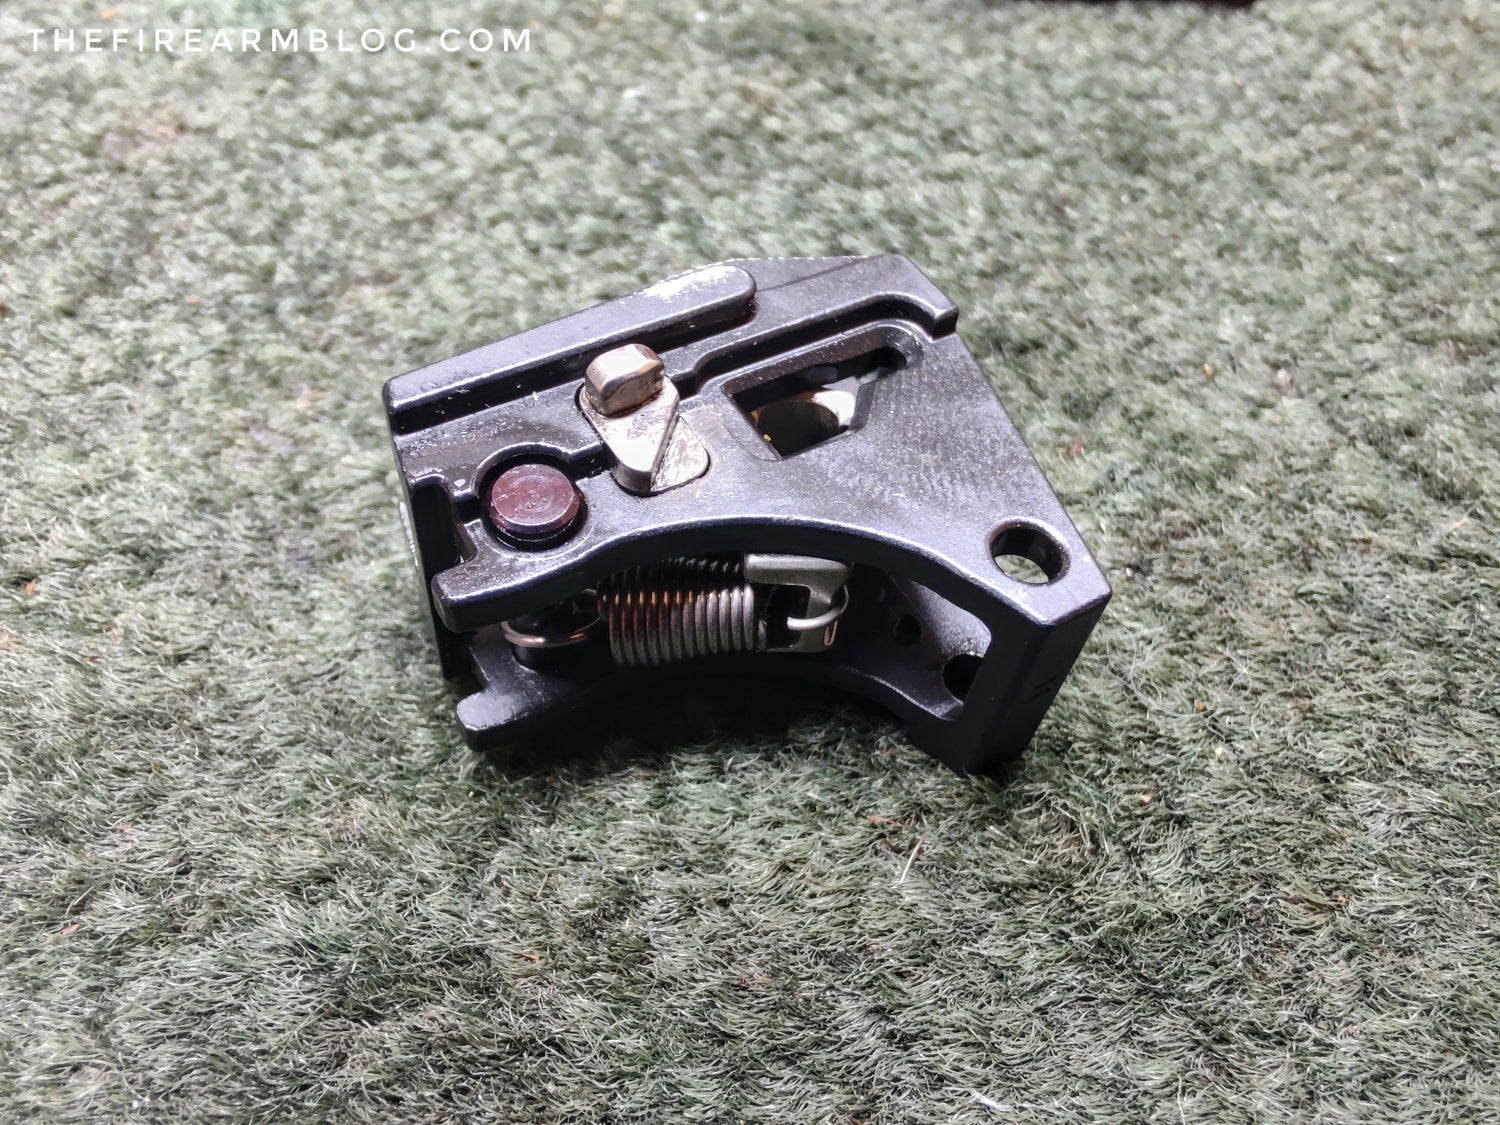
Step #9 – At this point, you have reached a tentative “Half-Way Point” in our surgery of an Apex Tactical Action Enhancement Trigger for a Springfield Armory Hellcat. All of the original components have been disassembled to their individual selves and are ready to be exchanged for Apex Tactical upgrades.
To start the Apex Tactical upgrades, we will begin by putting the New Action Enhancement Trigger Body onto the original Trigger Bar. It is intuitive to simply align the corresponding holes with one another and drive our tiny pin into place, but you want to take caution that you do not crush your Trigger Bar by robustly pounding away when your holes are not properly aligned. A cheat for this is to use a vice to simply press the pin into place as opposed to wailing away with a hammer (I am a Neanderthal so I chose the wailing away hammer method).

Step #9
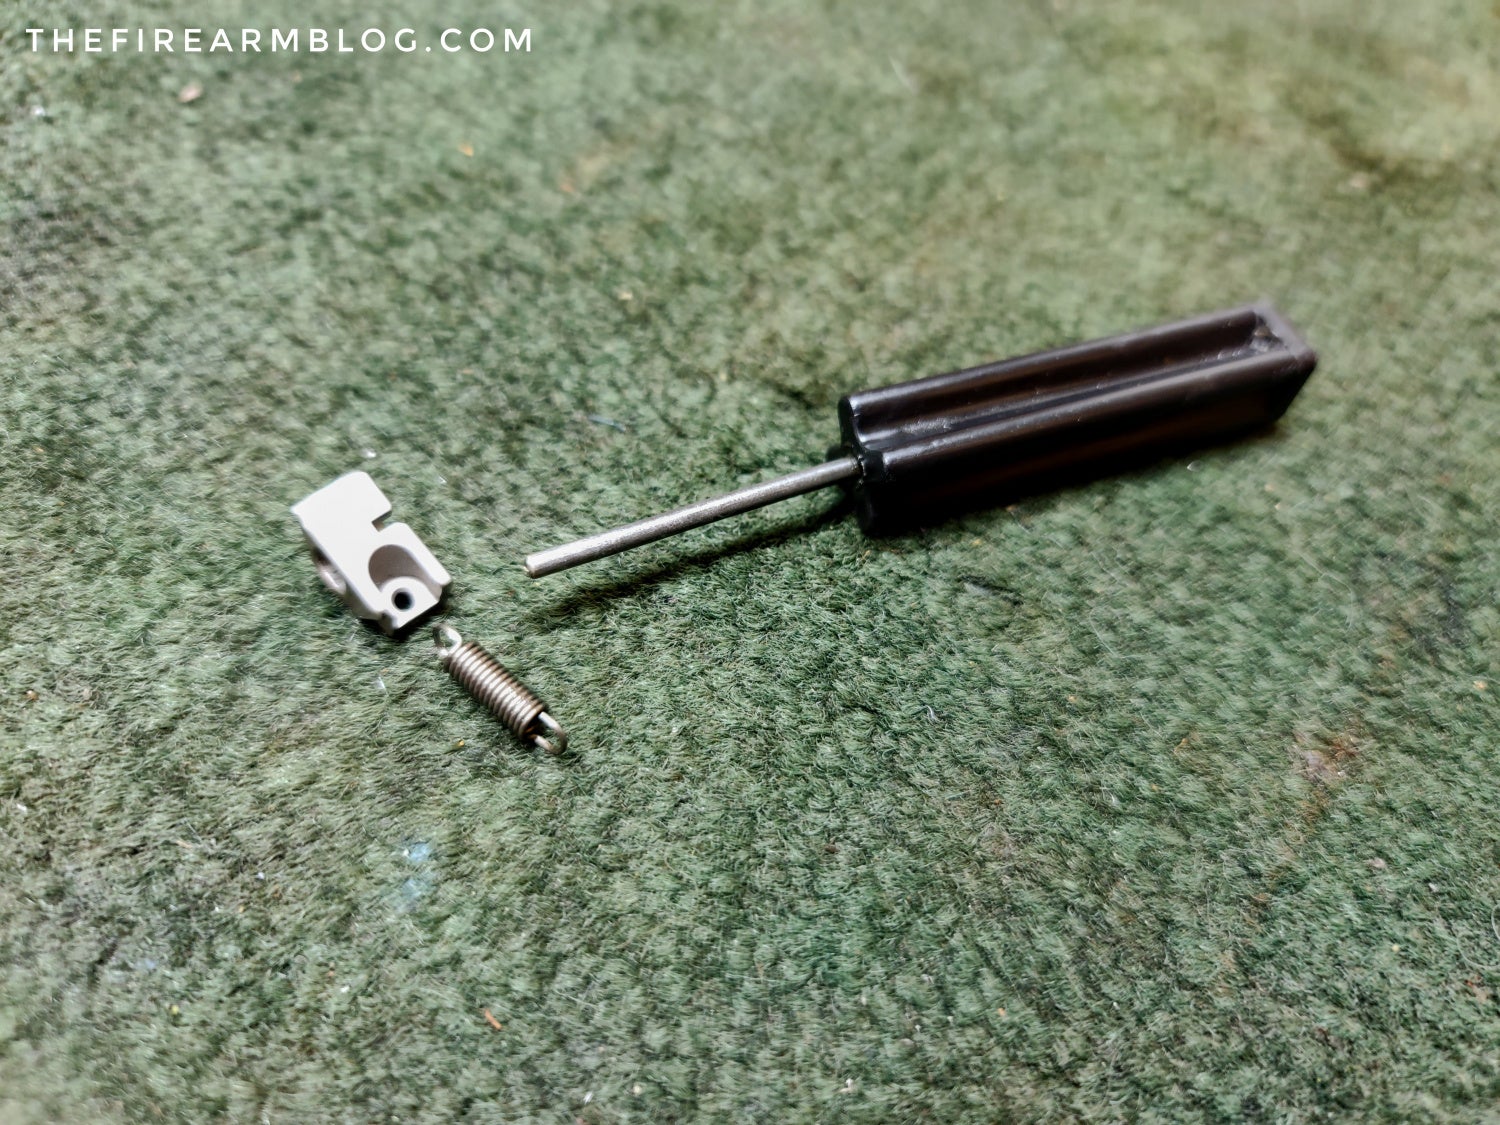
Step #10 – Then, we will put a New Sear Spring on our Sear before putting both back into the Sear Housing Block. In order for the spring to be orientated properly once installed, setup your install as displayed below. With the gap in the Sear Spring, clip it onto the the Sear and then rotate the Sear Spring to the 9 o’clock position.
Step #10
Step #11 – With the Sear and Sear Spring joined together in this 9 o’clock position, it is now orientated correctly to be re-installed into the Sear Housing Block. Simply take the Sear Housing Block pin you removed some time ago and put it back in place to hold the Sear and Sear Spring.
Step #11
Step #12 – With the Sear Housing Block completely re-assembled, you can take your assembled Trigger Bar and Trigger Body and insert it back into the Sear Housing Block. Just as before this should be a gentle process where it is wiggled back and forth into place. No pounding or hammers are needed for this. With the Sear Housing Block completely re-assembled, remember to put the Sear Housing Safety Pin back into place (that small, easily lost C-clip we set aside earlier).
With this done, we are now going to start putting our frame back together. The first step is putting the Magazine Blocking Lever back in place simply by setting it in. You can follow that up with putting the Trigger Body, Trigger Bar, and Sear Housing Block back into the frame as well as one unit. At this point, your frame should look like mine below.
Step #12
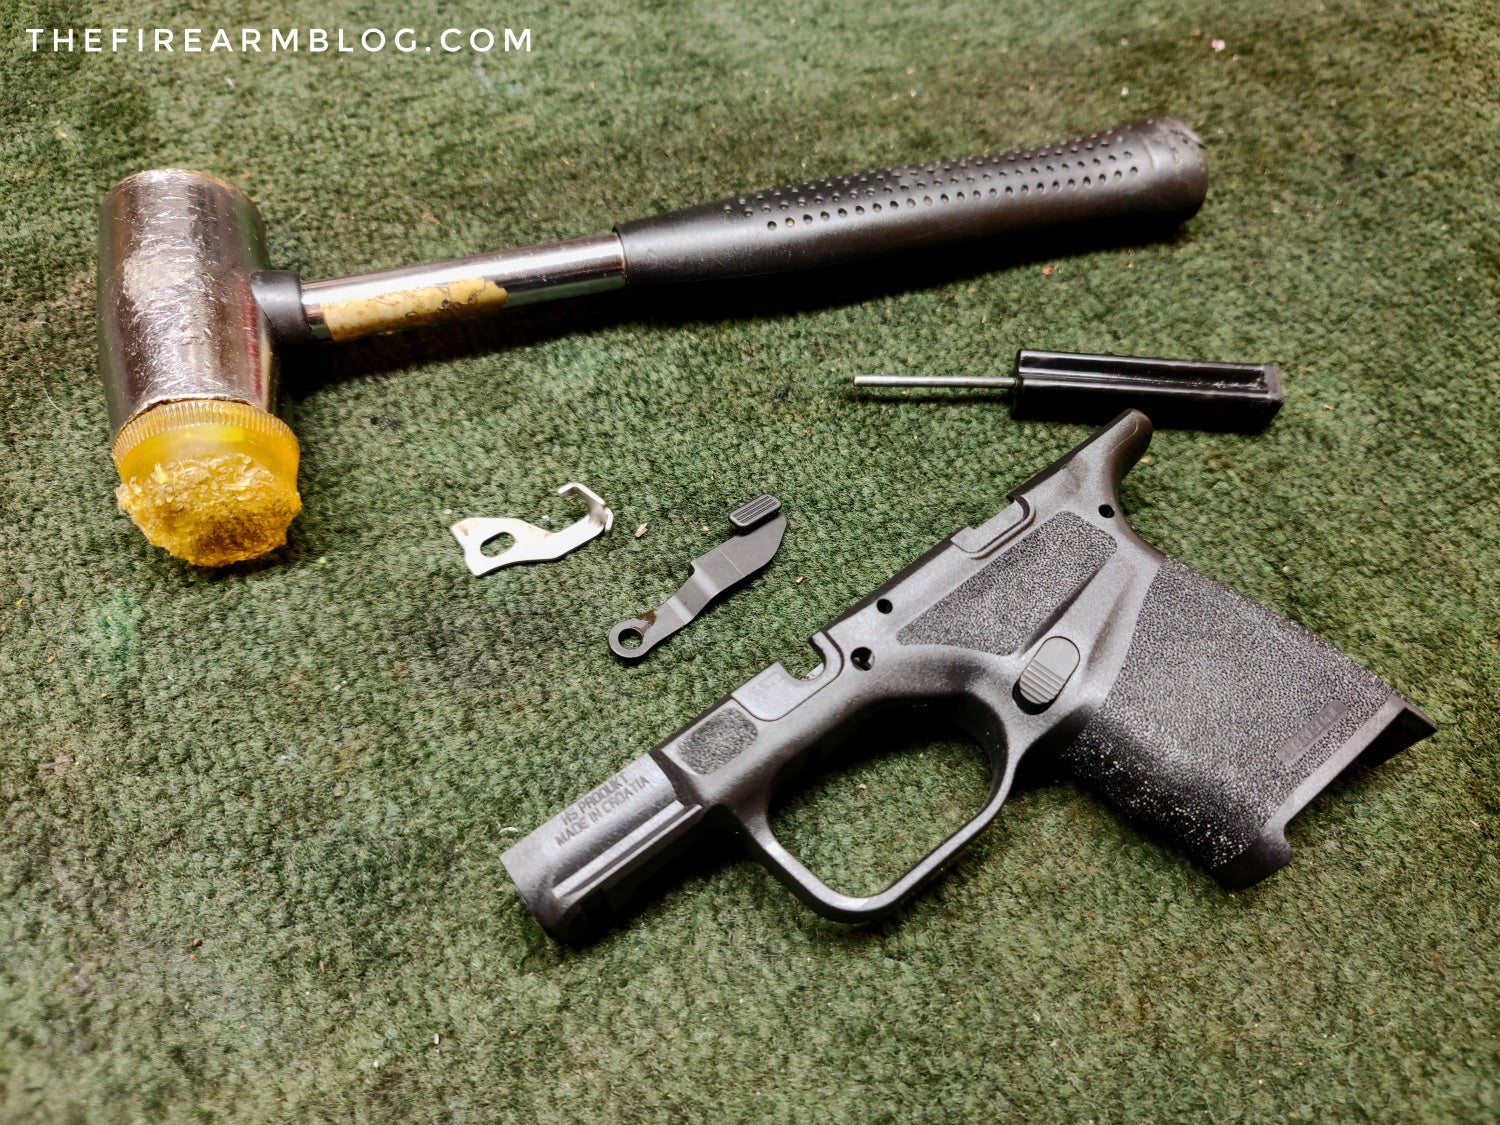
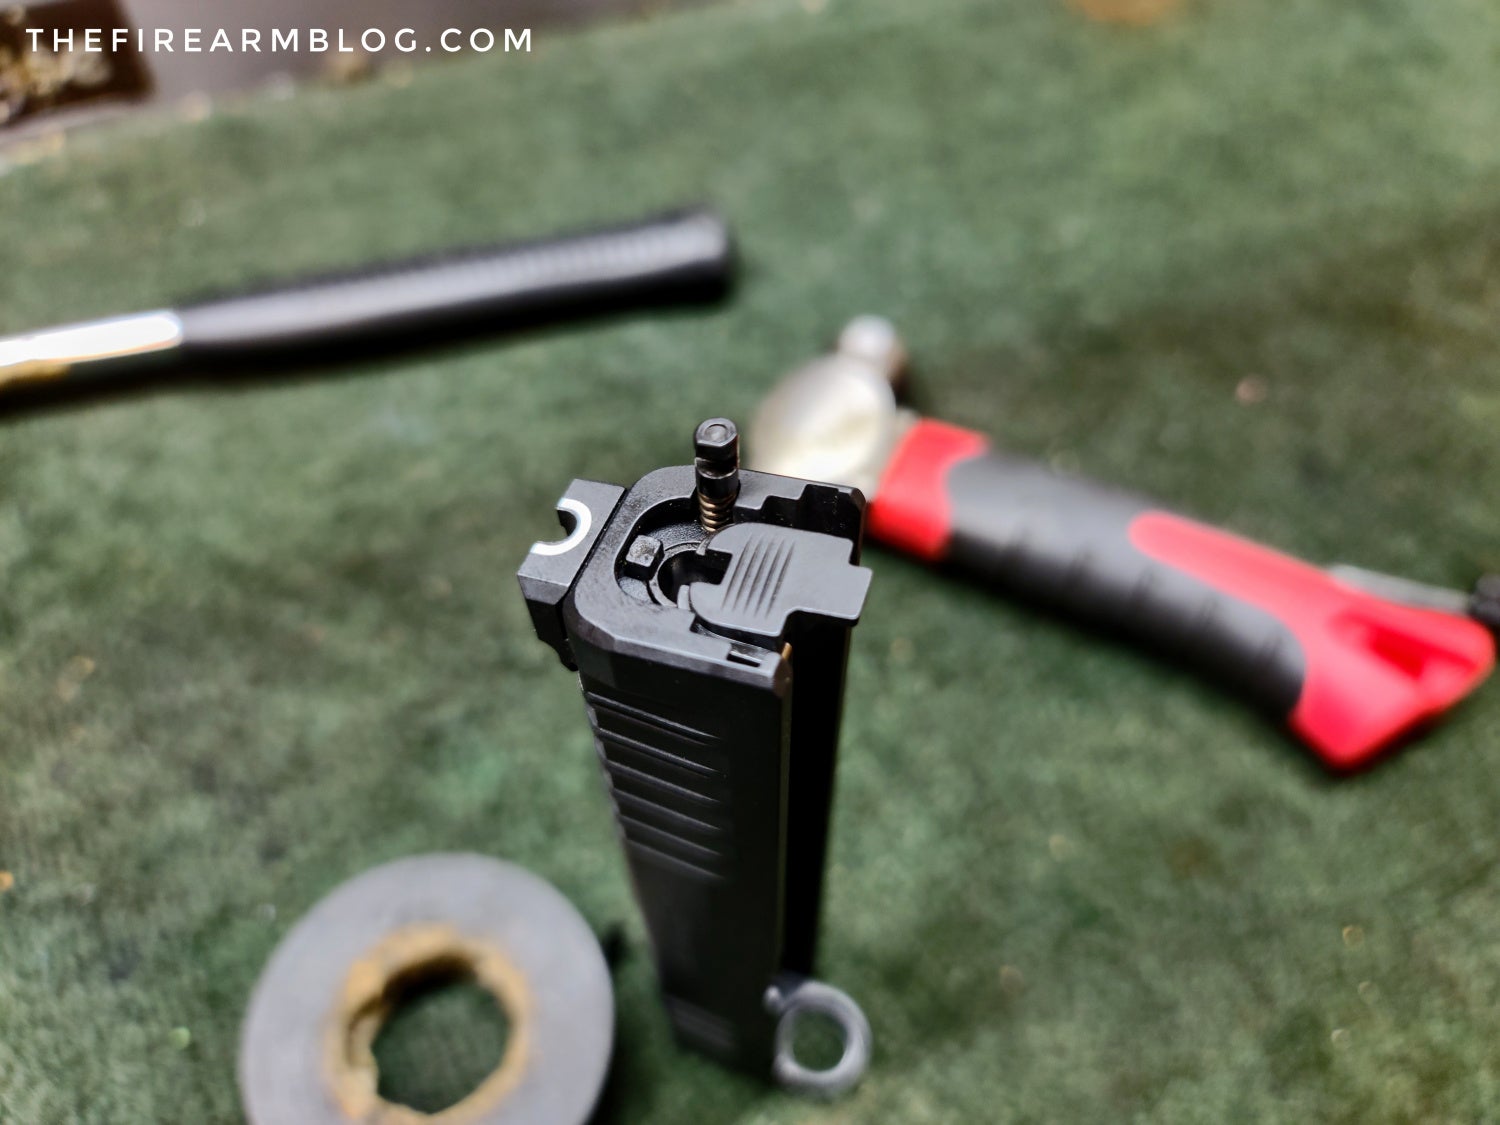
Step #13 – Next, we will be putting back into the frame your Locking Block, Slide Lock Lever, and Slide Lock Lever Spring. The squirrelly, T-shaped spring as I call it – Slide Lock Lever Spring – can rest again in the Locking Block. The Slide Lock Lever can dive back into your frame first. Next up is the Locking Block and Slide Lock Lever Spring as one unit with the Takedown Lever. This is something you should be able to push back into the frame through your own raw, awesome power!!!… What I am driving at is you do not need a hammer; don’t use one.
Step #13
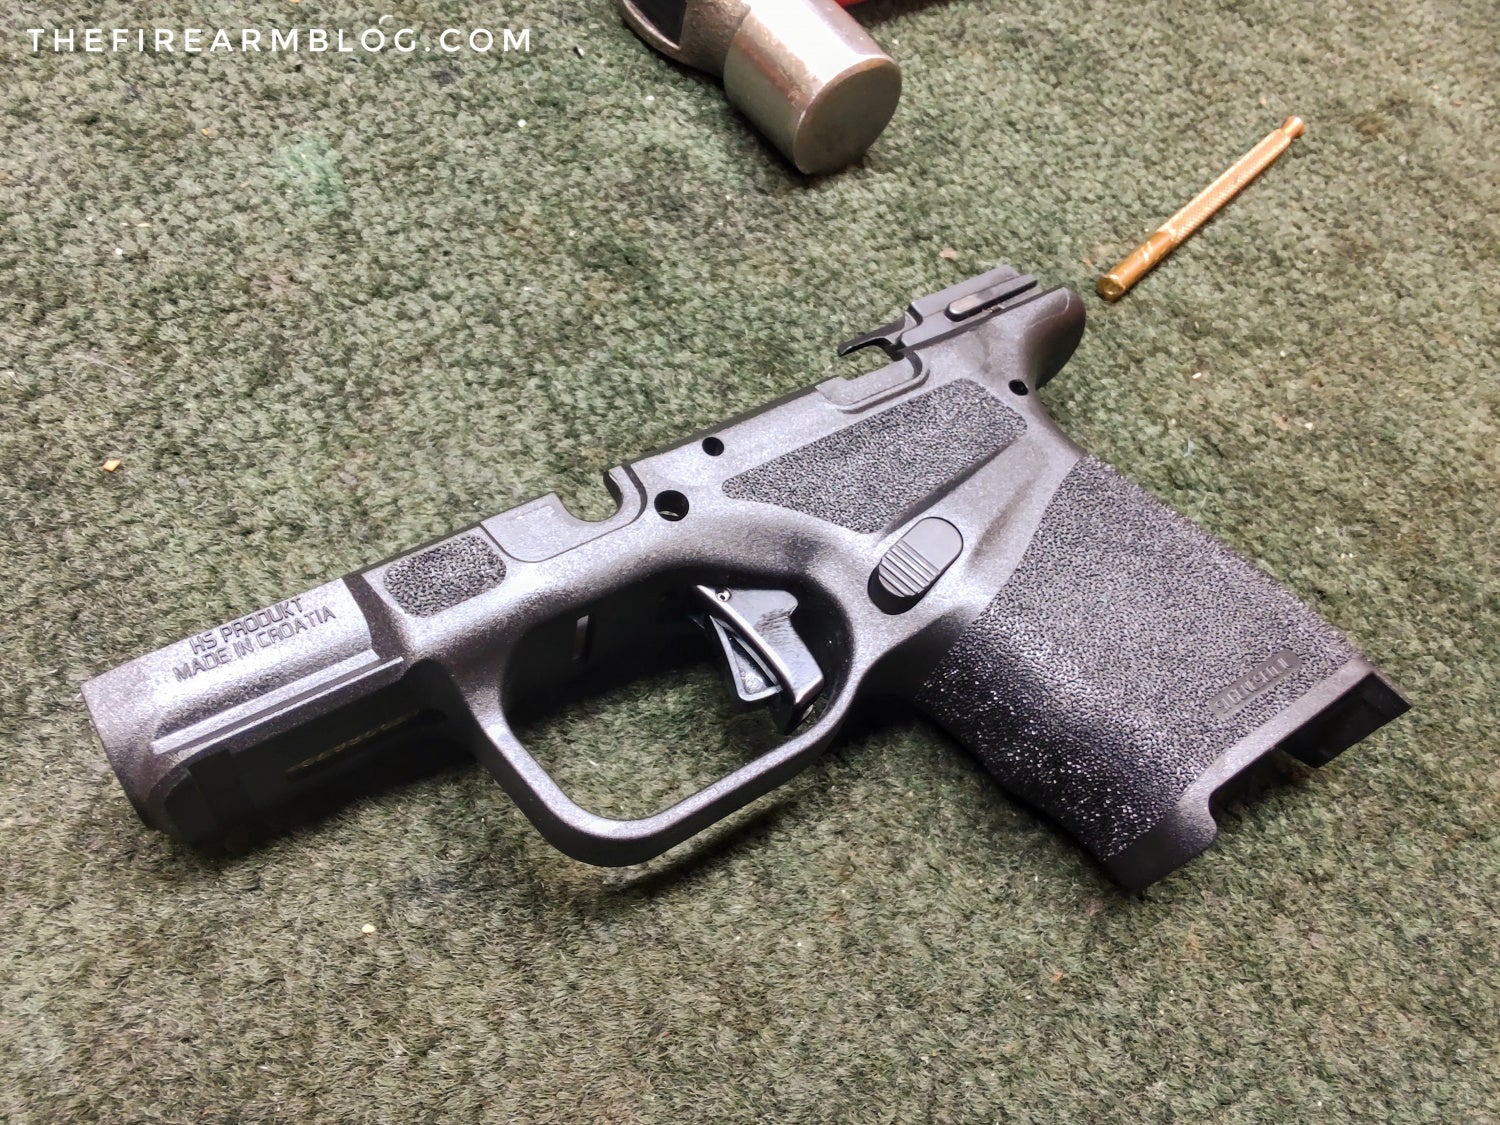
Step #14 – Then, we can start putting frame pins back in to hold everything in place. The Sear Housing Pin (furthest frame pin from the muzzle) has 3 rings on it. The Locking Block Pin (middle frame pin) has 2 rings on it. The Trigger Pivot Pin (frame pin closest to muzzle) is a different shape entirely.
Step #14
Step #15 – With our frame upgraded and back in one piece, let’s rip apart something else… like the Slide Assembly! Go and grab your slide because now we are going to dis-assemble the Slide Assembly so we can put in a New Striker Assembly Spring.
To begin to remove the Slide Cover Plate, you will want to depress the small, rectangular piece below the Rear Sight. This will get the Slide Cover Plate to travel an 1/8″ – 1/4″ off of the Slide Assembly.
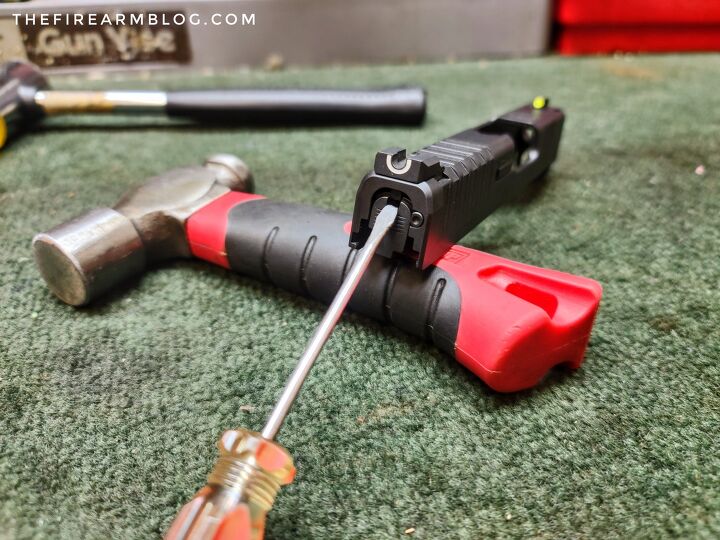
Step #15
Step #16 – That small, no-name, rectangular piece below the Rear Sight is under a small amount of spring tension so don’t shoot your eye out like Ralphie from “A Christmas Story”. The next piece inhibiting you from fully removing the Slide Cover Plate is the Extractor Assembly – Extractor Claw, Extractor Spring, and Extractor Rod. With your thumb covering the Slide Cover Plate and pushing the Slide Cover Plate off of the Slide, you will feel the Extractor Assembly pop and hit your hand with force. It will cause momentary discomfort because the Extractor Assembly is under a lot of force, but we promise it will not draw blood. At this point, your Slide Cover Plate is off and we can attack everything else.
Step #16
Step #17 – Next, we will remove the Striker Assembly with our bare fingers and look to replace the Striker Assembly Spring. To dis-assemble the Striker Assembly and accomplish this, you will want to gently compress the current Striker Assembly Spring so the Spring Cups can be removed. Once this objective is met, put on the New Apex Tactical Action Enhancement Spring on and return the Spring Cups back to their original spot.
Step #17
Step #18 – With the Striker Assembly re-assembled, you can put the Striker Assembly back into the Slide. Then, one-by-one you will want to gently compress the Striker Assembly and nudge the Slide Cover Plate over the top… then gently compress the Extractor Assembly and nudge the Slide Cover Plate over the top… and then gently compress that small, no-name, rectangular piece below the Rear Sight and nudge the Slide Cover Plate over the top.
Step #18
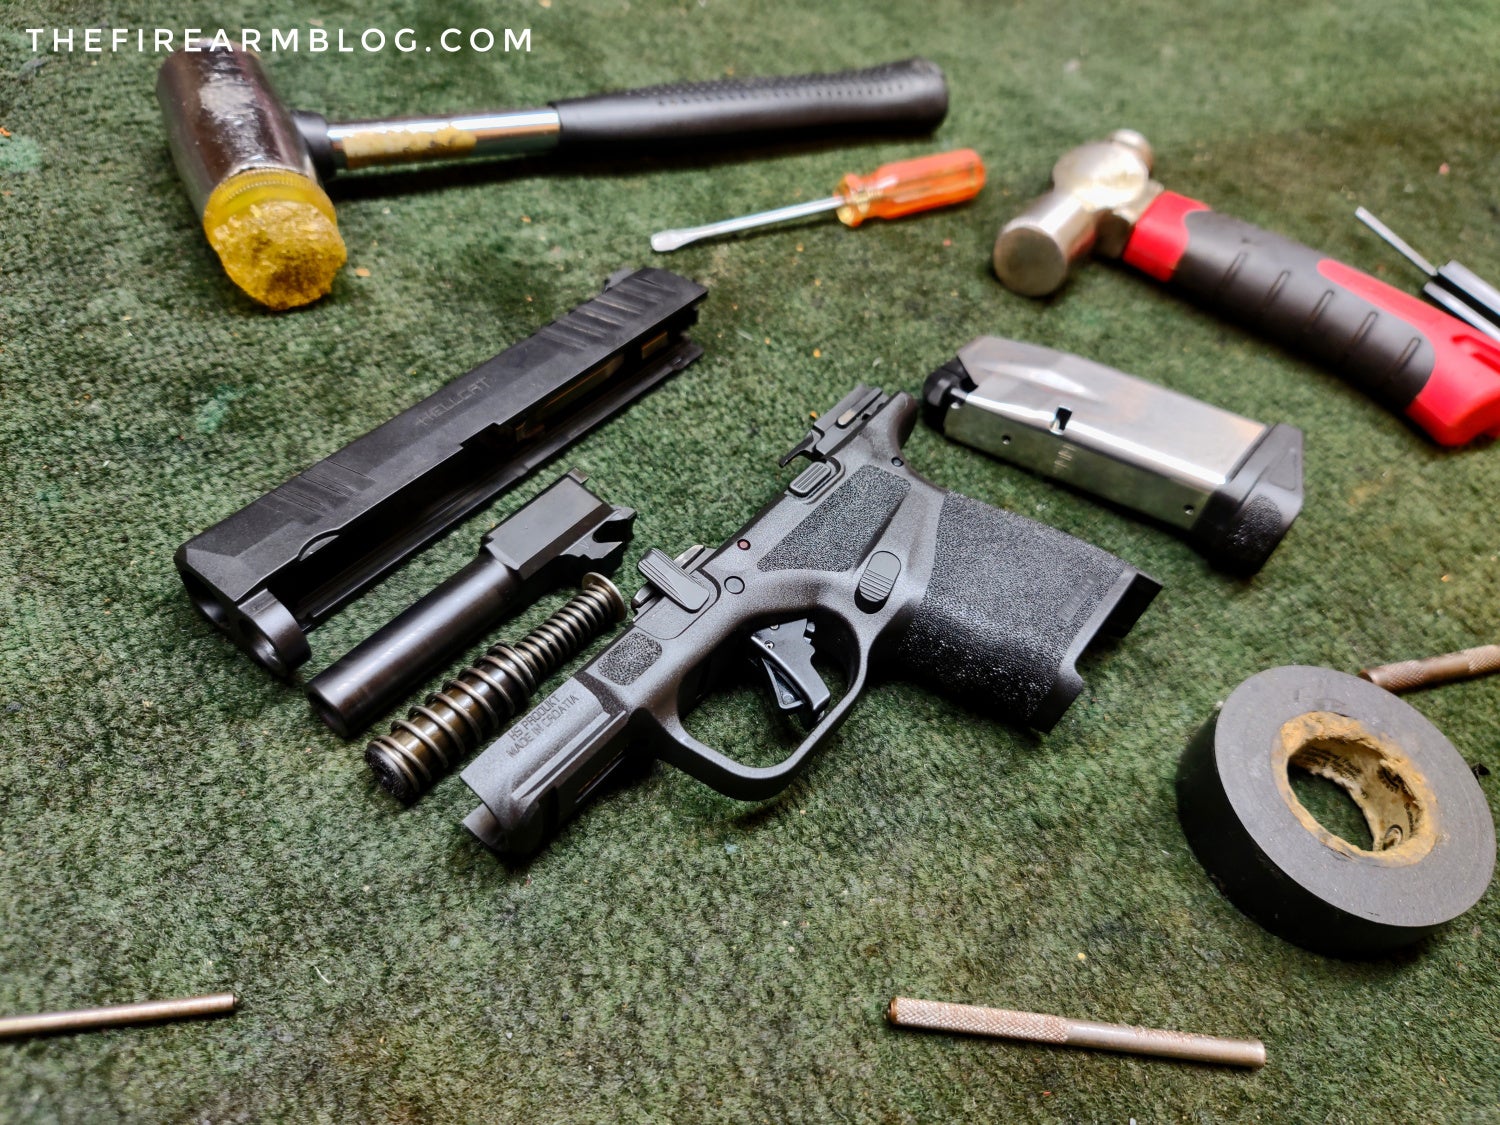
Completion: Apex Tactical action enhancement trigger install
With your Slide fully assembled and your Frame fully assembled you can claim sweet, divine victory… mate the two together… and tell all your friends you are a gunsmithing champion of the Gods!!! With the Apex Tactical Action Enhancement Trigger there is a “break-in” period as far as trigger pull weight reduction in the amount of 100 – 200 rounds. There is nothing else that needs to be done at this point as far as ‘smithing goes, but once you fling one hundred or so rounds down range the trigger will clean and polish itself up to feeling right at home. If you gauge your trigger it should be close to 1 Lb lighter and significantly smoother. It is advertised as such and I can personally attest that this happened to my trigger after use.
Thank you to everyone who made it all the way through this Hellcat surgery with us in installing an Apex Tactical Action Enhancement Trigger! Hopefully, we worded things plainly enough where it was easy to digest and gave you a better understanding of the internal workings of your Springfield Armory Hellcat. In closing, this article is a “Cliff Notes” for installing the Apex Tactical Action Enhancement Trigger. A more thorough explanation can be had from Apex Tactical and their YouTube Installation video below. If after reading this and watching the Action Enhancement video you still do not feel comfortable installing your trigger yourself, there is no shame in that. That’s what the pros are for. Ask a gunsmith local to you to help. As always, let us know all of your thoughts in the Comments below! We always appreciate your feedback.
We are committed to finding, researching, and recommending the best products. We earn commissions from purchases you make using the retail links in our product reviews. Learn more about how this works.