 Your Privacy Choices
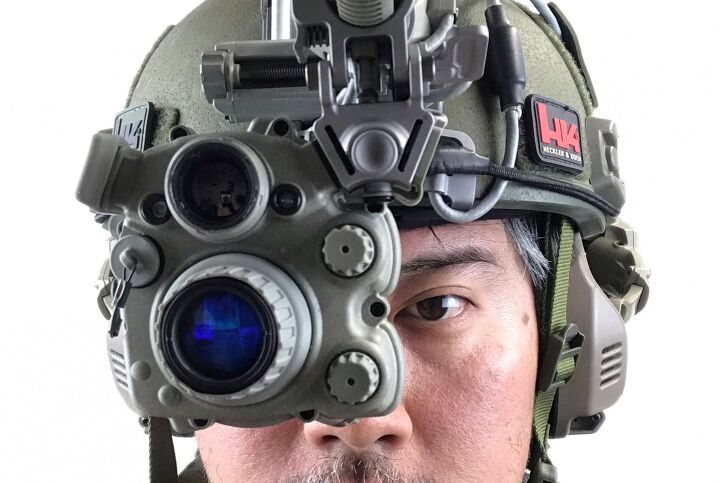
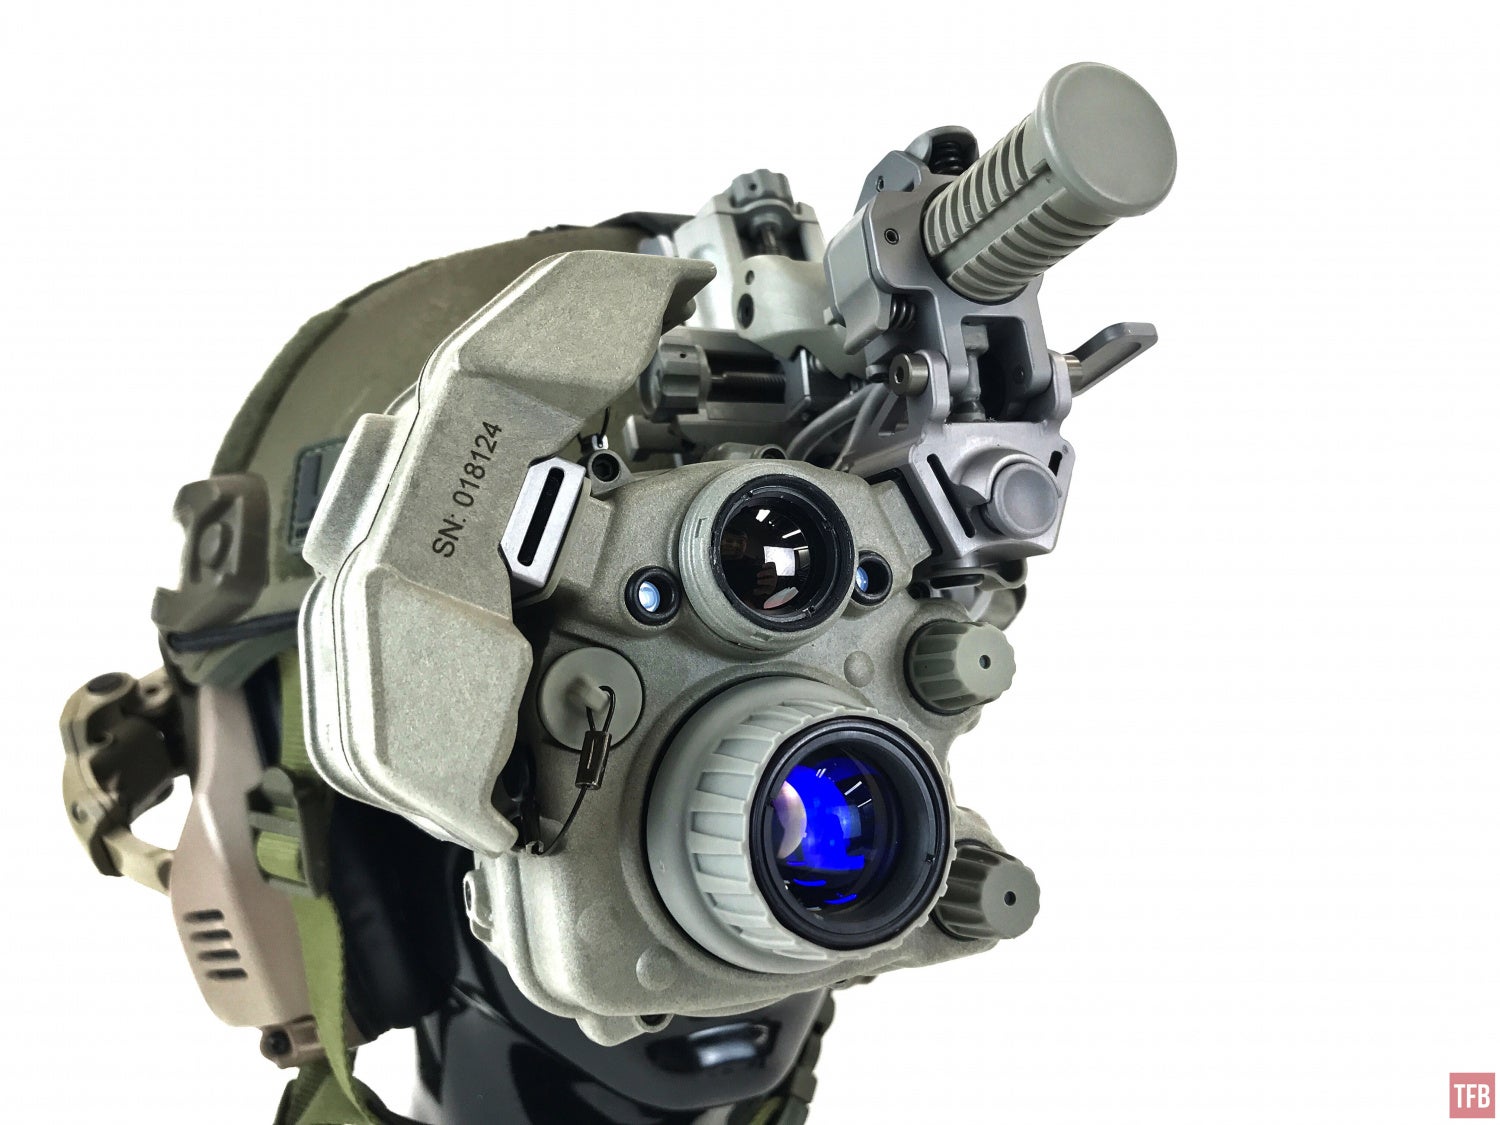
There are night vision goggles and there are thermal devices. Some people bridge the two like a FLIR Breach and PVS-14. The next level up is thermal fusion. This is where the thermal image is inserted into the night vision image. I wrote an article about DIY fusion, where you look into a thermal device with your night vision. Real thermal fusion allows you to see both night vision and thermal all in the same sight picture. The low barrier to entry for thermal fusion is to get a COTI (clip-on thermal imager). However, the ultimate thermal fusion is an integrated fusion unit that has rear projection overlay. That is the case for the ENVG PSQ-20.
ENVG Rear Projection Thermal Overlay
Before we talk about the coolness of the ENVG, let’s refresh your memory about other forms of thermal fusion. The COTI is what I use for thermal fusion. It inserts the thermal image via a fiber optic periscope and projects this image through the objective lens of my night vision goggles.

As you can see in the photo above, the thermal image is the smaller circle within the 40º FOV of the image intensified image. Here is a test I did last year using the COTI and my DTNVGs inside a night time corn maze.
This is where thermal fusion really shines. The night vision allows me to see the corn maze but the thermal allowed me to see people inside or behind the corn. In some areas of the corn maze, there are really bright lights, causing the night vision to dim down making it hard to see down the row of corn. But the thermal image is not affected by photonic barriers. So I was still able to see people and some of the corn.
A COTI equipped night vision goggle is near perfection. The next step is an integrated thermal fusion goggle like the ENVG which we will now take a closer look at.
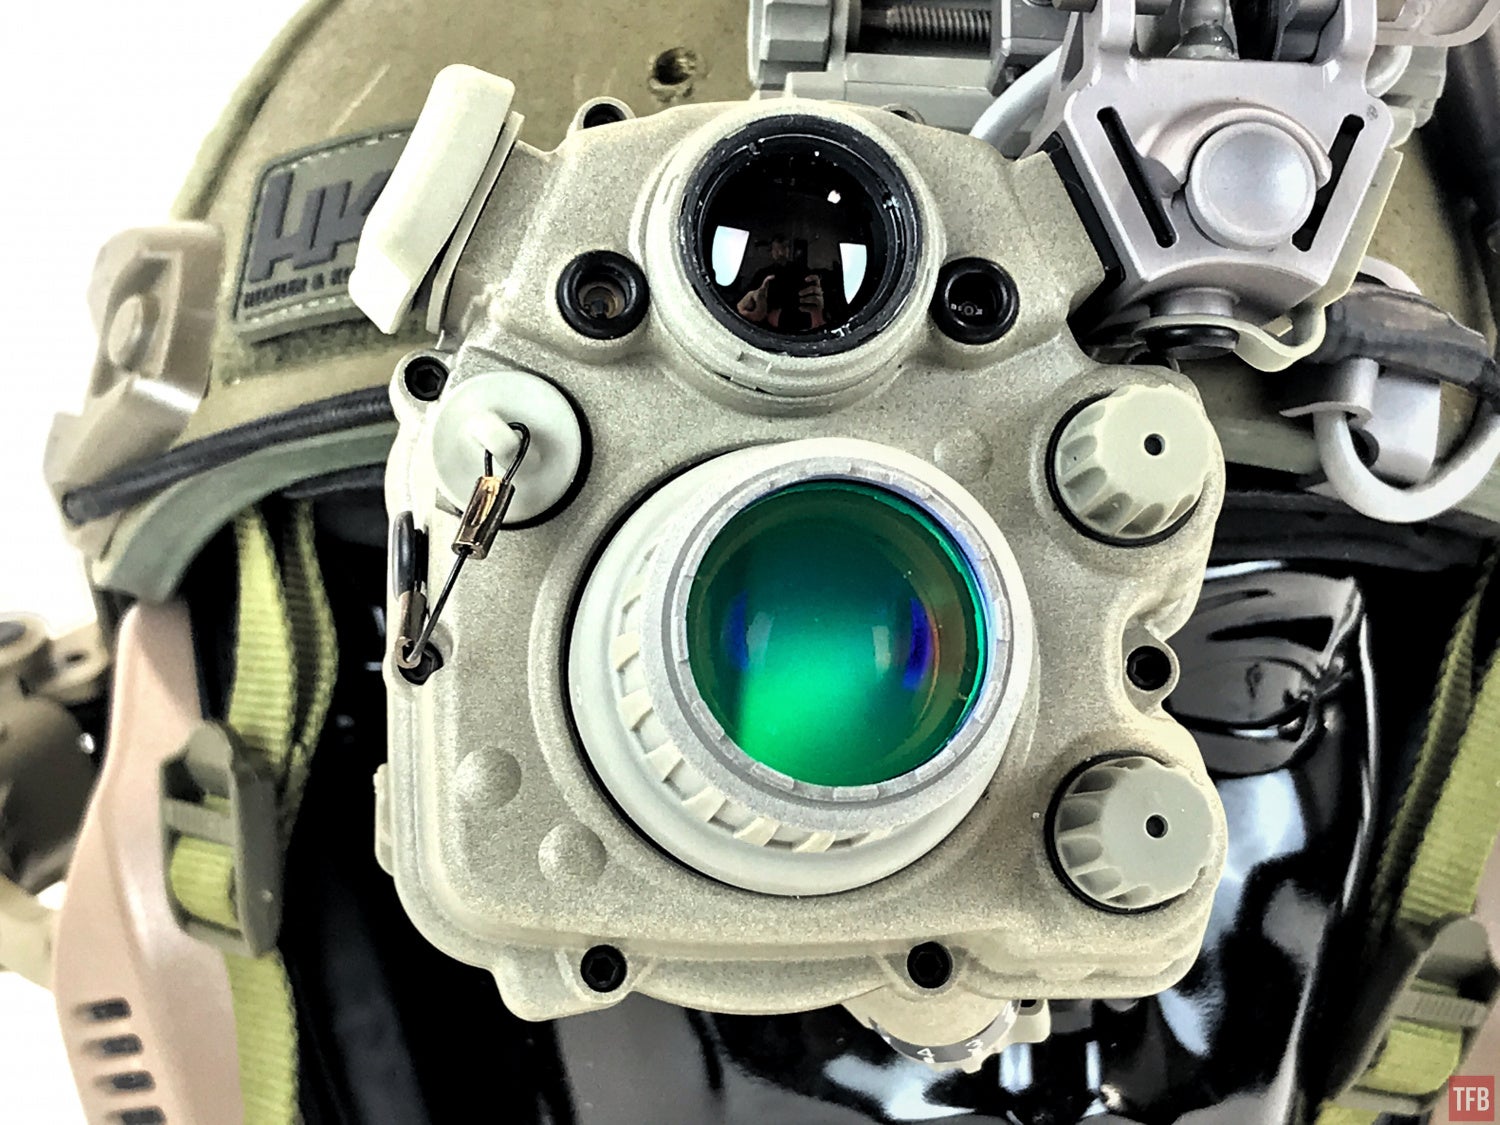
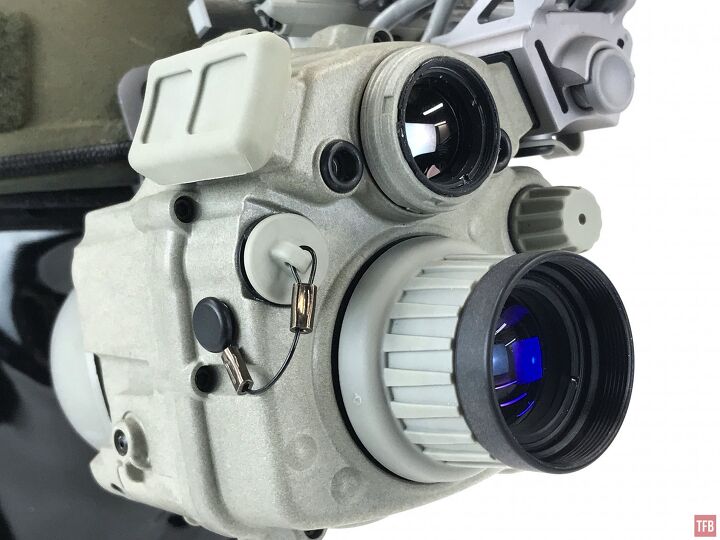
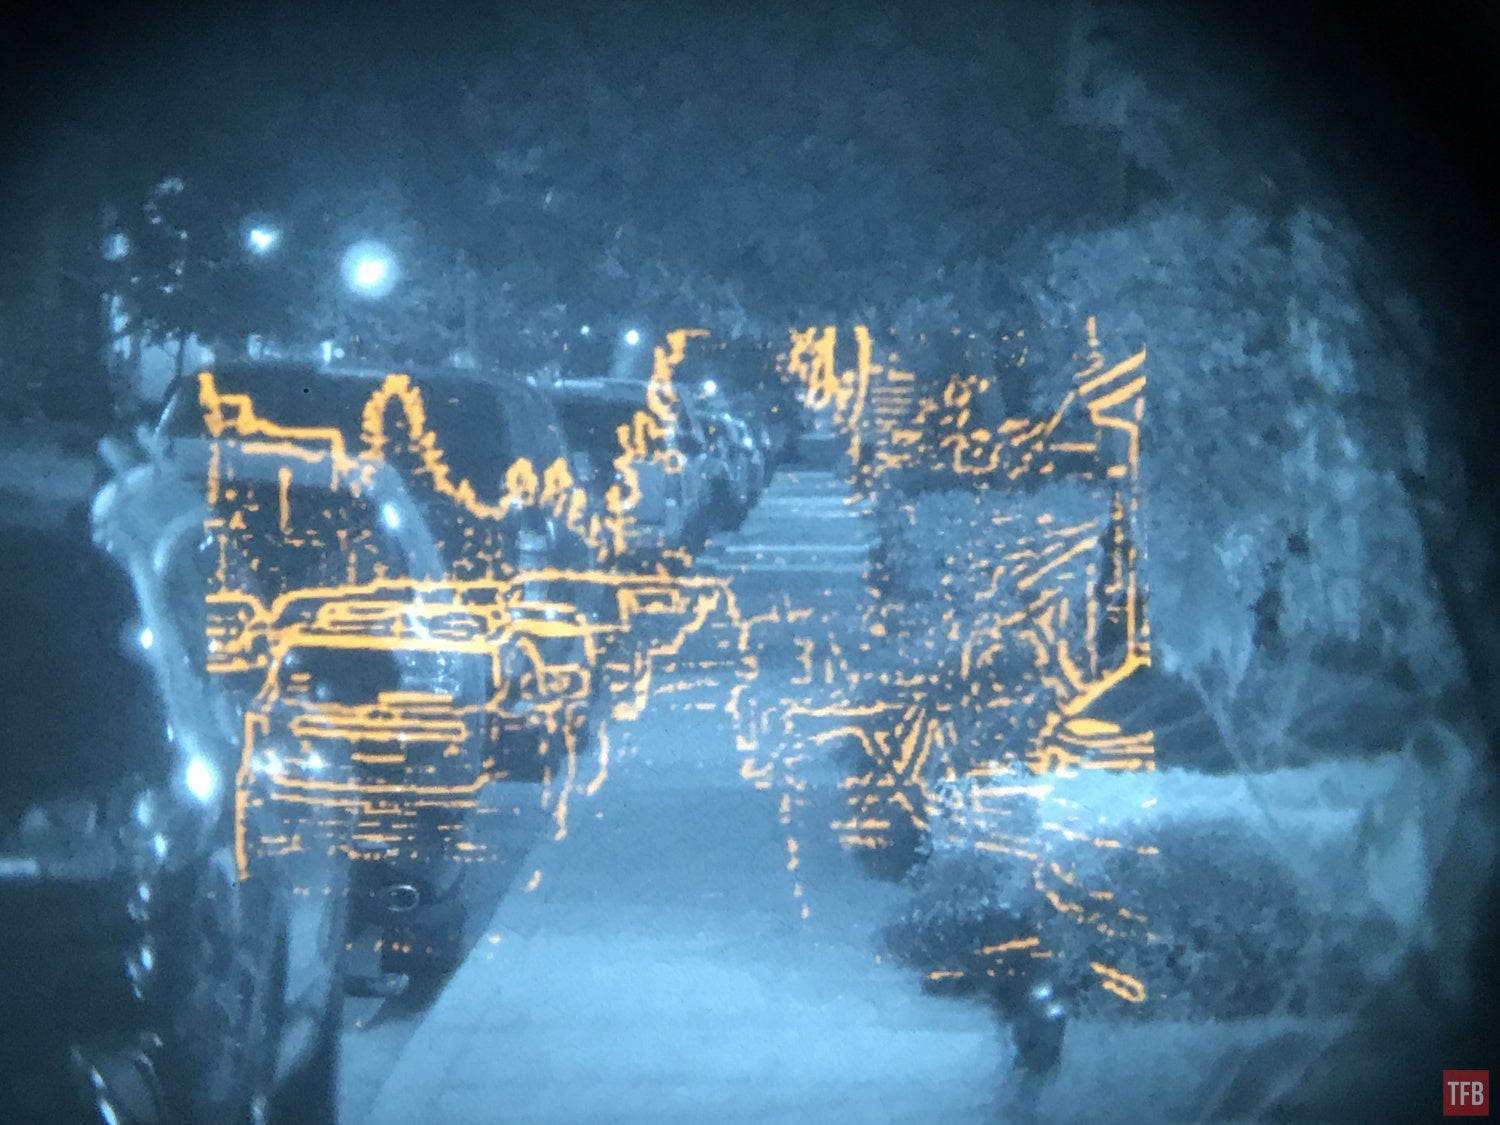
As mentioned earlier, the ENVG uses rear projection overlay. The thermal image is projected behind the image intensifier. In a COTI setup, the thermal image is the same color as the phosphor in your tubes. Green phosphor tubes will create a green image. White phosphor creates a bluish gray image. But with rear projection overlay, the thermal image is a bright orange to contrast against either green or white phosphor.
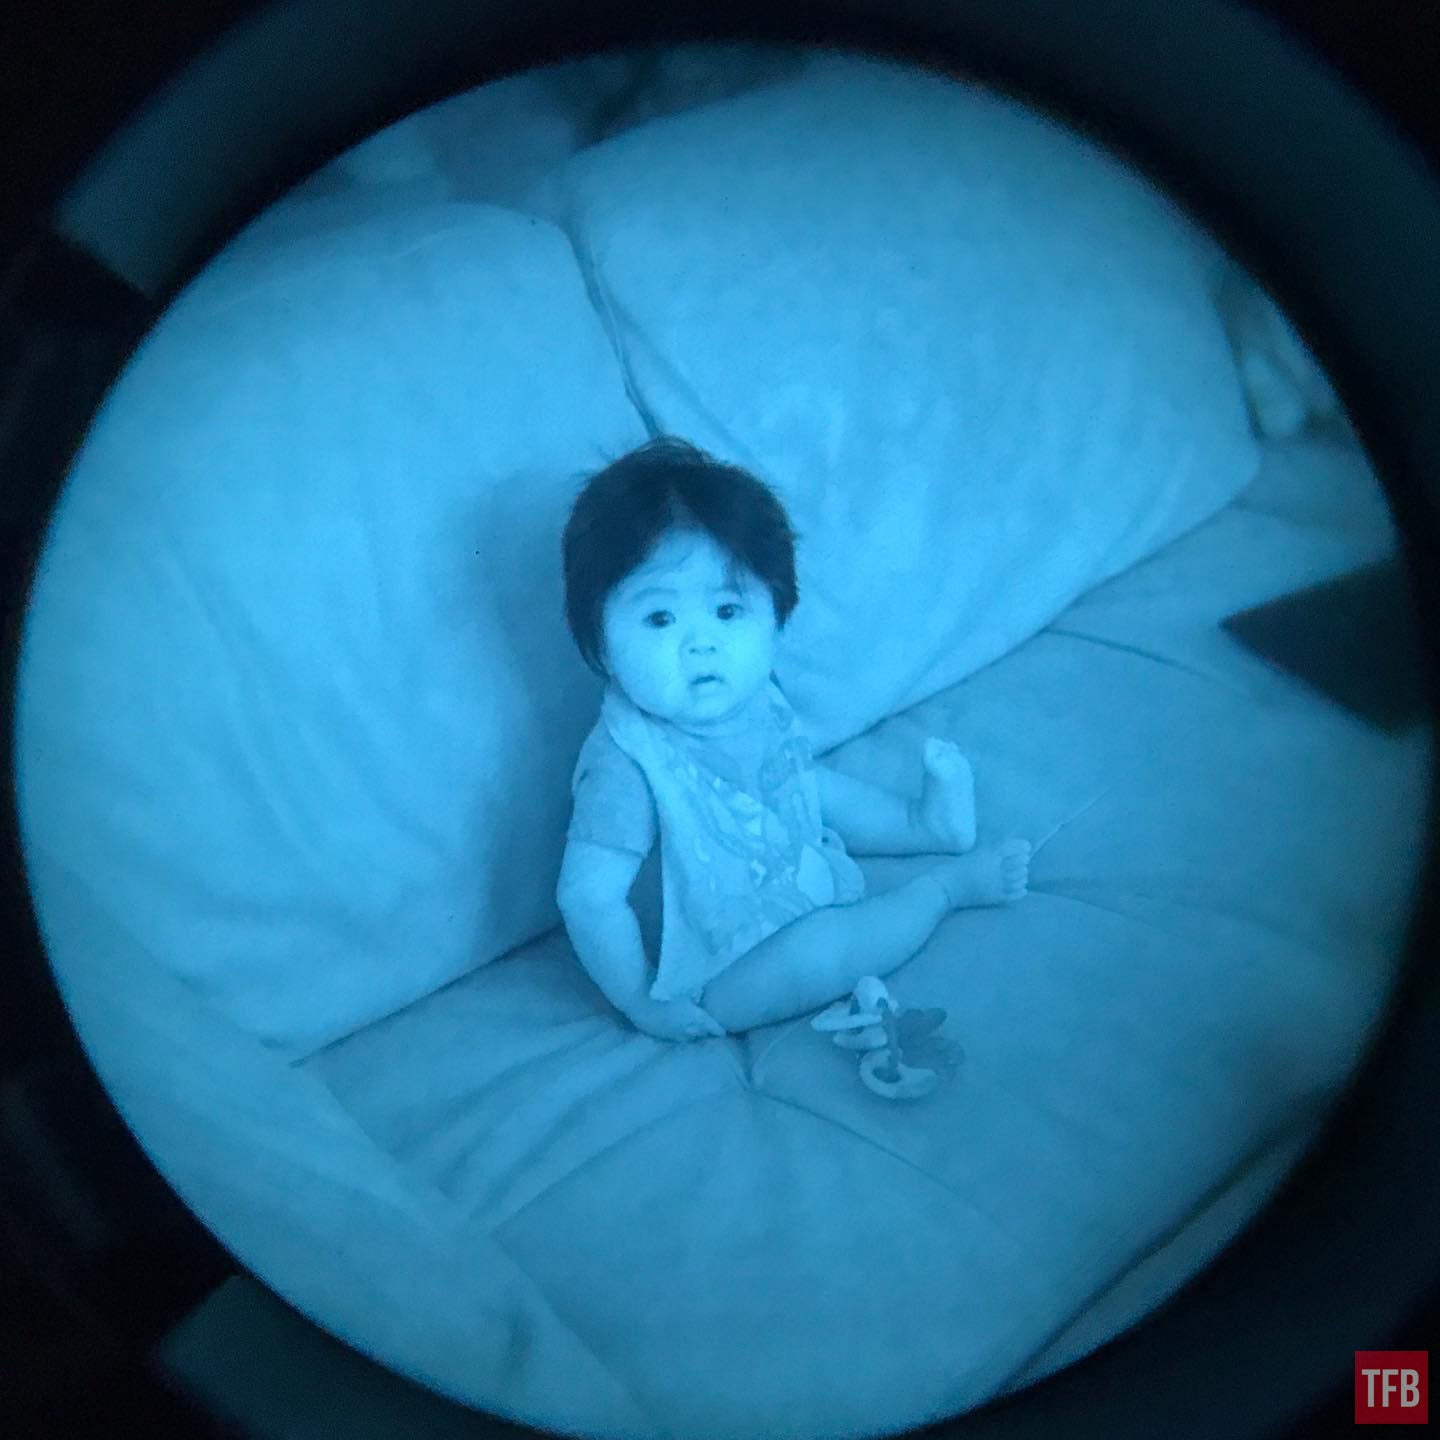

You can see how the thermal image is bright orange. What is different about the ENVG is the shape of the thermal image. It is a rectangle. You will notice it is not circular like the COTI.
The older ENVG monocular has a slightly different design and it used green phosphor tubes.
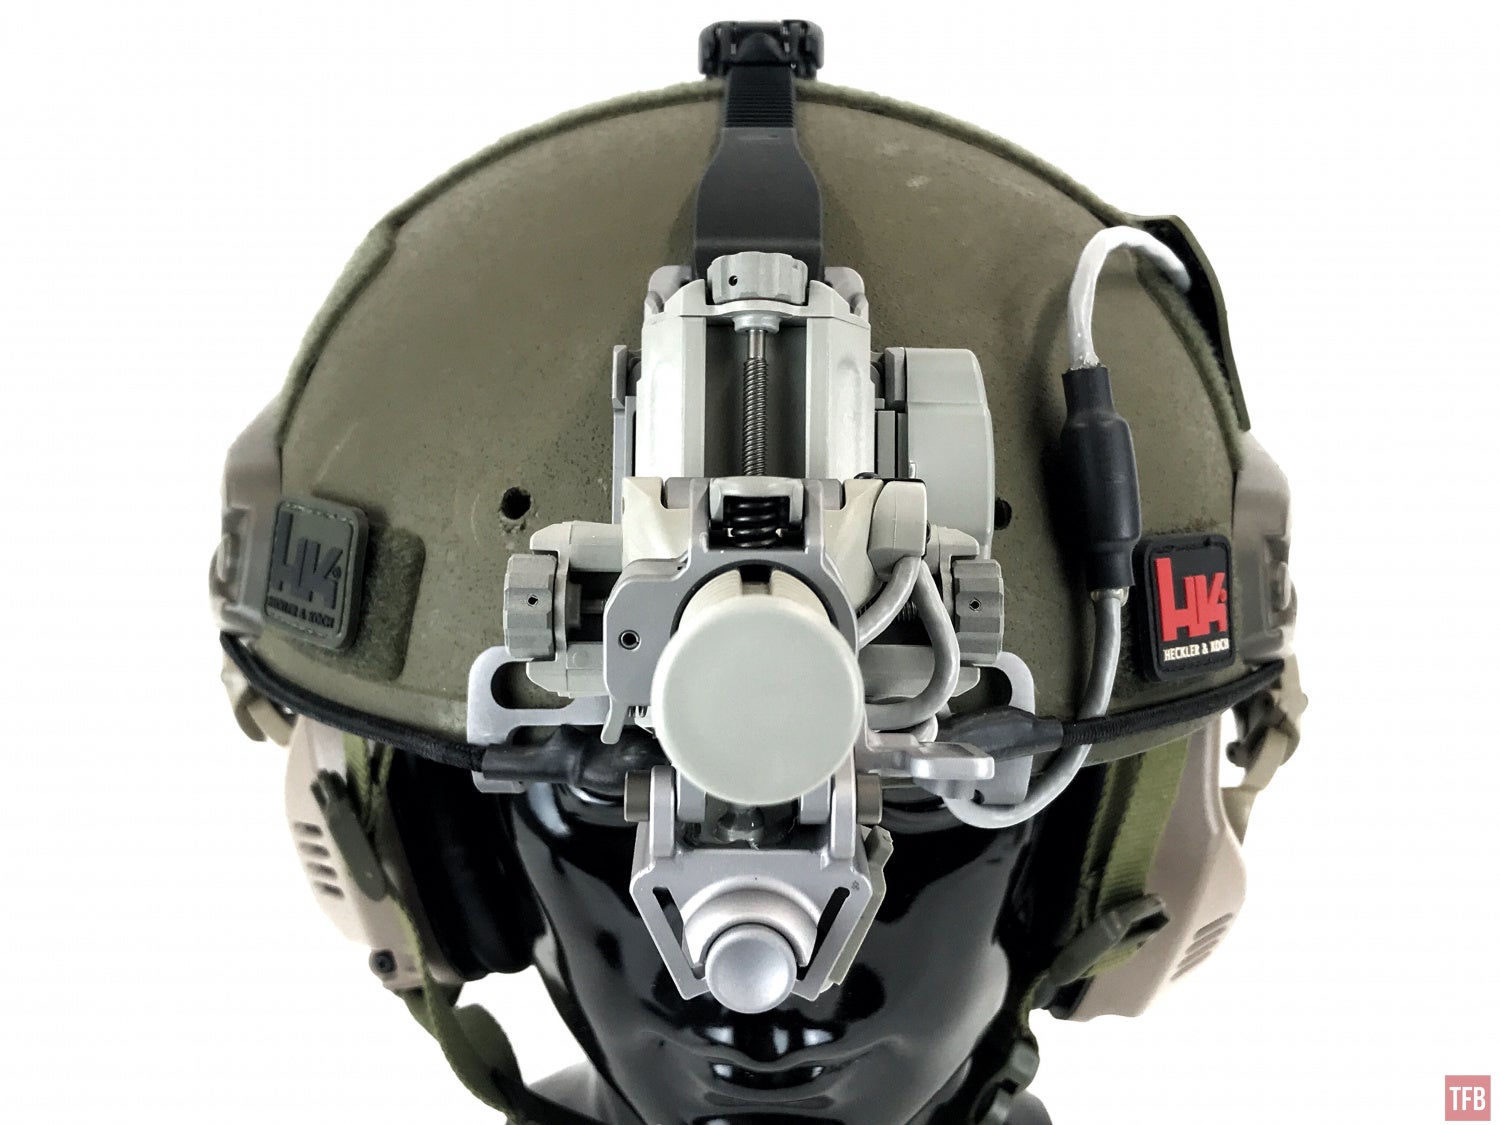
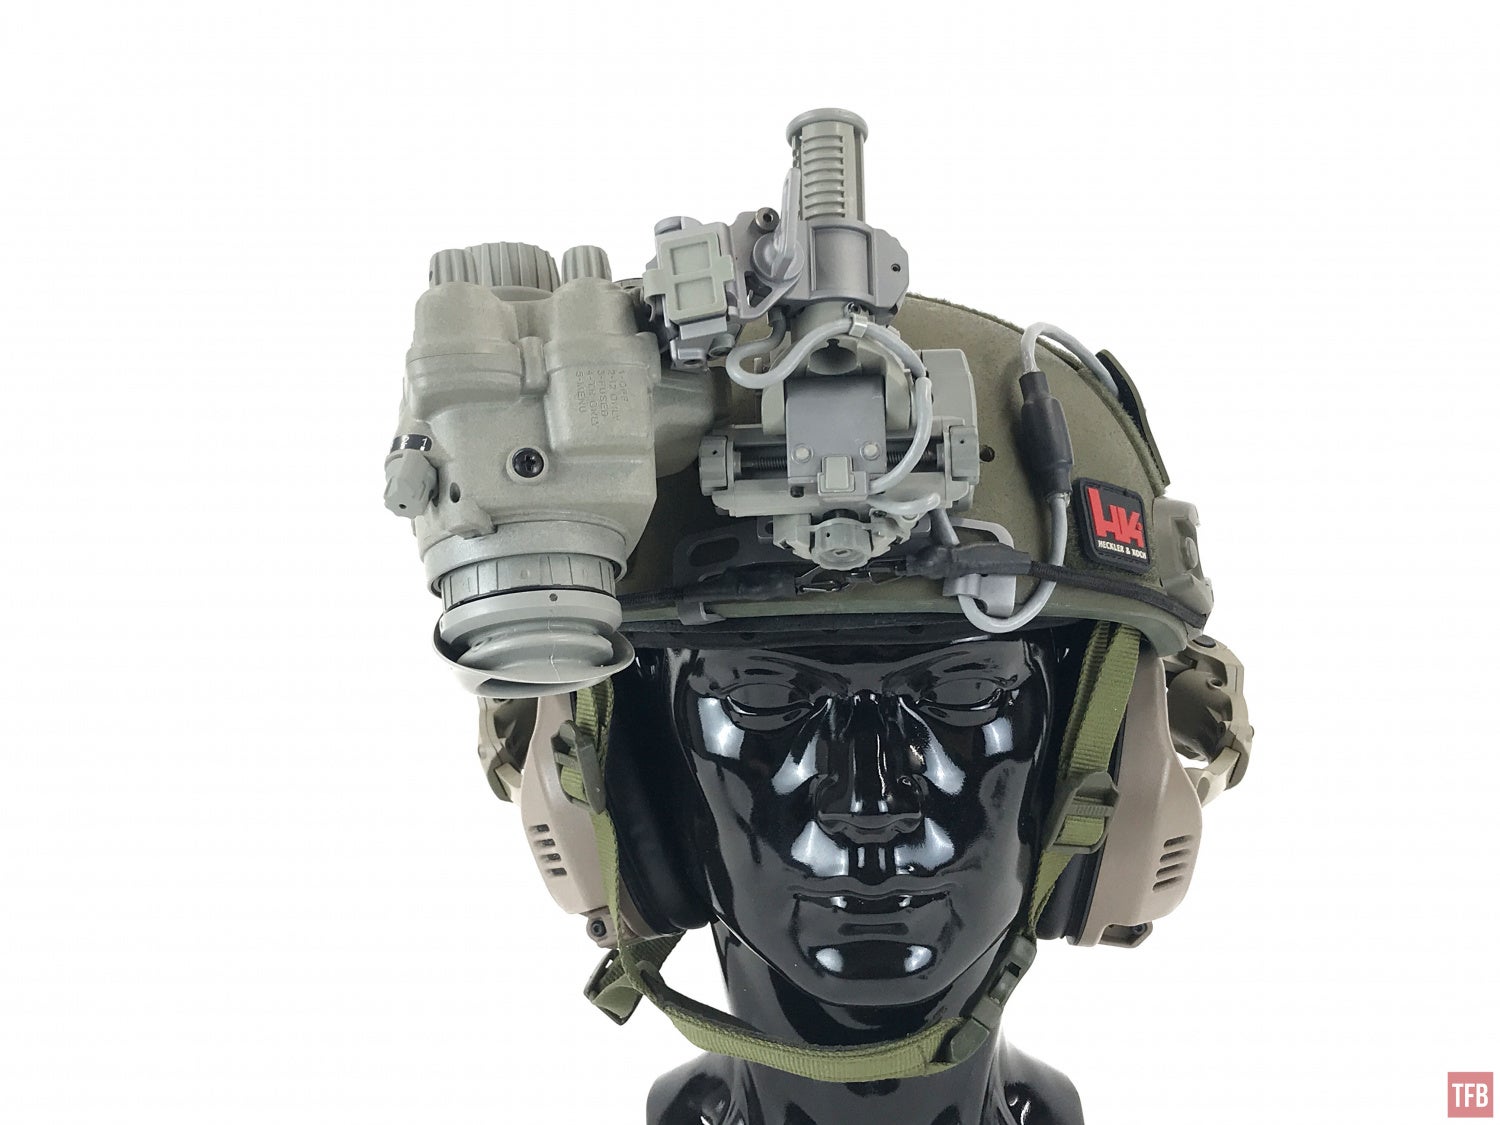
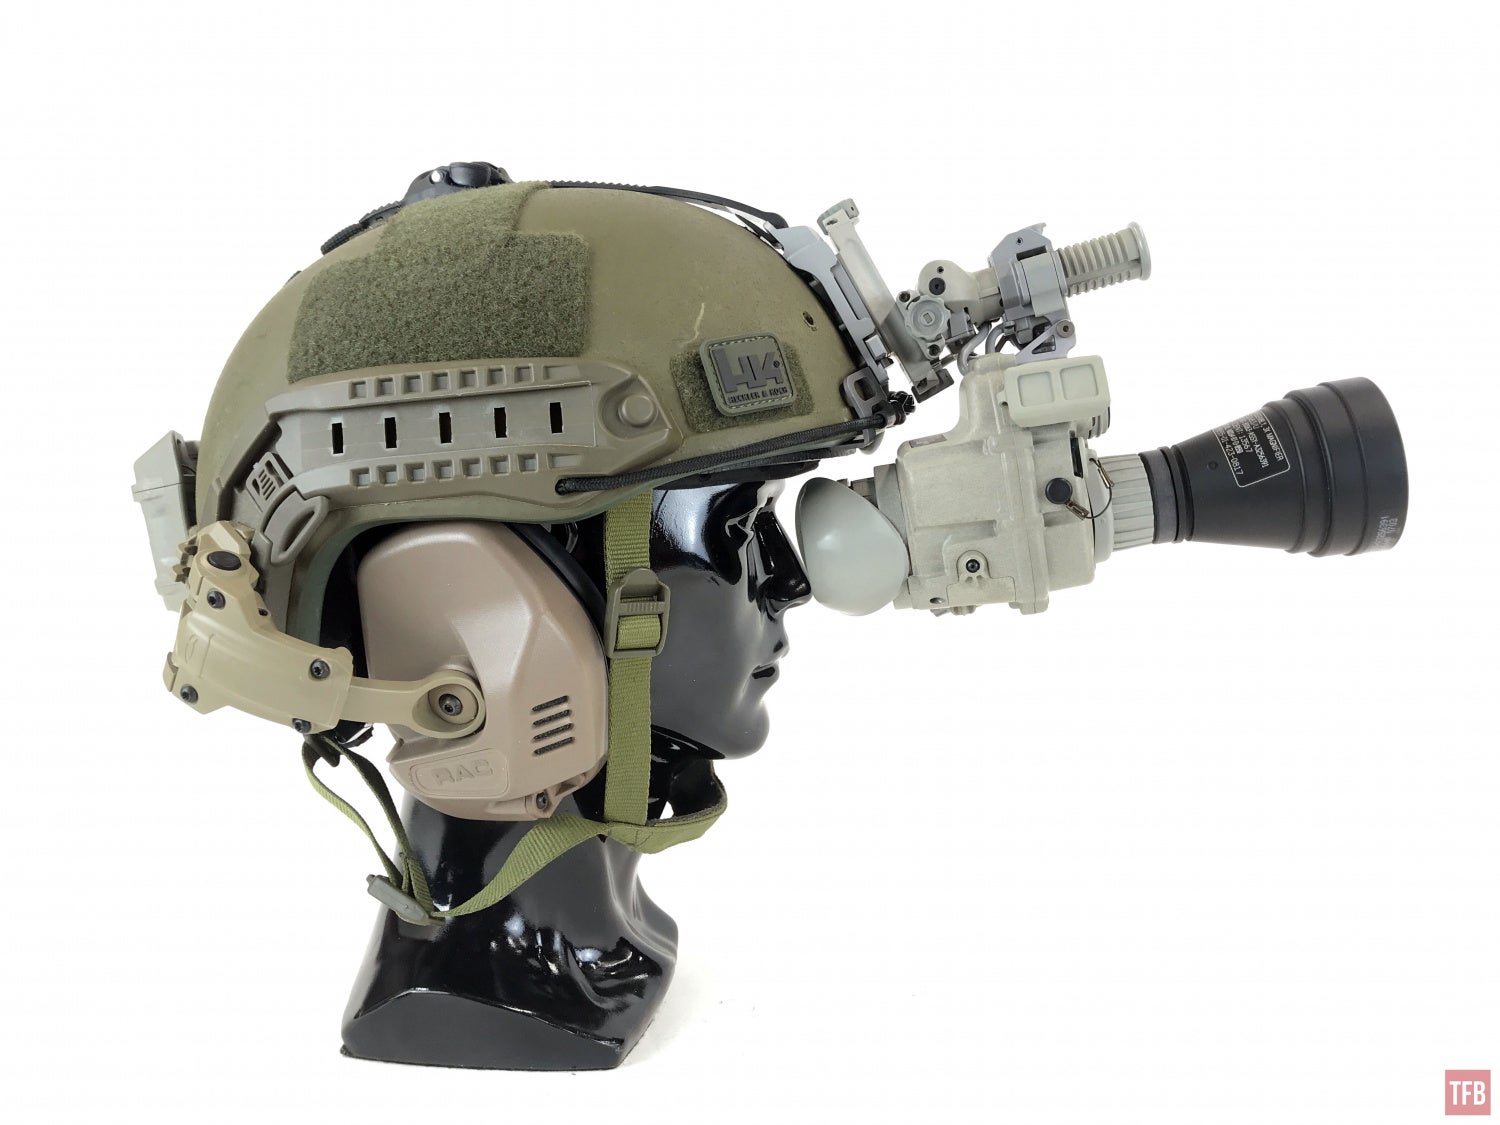
A Close Look At The ENVG PSQ-20
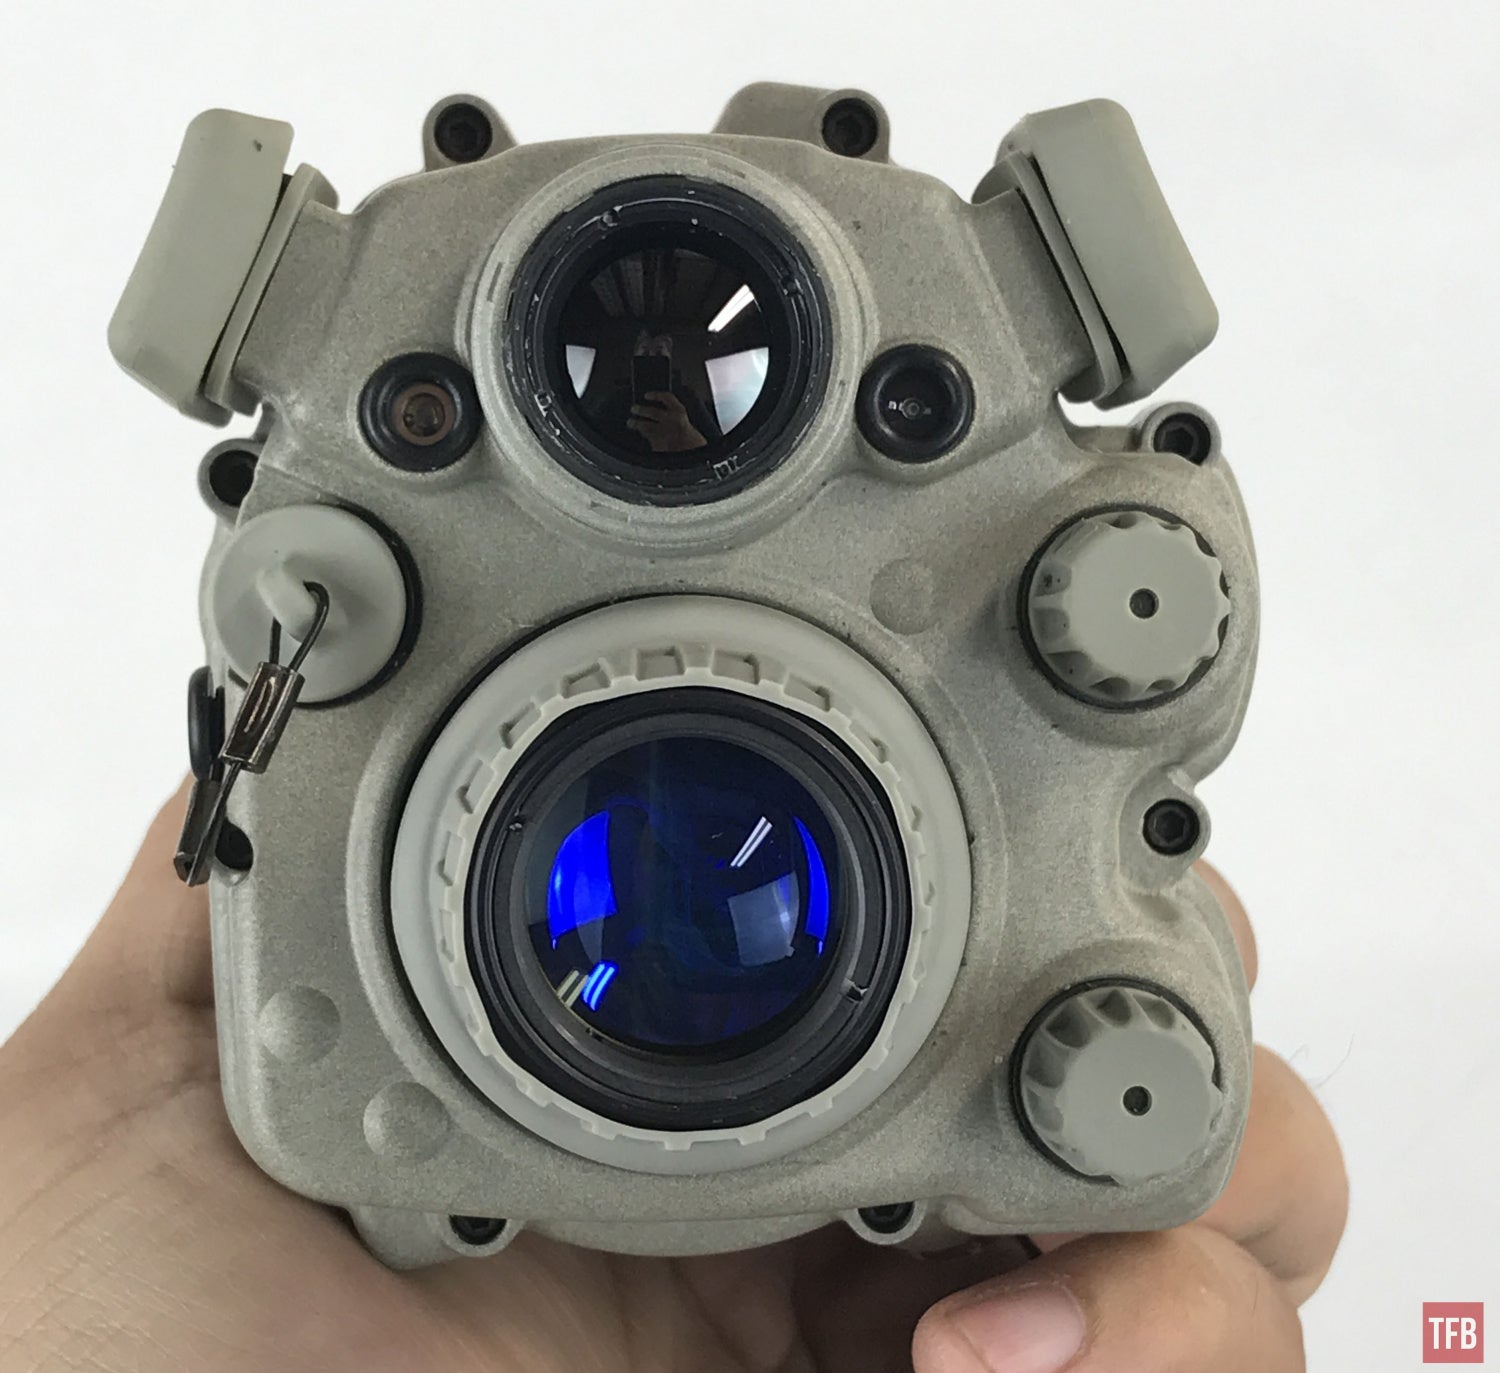

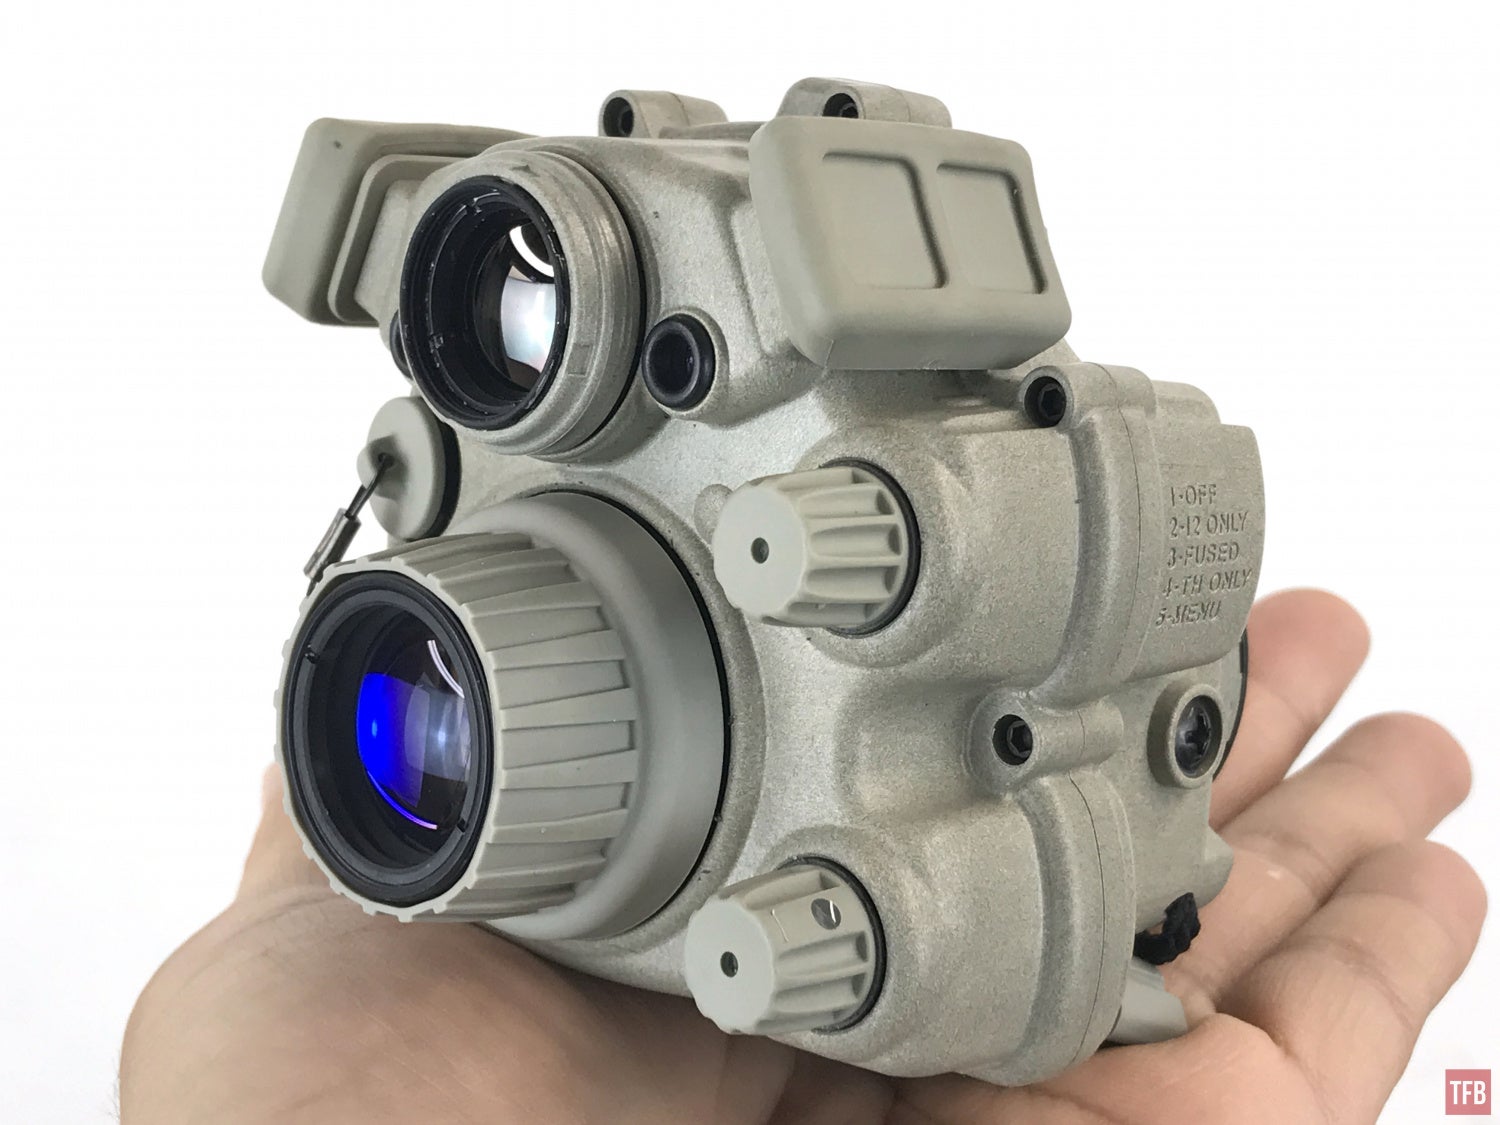
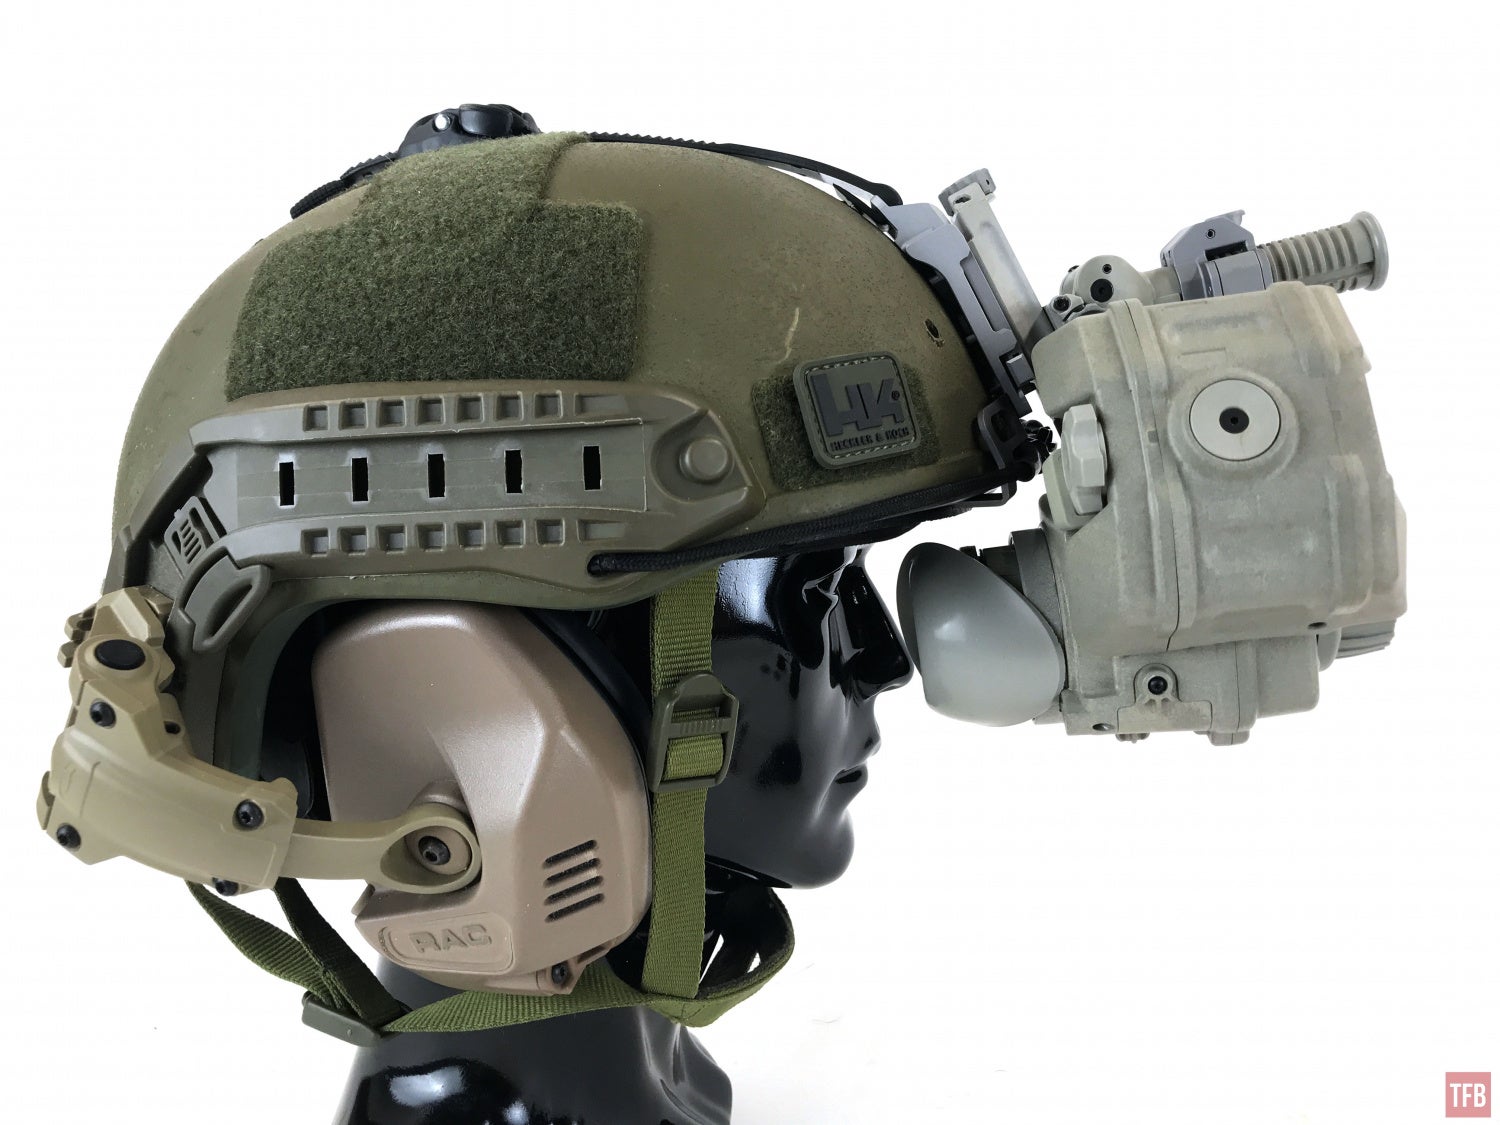
The PSQ-20 looks rather bulky. But it is surprisingly small in some dimensions. Here is the ENVG PSQ-20 compared to a PVS-18 with COTI.
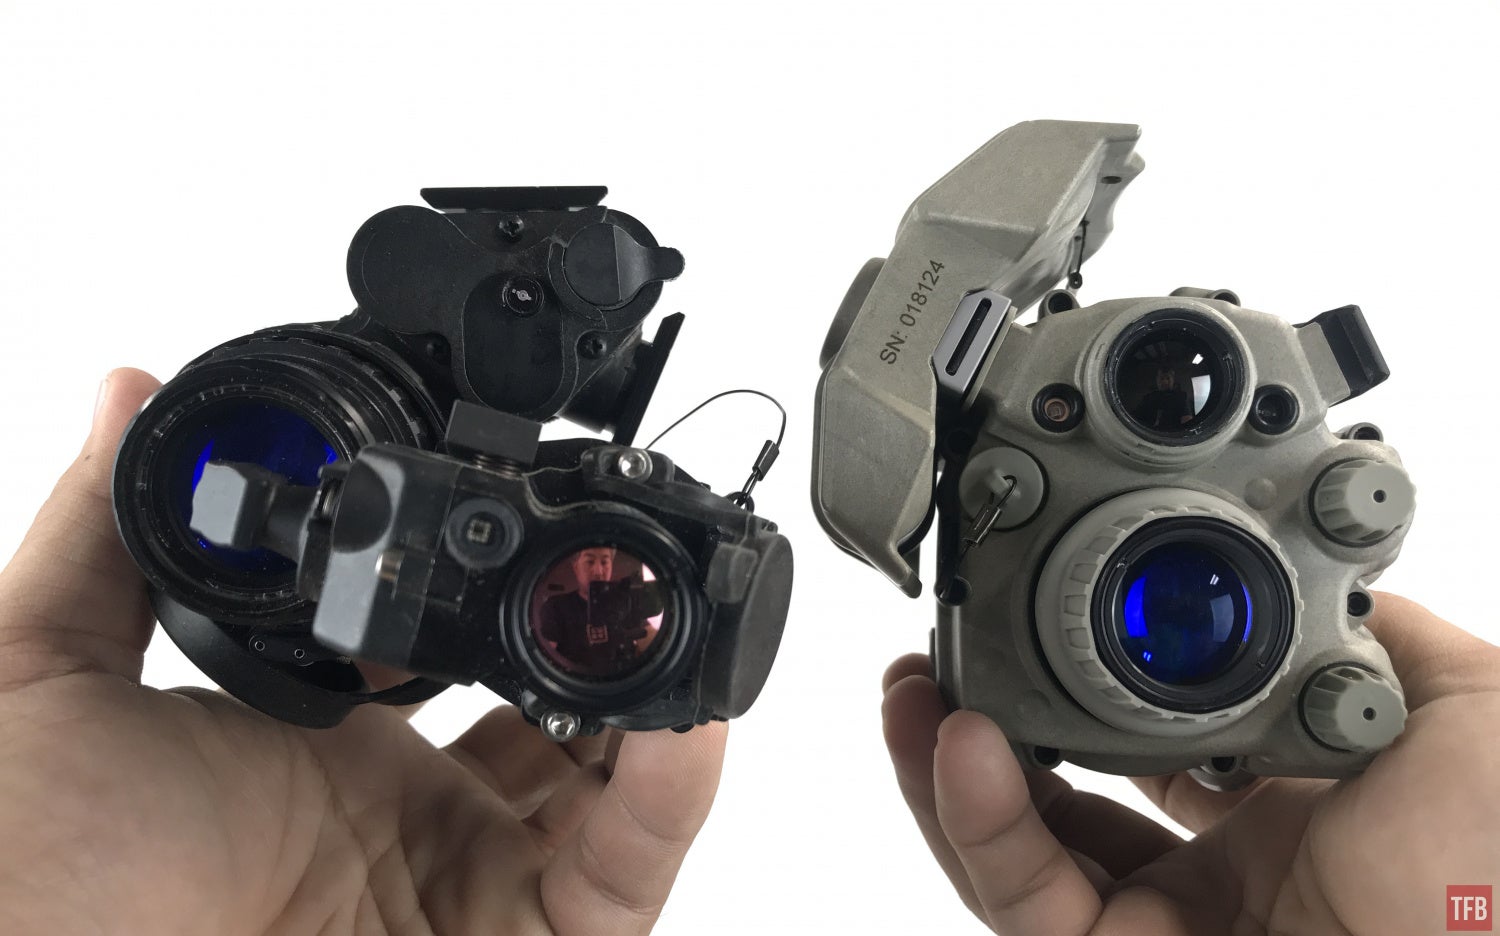

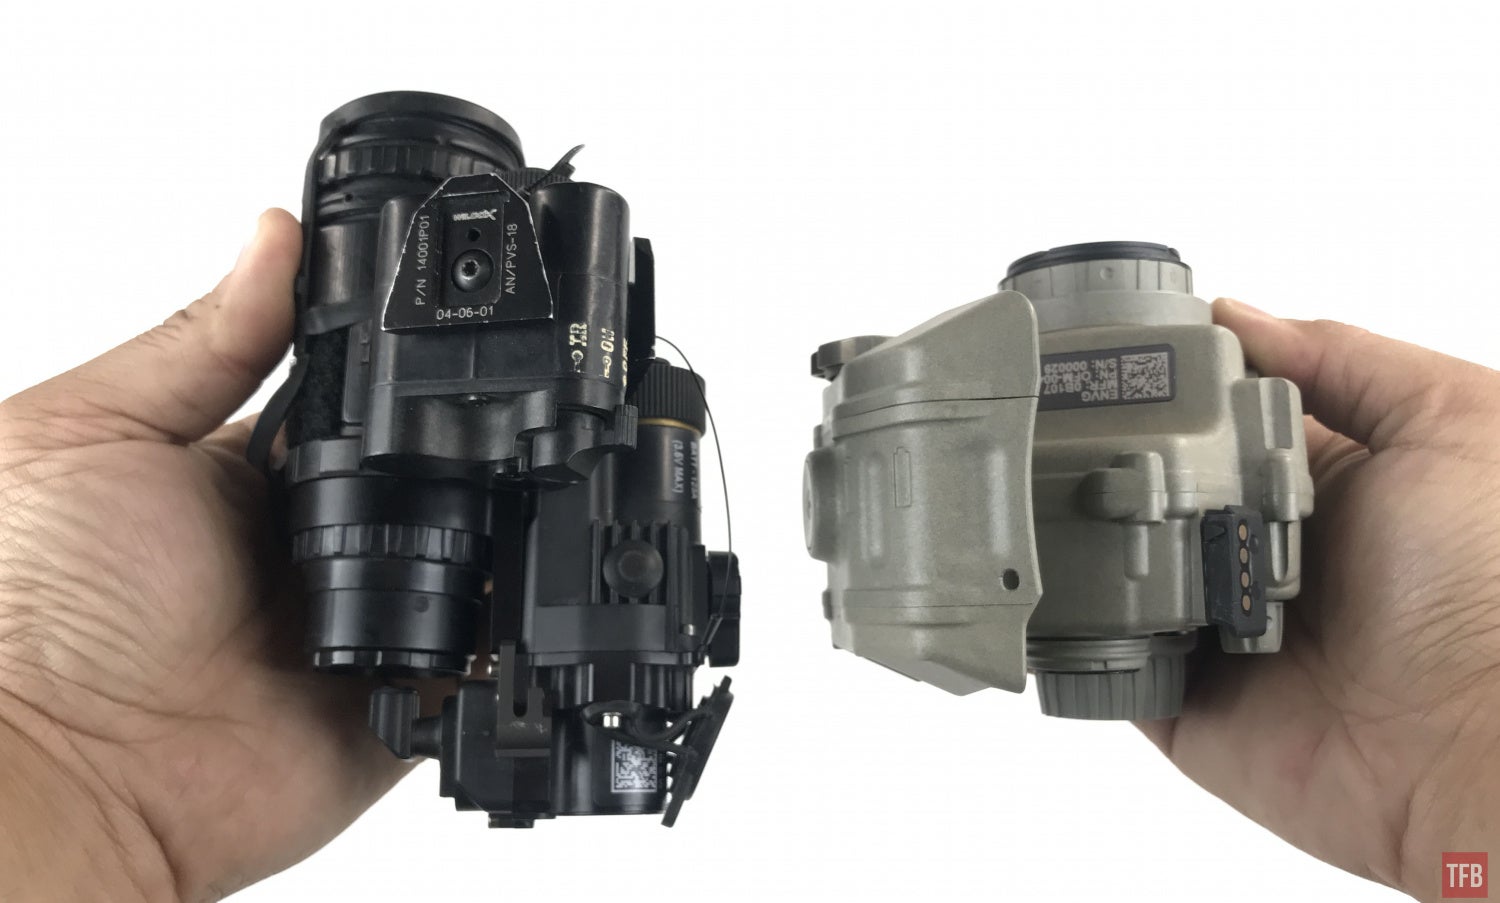
From the front, the ENVG looks bigger but front to back it is a lot shorter. Weight wise the ENVG is heavier. It weighs just over 21 ounces whereas the POVS-18 with COTI is about 18.5 ounces.
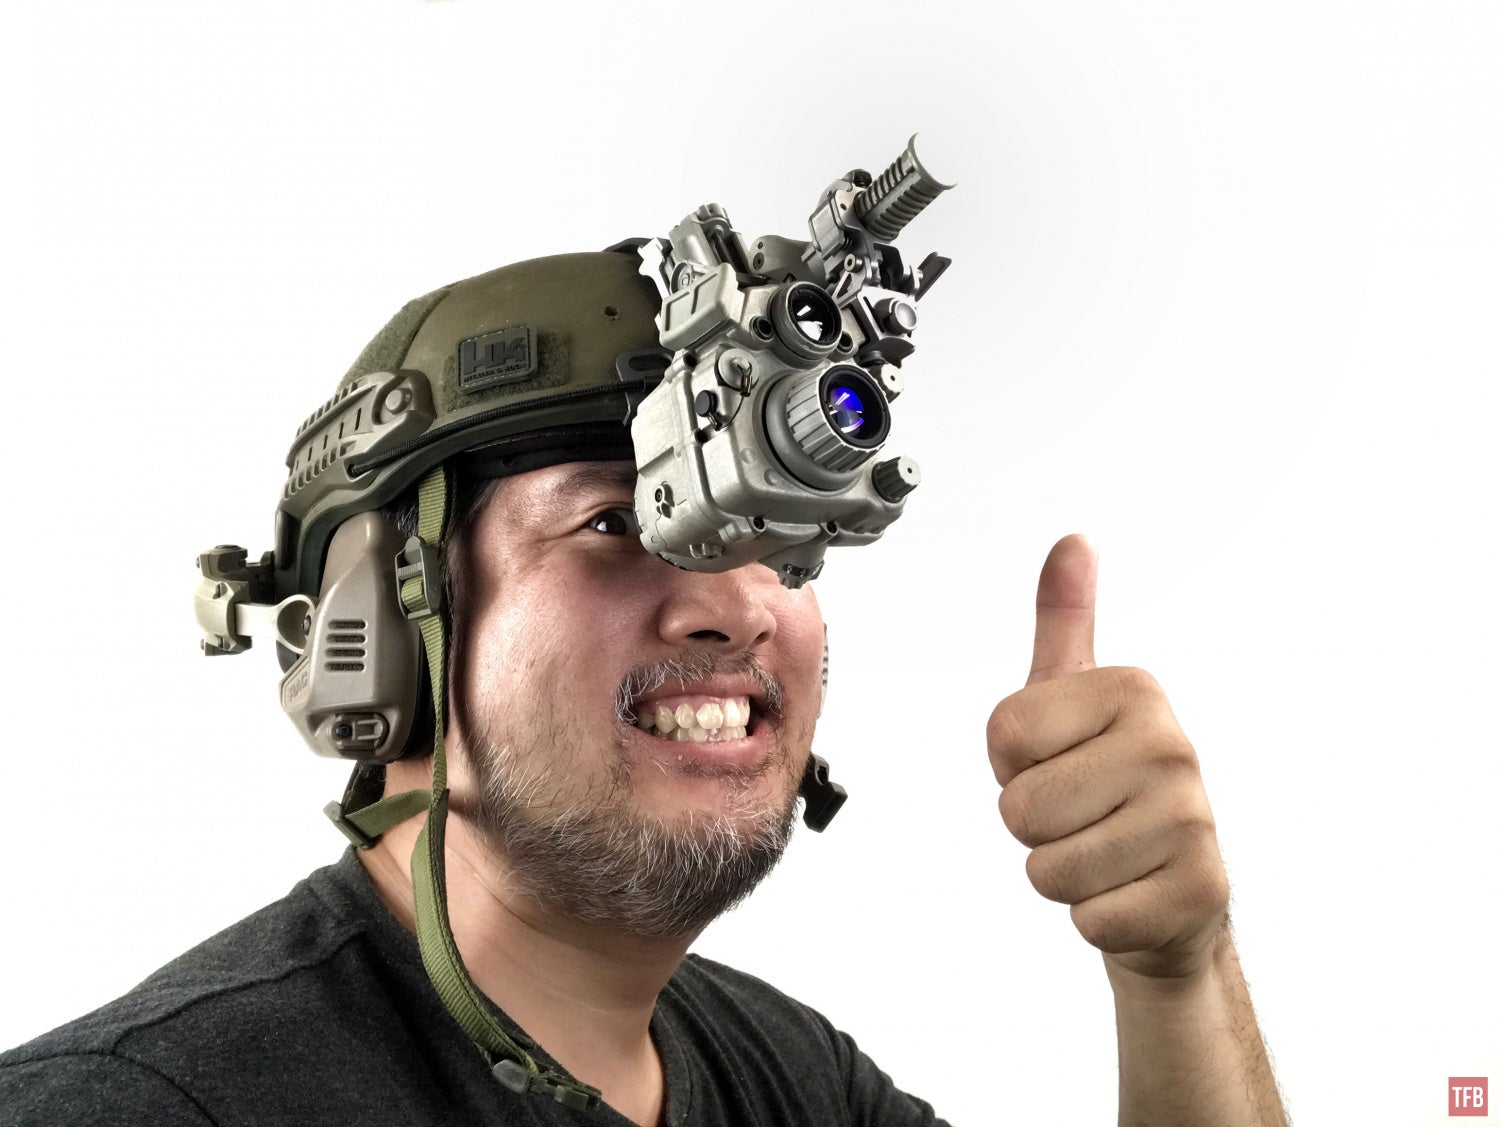
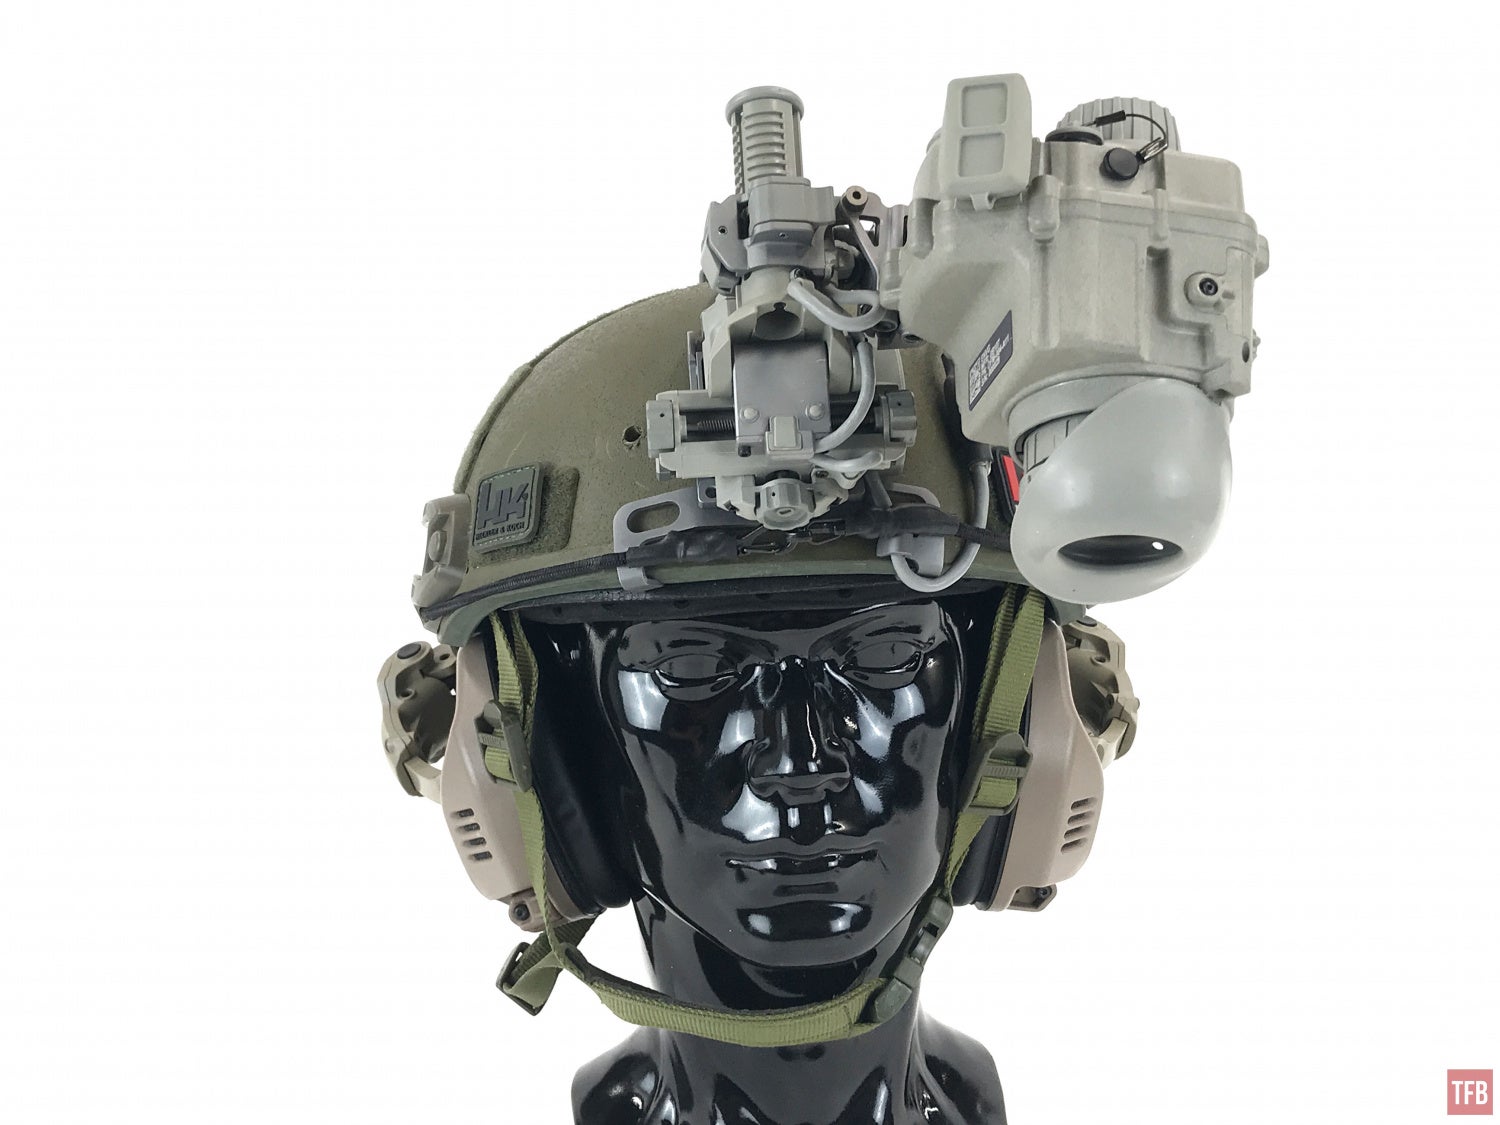
Mounted on a helmet, it does look massive though.
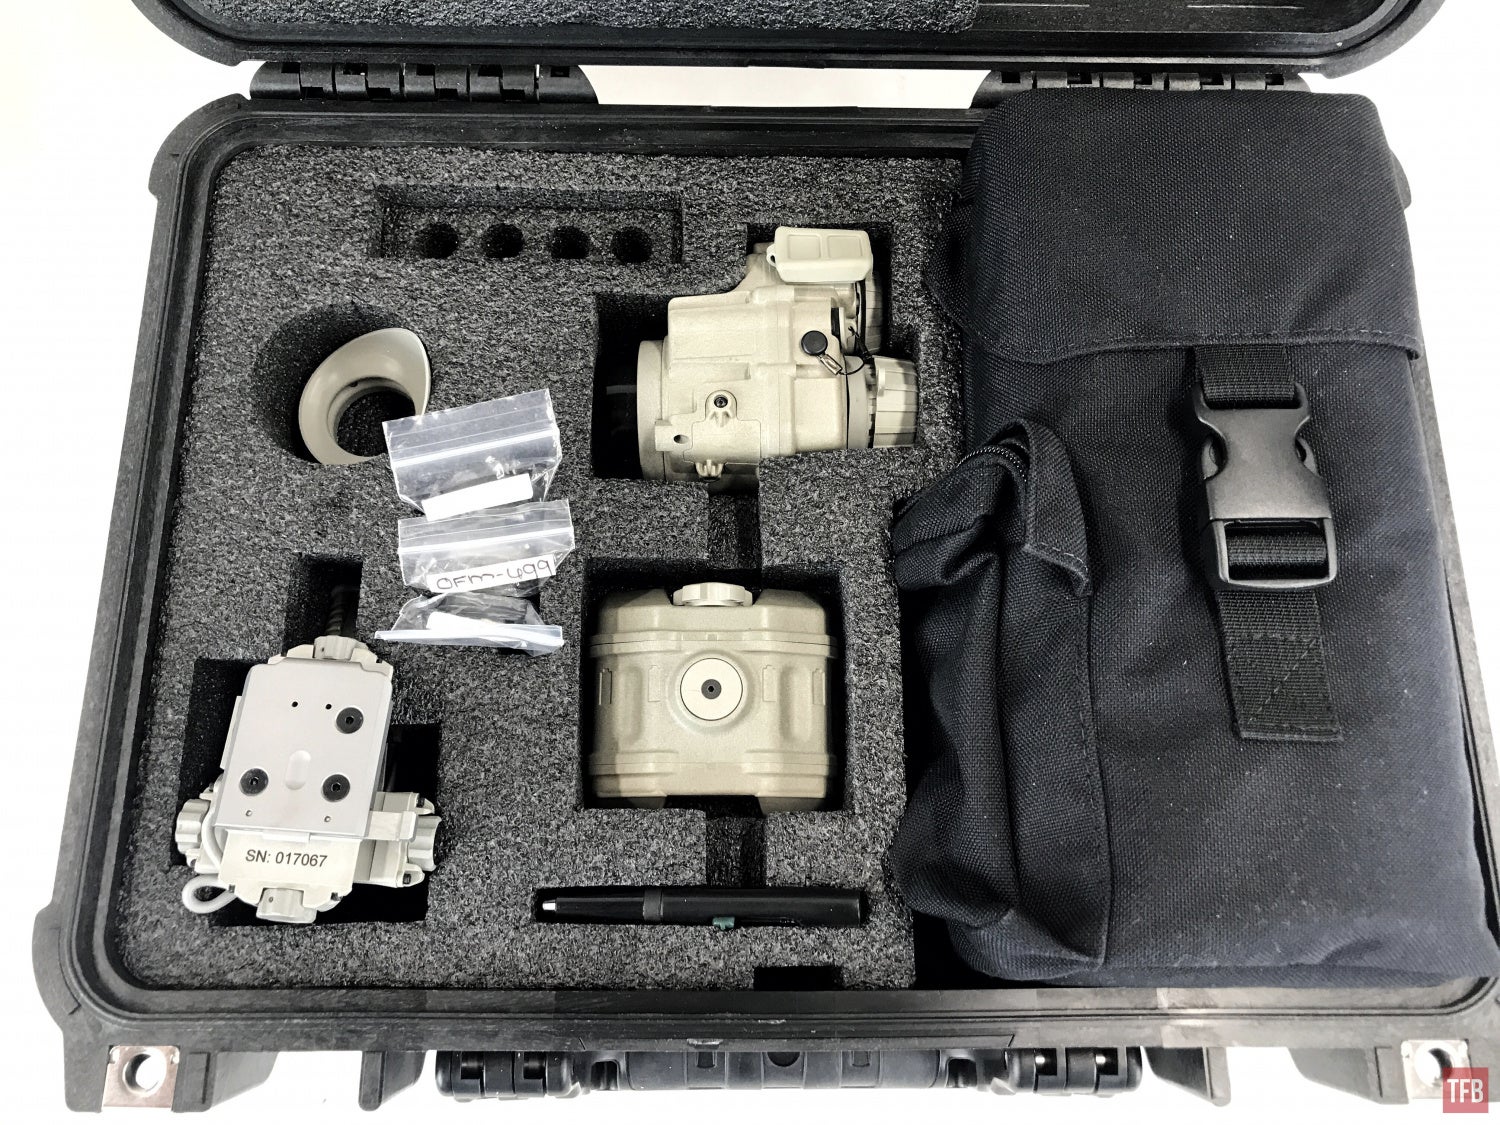
The ENVG comes in a pelican case.
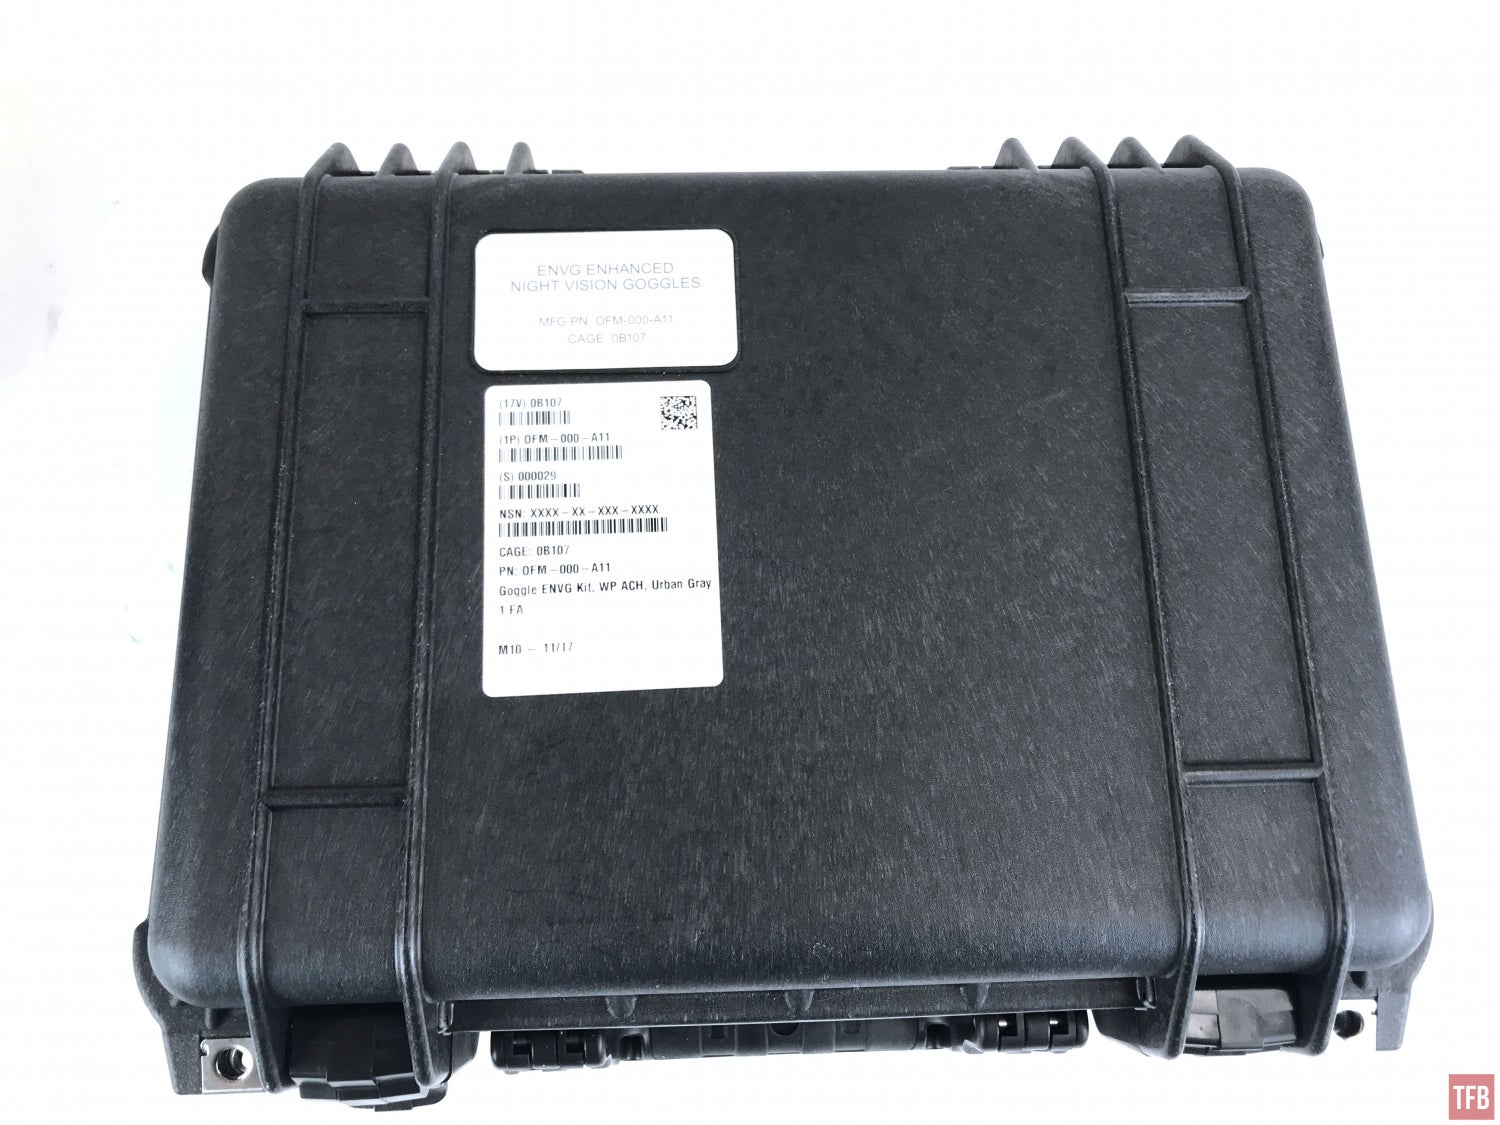
Closed Cell foam with dedicated compartments for all accessories. The helmet shroud/strap is in the soft carrying case.
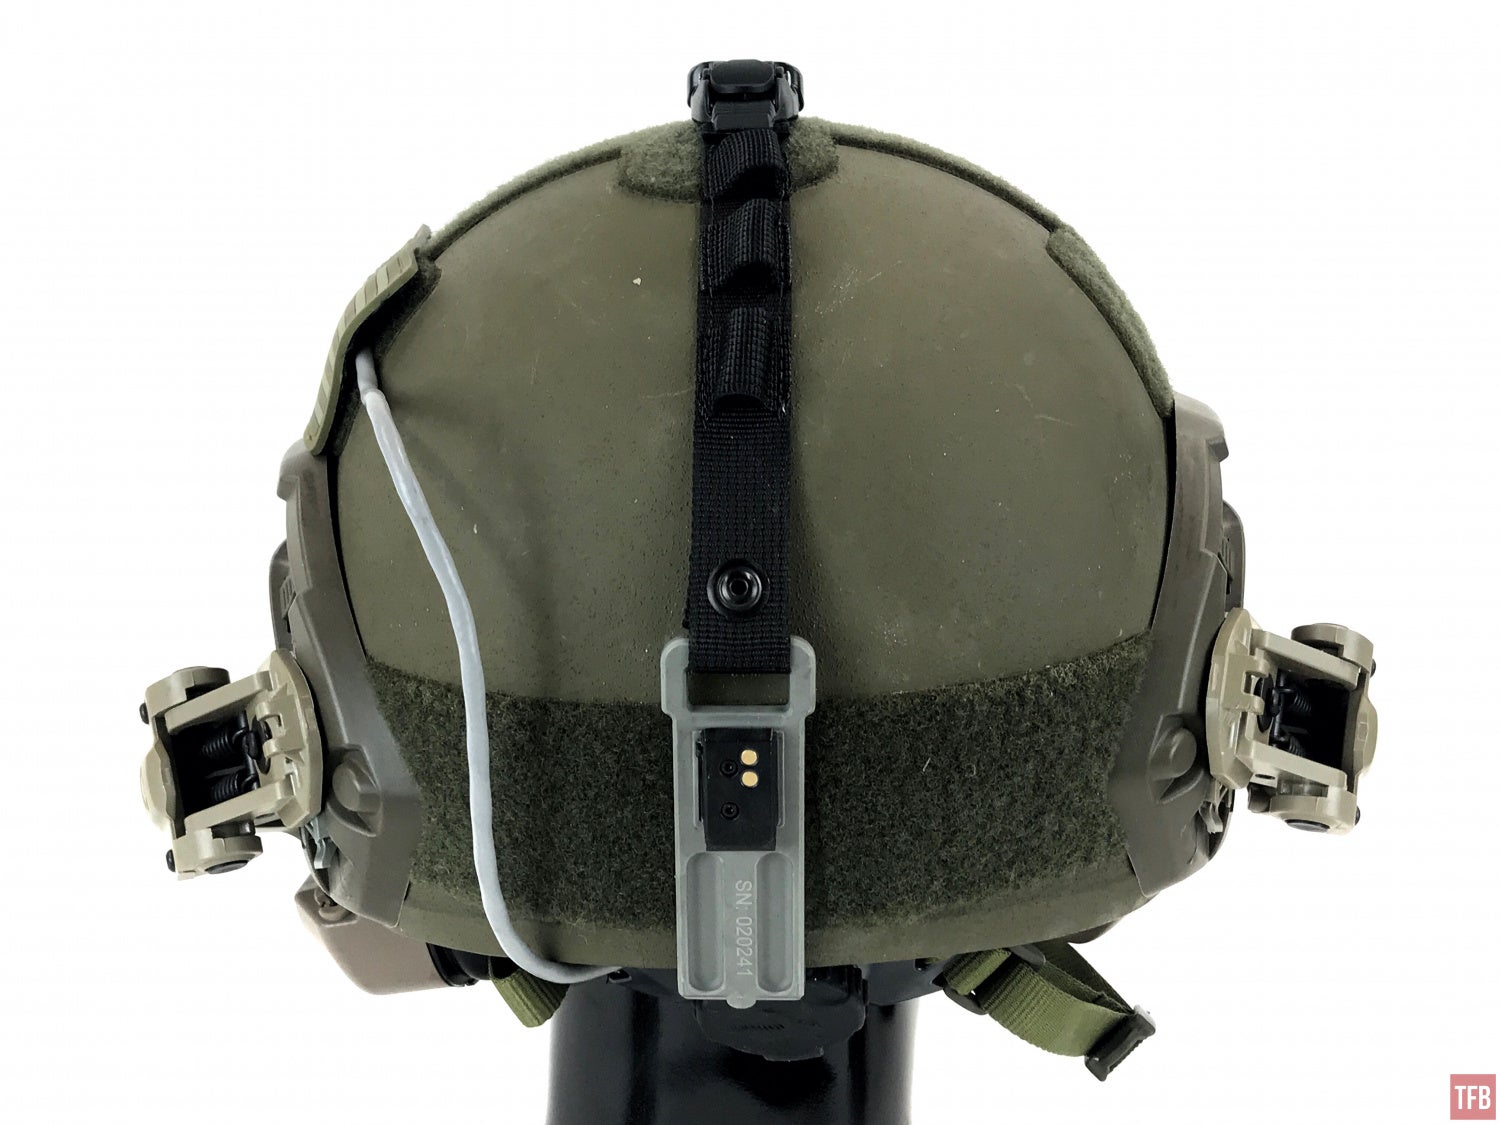
ENVG Shroud
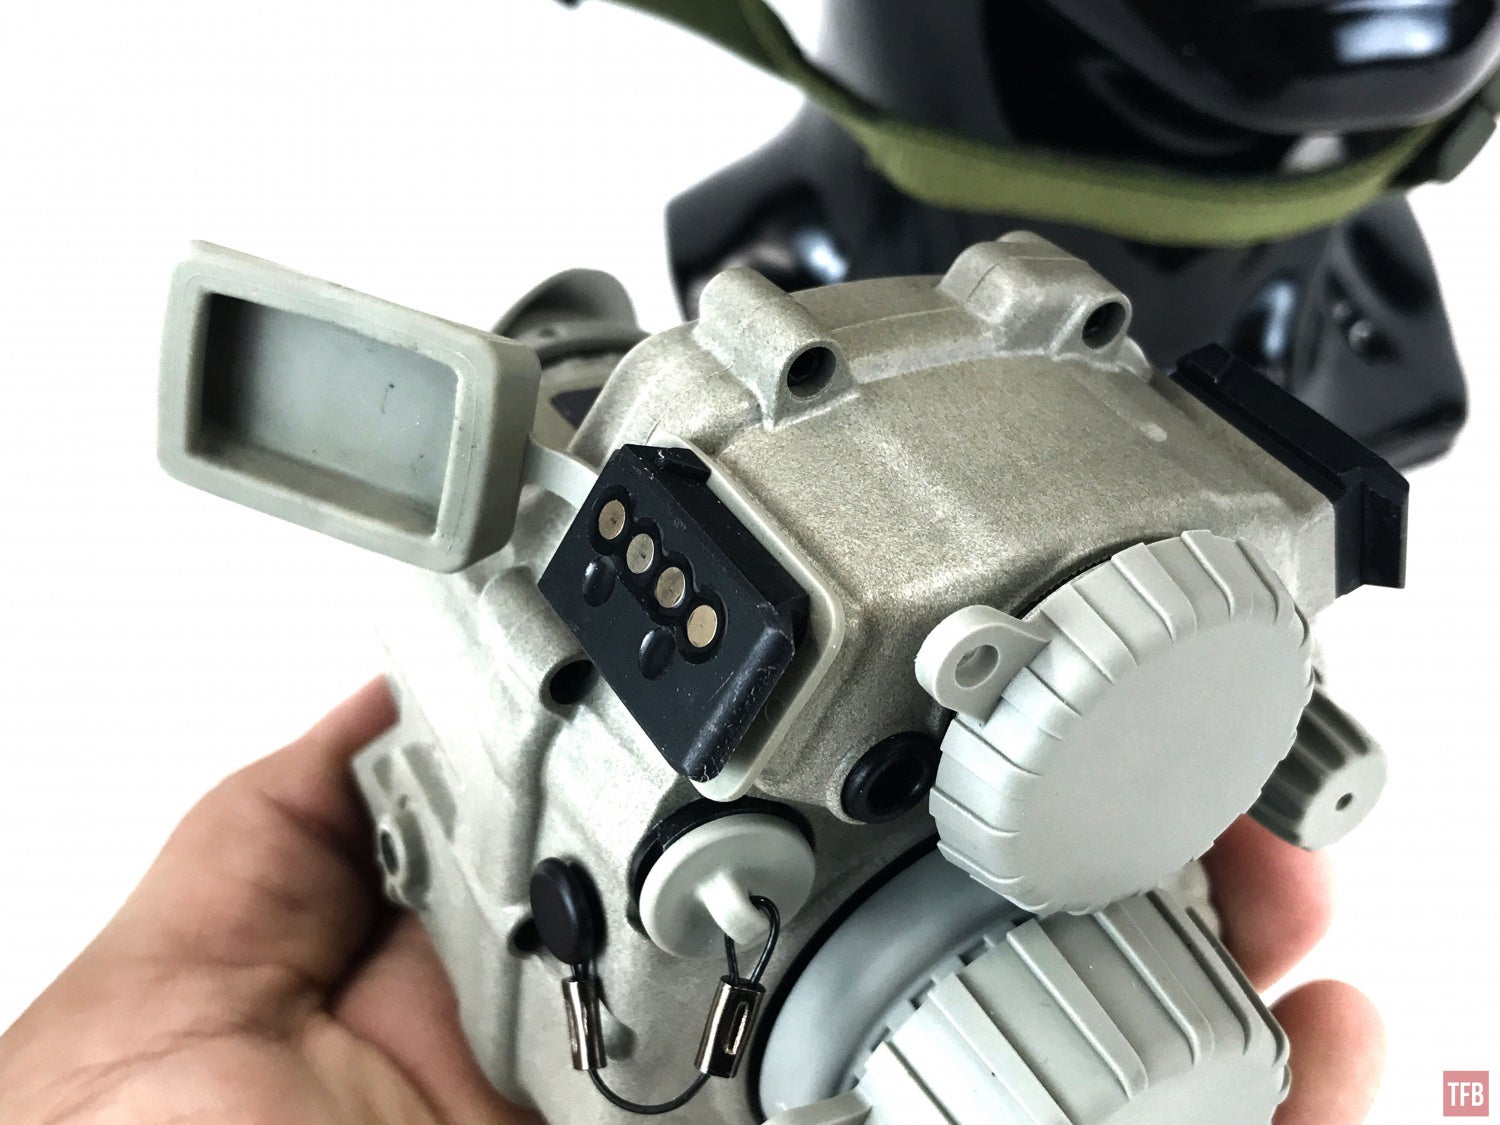
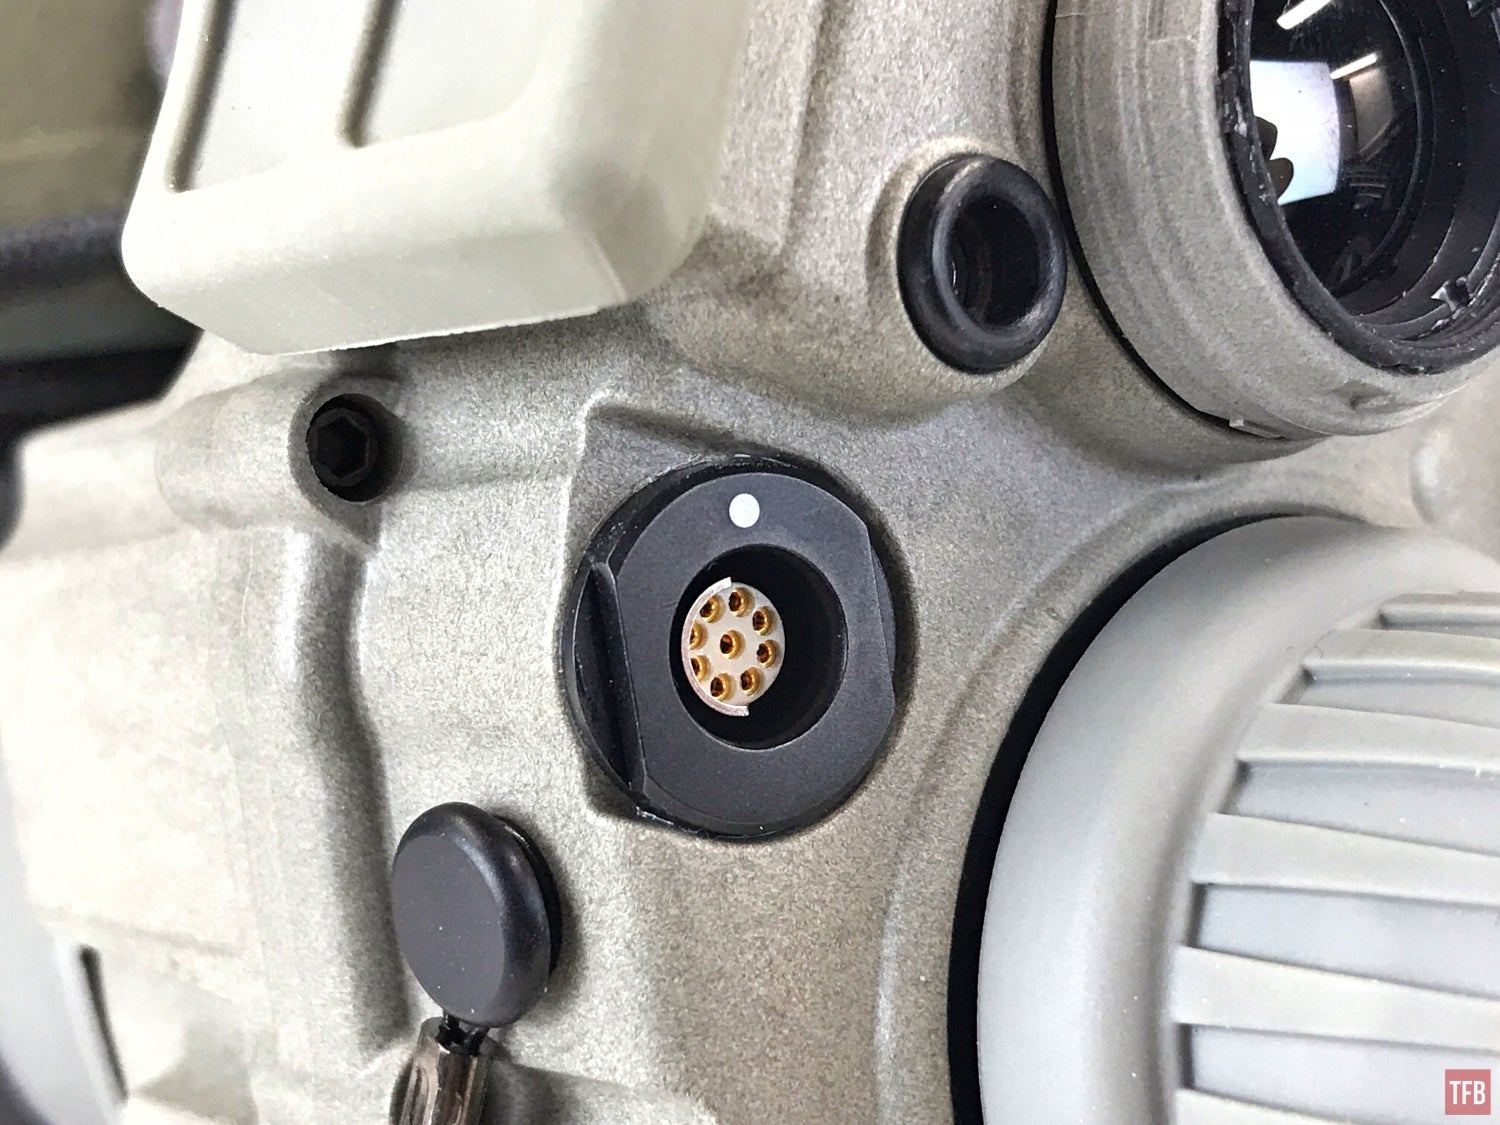
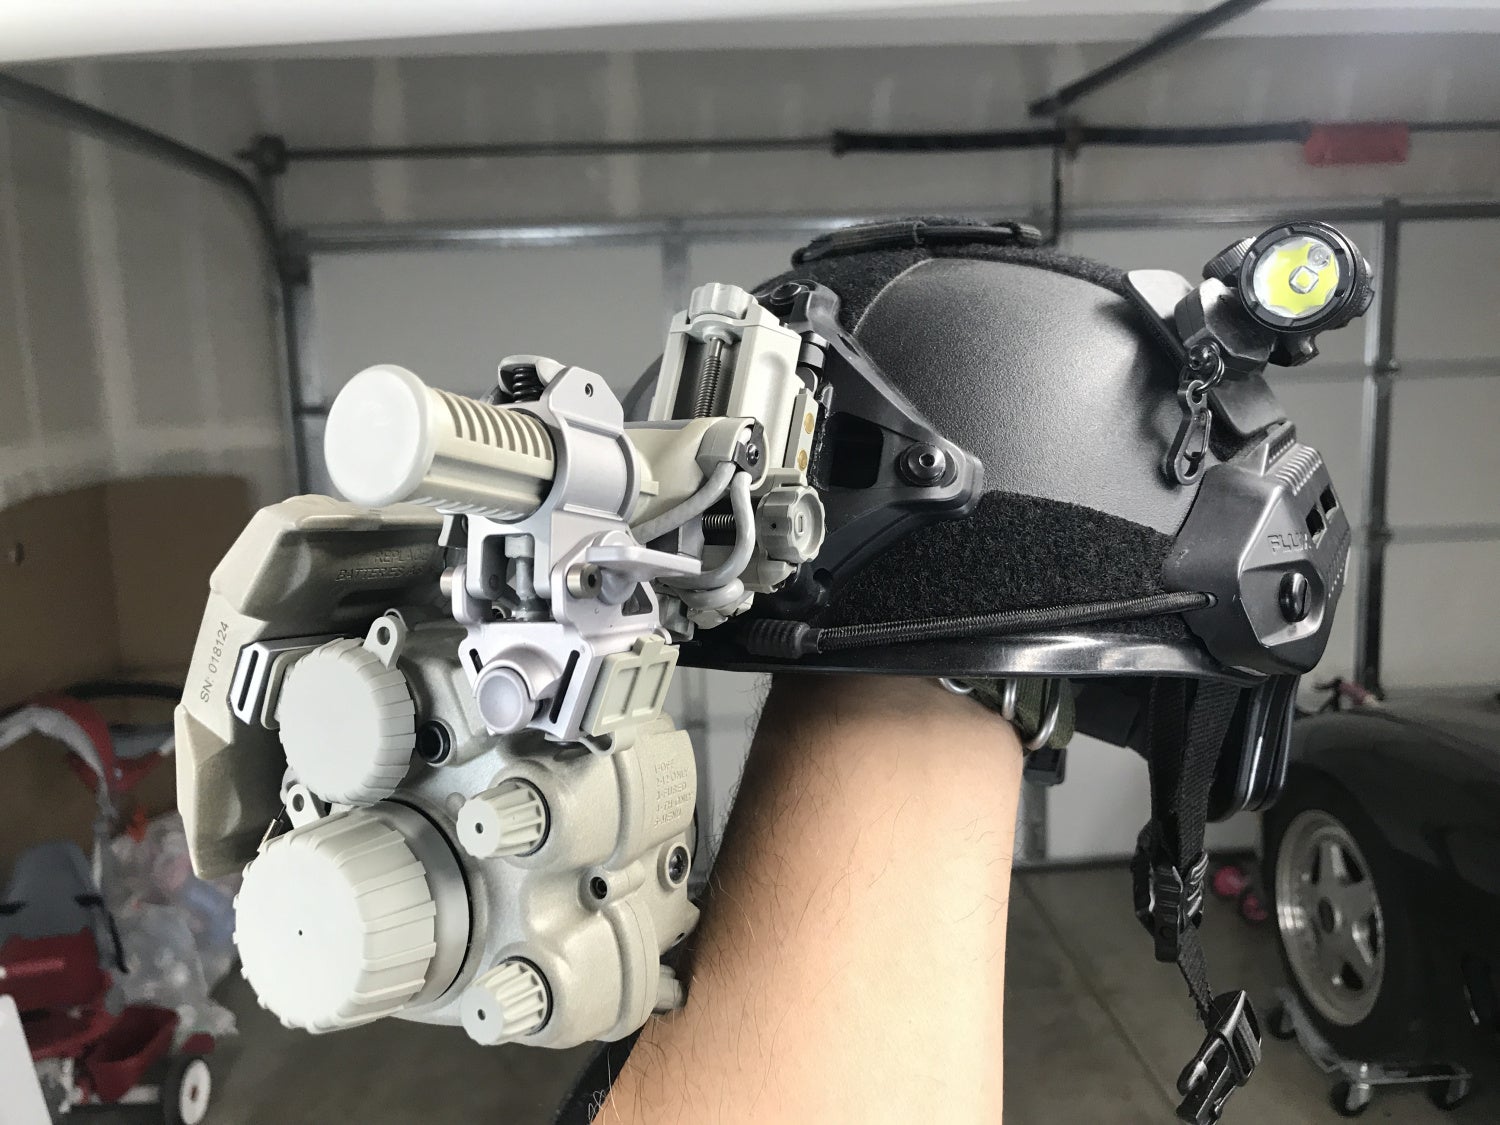
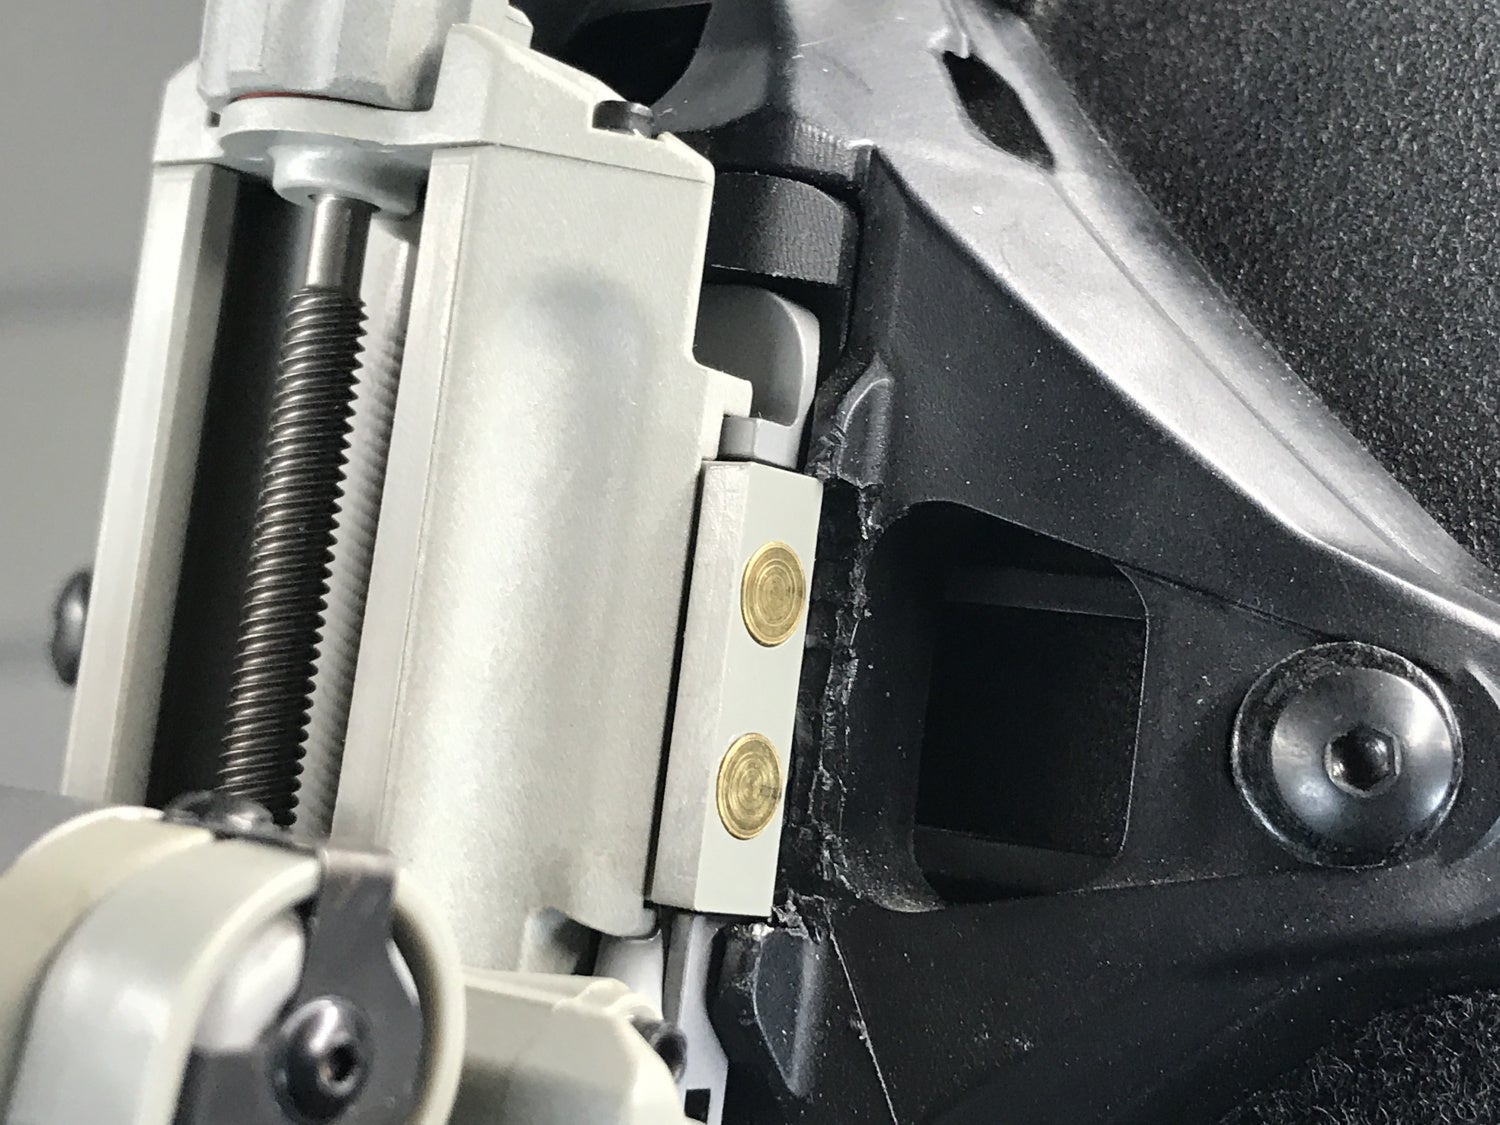
The ENVG uses a proprietary mounting system due to its power supply design. The goggle does not have any onboard power. Instead, power is delivered by either attaching the large 4xAA battery pack to the outside of the goggle or the powered mount and helmet strap.
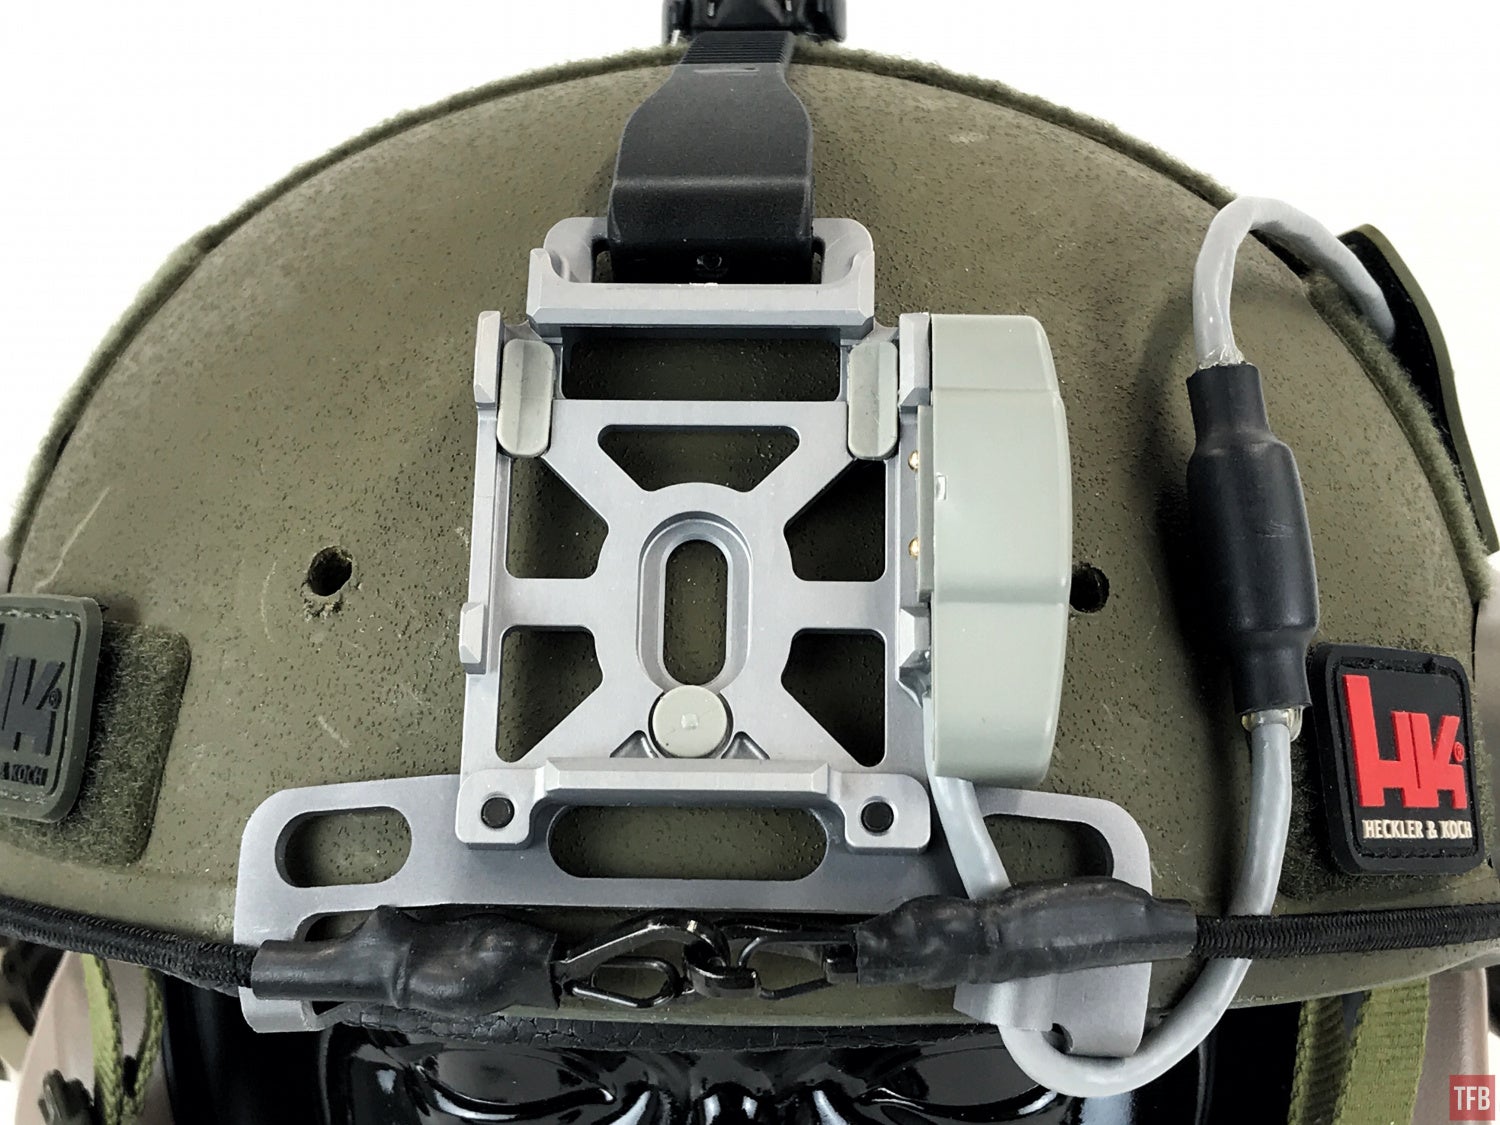
You can see the two power contacts on the side of the helmet shroud. Because of this, you cannot use a regular helmet shroud to mount the ENVG. I had to remove my Wilcox three hole shroud to install the ENVG powered shroud.
The shroud strap uses a ratcheting buckle to keep tension.
At the rear is the mounting point for the battery pack. It is a QD design and the anchoring point matches the anchoring point on the goggle itself.
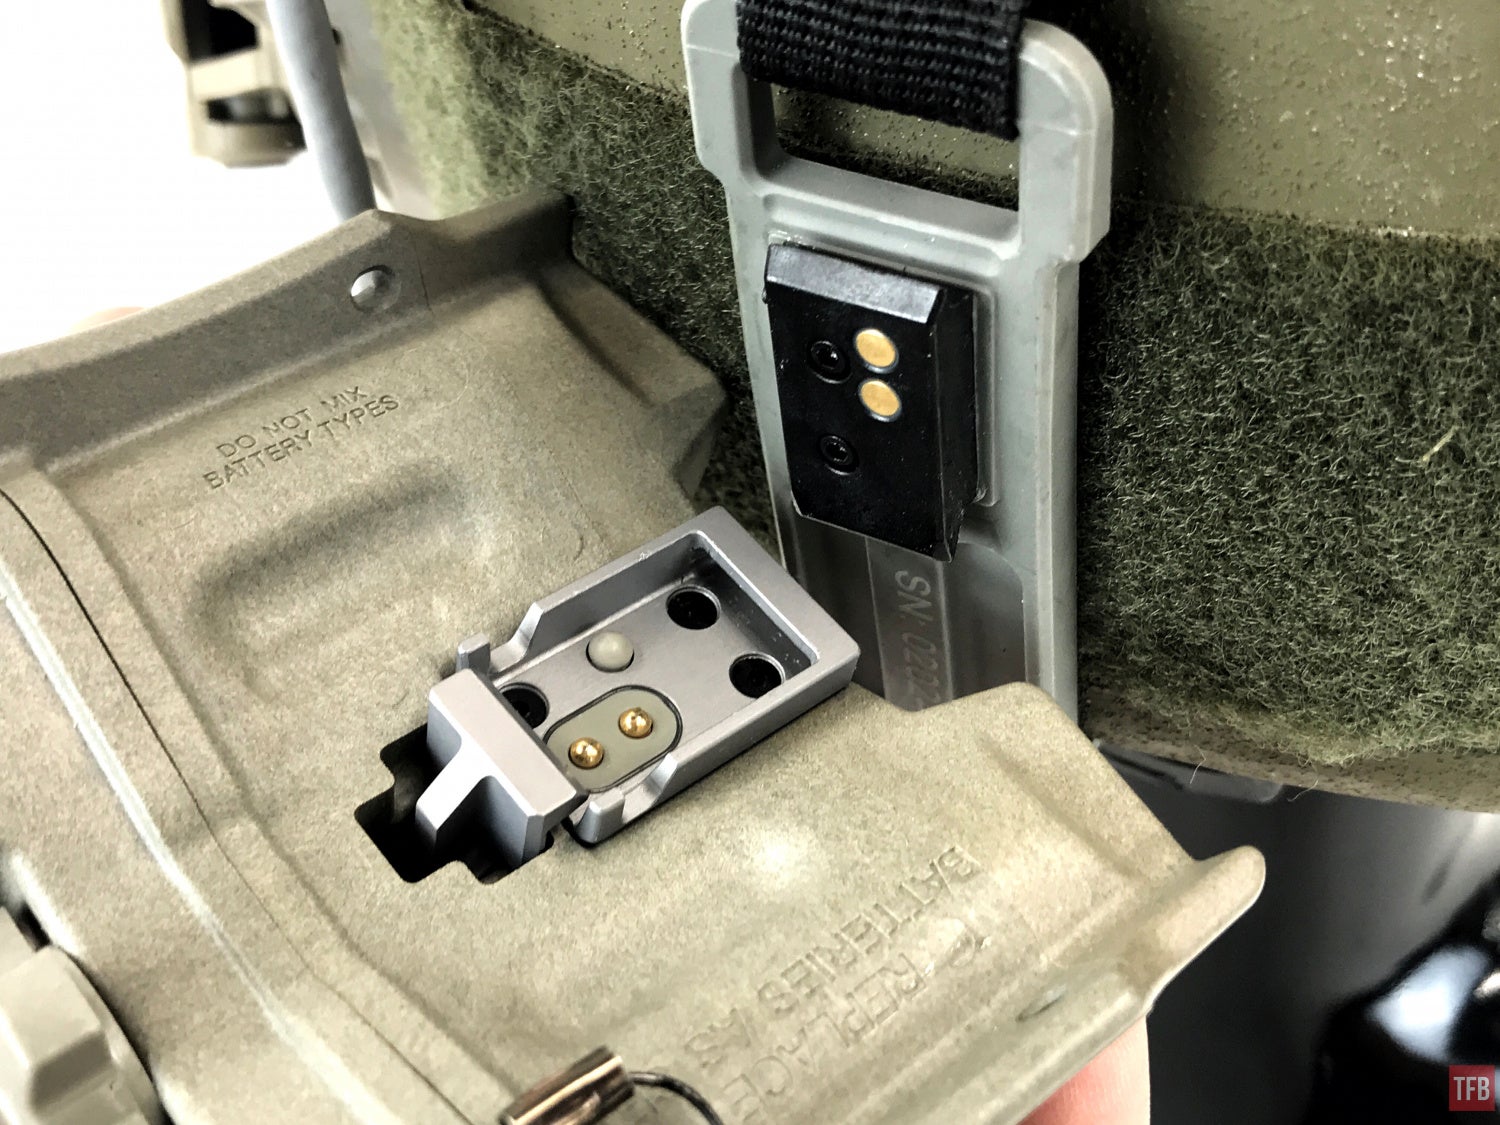
Once mounted, you just press the circular button on the back of the back to disconnect the pack from the strap.
ENVG Mount
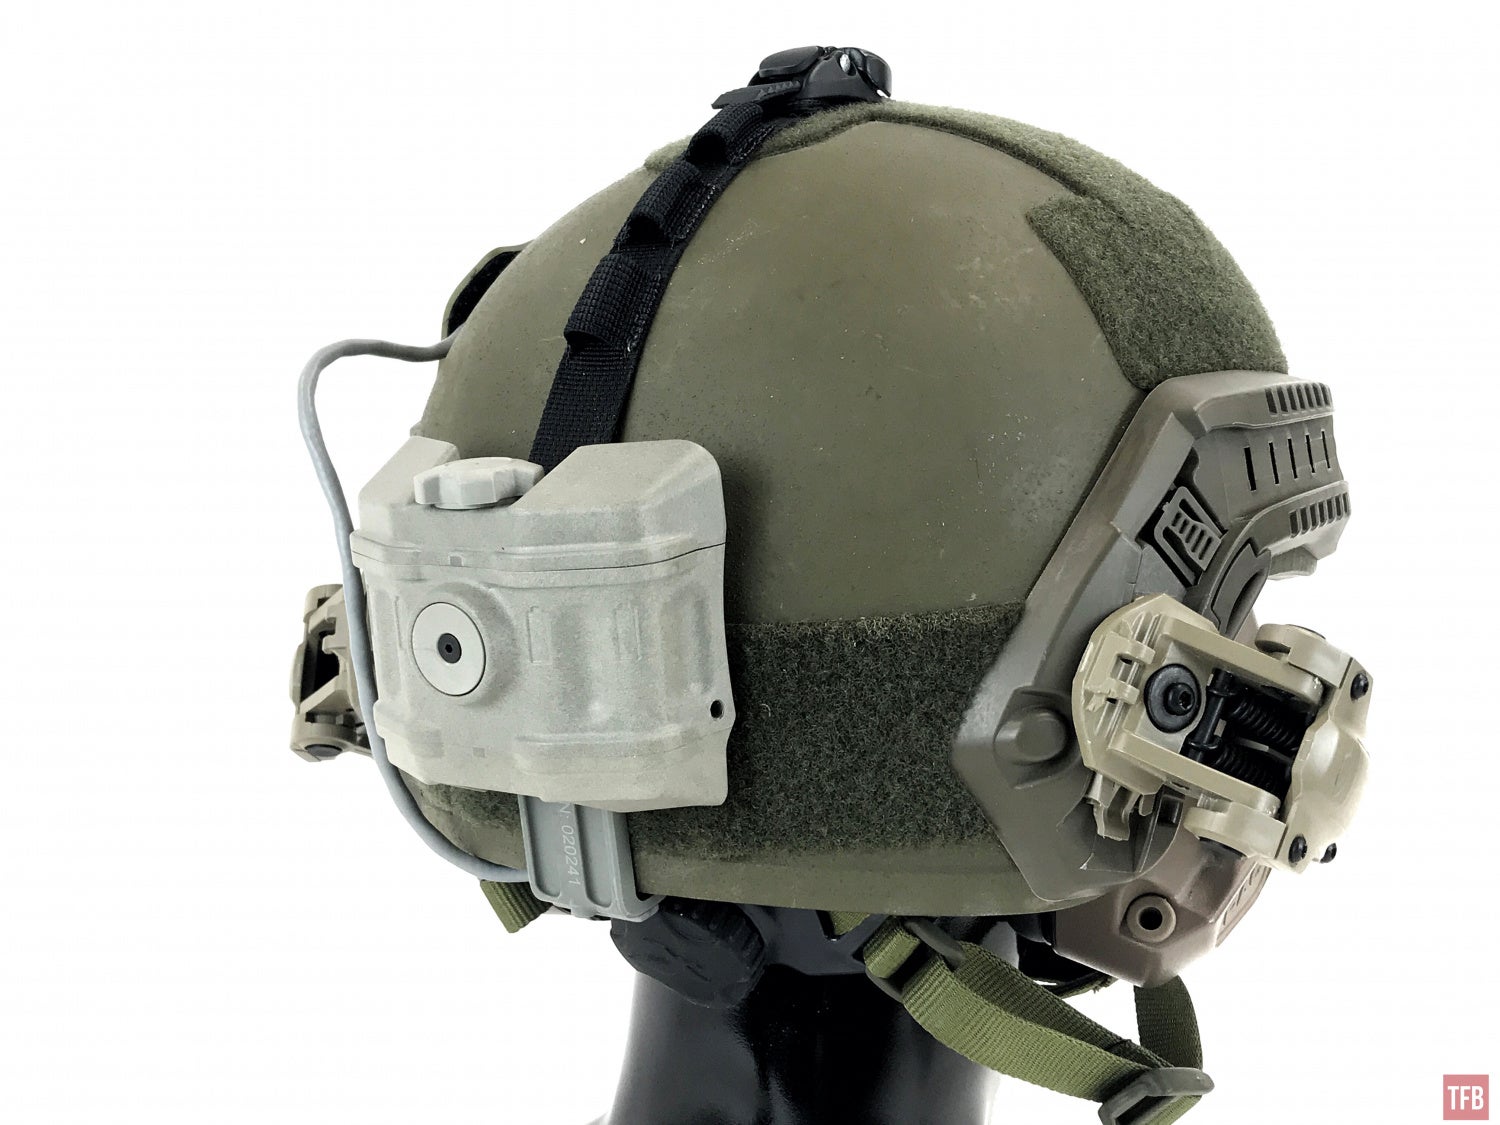
As explained and depicted above, the ENVG powered shroud has two power contacts that deliver power into the ENVG mount.
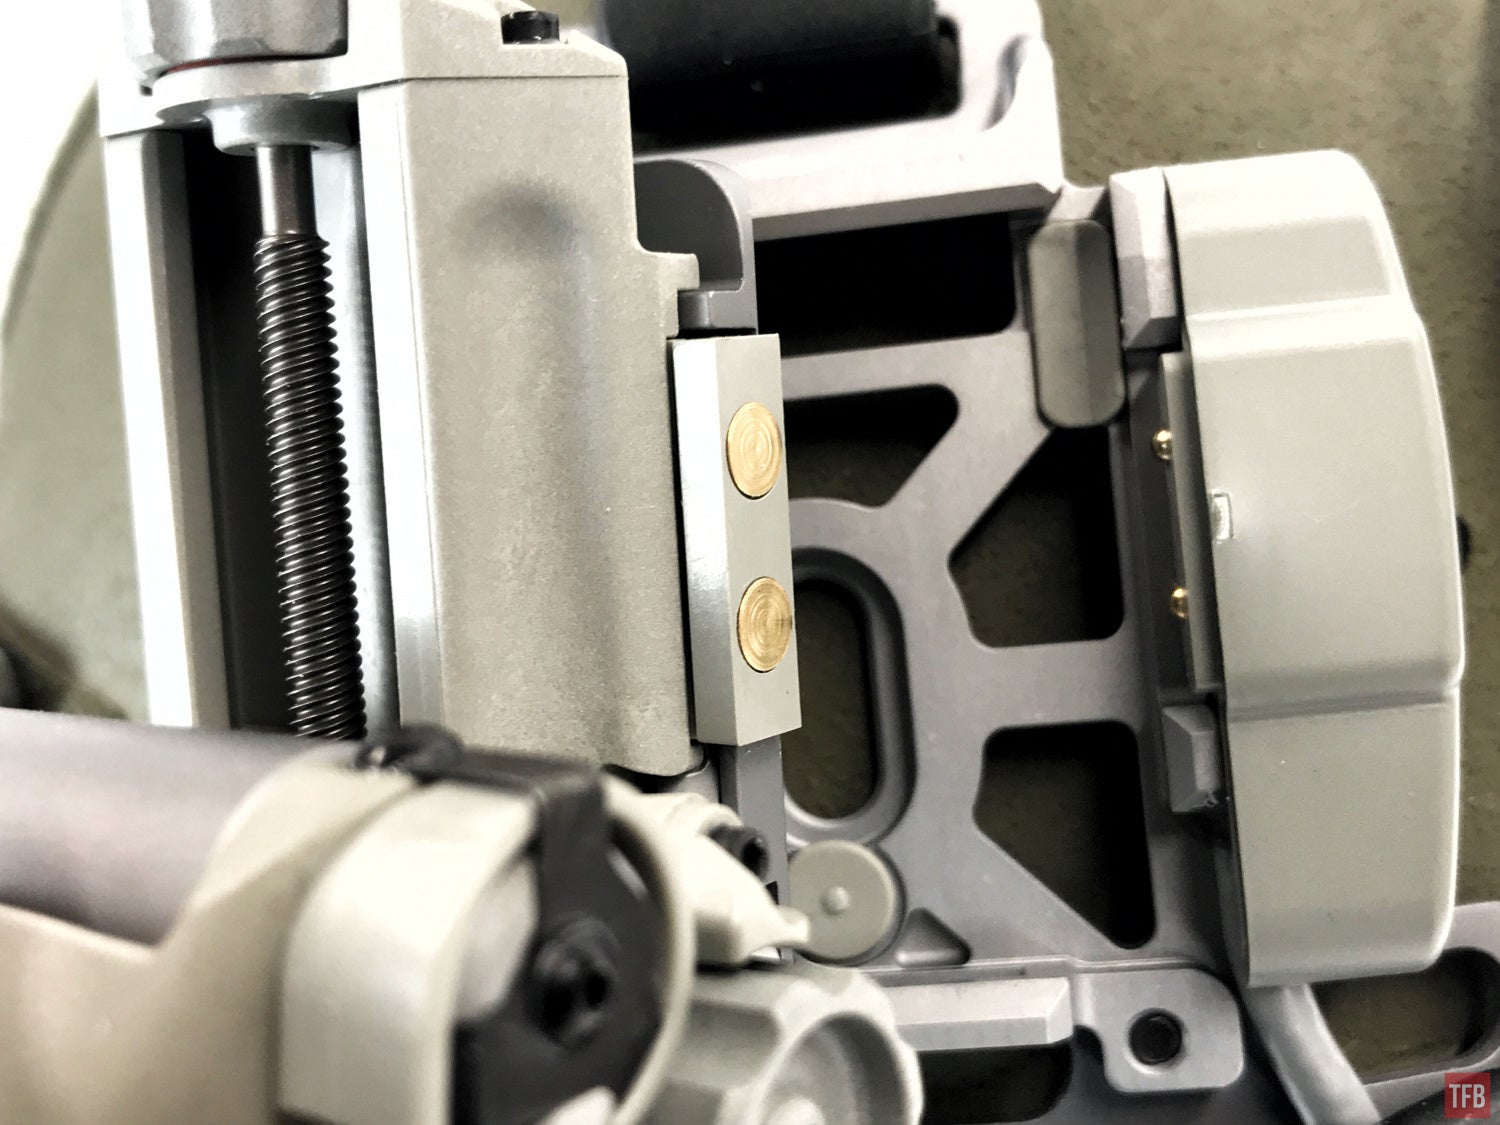
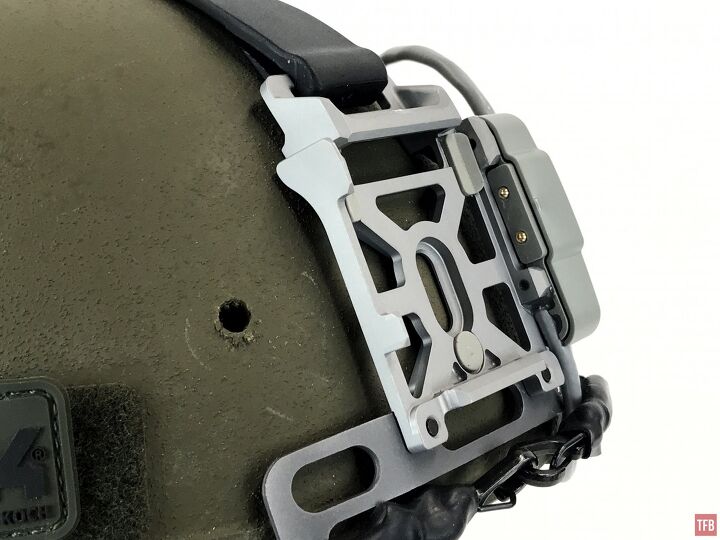
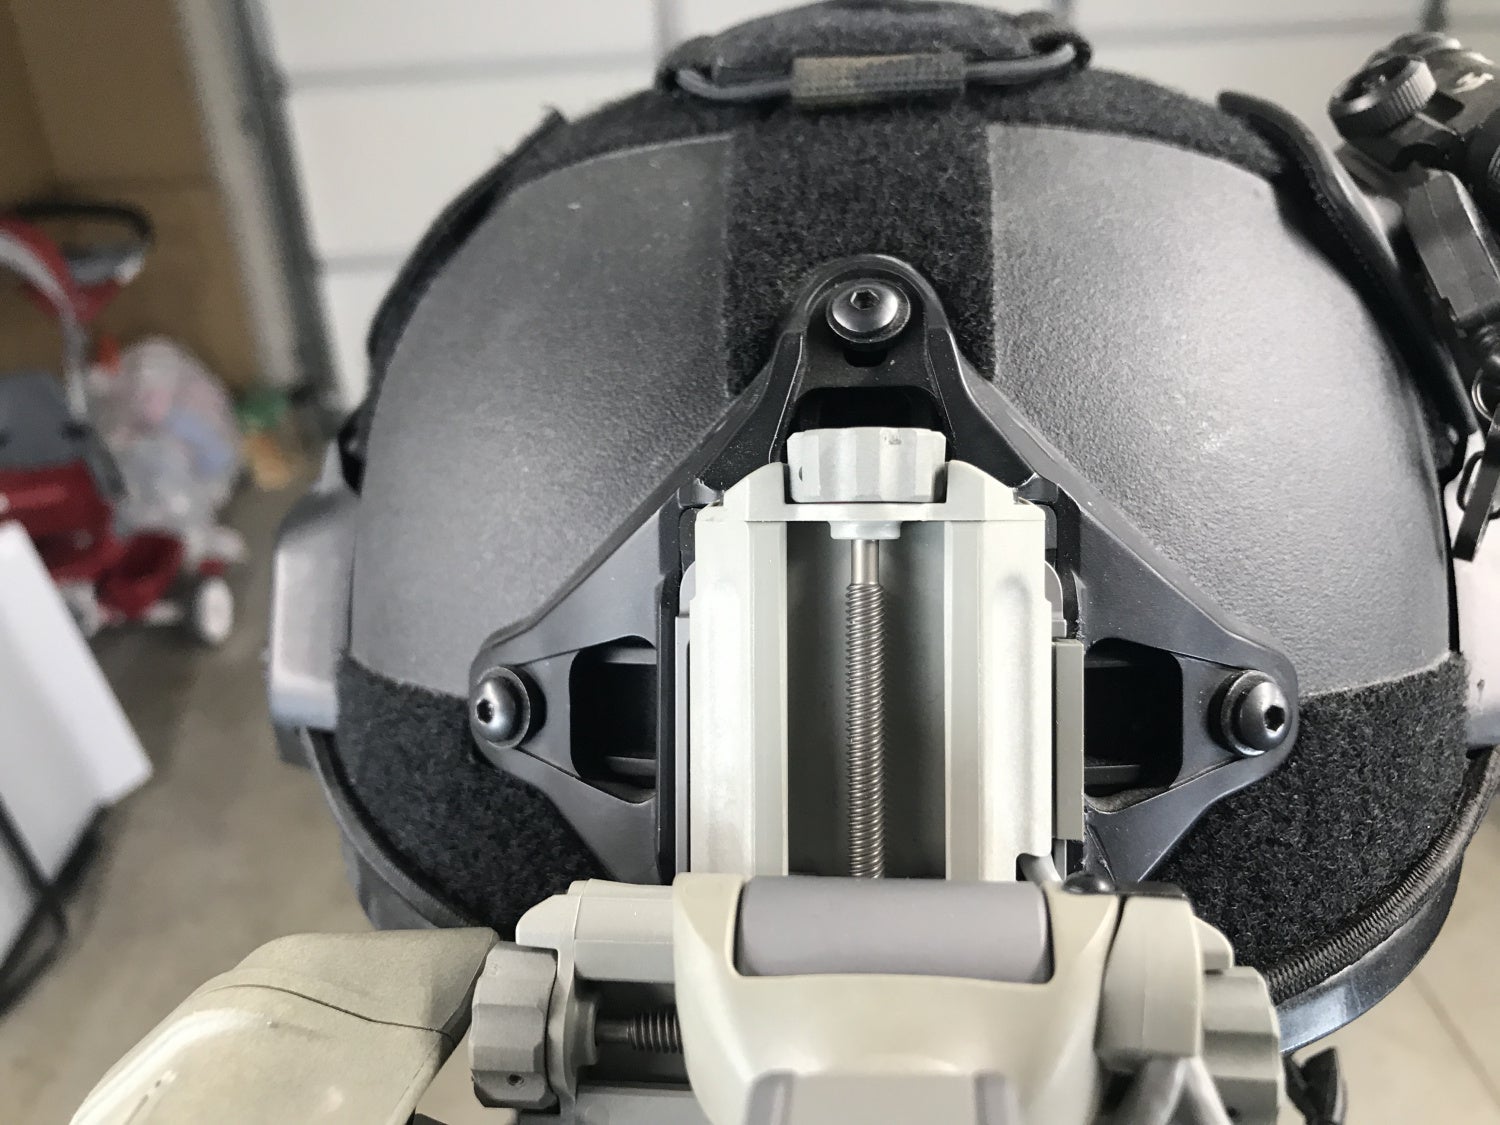
The ENVG mount resembles a Norotos INVG. It is a unicorn-like horn that allows the ENVG to attach to either side. More importantly, the horn allows the goggle to rotate and articulate.
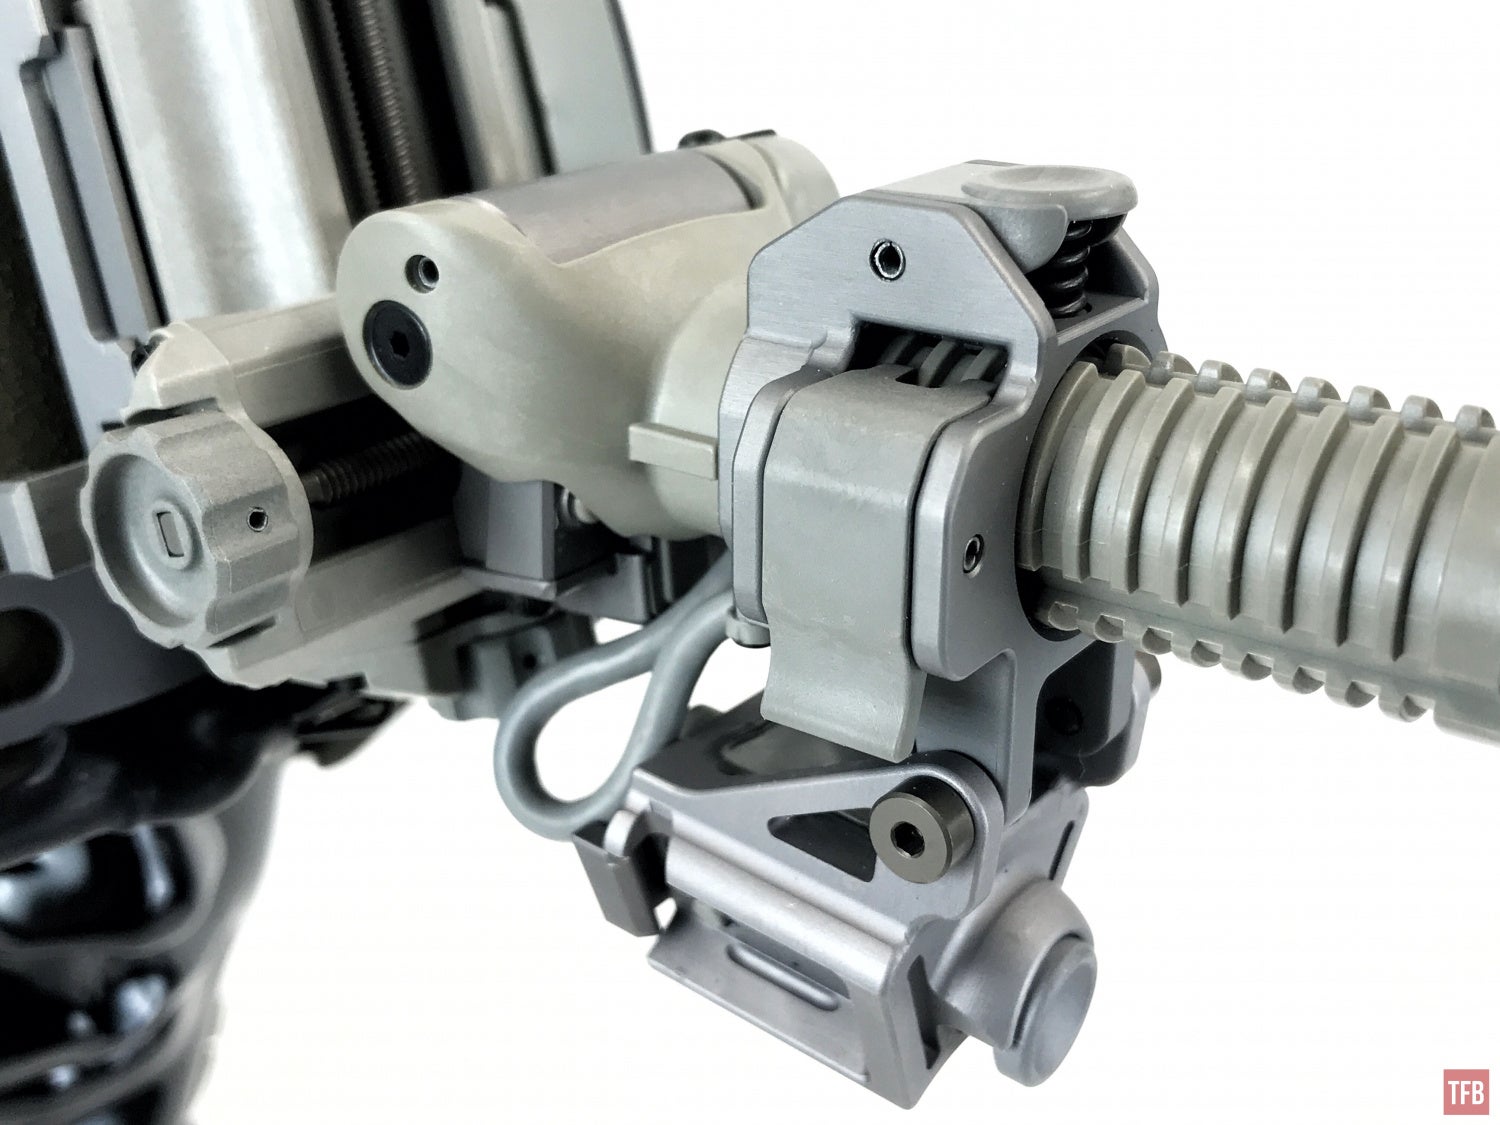
The latch on the side allows the mount to move forwards or backwards. The latch on top is a detent for the mount to spin around the horn.
The horn is a force-to-overcome design. So you just push up and it folds up. The detent mentioned above is also force-to-overcome. You do not need to press it to rotate the goggle around the horn.
On either side, below the mount are the mounting points for the ENVG goggle. They have brass contacts to deliver power to the goggle. There is one on each side so you can mount the ENVG for right or left eye dominant users.
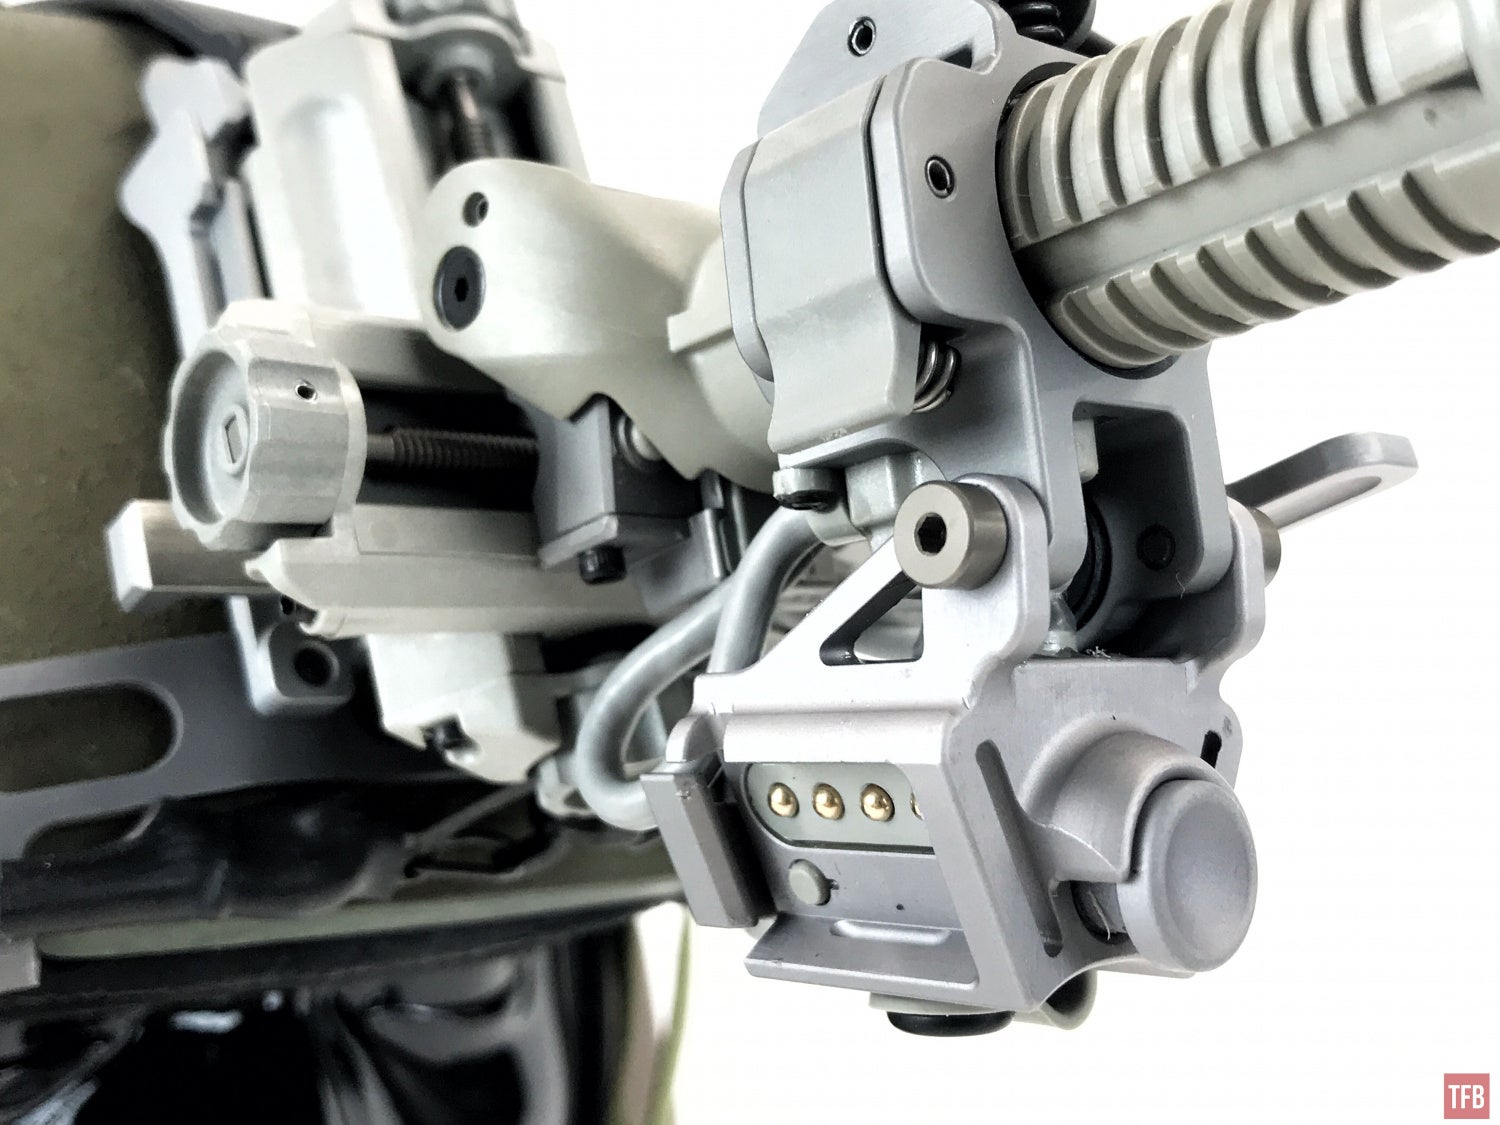
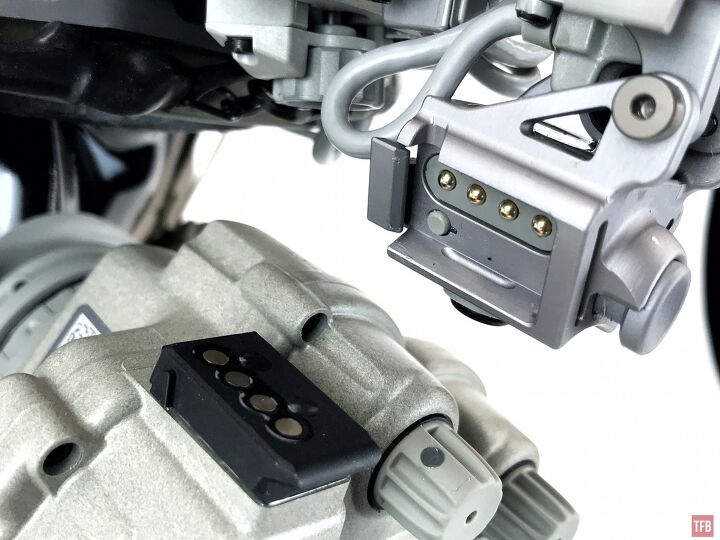
The goggle just dovetails into the mount. Pressing the concave circle button at the front of the mount unlocks the goggle so you can remove it.

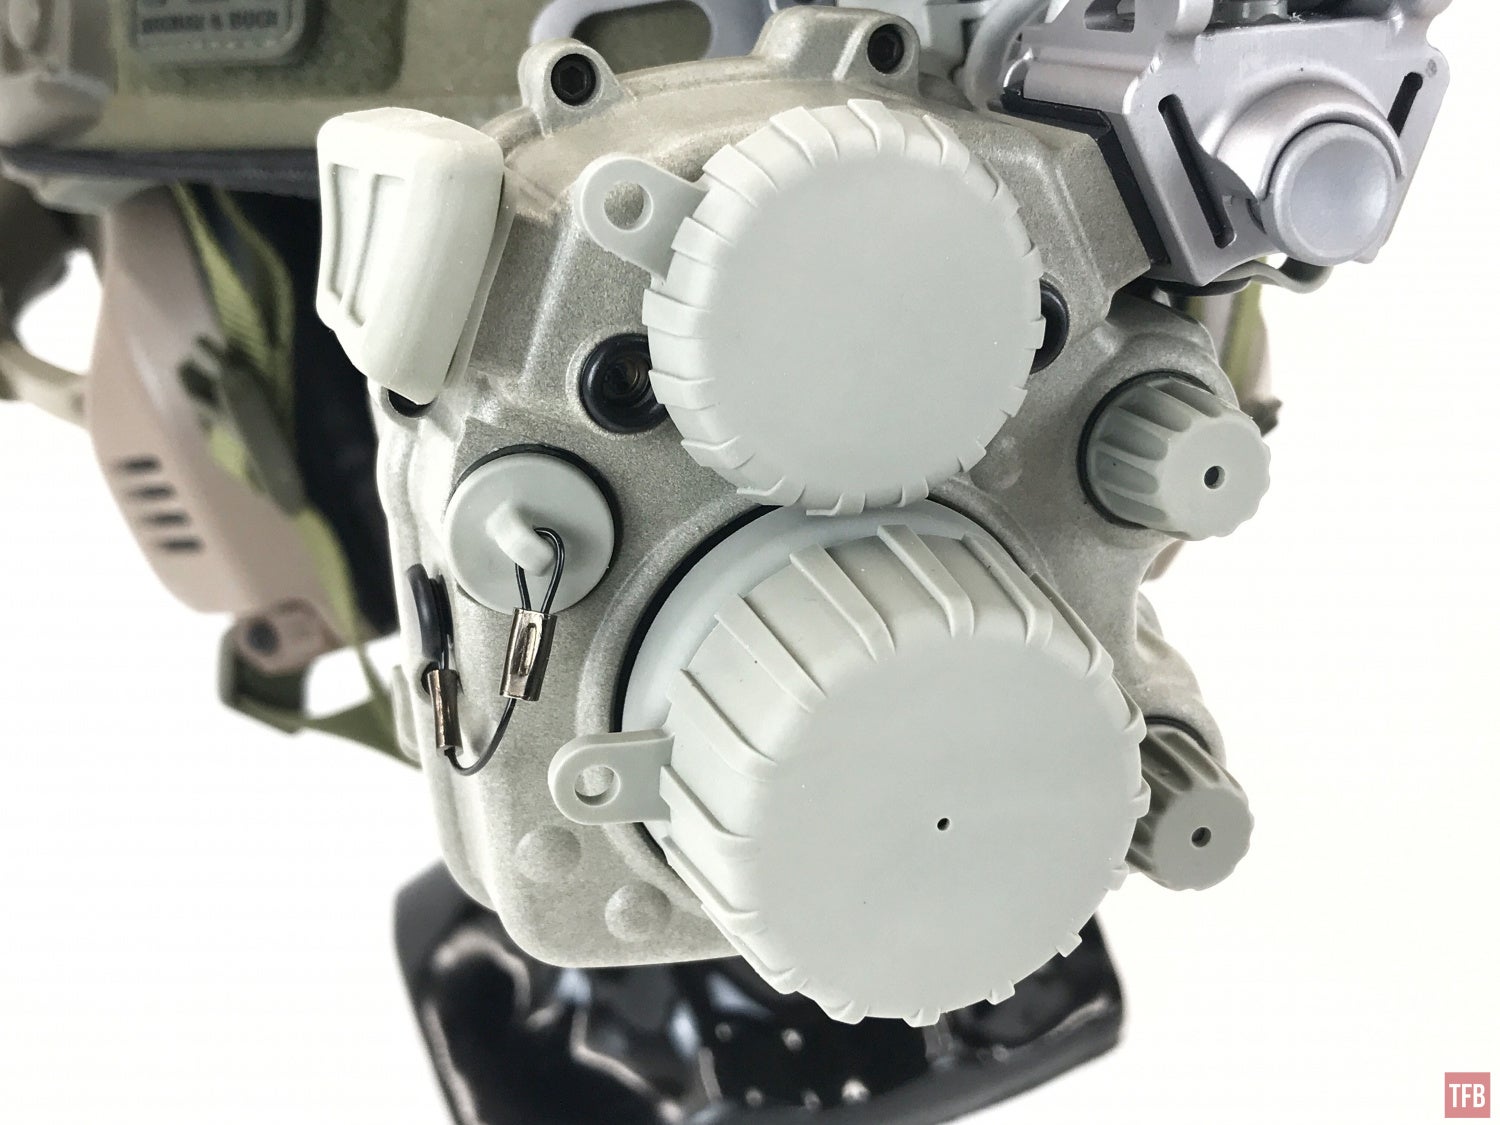
Rubber Covers
The ENVG comes with an urban gray day cover for the night vision objective lens and a dust cover for the thermal objective lens above the night vision objective.

Each power attachment point has a rubber cover to protect it from damage and exposure.
Off to the left side is a small plug that protects the I/O port.
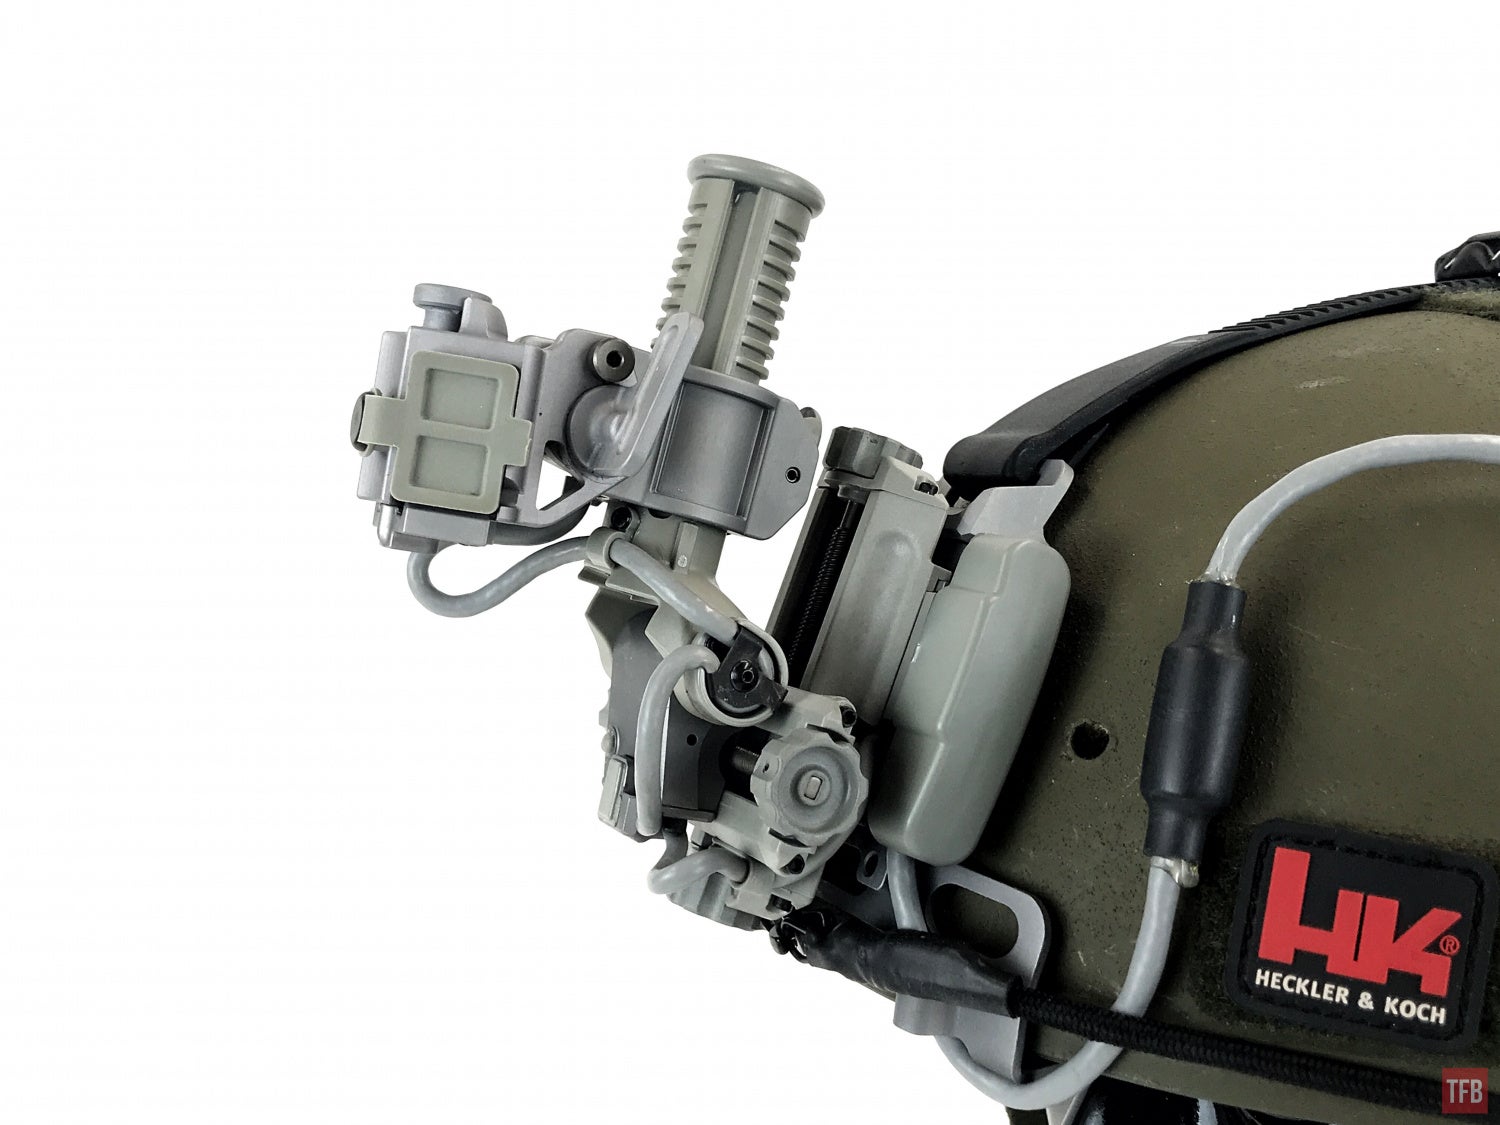
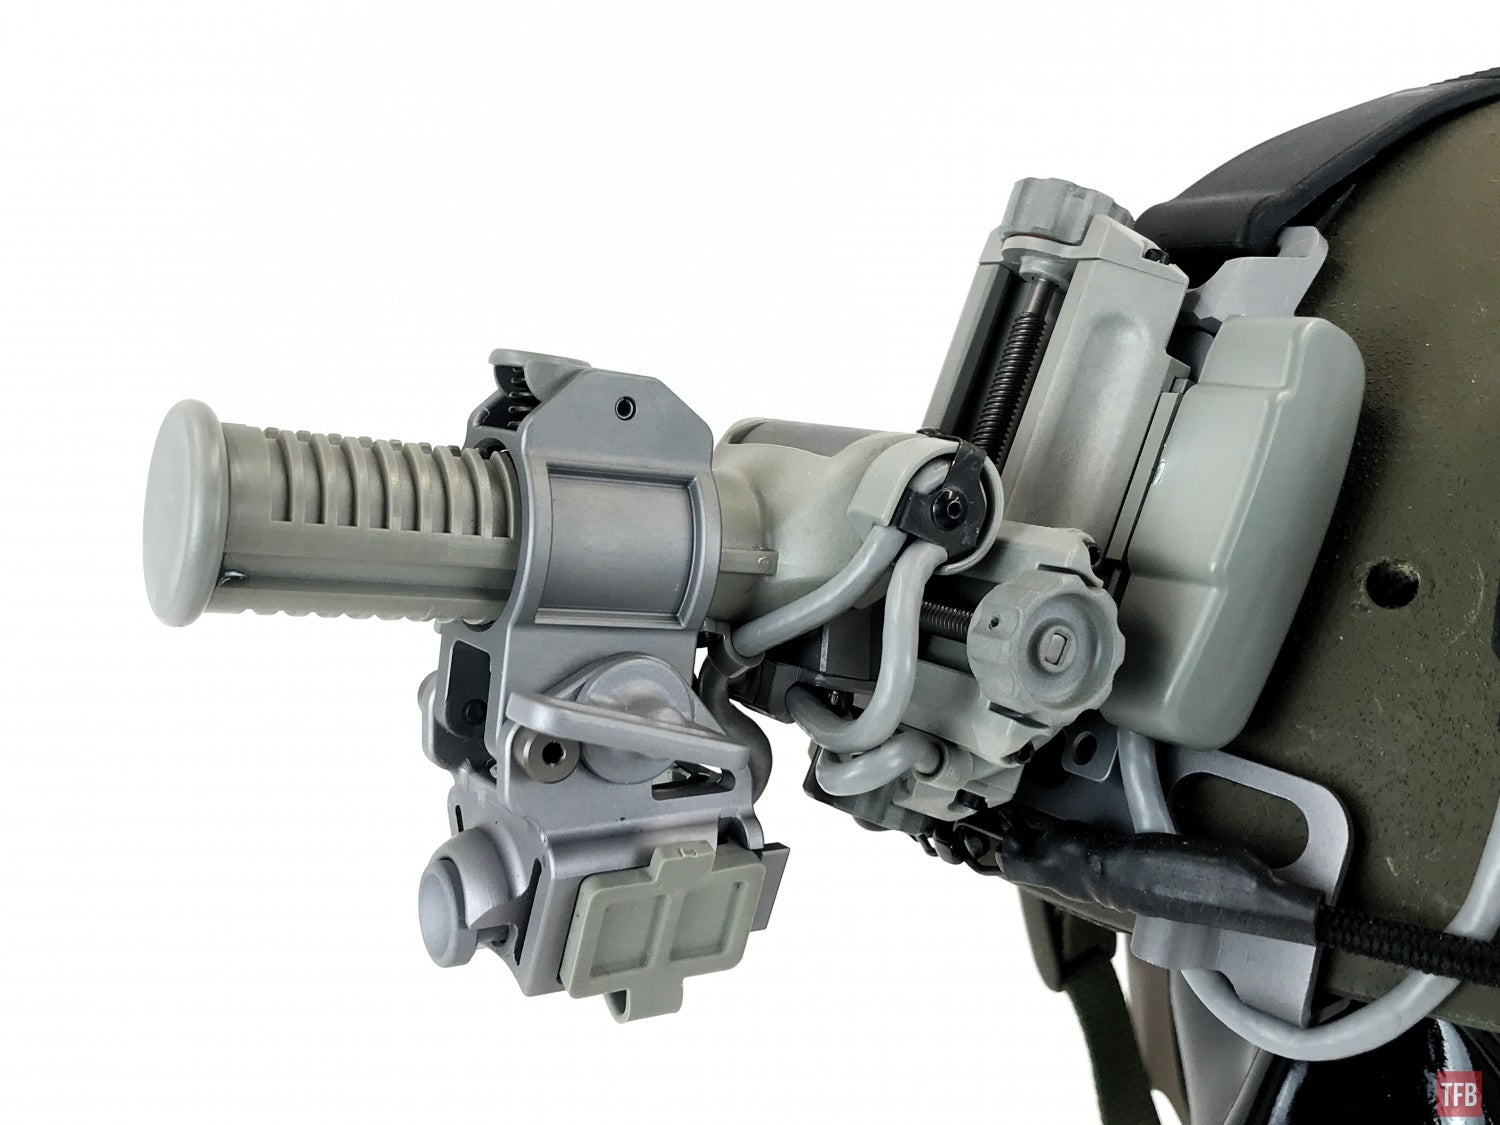
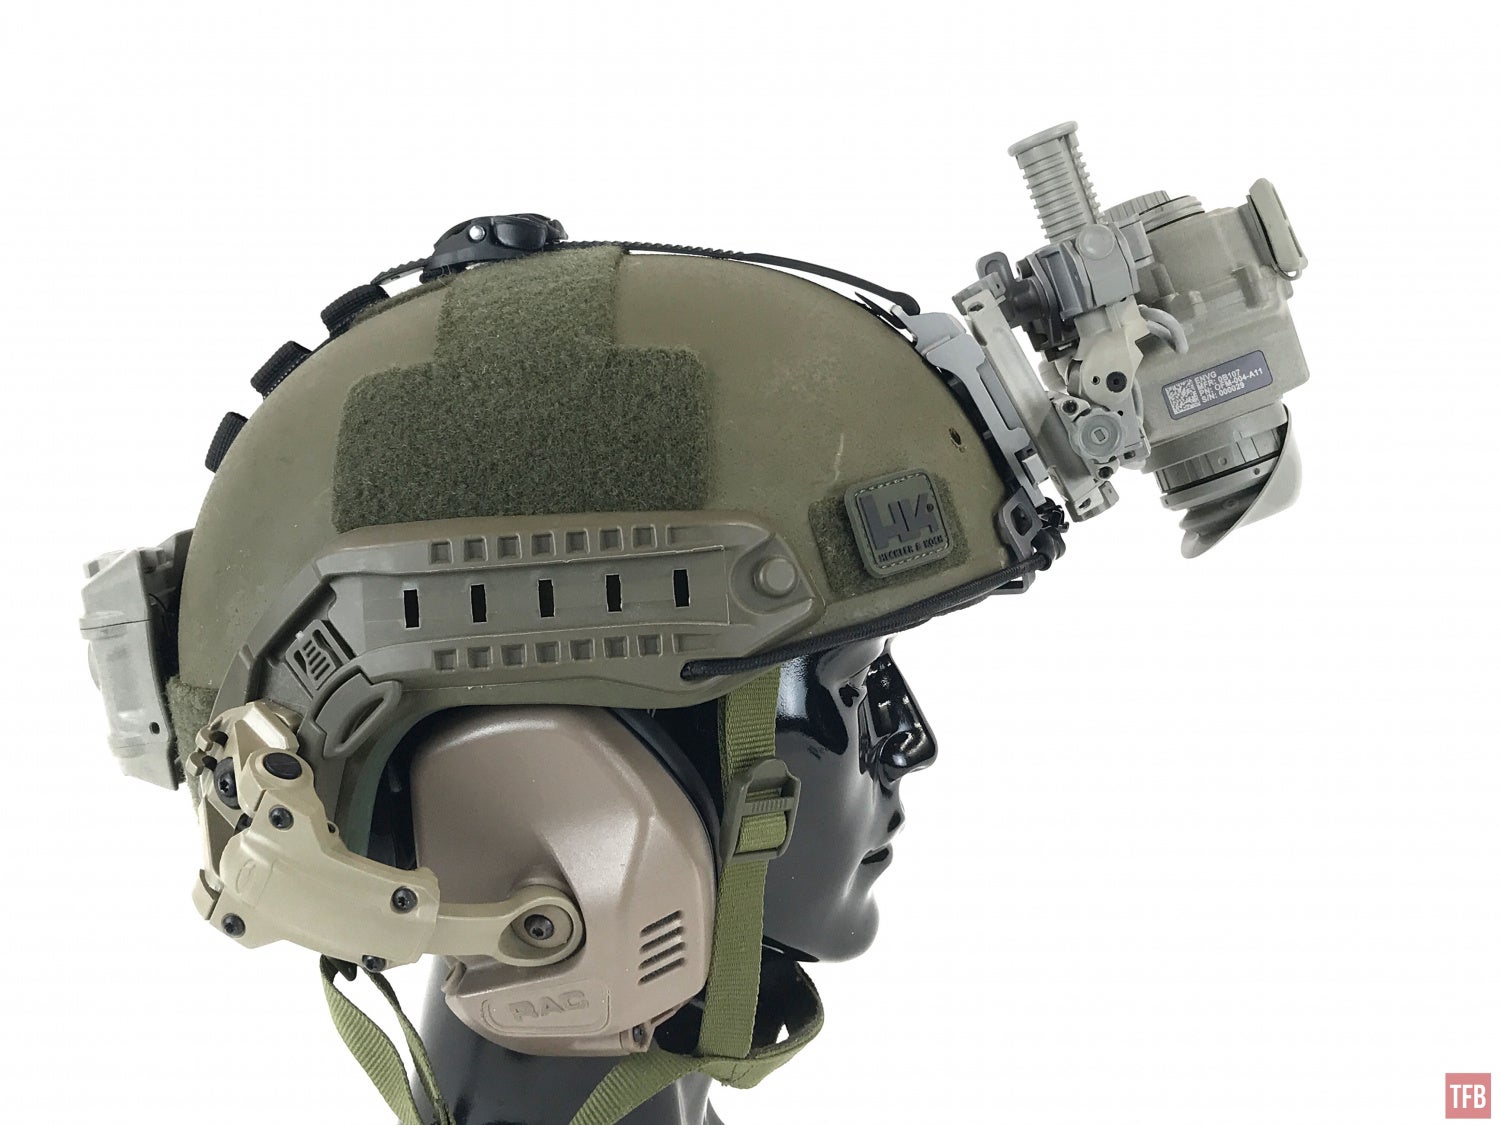
Articulating Unicorn Horn

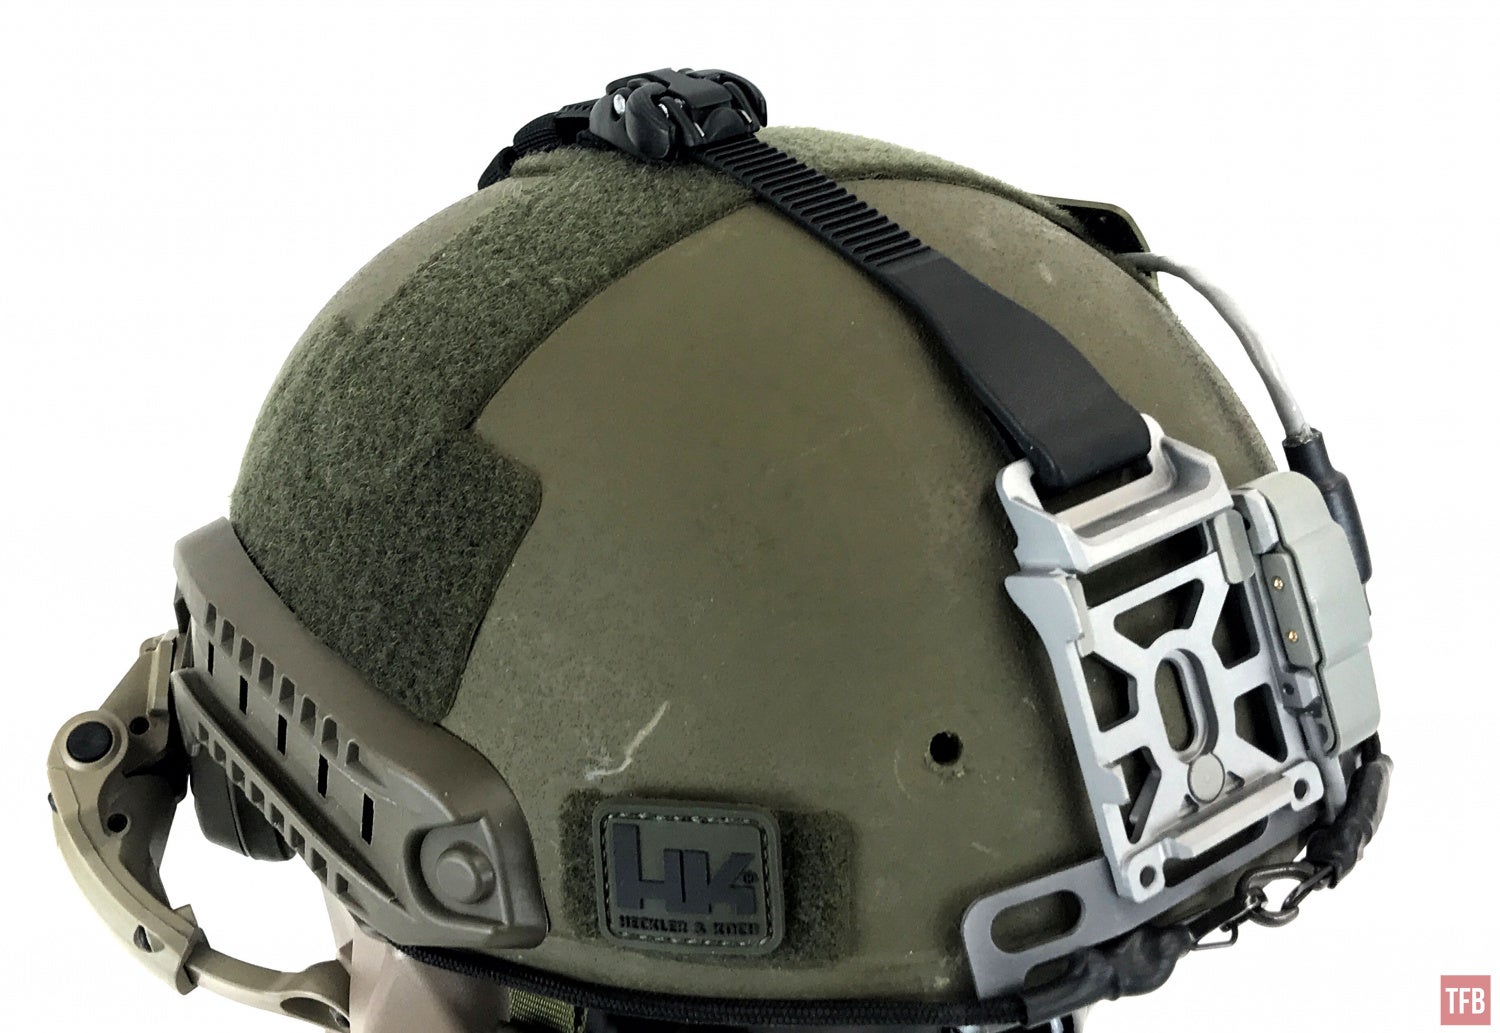
The ENVG mount allows the monocular to articulate when stowed up against the helmet.
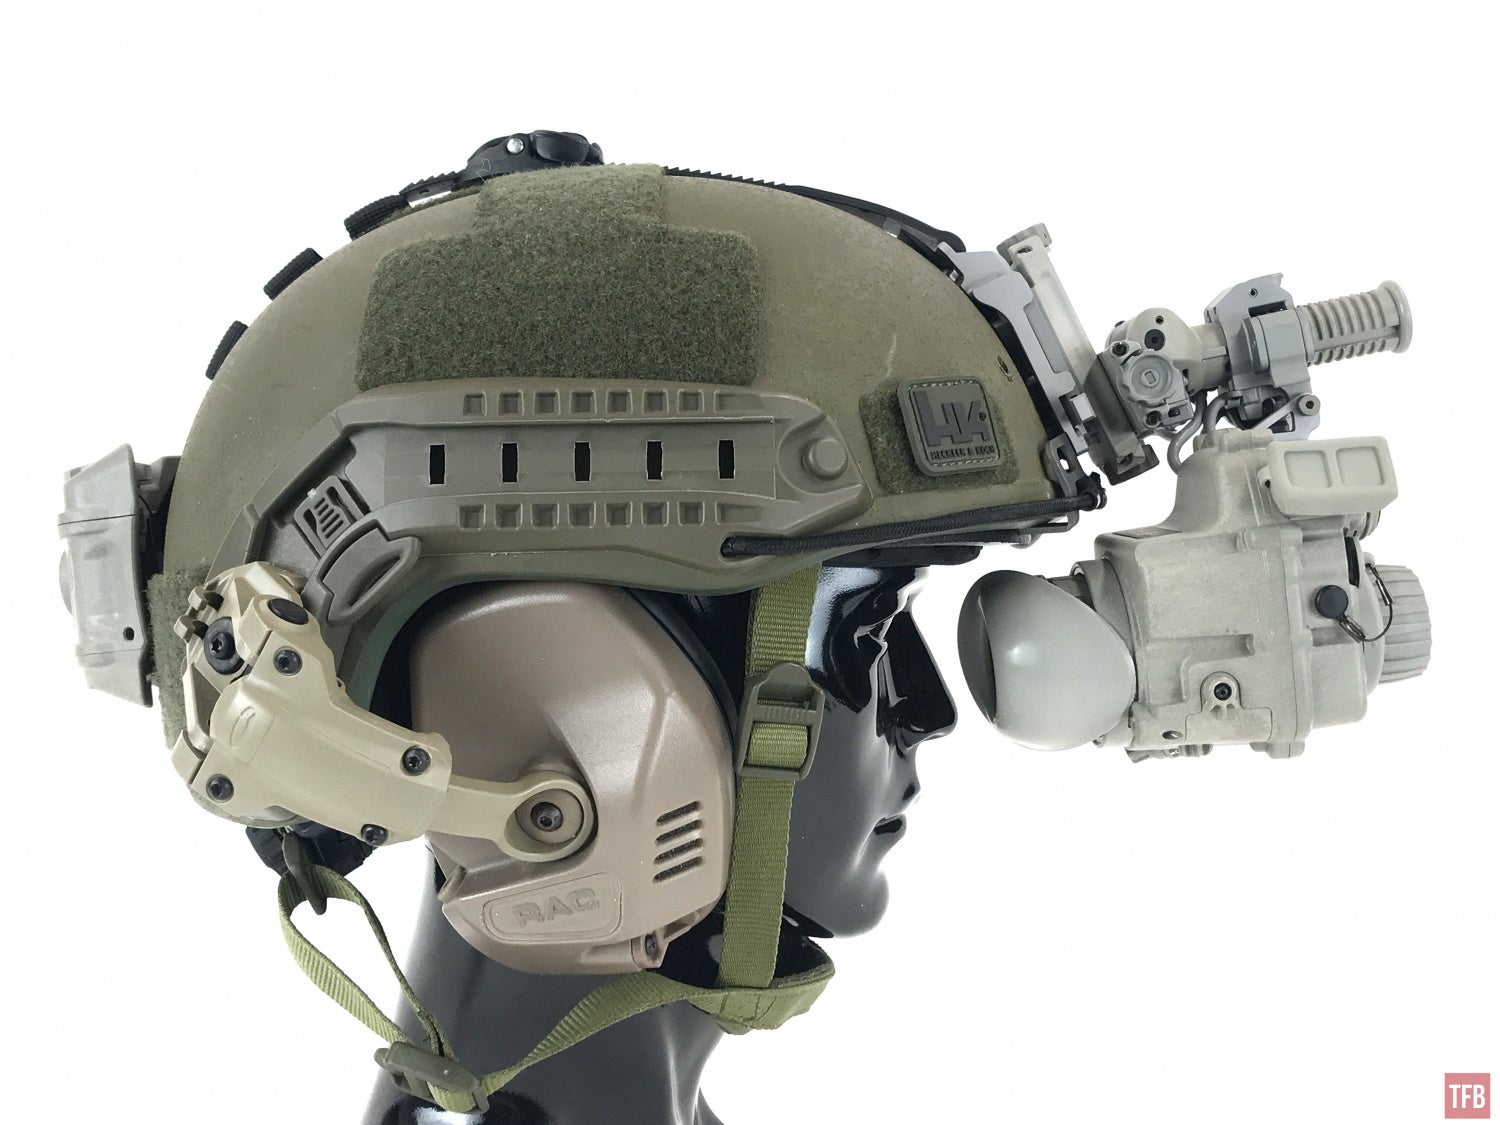
ENVG down for use.
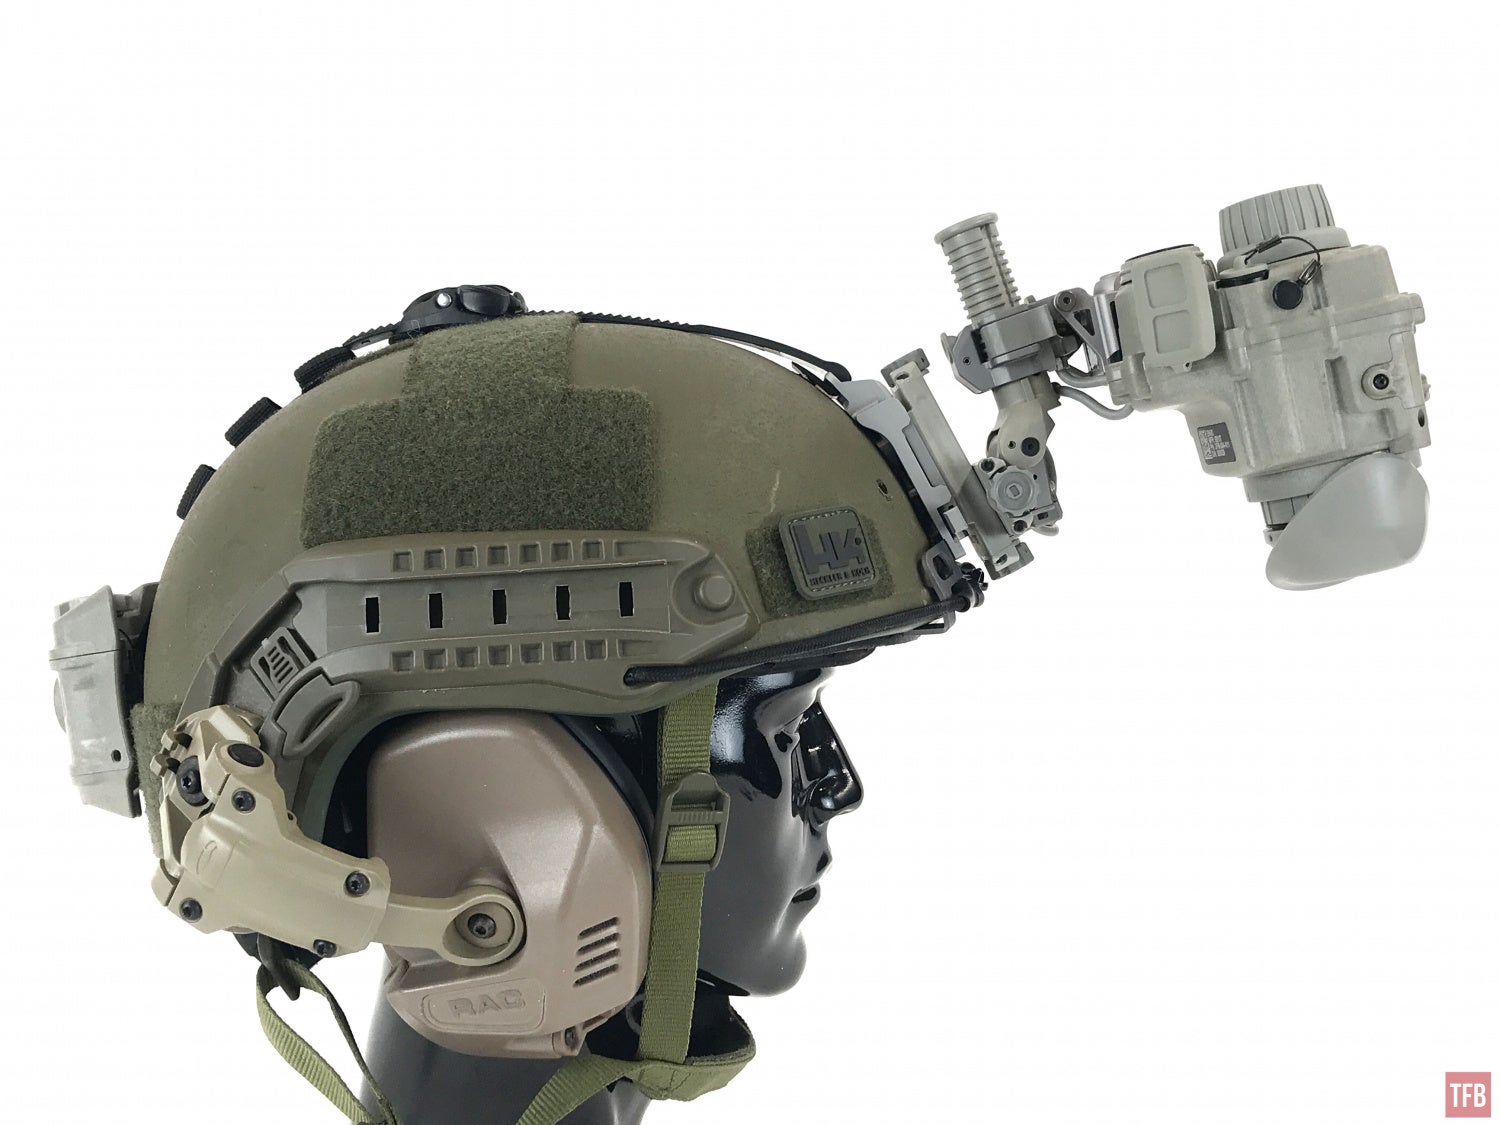
Flipping the mount up is not ideal. It sticks out away from the helmet.
Once the ENVG is stowed upwards, you can swing the ENVG left or right. Thus bringing the monocular closer to your helmet and making it more comfortable to wear for extended periods of time.
ENVG Lens Accessories
The ENVG comes with some accessories for the night vision objective lens.
- Sacrificial Lens
- Light Interference Filter (LIF)
- Magnifier mount
LIF look green when you look at them. They help block a certain wavelength of green light to protect the image intensifier from tank lasers.

The ENVG comes with a coupler that allows you to screw a magnifier to the objective lens like a PVS-14.
Below is a 3X magnifier attached to the objective lens.
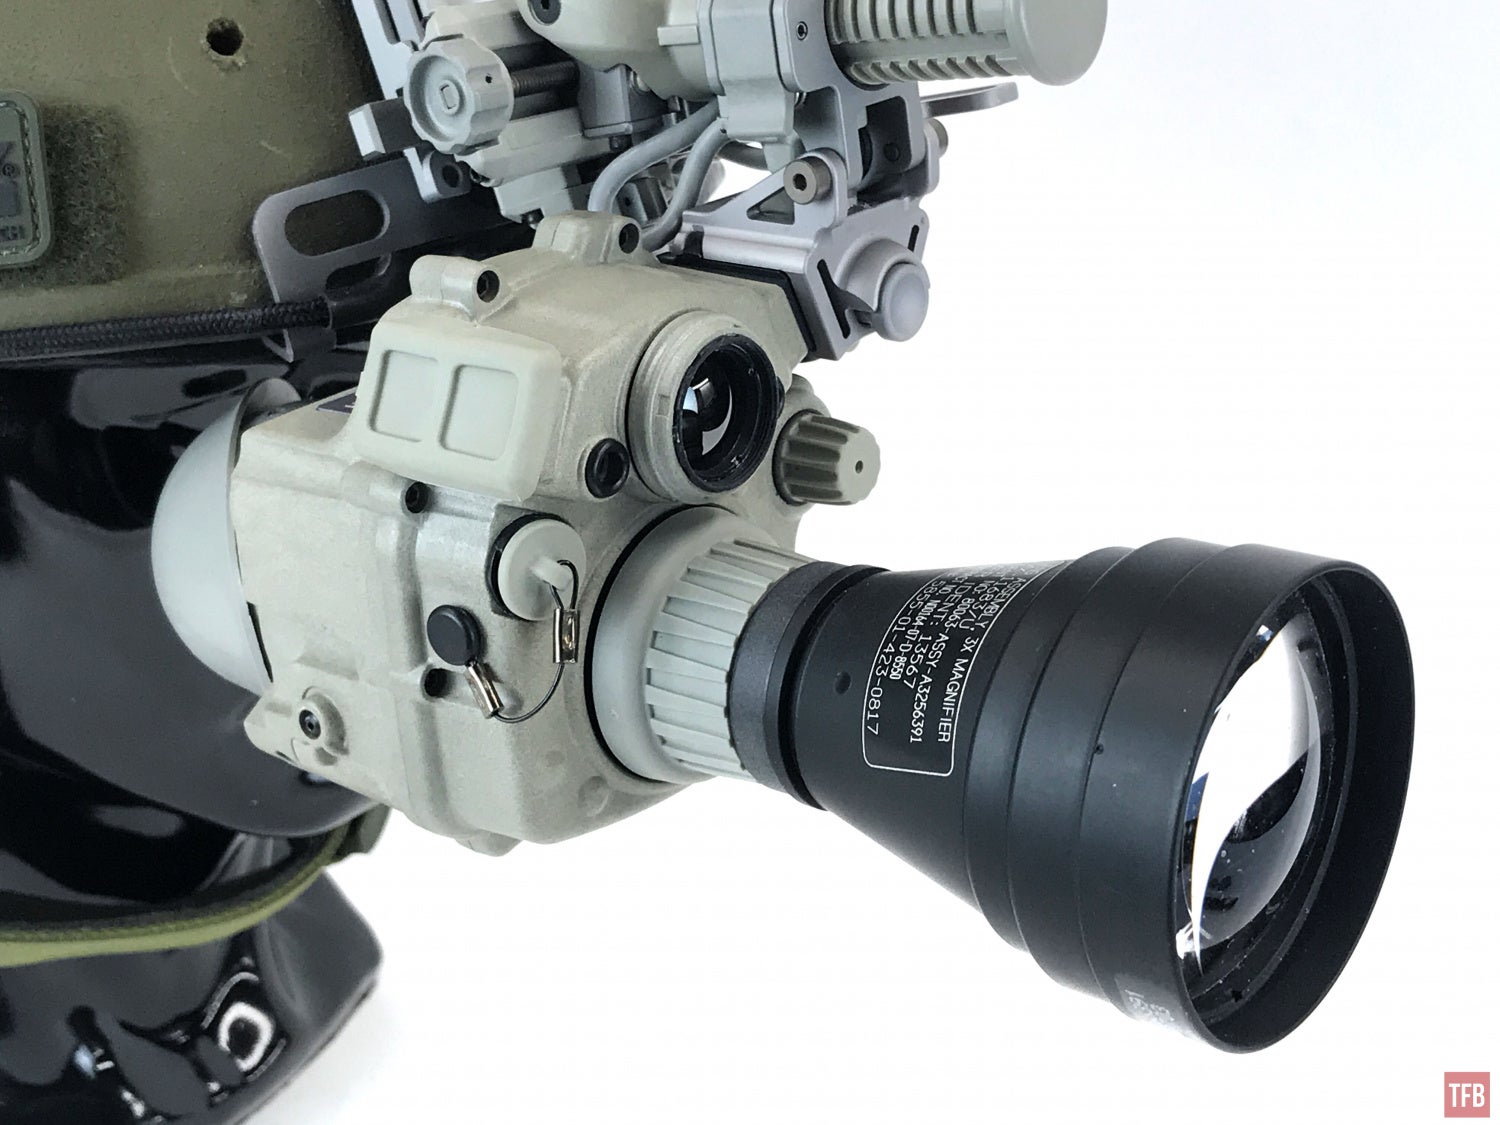
Below you can see how the 3X magnifier has changed the night vision image. Since the thermal objective is not magnified, the thermal overlay no longer matches. The thermal image is a wider FOV compared to the magnified night vision image.
Here is my ITT 5X magnifier. It is a modular system but when fully assembled, it is a 5X magnifier.

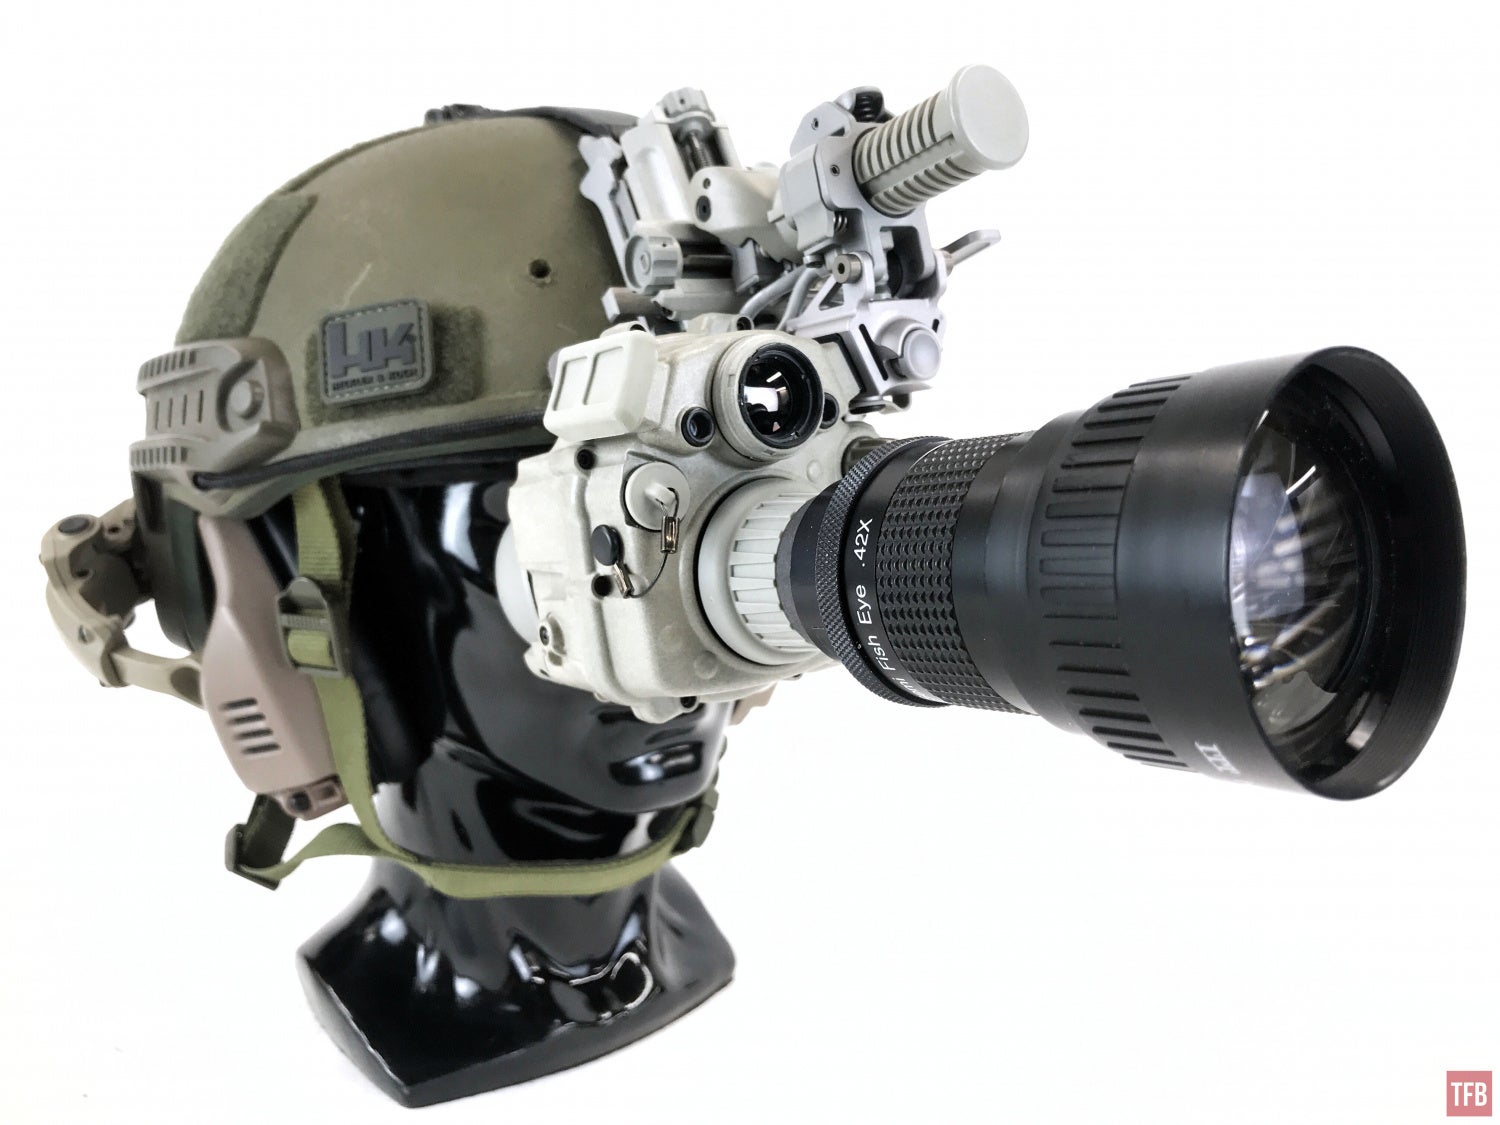

5X magnifier on the ENVG
Mounting The Battery Pack
The battery pack can be attached to the side of the ENVG using the same power mounting points as the ENVG Mount. However, due to the design of the housing, you can only attach the battery pack to the right side of the housing. It will not fit on the left side. You can still attach the ENVG to the powered mount while the battery is attached to the ENVG however this greatly increases the discomfort when worn on a helmet since now the battery is further away from the helmet and adding weight to the ENVG thus pulling the helmet down more onto your forehead.

Modifying The ENVG
Ok, so I didn’t really modify a $20k device. Instead, I modified my helmet shroud to accommodate the ENVG powered mount. Since the battery pack can dock onto the ENVG housing, you don’t need the powered shroud. But the powered mount has a rectangular protrusion that gets in the way of using a normal NVG shroud. I sacrificed the Wilcox 3 hole replica that is on my PTS MTEK Flux helmet.
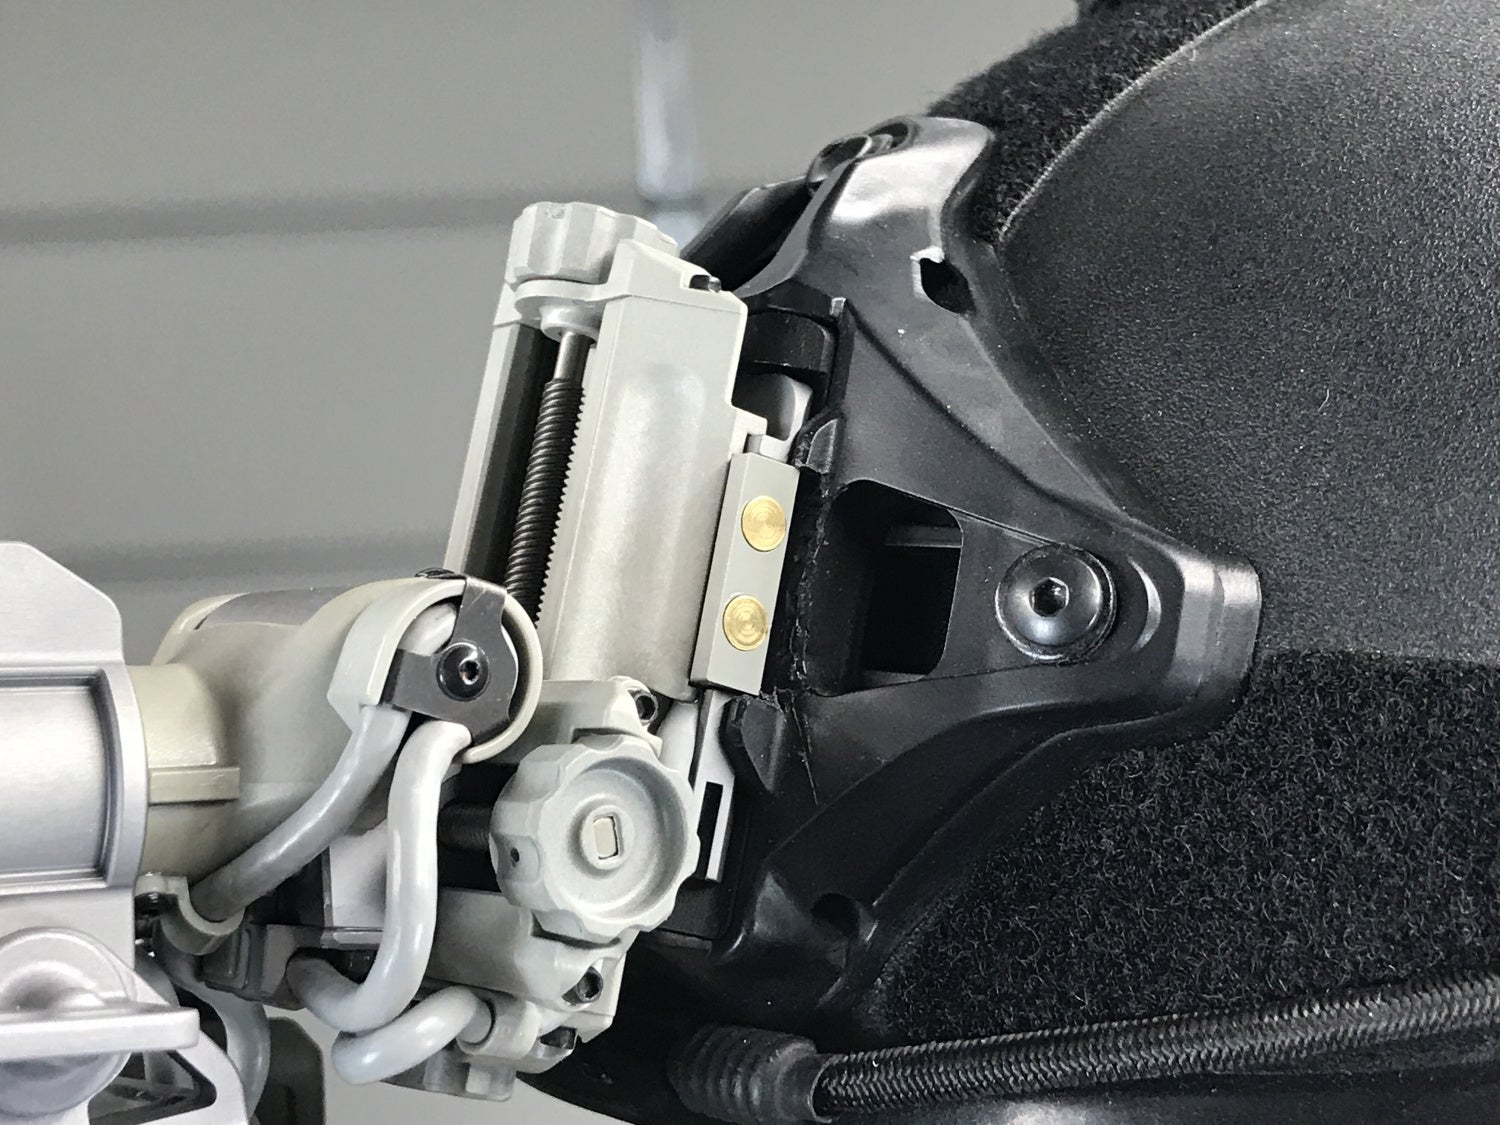
You can see I removed material from the plastic housing of the shroud. So now the ENVG powered mount can attach itself to a regular helmet NVG shroud.
Shooting With The ENVG
Shooting with NODs is not particularly difficult especially with a laser. However since the ENVG is somewhat odd-shaped, I was curious how it would work with aiming passively, i.e. looking through a red dot. To my surprise, it worked better than I had anticipated. Since the thermal objective lens is above the night vision objective lens, my hands and the gun do not interfere with the thermal image. Watch the video below. I switch from passive to laser and back again.
Night Corn Maze With ENVG
Final Thoughts On The ENVG
Talking to some veterans who have some experience with the ENVG, it does not seem to be well received. Many veterans complain about the size, weight and more importantly the fragility of the system. Here is what one of my fellow NVG aficionados said, (he works on these units for the military)
The internal circuit card assemblies are extremely fragile. There are three separate boards in them and they’re very susceptible to shock and moisture damage. Maintenance on them is a nightmare, and requires using heat guns and epoxy, the tubes are proprietary (Mx-11769/ENVG), and the thermal overlay screen is pretty easily dislodged if you drop the unit and when that happened you have to take the whole thing apart. You can’t just unscrew the ocular lens, they work totally differently than a PVS-14.
While I cannot attest to the fragility, I am not going to sacrifice my friend’s ENVG to see how rugged it is. I can say the proprietary design of the ENVG PSQ-20 is not ideal. The fact that there is no onboard power is disappointing. Add on to that fact that you need a proprietary power mount and shroud. So you can’t just hook this up to your Team Wendy or Opscore helmet without modification or remove the factory shroud altogether and strap-on the powered shroud.

With respect to the thermal fusion feature, the ENVG PSQ-20 does not really do that much more than a good monocular and a PAS-29 COTI. The bright orange rear projection overlay is nice but not much of an advantage over the COTI. The only true benefit is that you do not have the light of the thermal image projected into your objective and over saturating your image intensifier. Some people run their COTIs at full brightness and cause microchannel plate oversaturation. You get a ghosted image that is temporary in the tube. Another benefit to the ENVG is that you can switch from night vision to fusion and only thermal if you want to. You can get two out of the three with a COTI setup. You can have just night vision and thermal fusion, but you cannot turn off the night vision and only see thermal imagery. The COTI setup does have a couple nice features that the ENVG does not. There is a digital compass that you can activate for land navigation that is projected in the thermal image. Also, the COTI has PATROL mode. It has FULL, PATROL and OUTLINE. Whereas the ENVG has Black Hot, White Hot and Outline. The COTI also can switch from black hot to white hot but you can still select the three modes, FULL, PATROL or OUTLINE. Patrol mode is my favorite. It seems to prioritize the hottest objects in the FOV of the thermal objective. So there are fewer false positives. The ENVG just shows you everything all the time. I do notice that it will automatically showcase the hotter objects. So like people and animals will glow brighter in the thermal image and then the other objects are not lit up by the thermal as much. Battery life is not that great for the PSQ-20. Many veterans have said that the ENVG chews through batteries like no tomorrow.
Price is another major downside to this obsolete system. Last I checked, L3Harris wants around $20k for the ENVG. You can get a good PVS-14 for $3k+ and a COTI for about the same money. So for around $6k-$7k, you can have a setup that is easier to use and mount to any helmet and you can use any mount you want. You will have 95% capabilities as the ENVG and you saved yourself about $13k-$14k.
The military have moved away from the PSQ-20 and is now using the ENVG-B. A binocular enhanced night vision goggle. Also, it has wireless connectivity to a dedicated thermal weapon sight and the sight picture is projected within the ENVG-B display.
Huge shoutout to my friend Jason and Alex for letting me borrow this ENVG PSQ-20.