 Your Privacy Choices
The SiOnyx Aurora is a digital night vision camera. It is relatively inexpensive and has potential. It has a sensor that is sensitive to low light and has the ability to see infrared light. While the Aurora is a pretty straight forward action camera, it has greater potential lying dormant inside. Thanks to astrophotography enthusiast CNOCT (aka Carpe Nocturnum) who sacrificed his Aurora. His modified Aurora can now use a variety of lenses as well as work with a PAS-29 COTI to get thermal fusion.
Hacking The Aurora

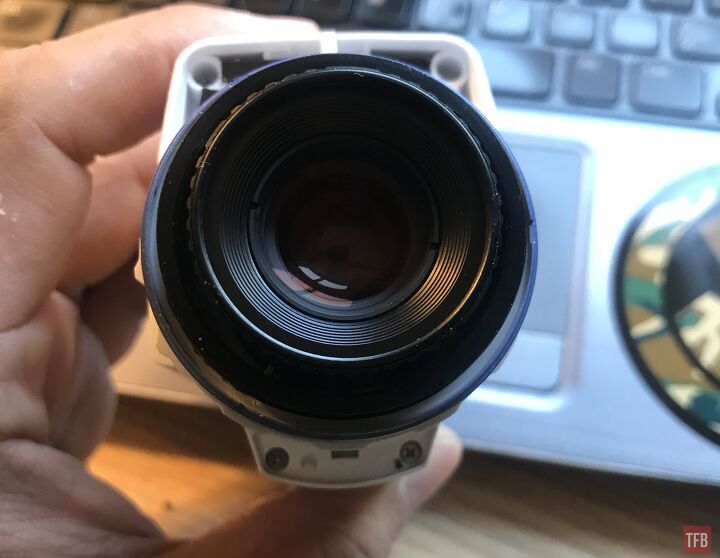
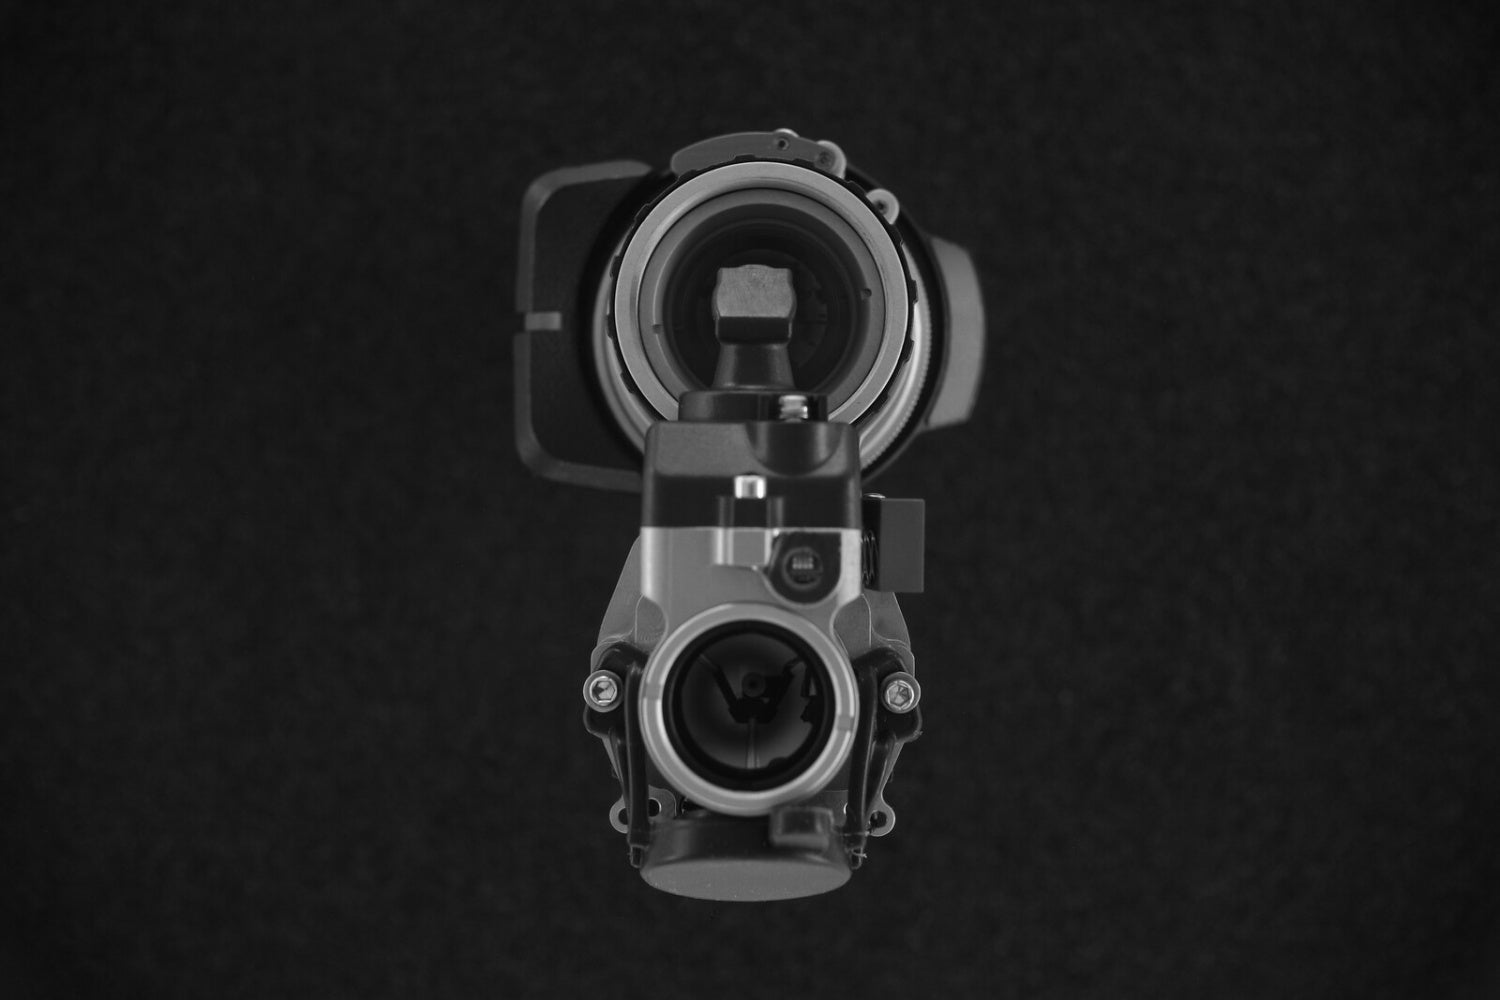
Photo by CNOCT. Factory lens protector and focus ring removed to reveal the actual camera lens. The black object is an adapter ring for use with a telescope.
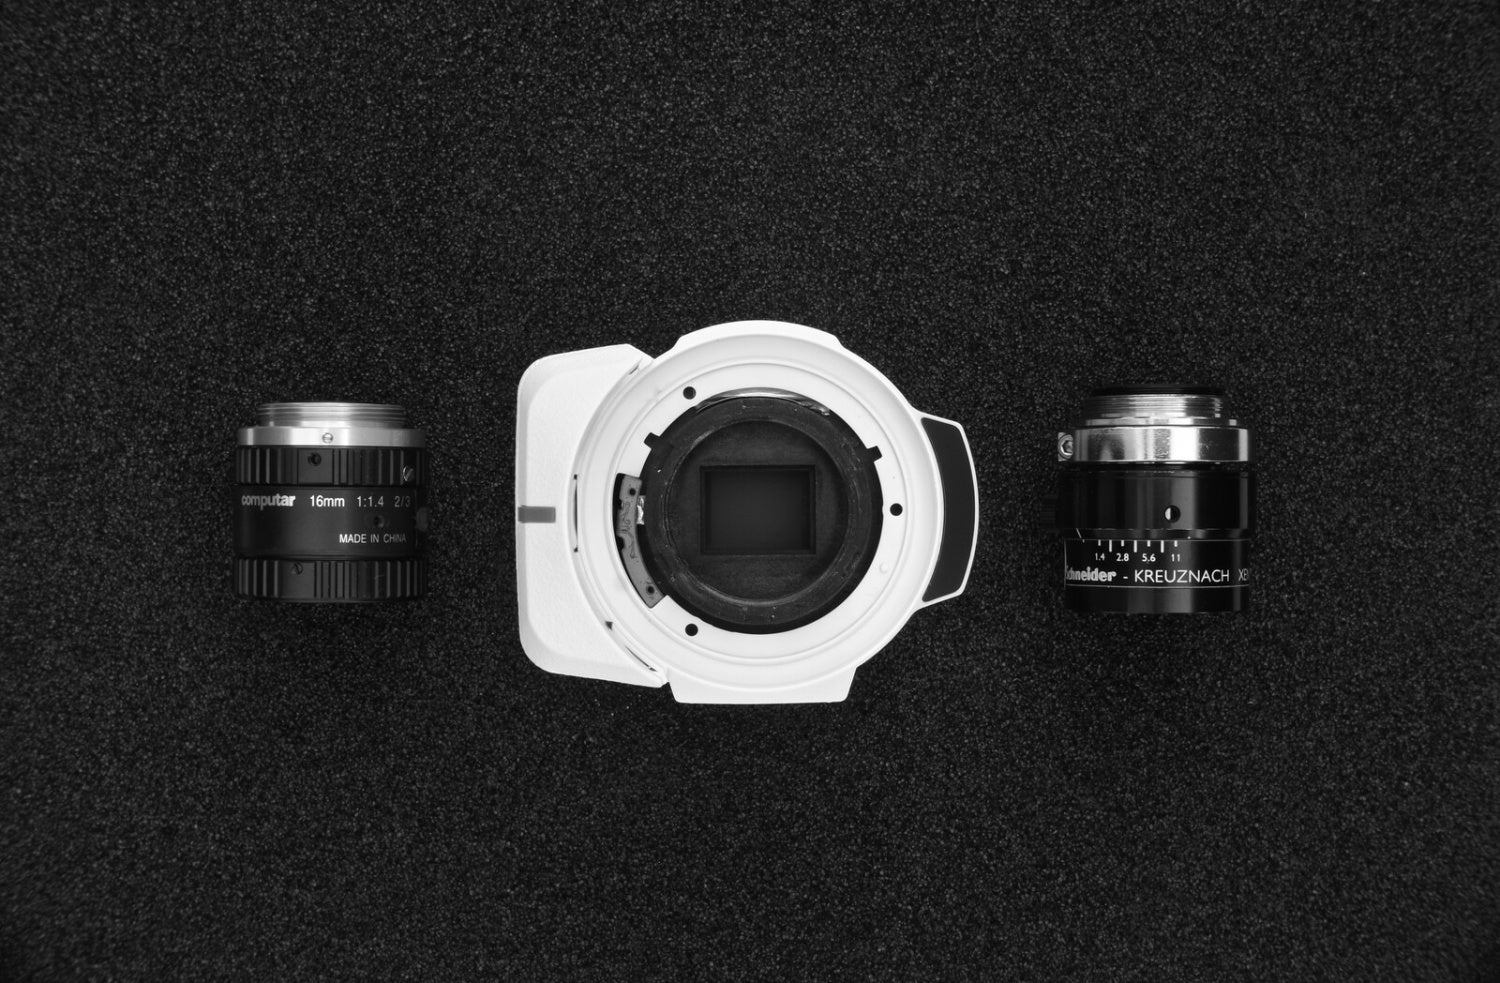
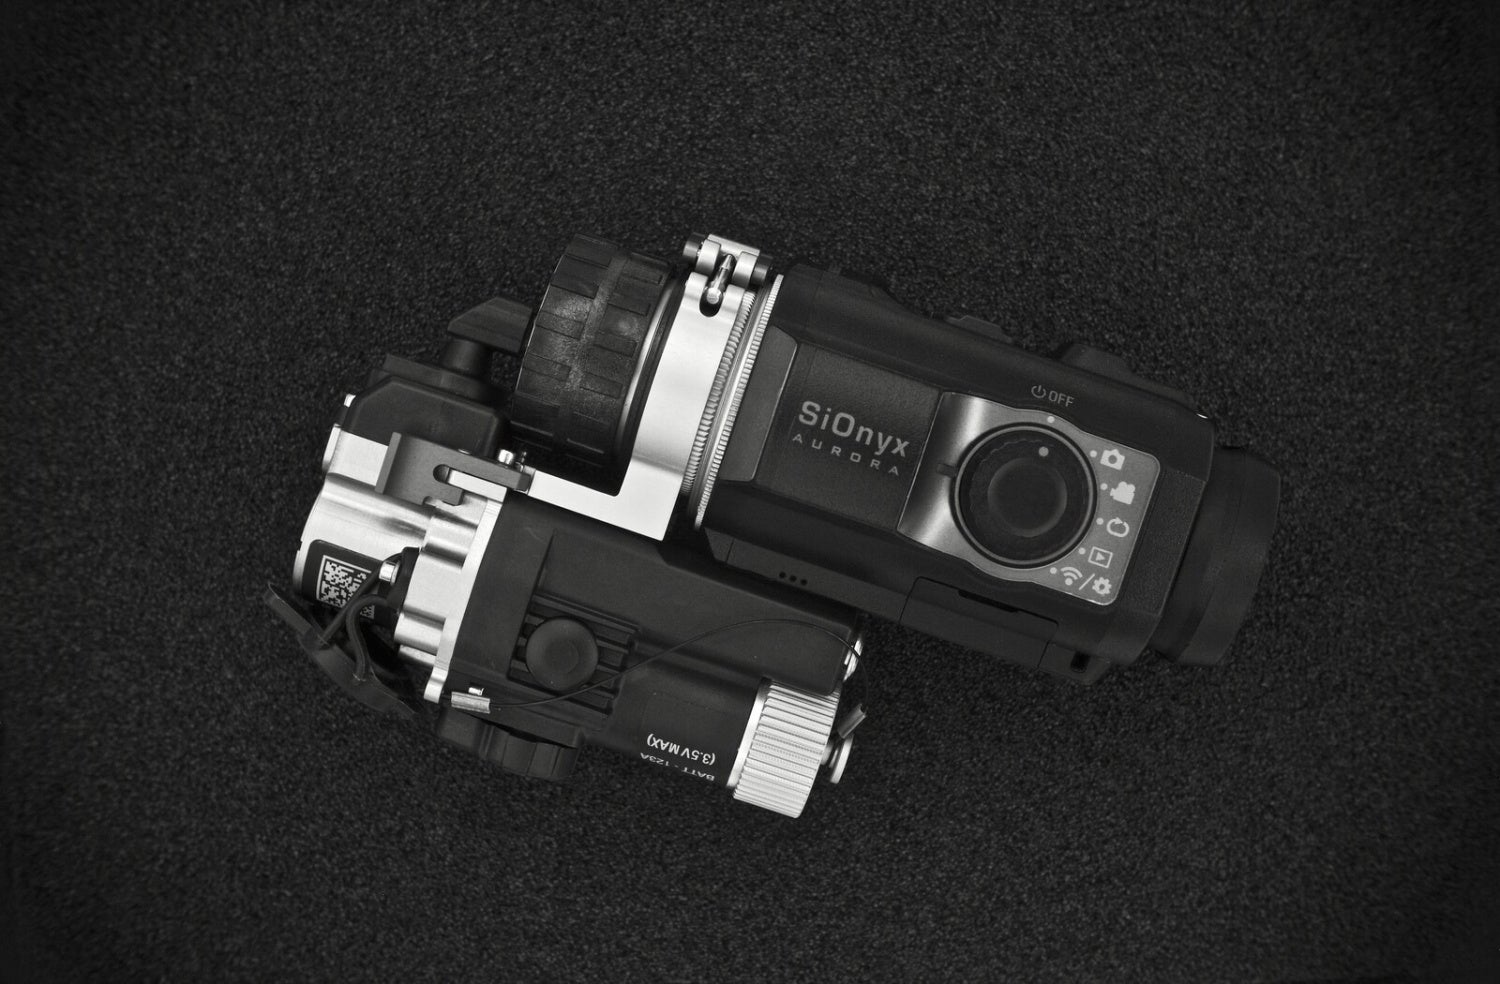
Photo by CNOCT. Front of his modified Aurora Sport. Factory lens is on the left.
I stumbled across these photos by CNOCT on the Cloudy Nights astronomy forum. He managed to remove the factory lens and swap lenses on his Aurora Sport.
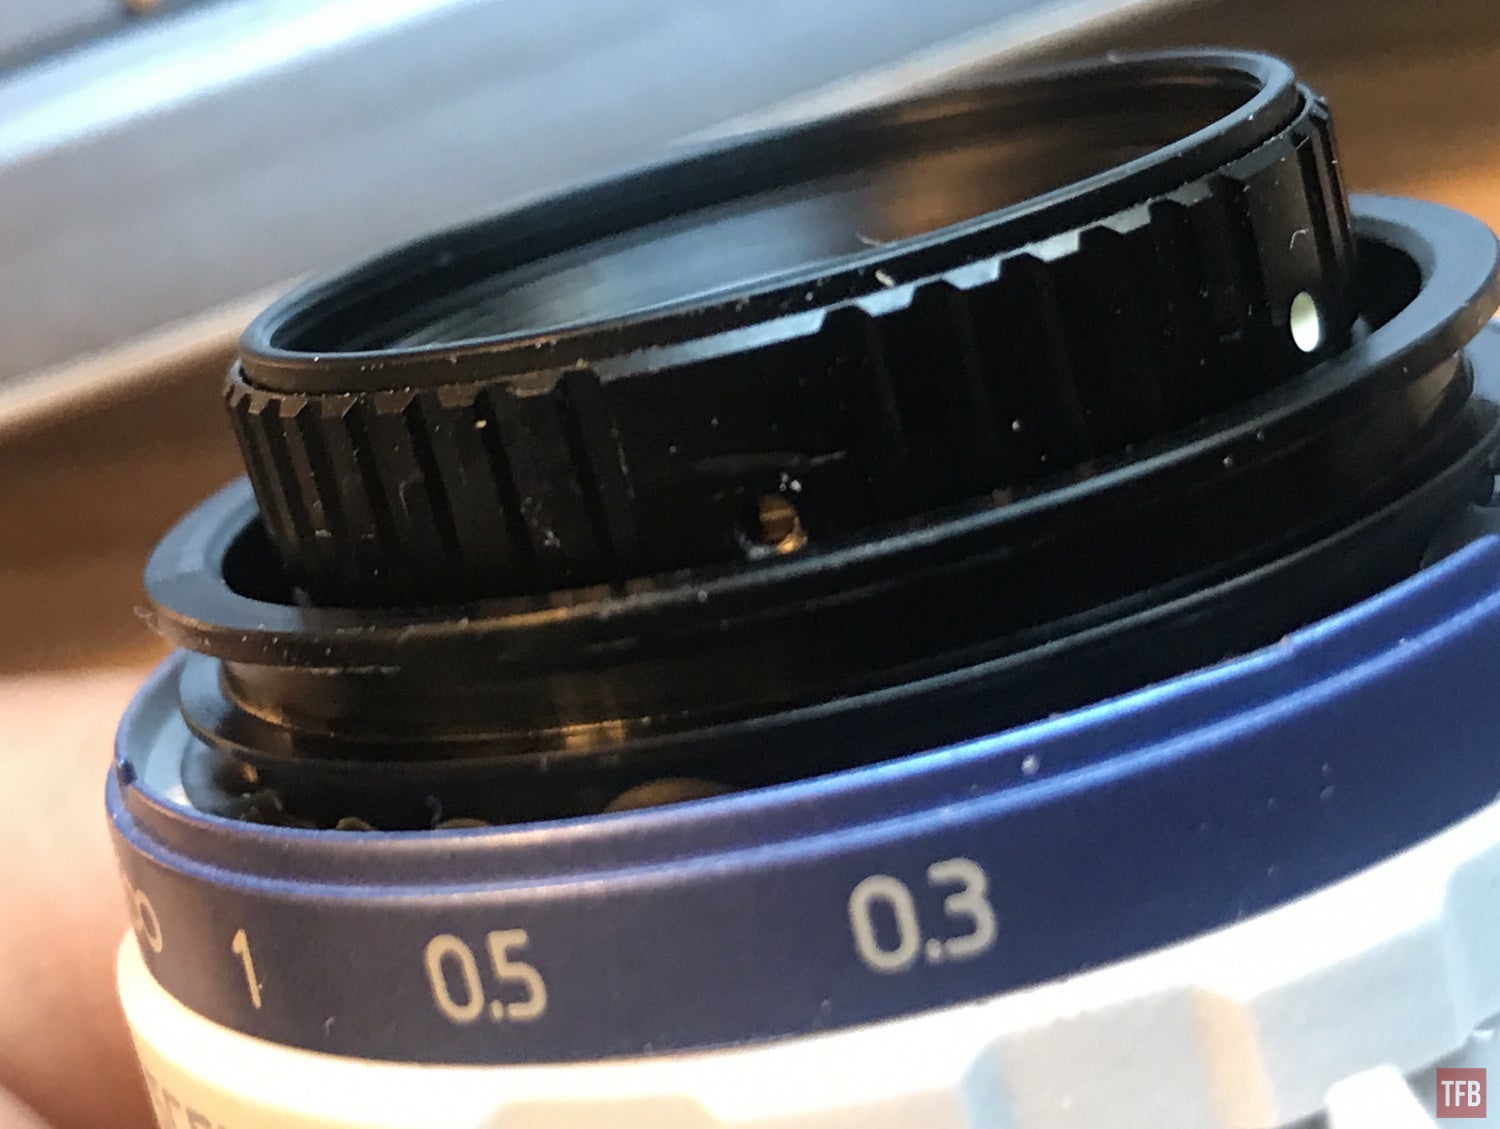
I reached out to CNOCT and through a series of messages, he guided me on how to modify my Aurora Sport. In his first photo above, the “lens” with the white ring around is not a lens at all. It is merely a plastic lens cover that protects the actual lens underneath. The white ring is just a focus ring, it is notched to match the notches along the outside of the actual Aurora lens which is a 16mm Computar lens from Japan. For those interested, the factory lens has a thread size of 30.5 so you can try and find adapters or filters to screw into the lens.
I apologize for the photos, I did this while I was on vacation so I did not have my photo studio to take better pics.
My initial attempt to get to the factory lens.
The modification is daunting at first however it is merely removing factory bits and pieces to get access to the factory lens. The big white focus ring with plastic lens cover is just held in place by two plastic tabs. If you press down on it and twist it will pop out of the tabs and you can eventually pull the ring off.
Here is what CNOCT sent me.
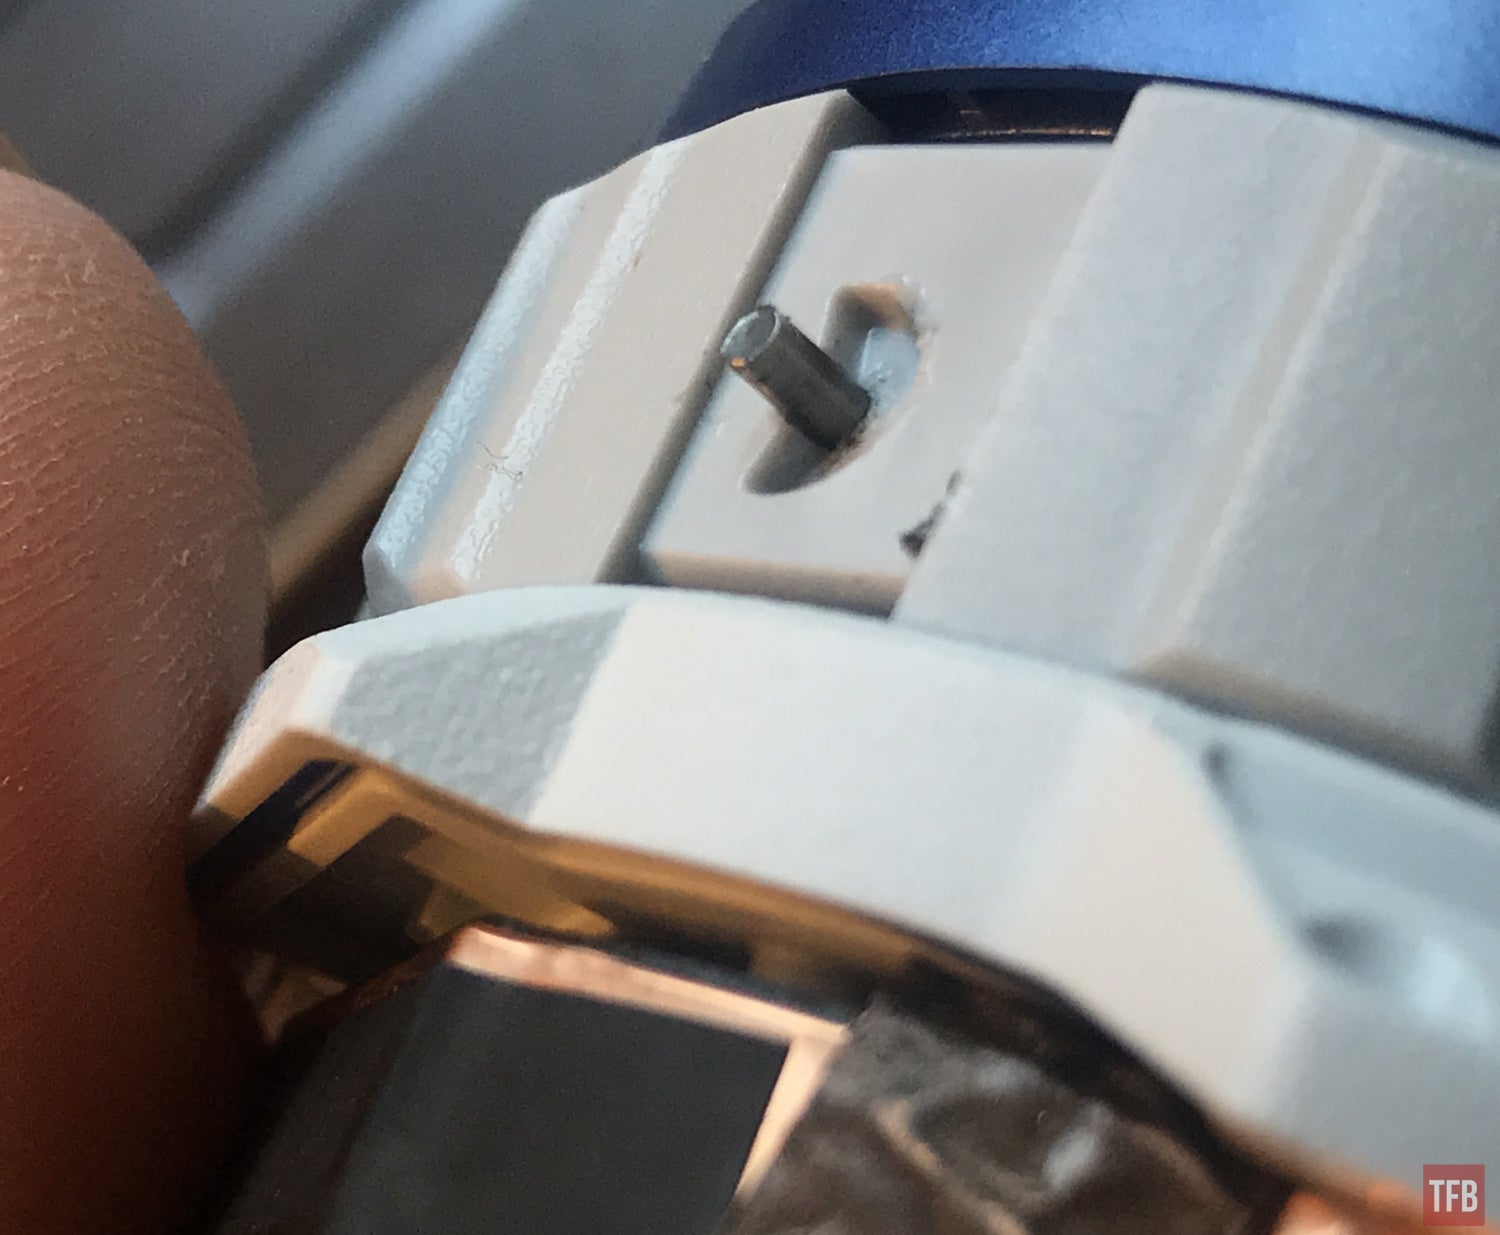
First locate and remove aperture/mode pin on the mode selector ring. The rectangle cover is held down by double sided adhesive strip, pop the cover off and pull the pin out.
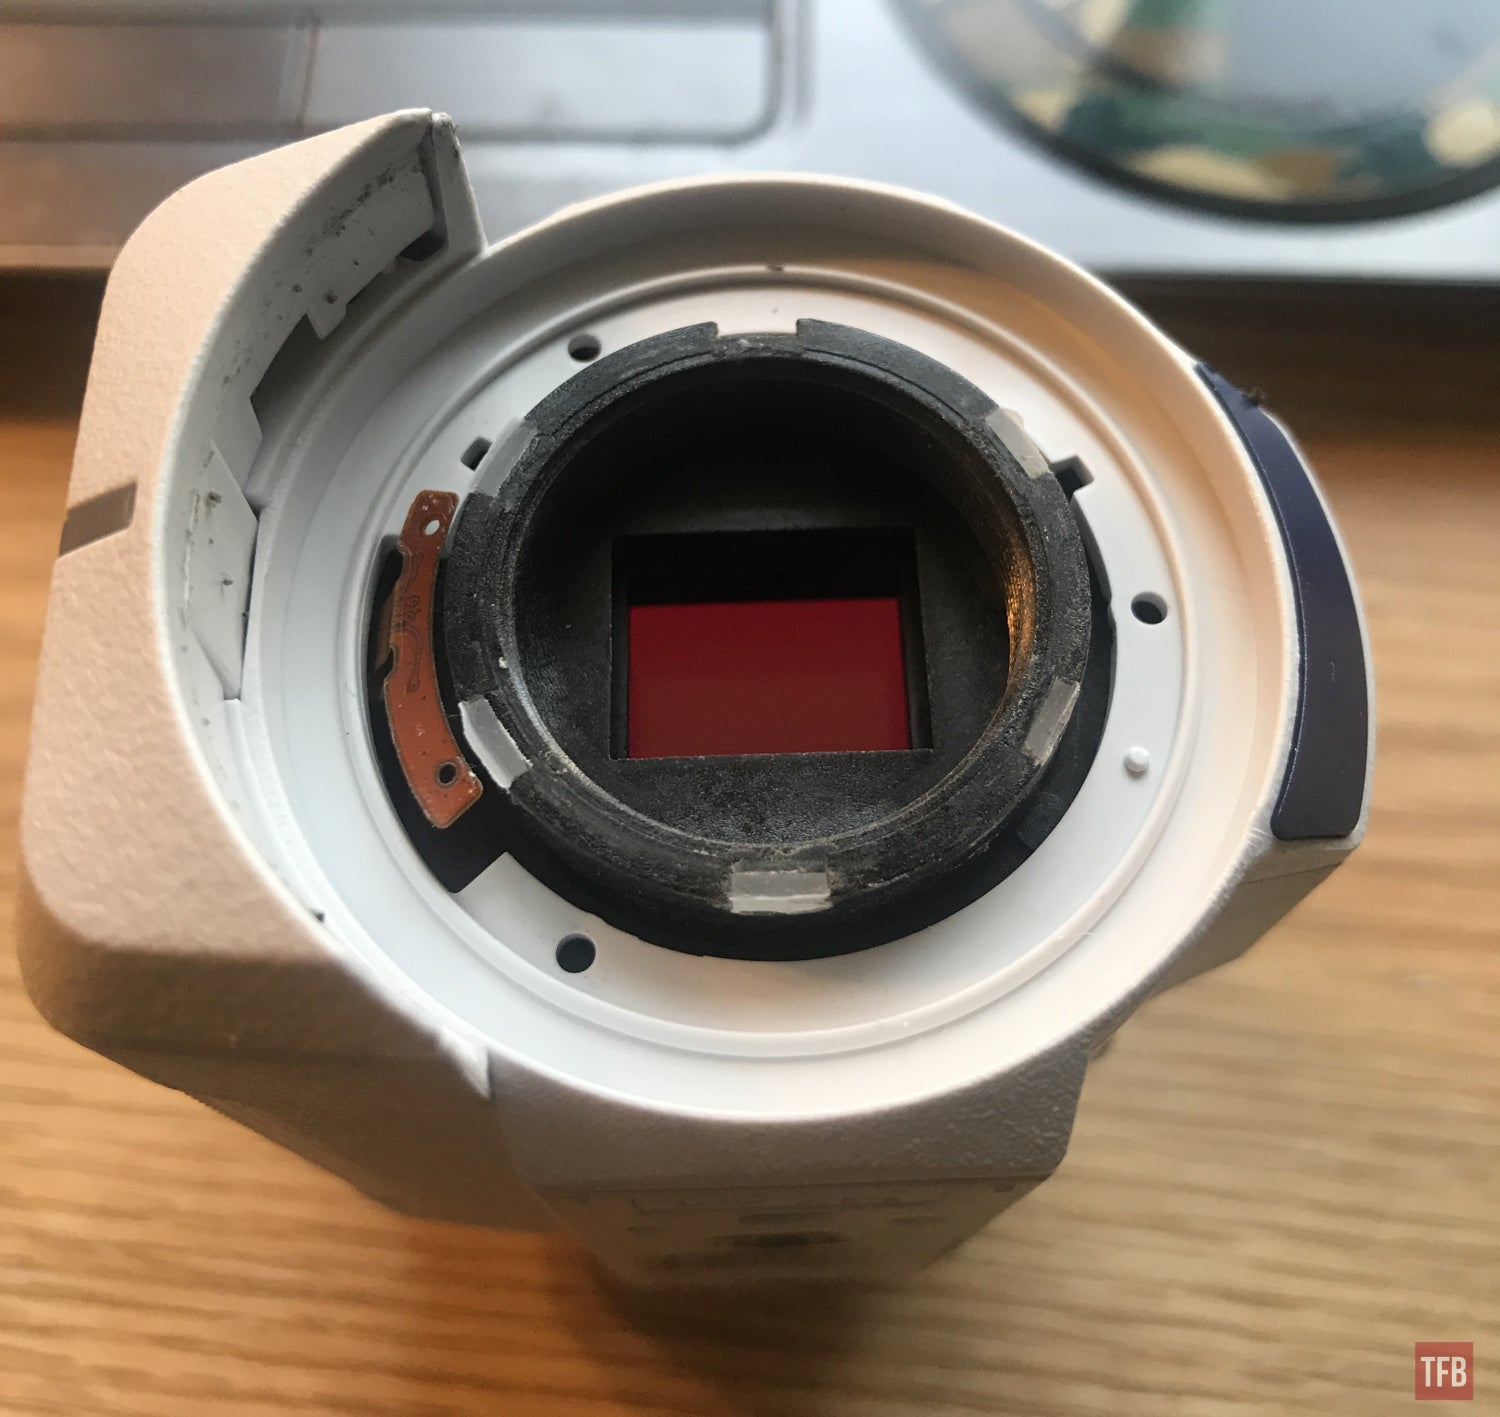
Same goes for accessing the 4 screws securing the lens and sensor assembly to the main body. Pop the cover on either side of the lens assembly, one is under the forward facing green colorized plastic piece, the other is under the forward facing black plastic cover surrounding the red indicator LED. Once removed you should have access to the four screws securing the sensor and lens assembly from the main body. Remove those 4 securing screws and gently separate. From there you’ll want to unplug the IR filter slide, wide plug with black and red power wires. Then disconnect the sensor by popping up the back flip retention connector , you’ll likely need to peel back some insulating tape to access. Now move on to doing the same on the single action lock for mode selectors transistor array. Once you get this far in, the rest will rather intuitive.
The next step is to remove this small panel to get access to the aperture pin. This white ring switches from day mode to night mode. It has a small pin that you need to pull out. This pin is linked to the aperture control ring on the actual lens. When you rotate the selector ring the Aurora switches from day, twilight and then night mode.

This pin indexes a hole in the factory lens so as you turn the selector ring, it physically opens or closes the lens aperture.
Next, you need to pop off the plastic housing covers to get access to the screws.
The small metal tab is what indexes your selector ring. It pushes against the white selector ring.
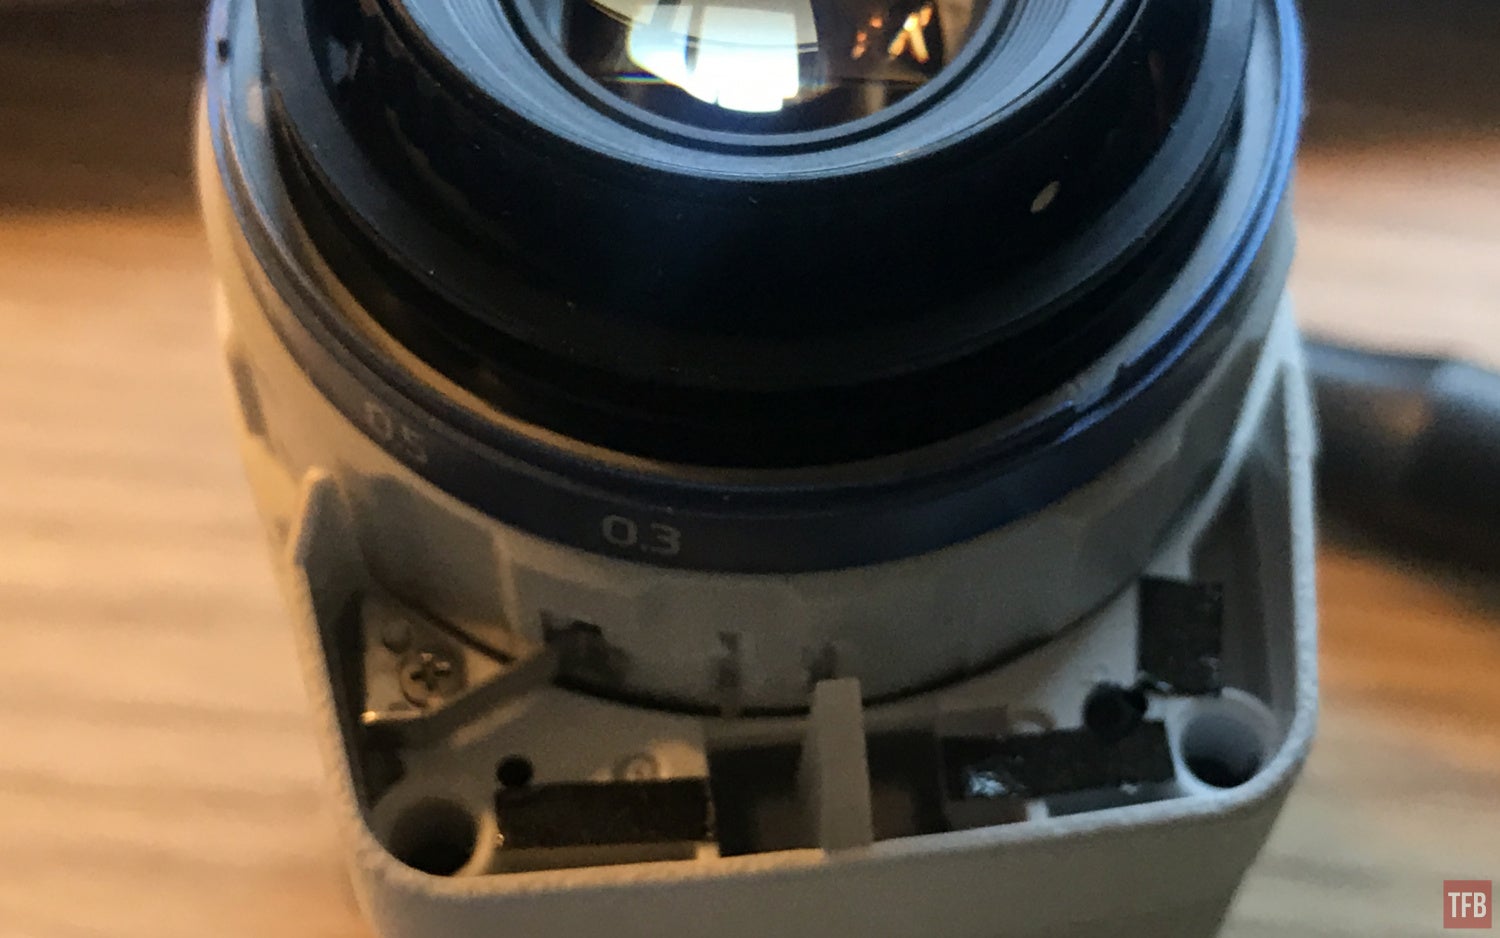
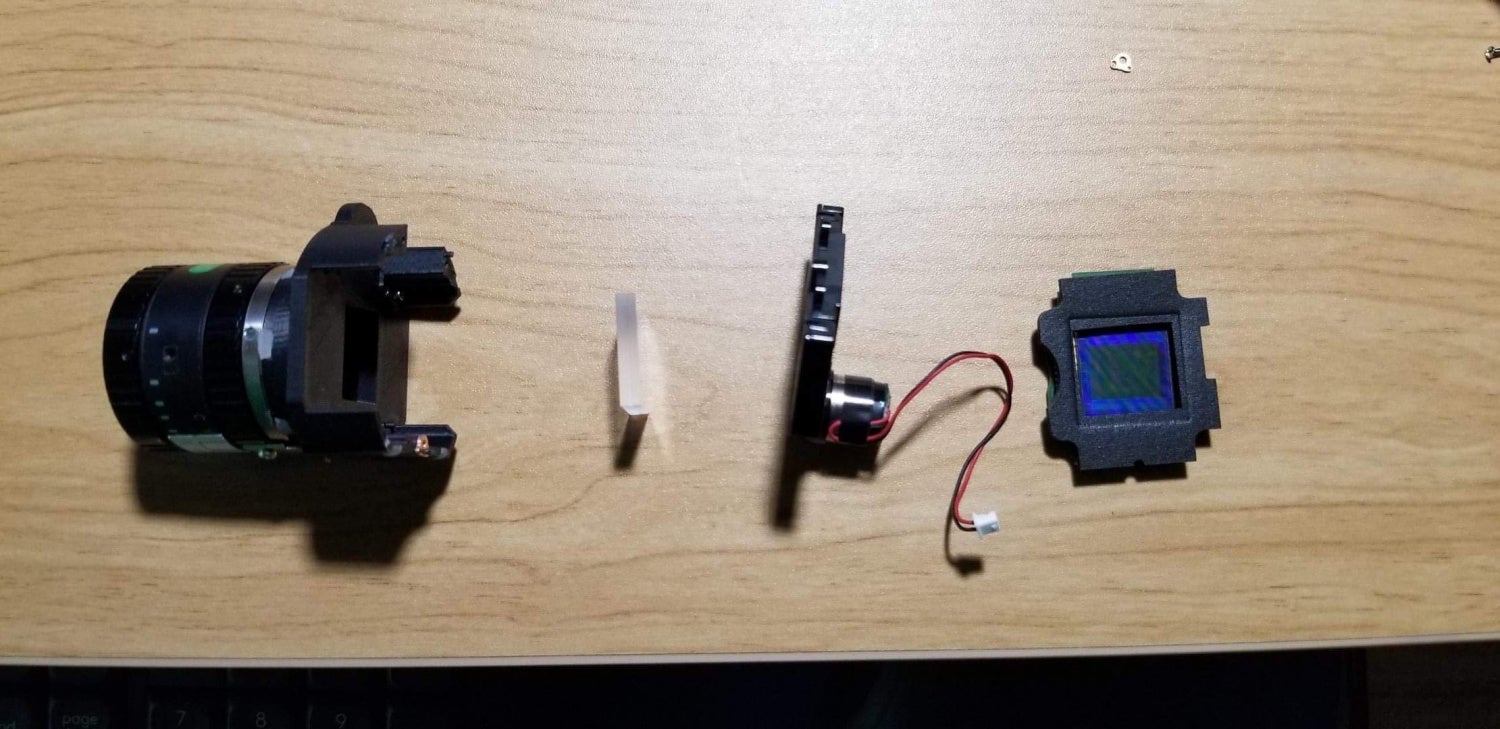
Next, you remove the two screws in the corners and pop off the color plate on the opposite side and unscrew the two screws underneath. Now the front assembly must be separated from the modified aurora body. This assembly contains the lens, IR slide filter and CCD sensor. You will have to unplug some wires.

There is some insulation tape that you need to peel back, At the back of the sensor are four small screws. Remove these and you can pull the factory lens and sensor out the back of the modified aurora front assembly.
The factory lens is a 16mm Computar CCTV camera lens. It is C-Mount but it has 6 spots of epoxy to hold the lens to the Ultem mounting flange (the black polymer part with the female threads for the C-Mount lens).
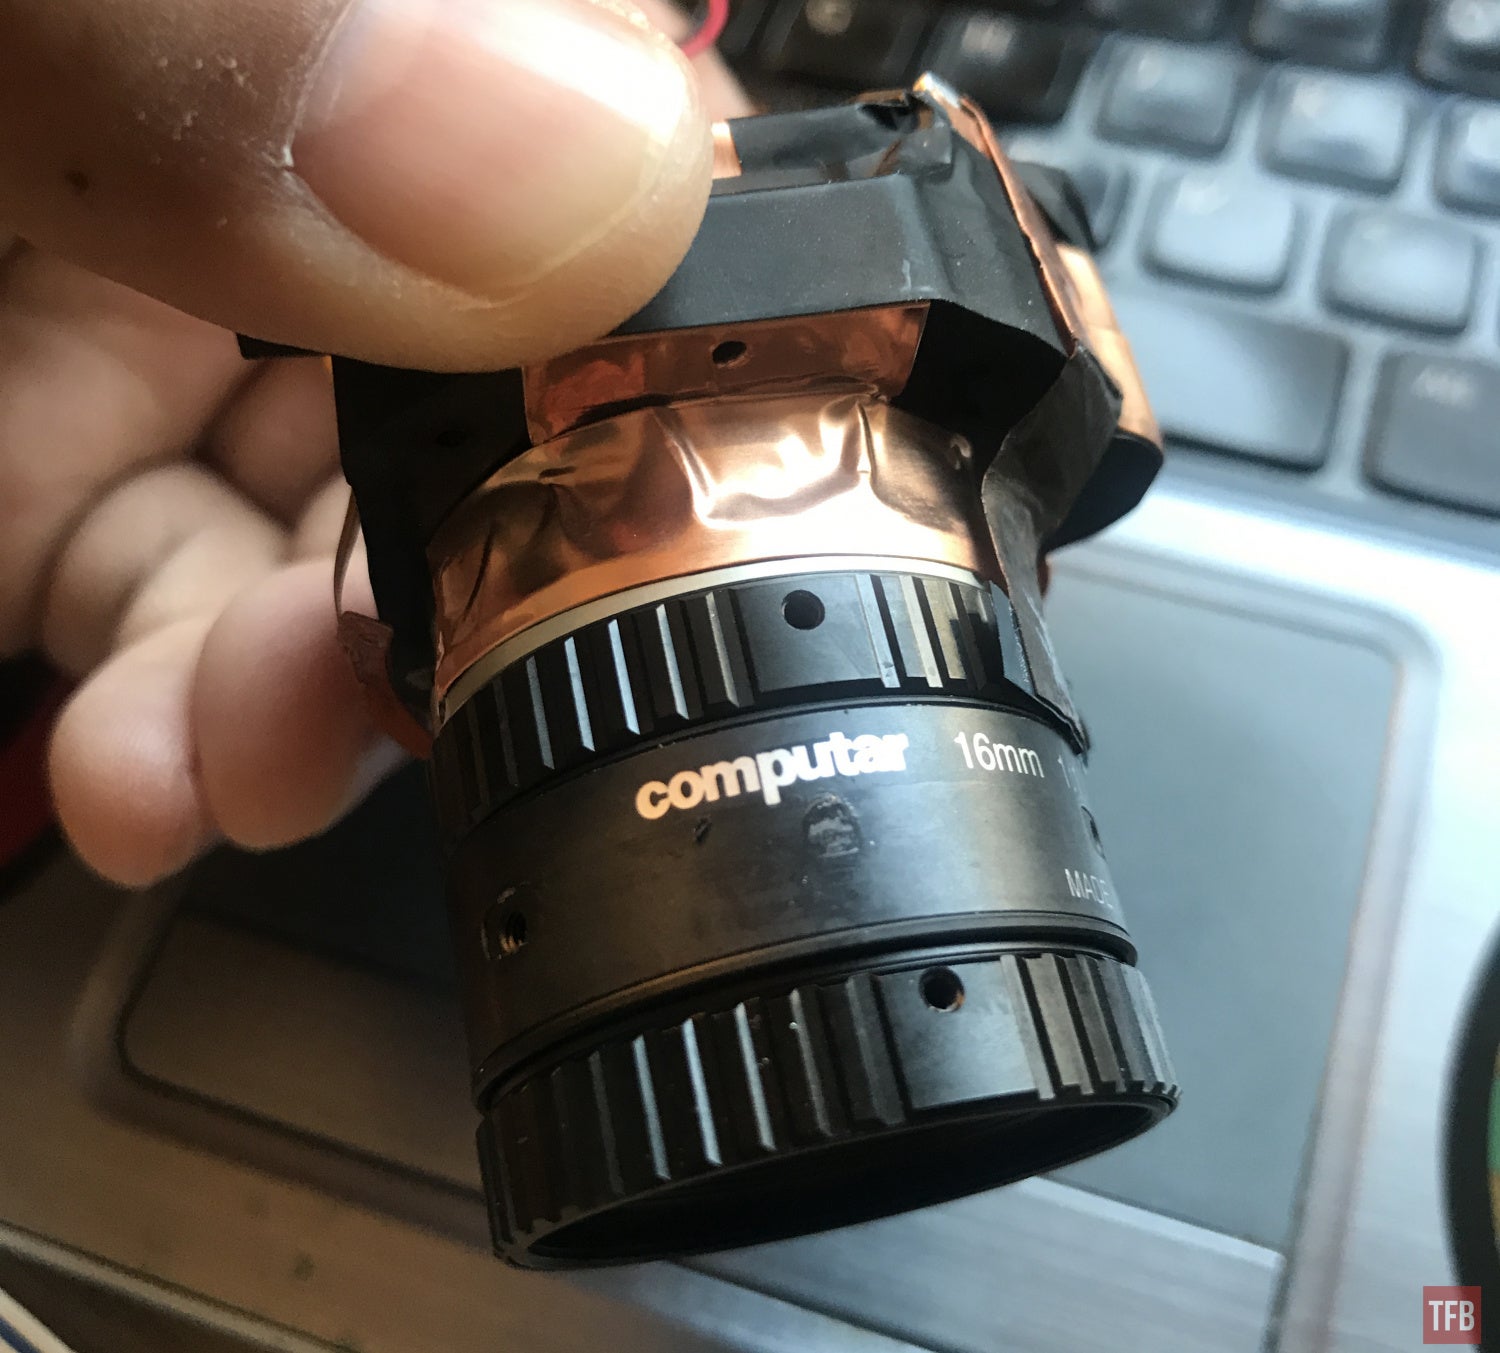
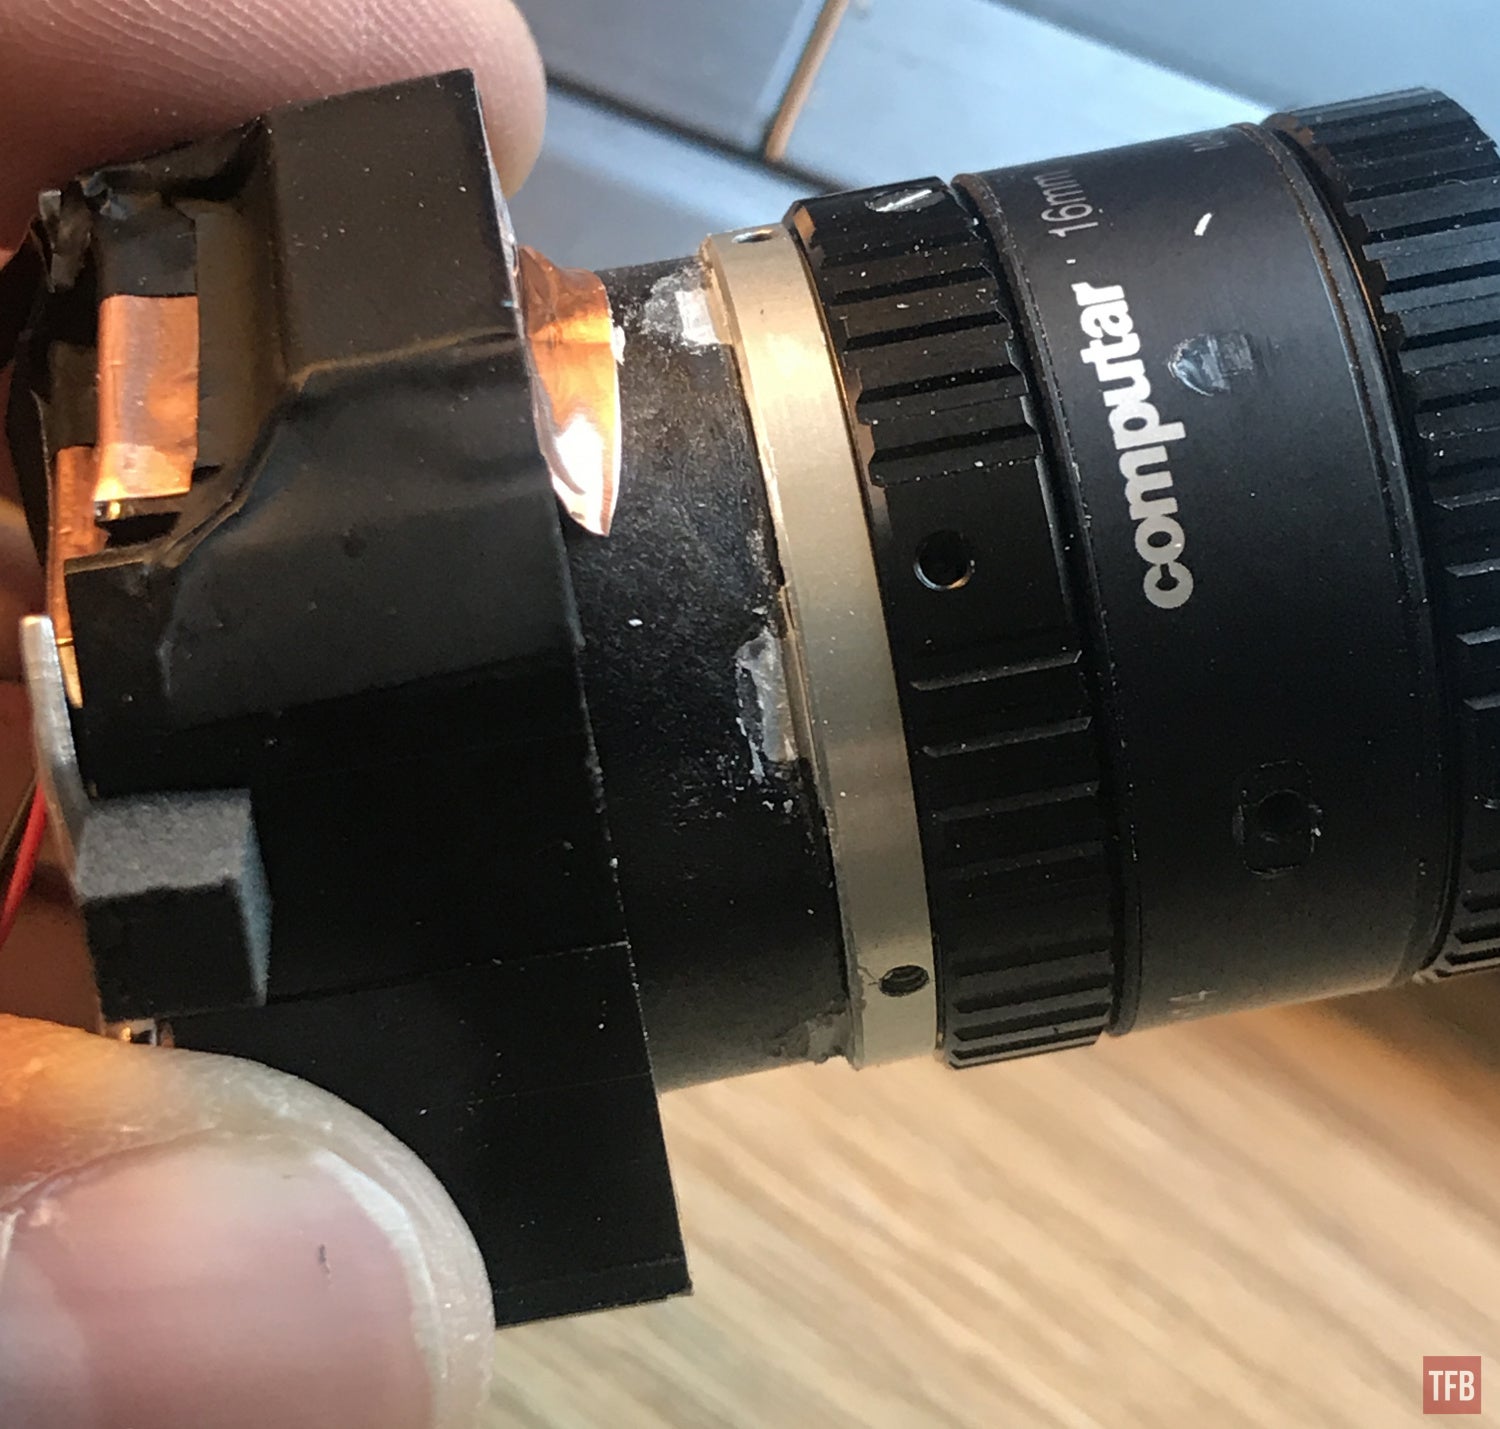
Shave down epoxy to free the factory lens.
Once you remove the lens, just put everything back into the now modified Aurora body.
Now you can use almost any C-Mount lens. I say some because not all C-Mount lenses are the same. Some, like the ENVIS objective lens, protrudes too far rearward and interfere with the IR filter and mounting flange.
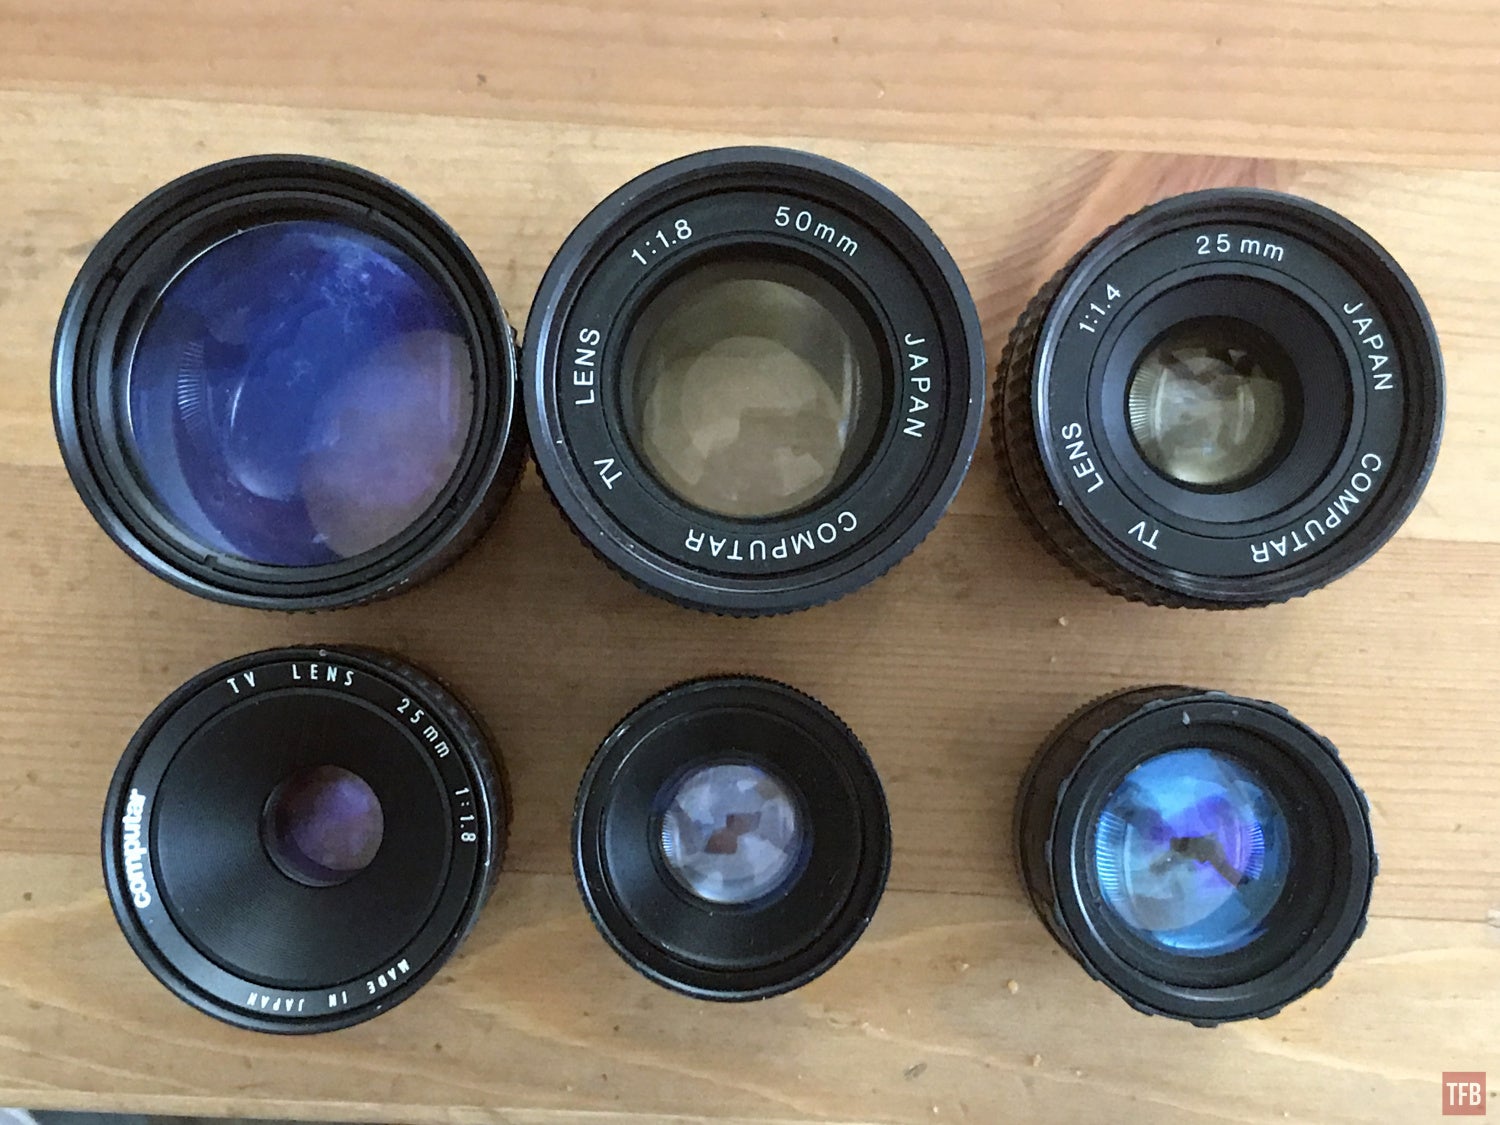
My collection of C-Mount lenses

Modified Aurora with fat 25mm lens
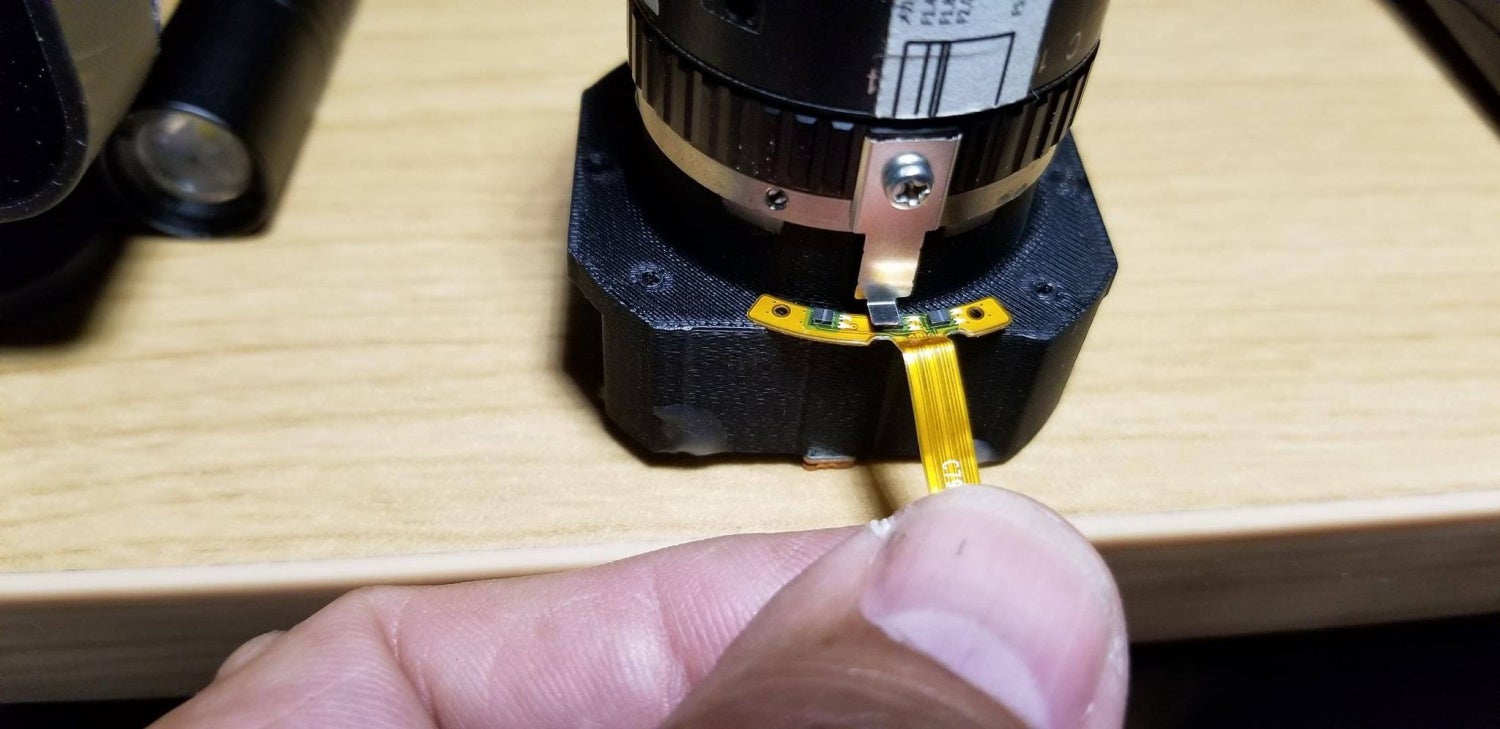
After the modifications I had a problem, I could no longer switch to night mode. When I fired up the modified Aurora, the camera was stuck on Day mode. With CNOCT’s help, I was able to fix the problem. There is a small metal tab that is screwed into the side of the factory Aurora 16mm Computar lens. As you spin the selector ring to switch modes, that metal tab moves. It covers a specific sensor chip, you can see there is one on either side of the metal tab in the photo below. The metal tab is covering up the middle chip so it is in twilight mode. That metal tab interacts with the small ribbon you see below. When that metal tab swings over one of those sensors, it will trigger the camera into changing modes. Since I removed the factory lens, I no longer have a metal tab to interact with that ribbon of sensor chips. So in order to trick the Aurora, I used aluminum tape. I cut a small strip and covered up the sensor to the far left.
Another way to achieve this would be to remove the IR slide filter completely. It is the piece with the red and black wire coming out of it. As mentioned earlier, some C-Mount lenses, like the Envis objective lens, protrude too far rearward. They physically hit the black Ultem polymer material and the IR filter. CNOCT said if I want to use my Envis lens like he did, then I would have to remove the IR filter and Dremel the mounting flange (black polymer Ultem part) so the lens can fit through it.
Modified Aurora Thermal Fusion
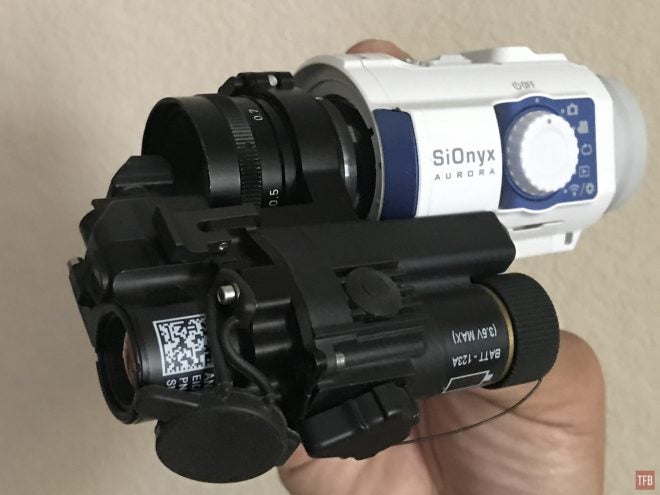
What caught my attention the most from CNOCT were these photos. CNOCT managed to put what looks like a PVS-14 style lens on his Aurora (he has at least two modified Auroras). Looking at his photos above his modified Aurora appears to use C-Mount style lenses. Looking closer at the photo below, I deduced that he is using an ENVIS objective lens.

Since CNOCT was able to use the ENVIS lens, he could attach the mount for a PAS-29 COTI.
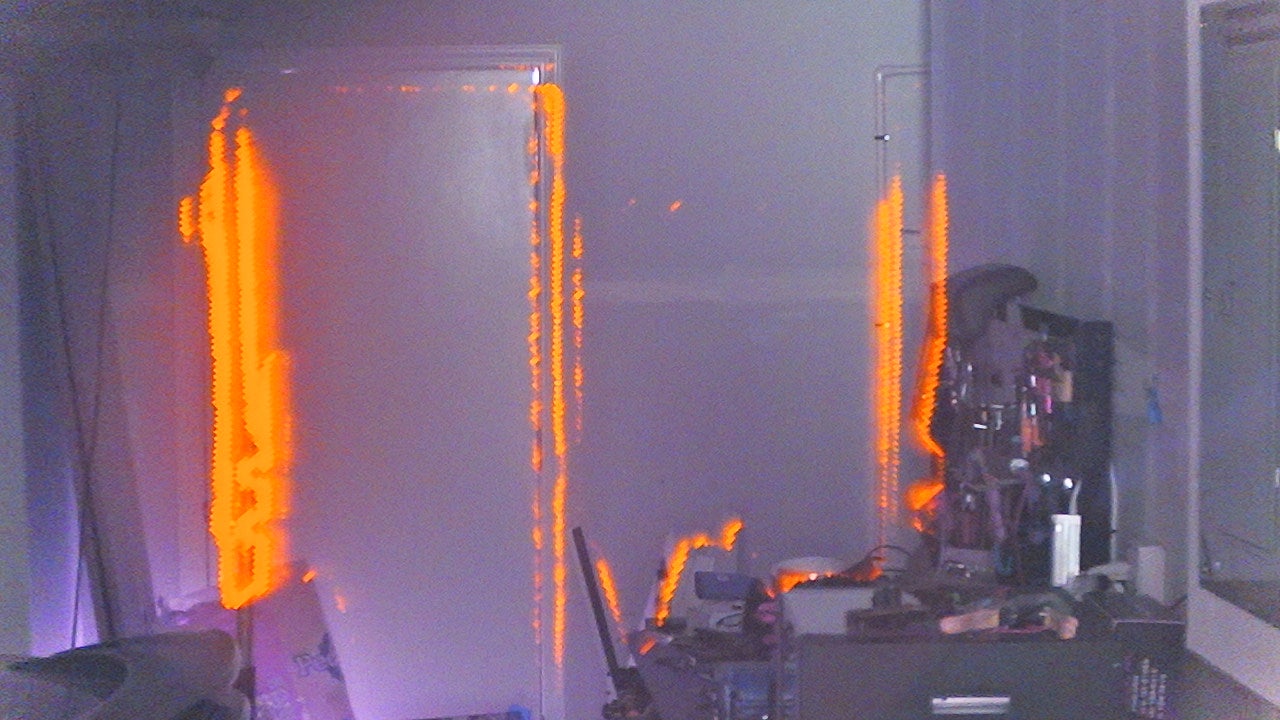
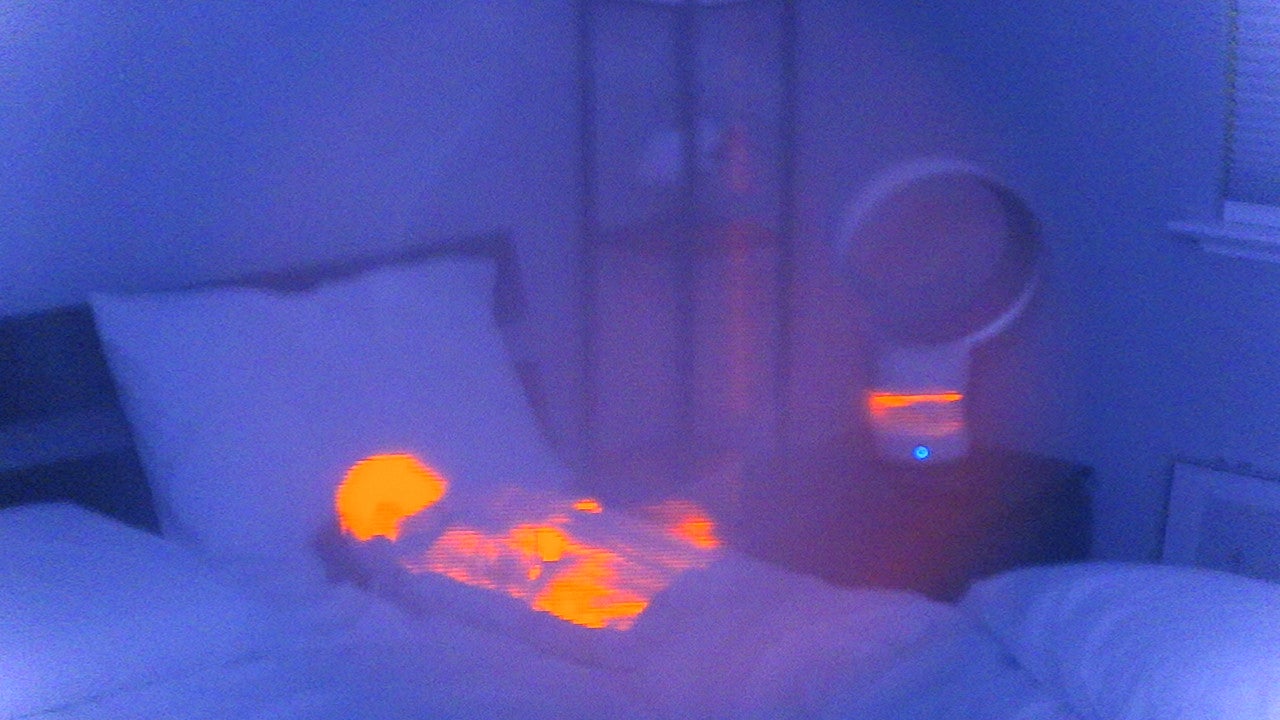
If you recall, this is what typical analog night vision thermal fusion looks like through white phosphor night vision.

The COTI actually produces an orange image but night vision is monochromatic. The thermal image is inputted via a fiber optic periscope and displayed into the objective lens of analog night vision devices.
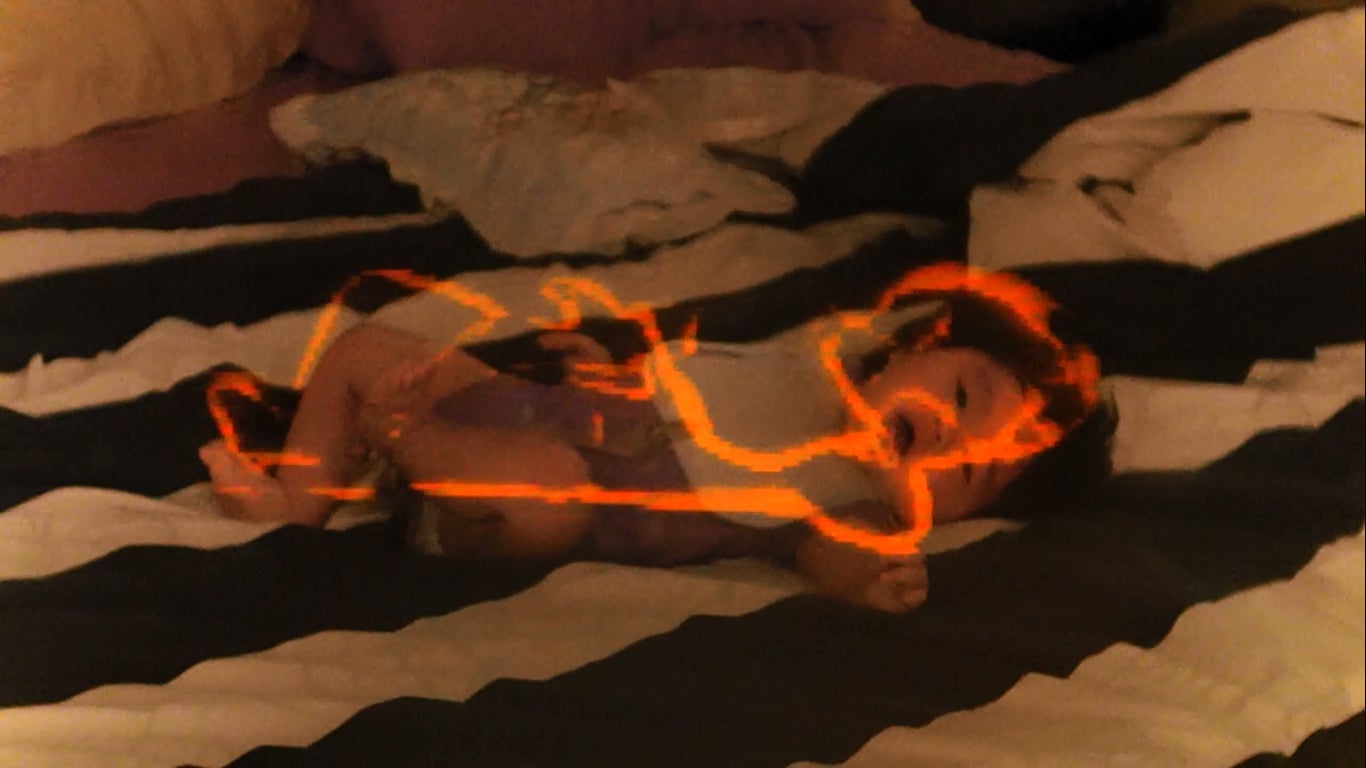
So what does digital color night vision fusion look like? It looks like this. The video is by CNOCT.
Since the SiOnyx Aurora can see color, the modified Aurora can properly display the orange image produced by the COTI.
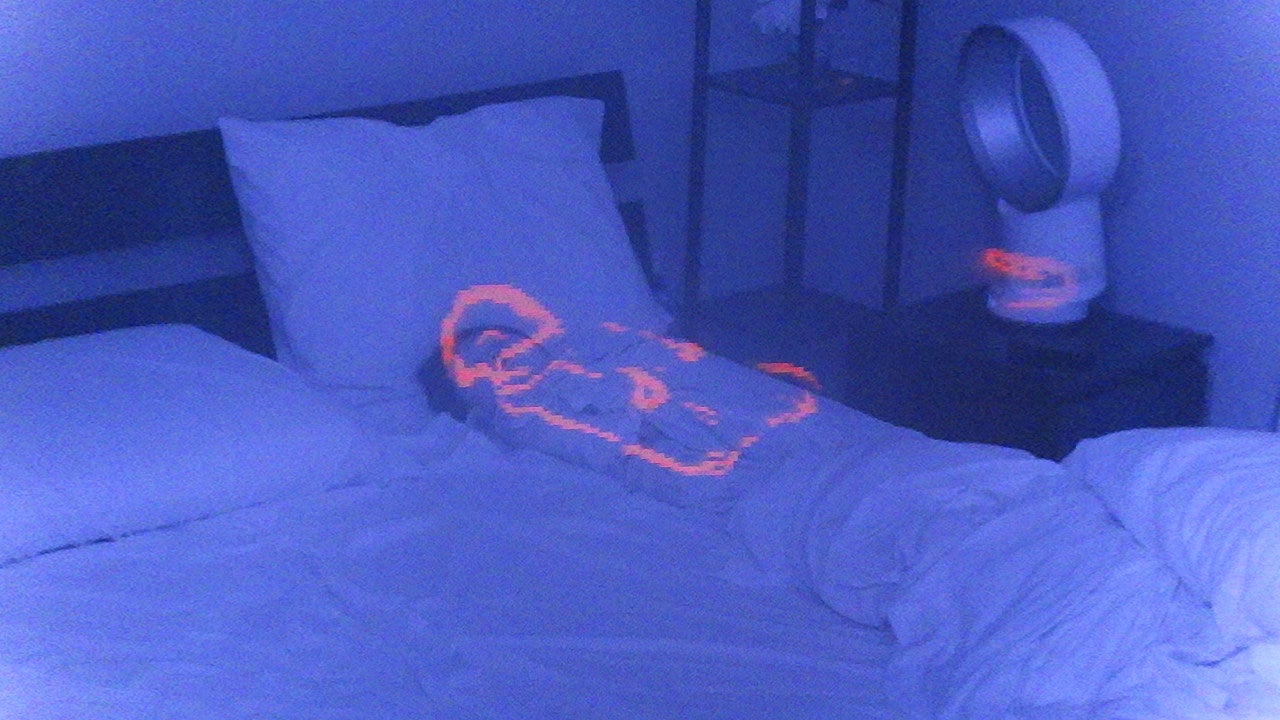
Here is a video I shot with my modified Aurora.
Just like Analog Thermal Fusion, the COTI objective lens is offset from the modified Aurora lens so subjects that are closer to the camera will be offset. The further away is the subject the more the thermal image will line up with the digital night vision.
Edit: Aurora Fusion In Night Corn Maze
Final Thoughts About A Modified Aurora
This modification is not for the faint of heart. I had so many questions and a bit of a learning curve to understand what paths CNOCT was referring to. His instructions were all text and no pictures so it was daunting, to say the least. This modification has some significant drawbacks. The camera is no longer water-resistant and more than likely voided any warranty with SiOnyx. Also, you lose the ability to change from night mode to day mode on the fly. You do gain the benefit of using better lenses. You just need to shop on eBay or places that sell old camera lenses. C-Mount lenses are used for old CCTV cameras and some old 16mm film cameras and can be purchased for relatively cheap. Huge thanks to CNOCT for helping me with the modified Aurora project. Ever since I got a COTI, I had always wanted to try pairing it up with the Aurora but the “lens” was too wide. Well, now the size is no longer an issue.