 Your Privacy Choices
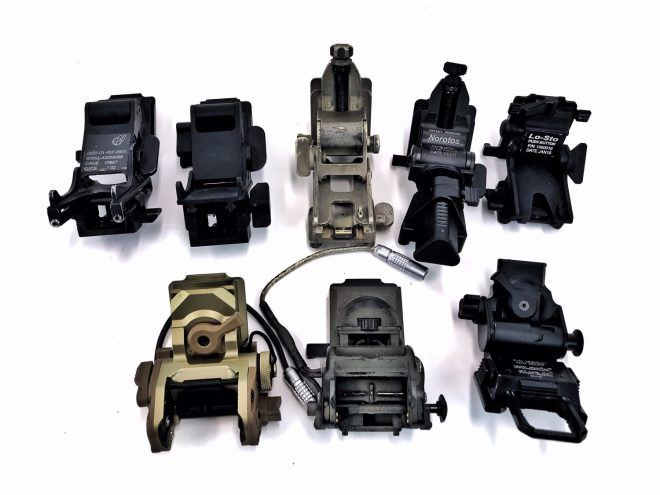
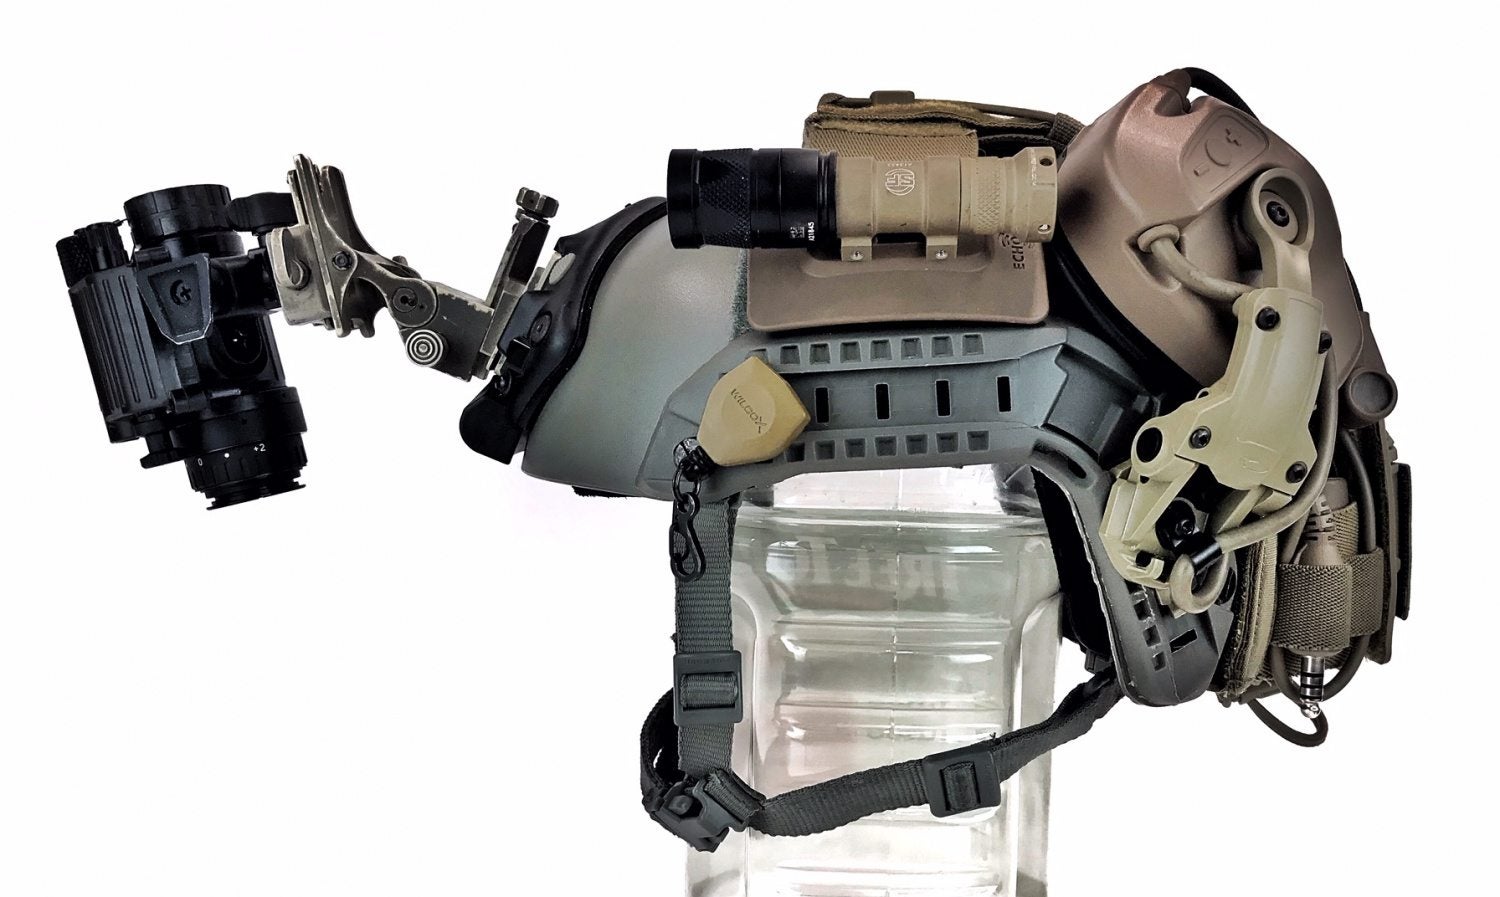
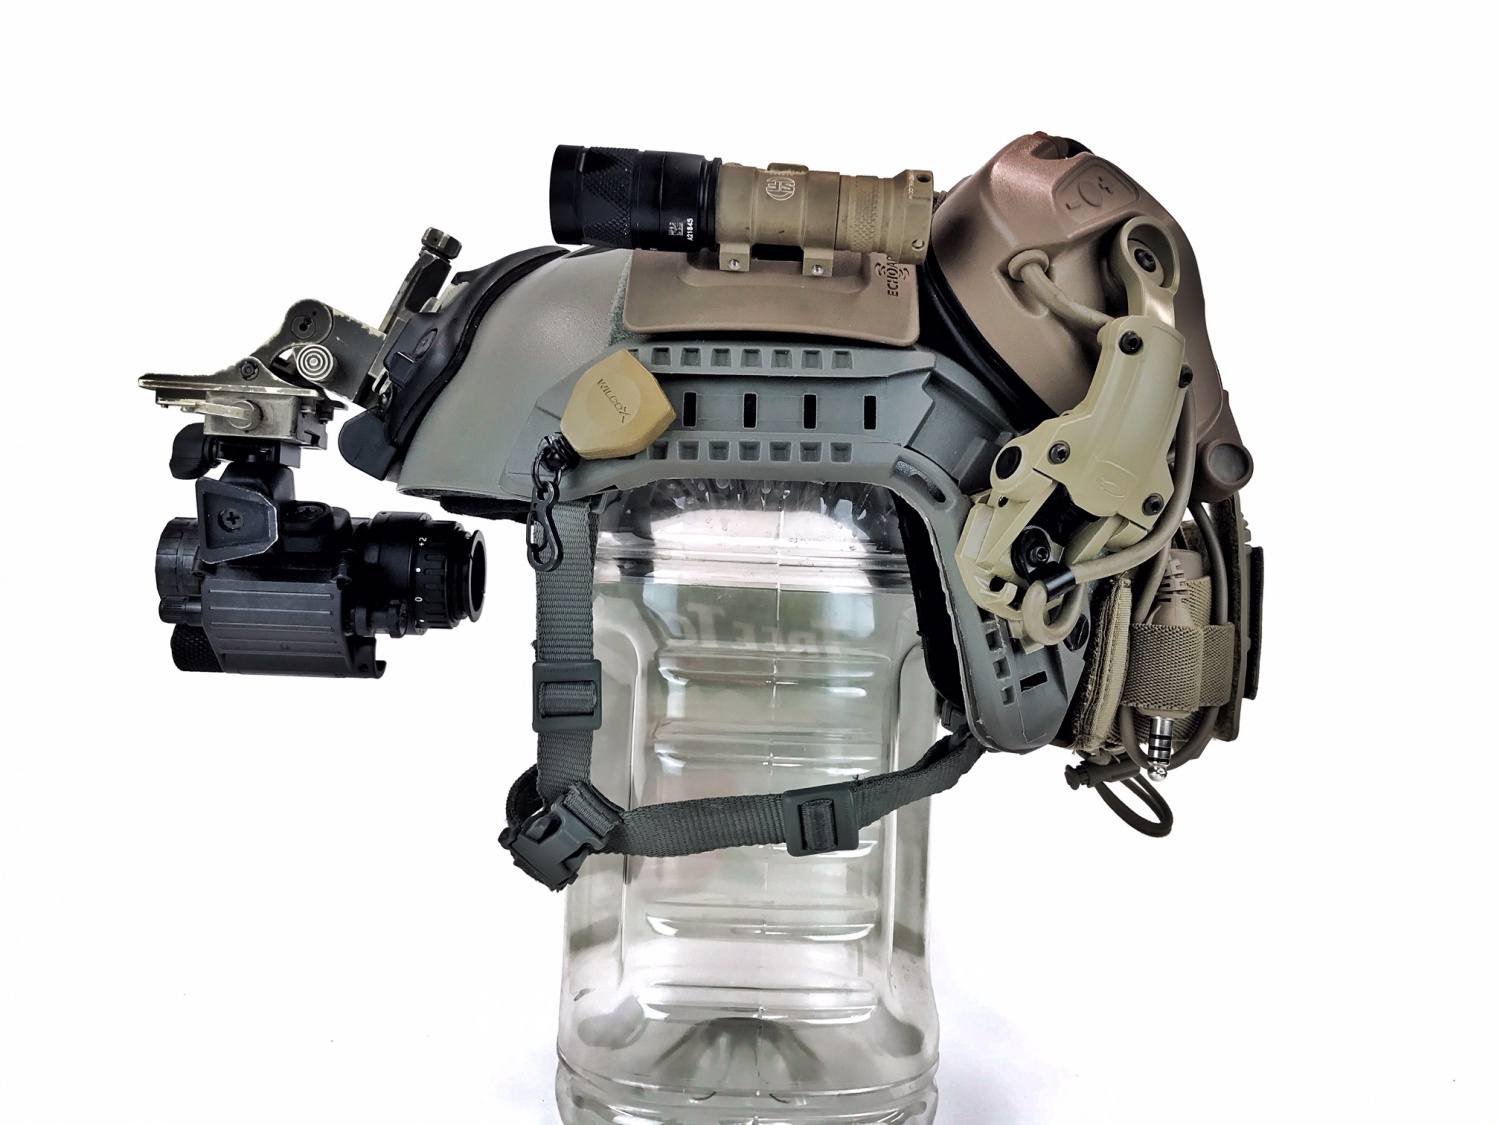
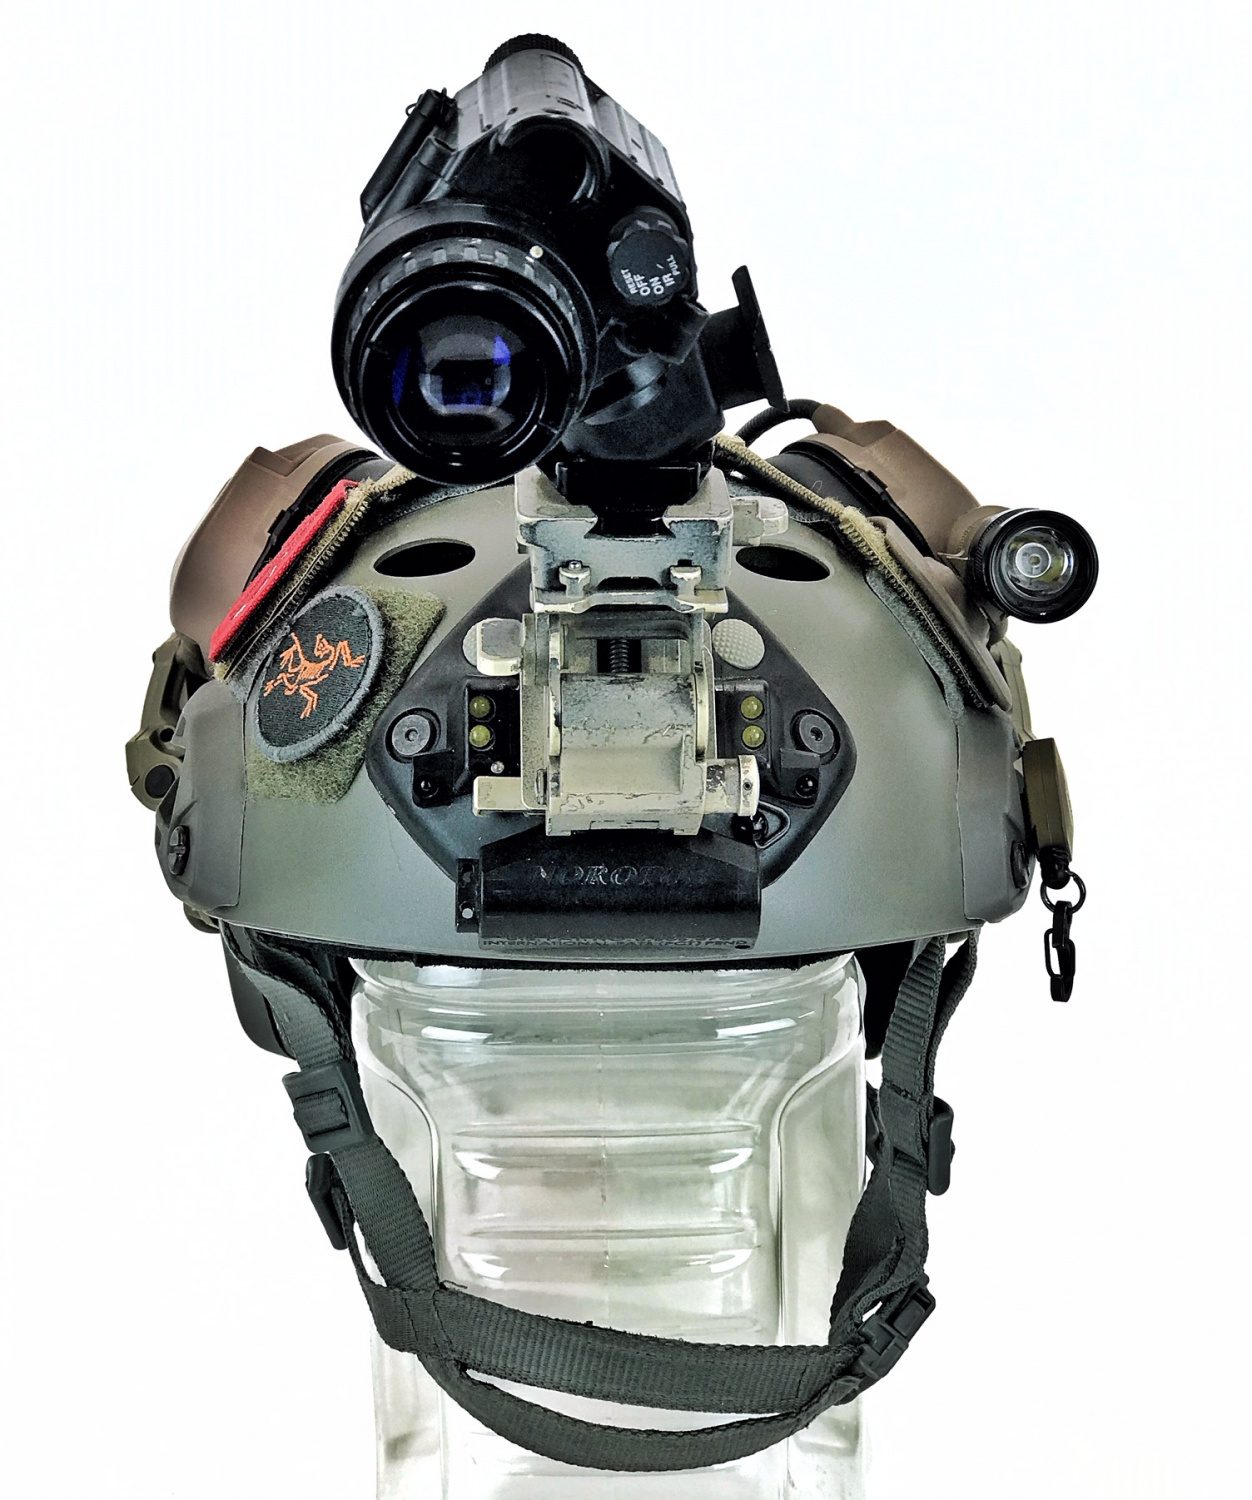
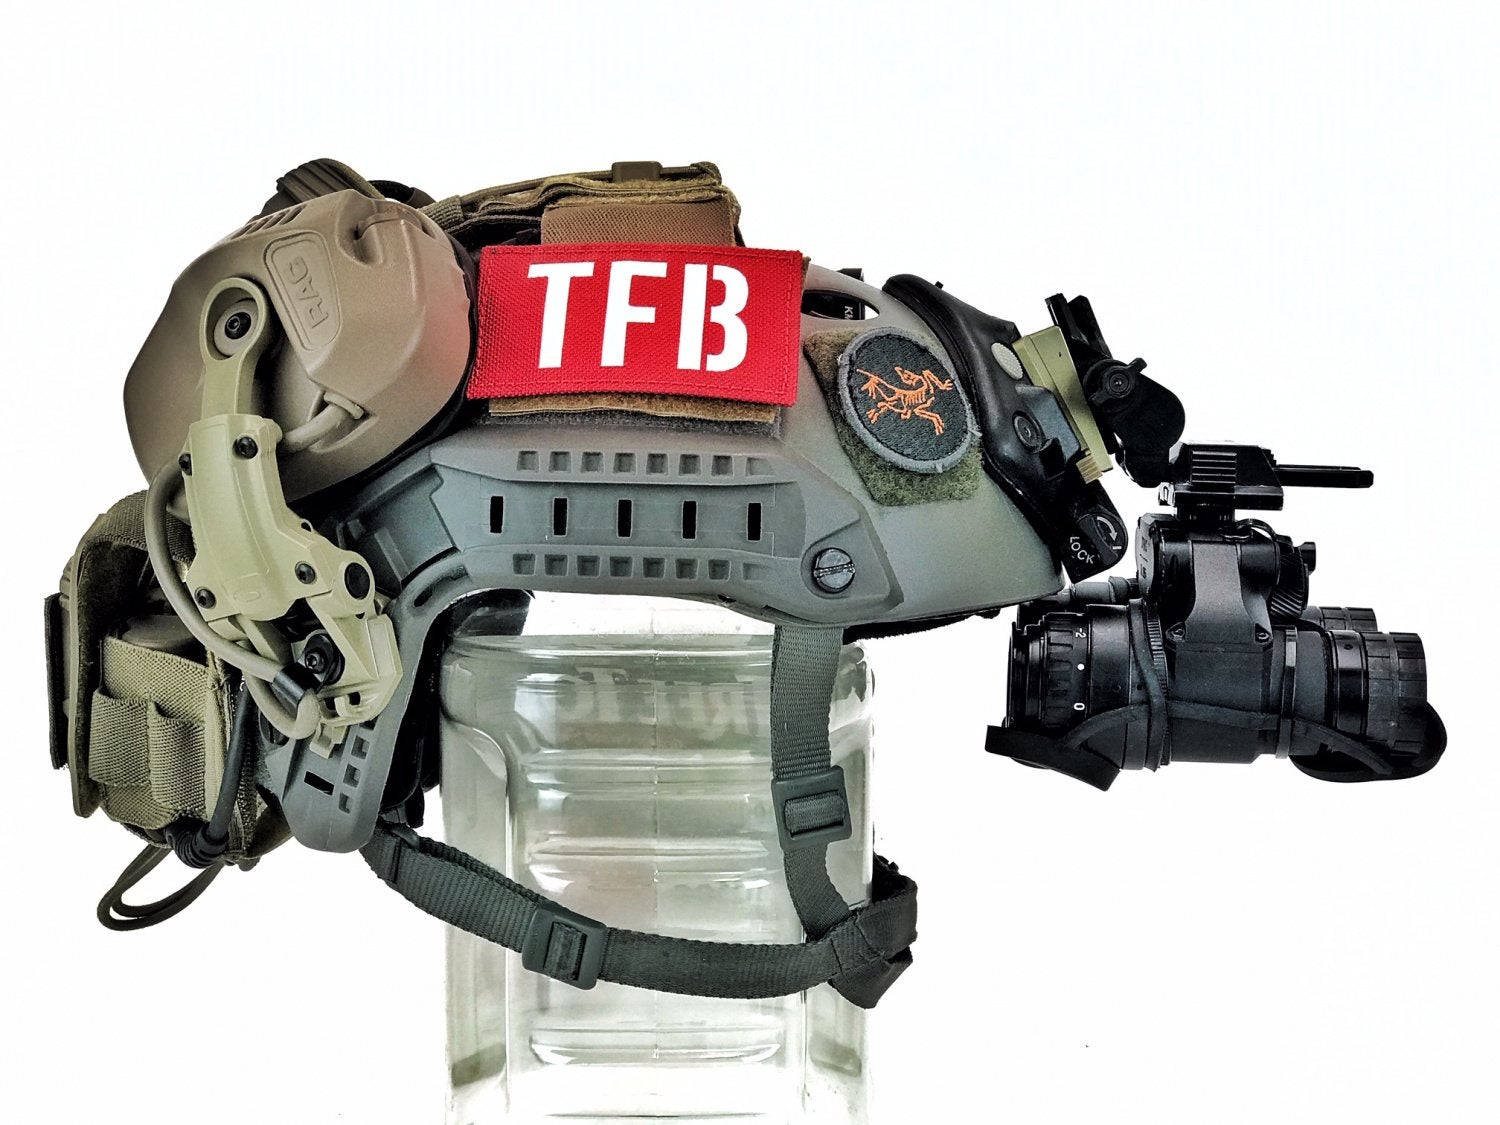
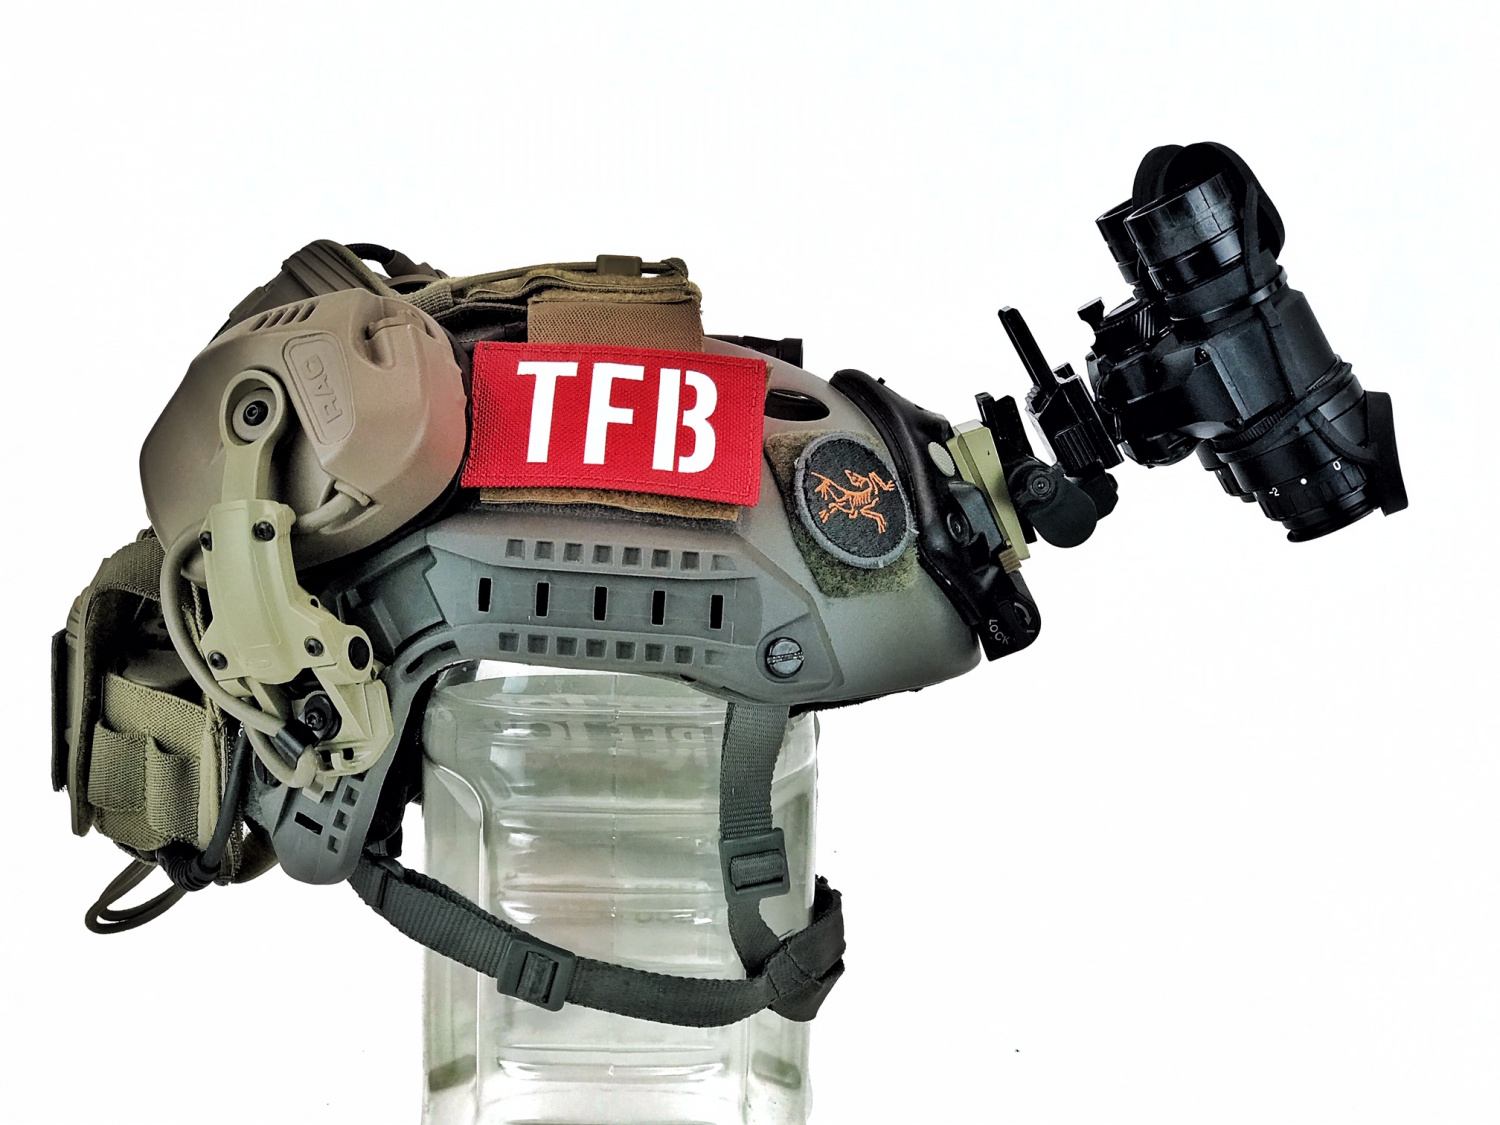
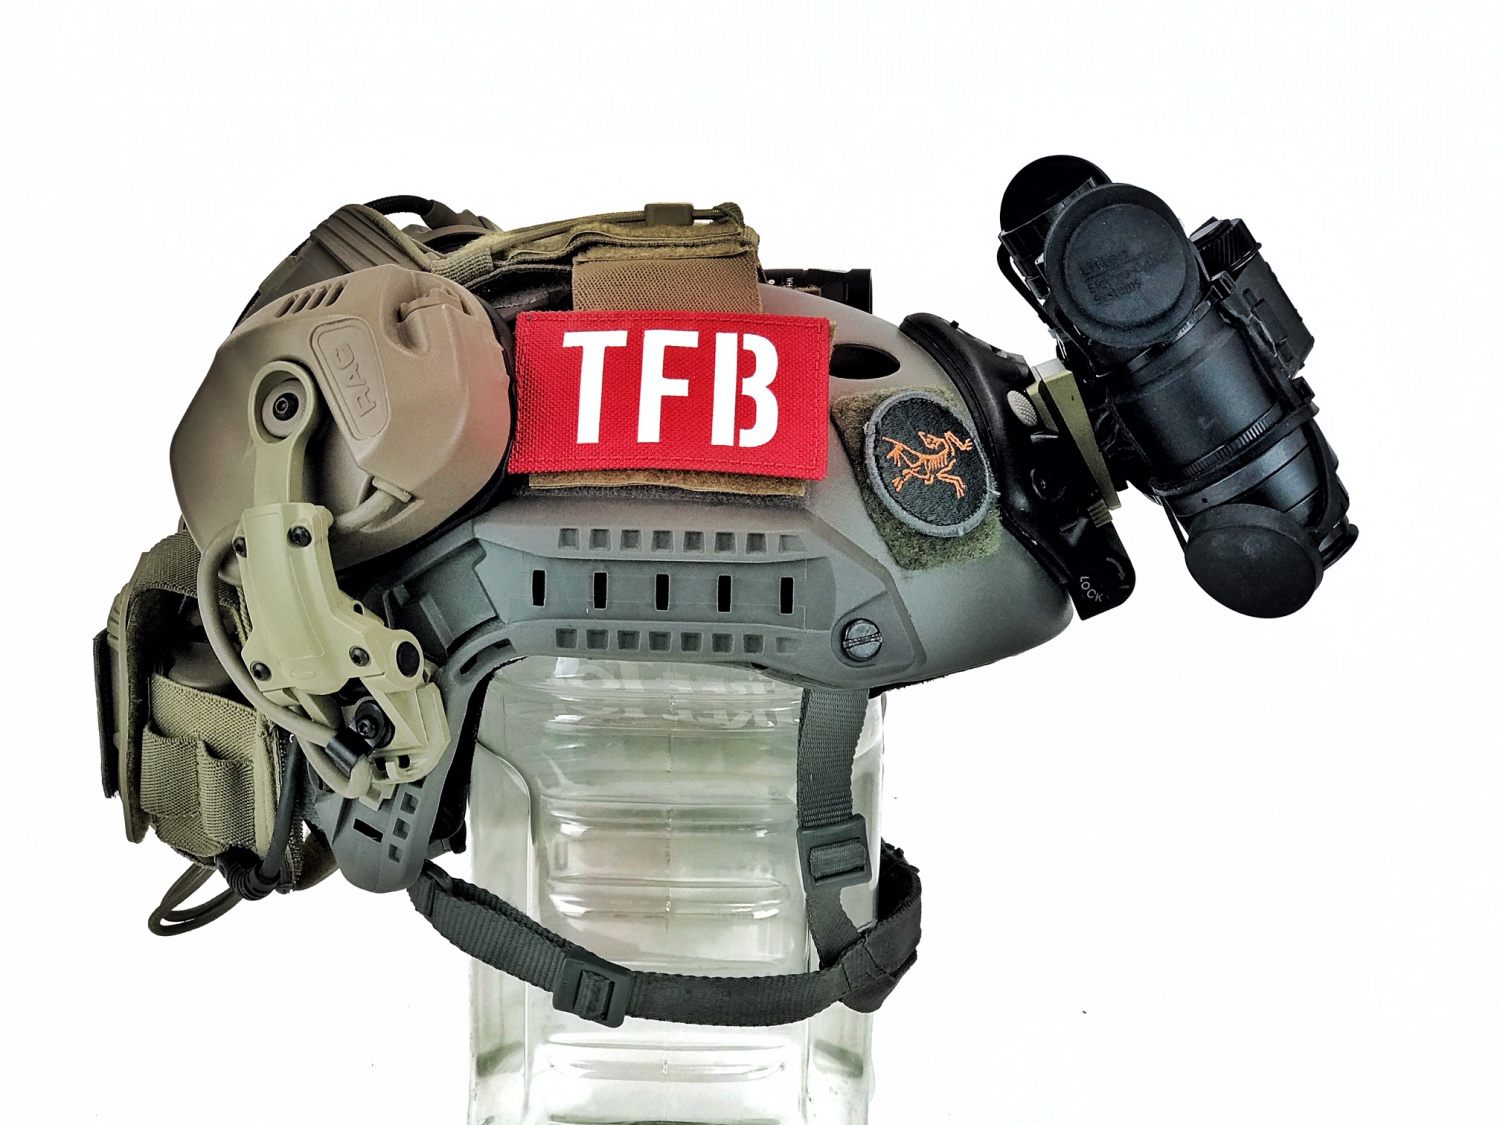
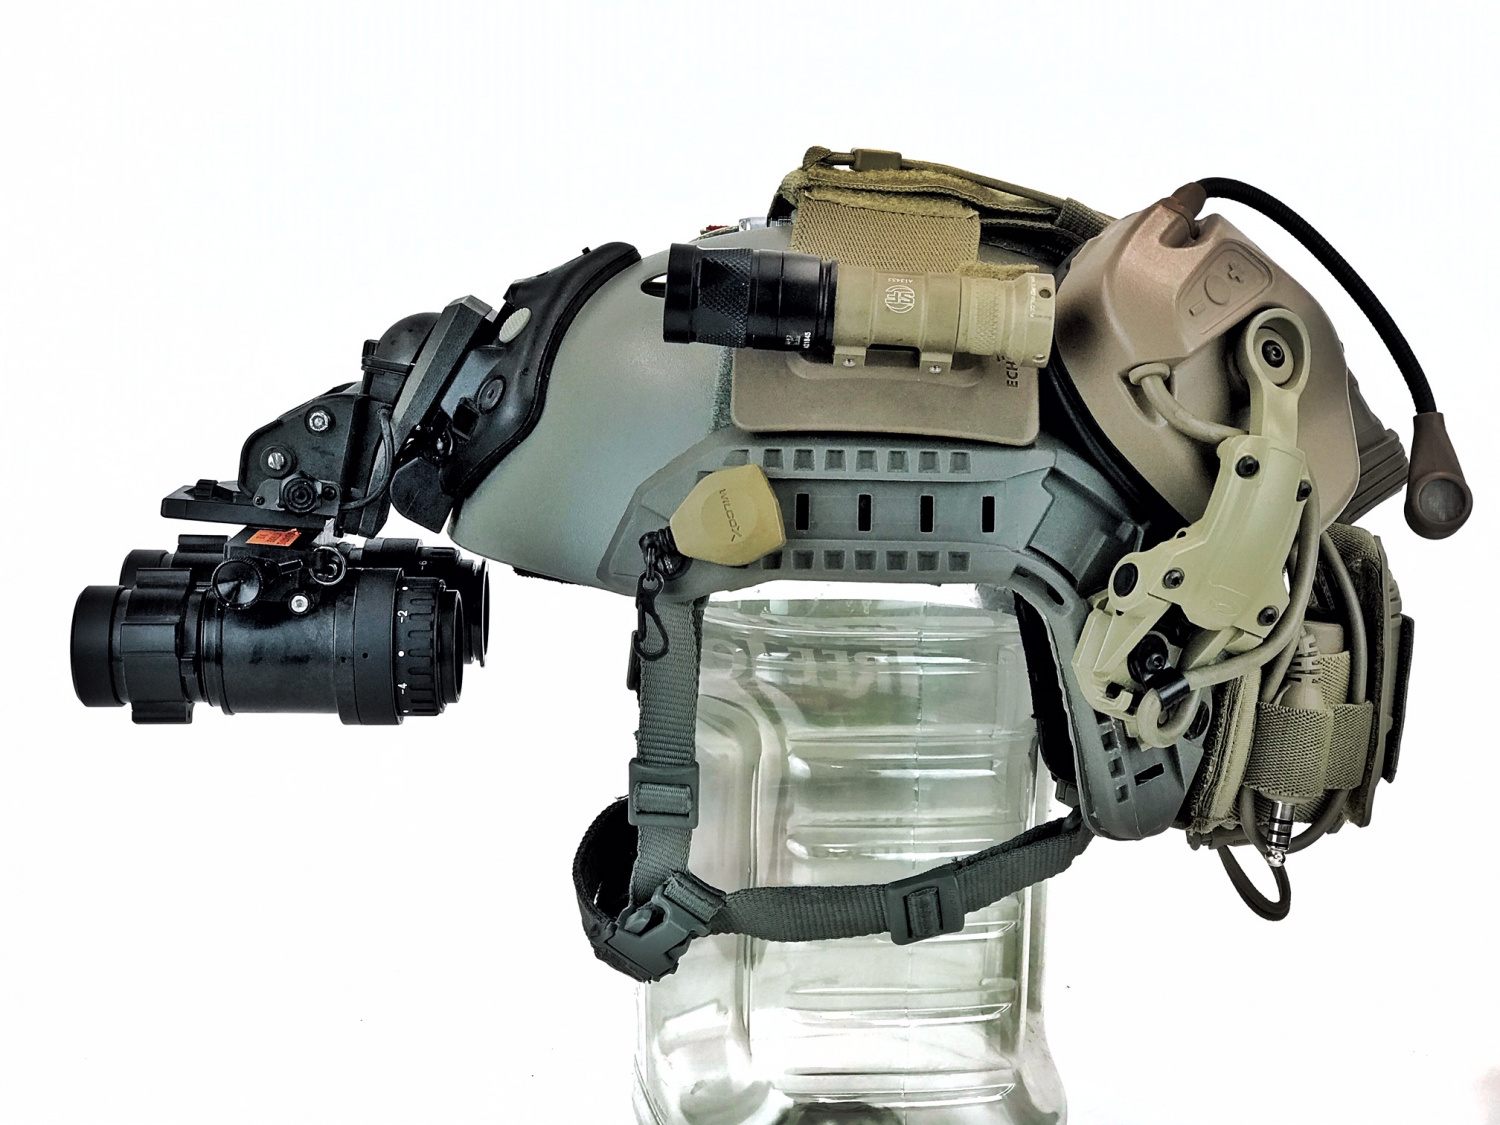
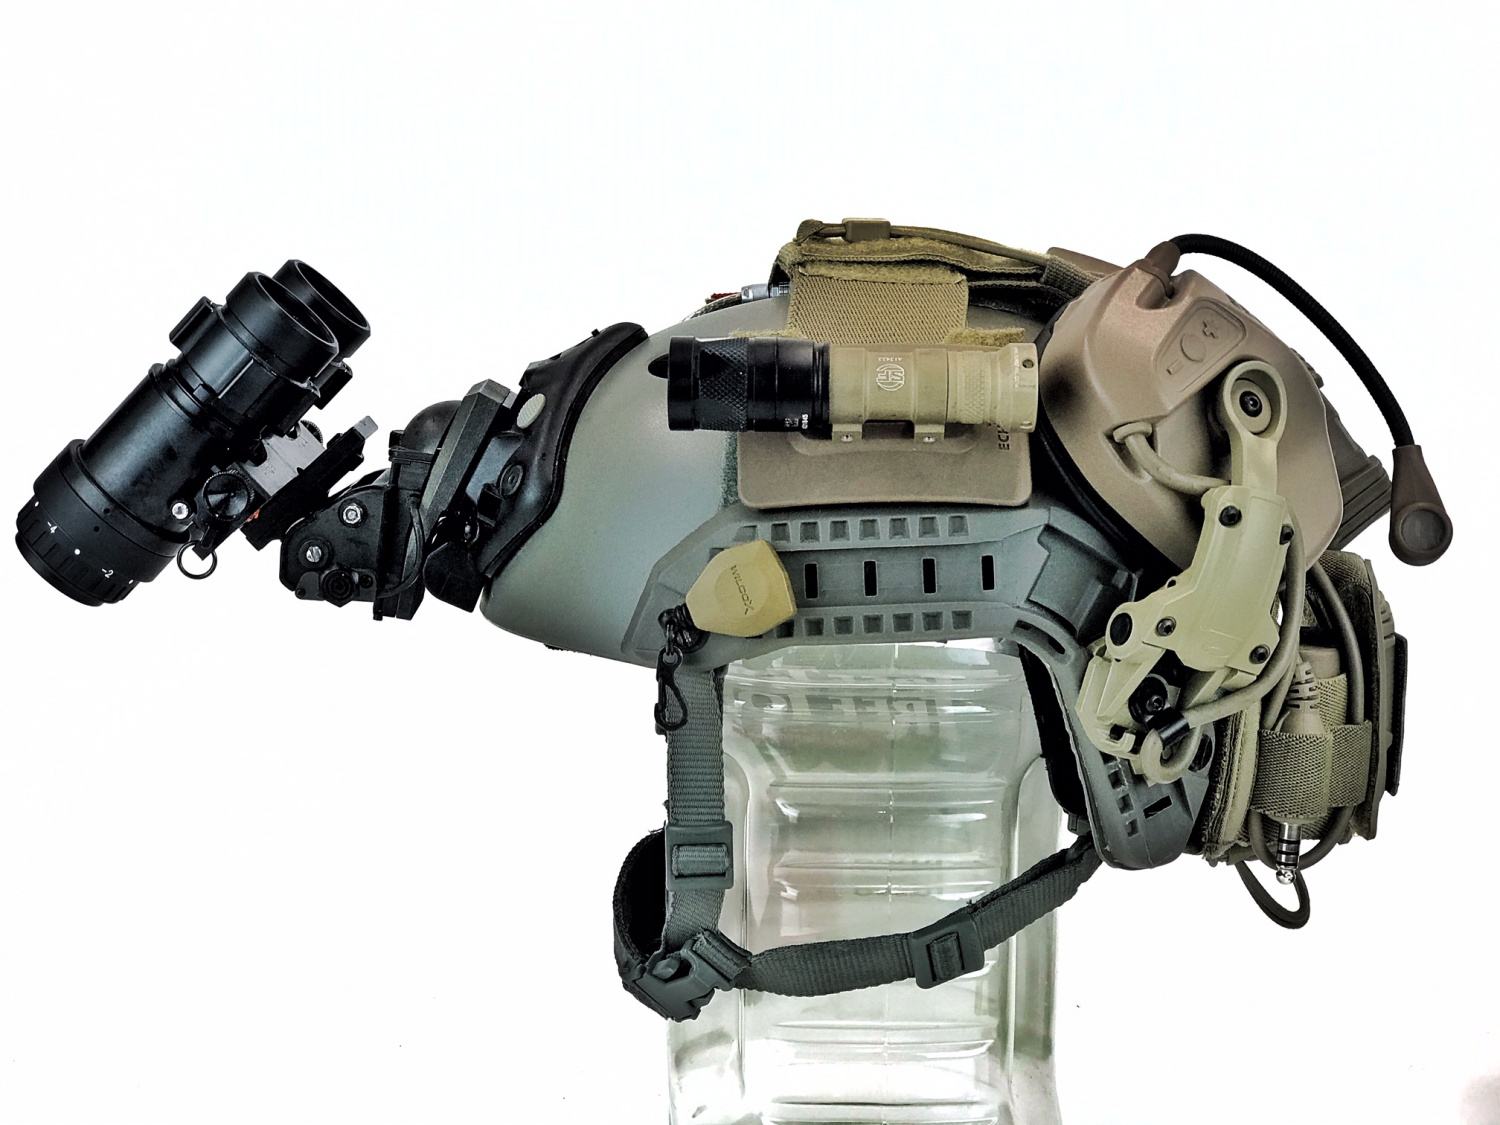
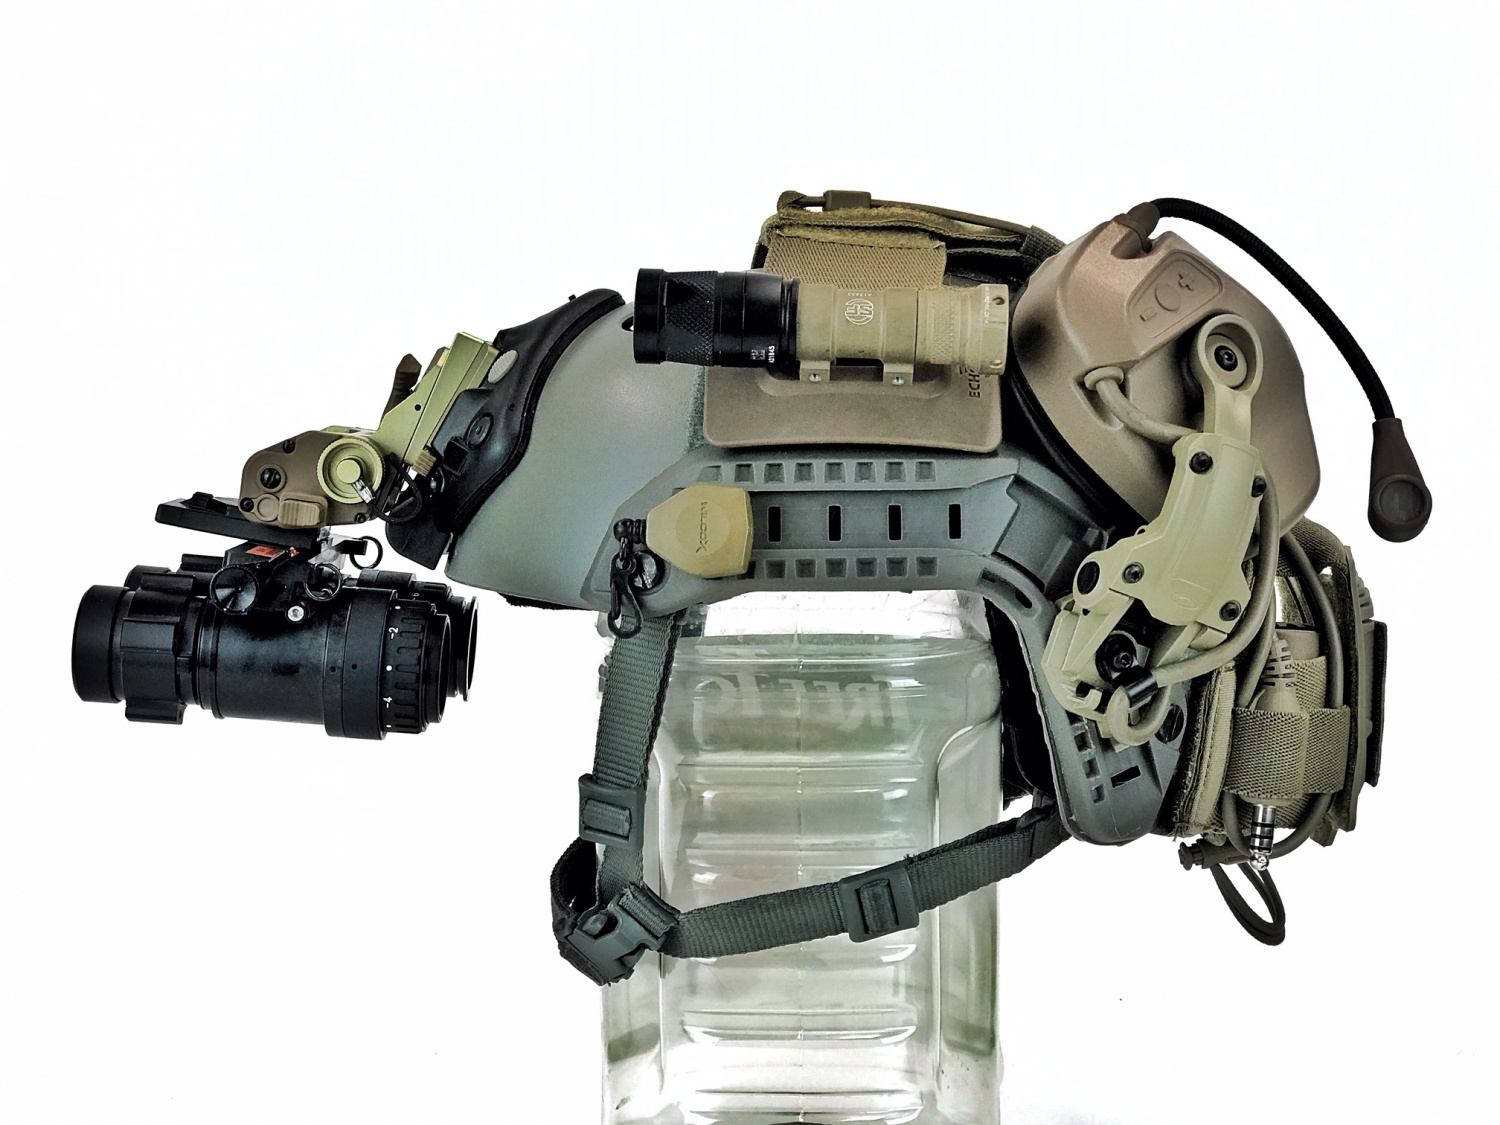
For this week’s edition of Friday Night Lights, we will take a look at the various accessories to attach night observation devices (NODs) for helmet worn applications. There are quite a lot of options. Some are extremely basic while others have a whole host of features to adjust your NODs to your eyes. Let’s take a closer look at the common ones most people use. Get ready for an extremely photo heavy detailed review so sit down and buckle up. Night Observation Devices, Mount Up!
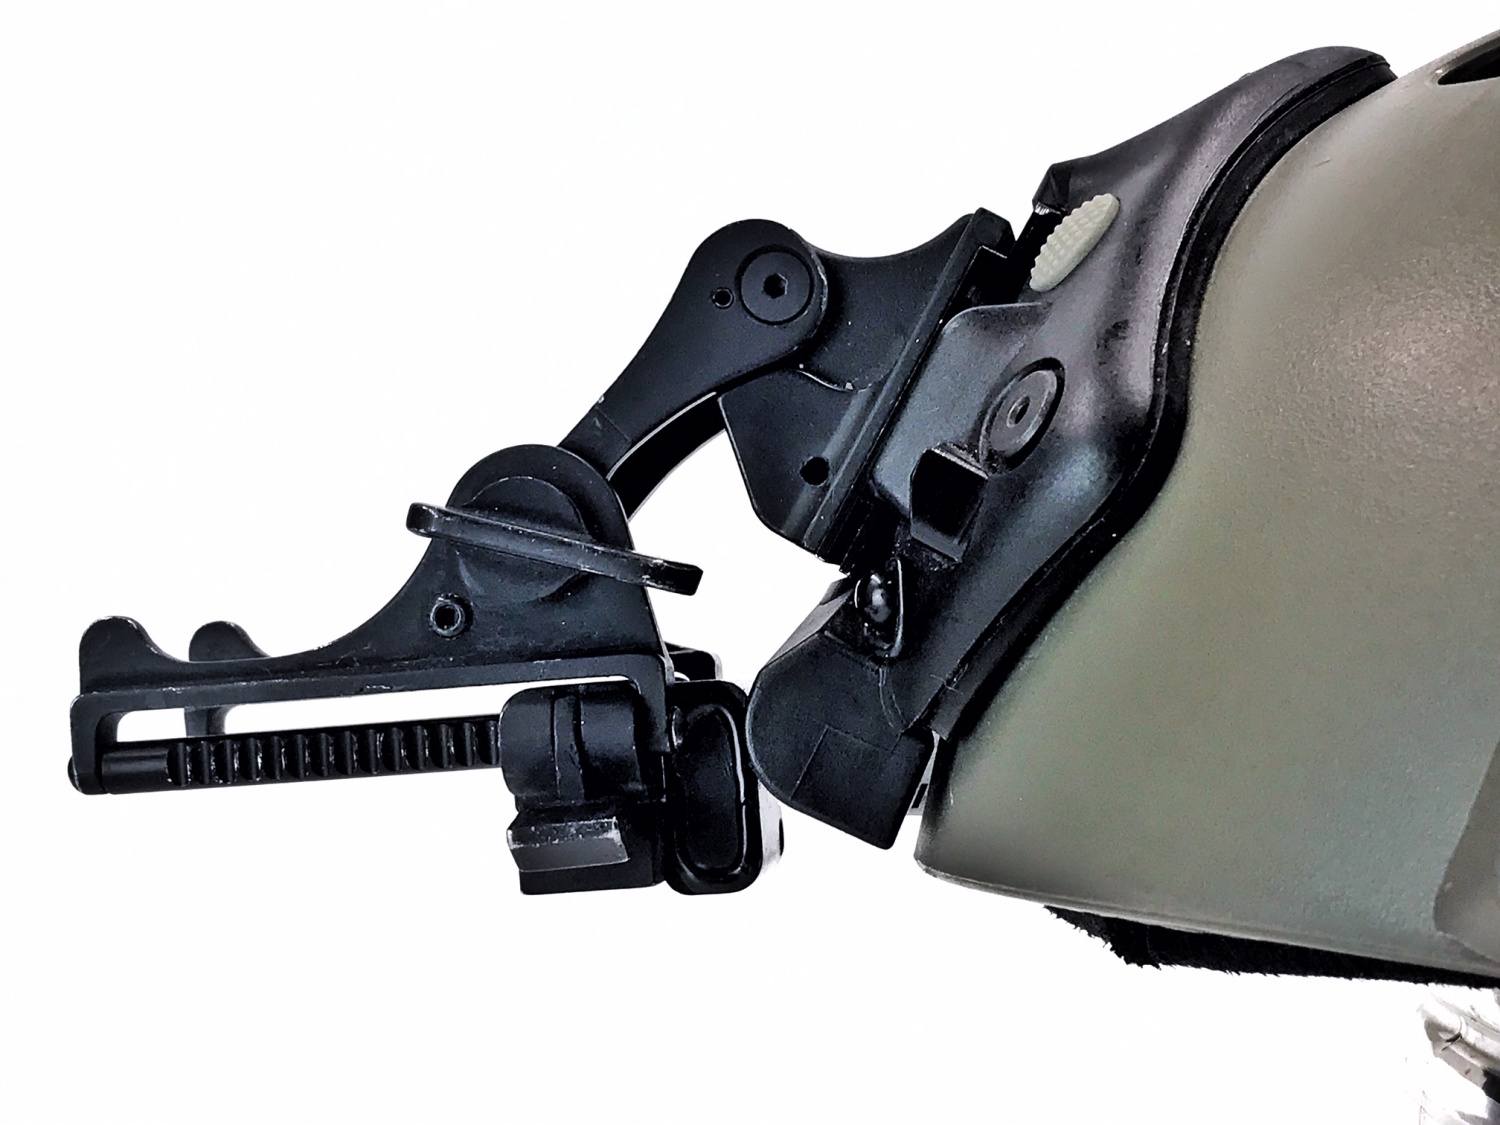
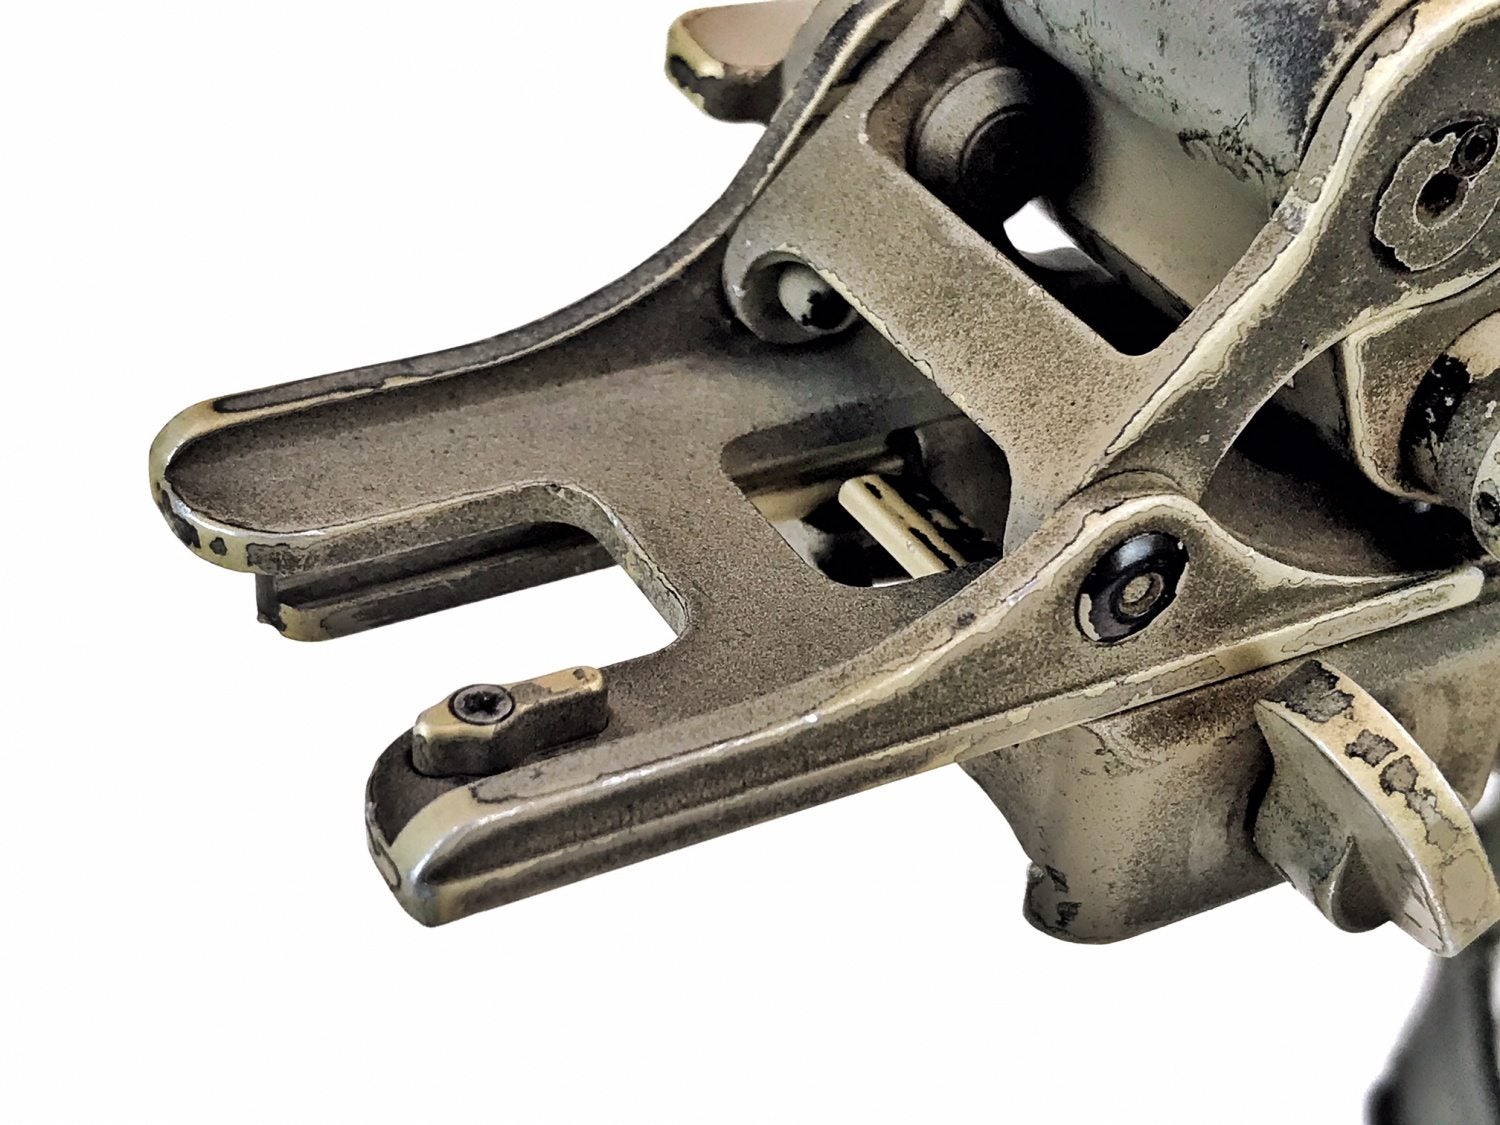
Mil-Spec Rhino Mount

For people just entering the world of night vision, the standard GI issue Rhino mount is the basic mount they typically start off with. It is like your first AR-15. It is not fancy and it is one of the cheapest things you can find but it gets the job done.
The Rhino mount folds upwards to store your NODs out of the way when you don’t need night vision.
The profile of the Rhino mount up is how it got its name. The Rhino mount is a force-to-overcome design so you just need to push the Rhino mount up to fold it and pull it down to unfold it.

The Rhino Mount is limited in features. It does have two types of adjustability. You can adjust the tilt angle and the position of the NODs forward or backward.
Rhino mount tilted upwards
Rhino mount tilted downwards
The small lever on the side of the bayonet/horn socket is what locks into the notched bars. Push it down while bringing the socket backwards or forwards.

The Rhino mounts can be found second hand for around $25-$50 online. One downside to the Rhino mount is that it can only be used for bayonet style arms or compatible bridges. The bayonet aka horn style attachment is obsolete. Often the tolerances are not great and you will find the bayonet will wobble a lot even though it is locked into the Rhino mount.
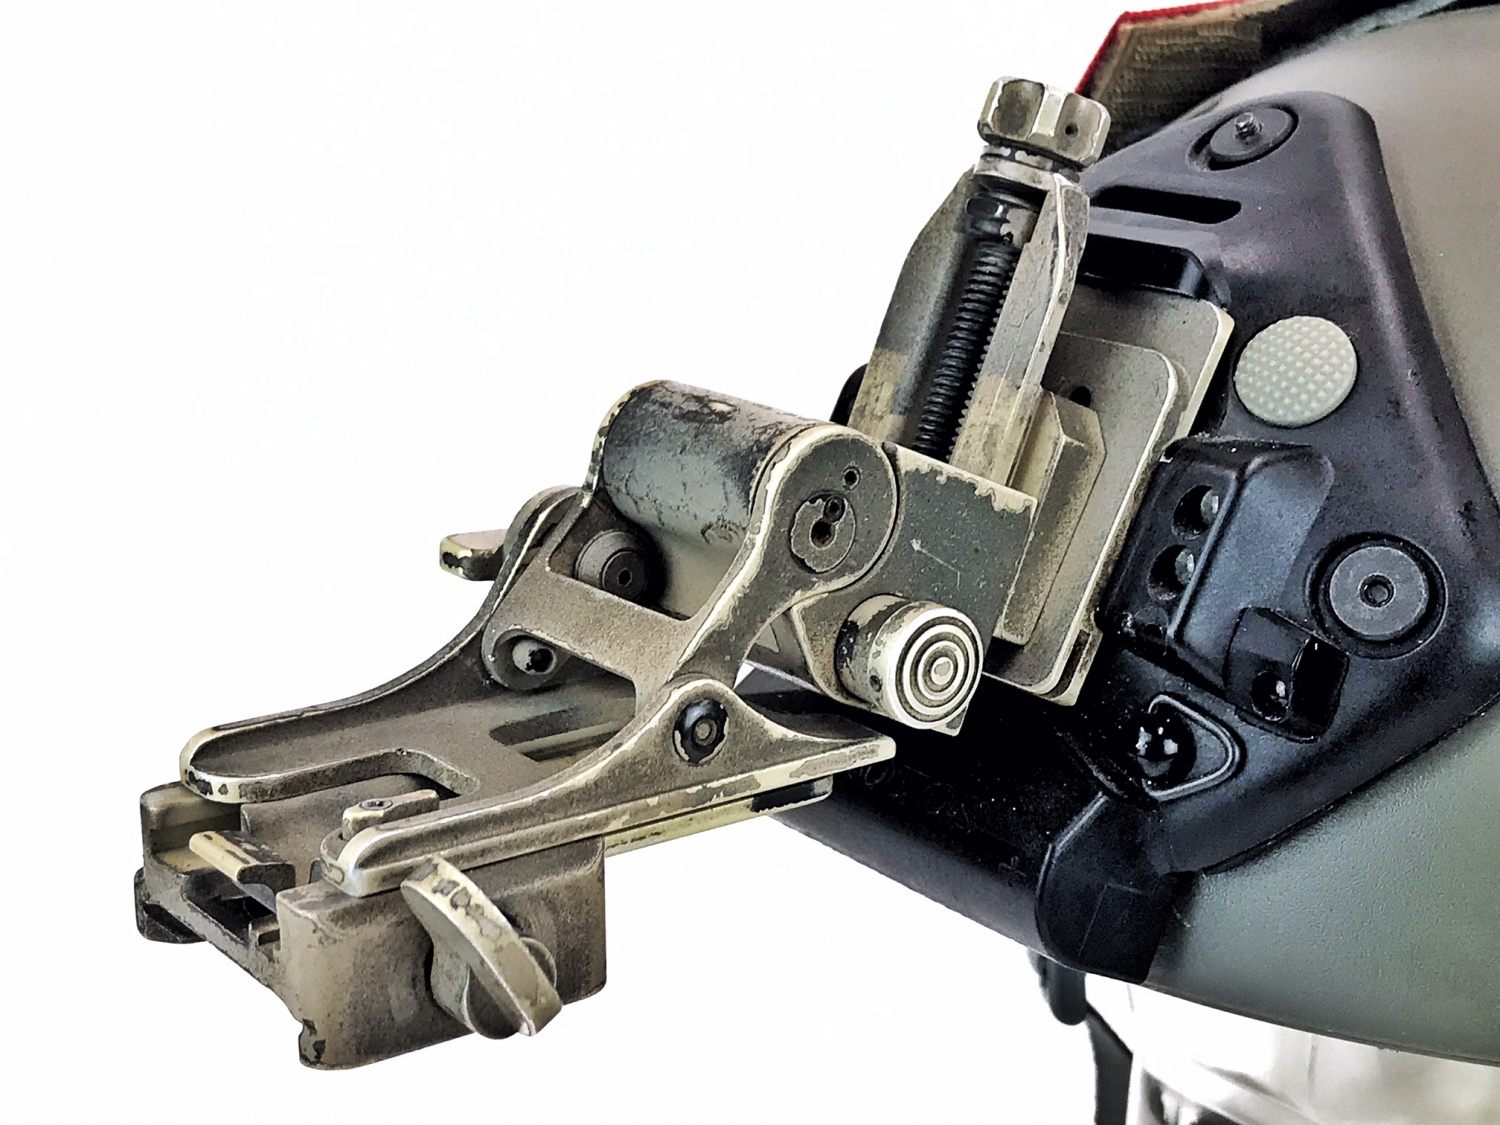
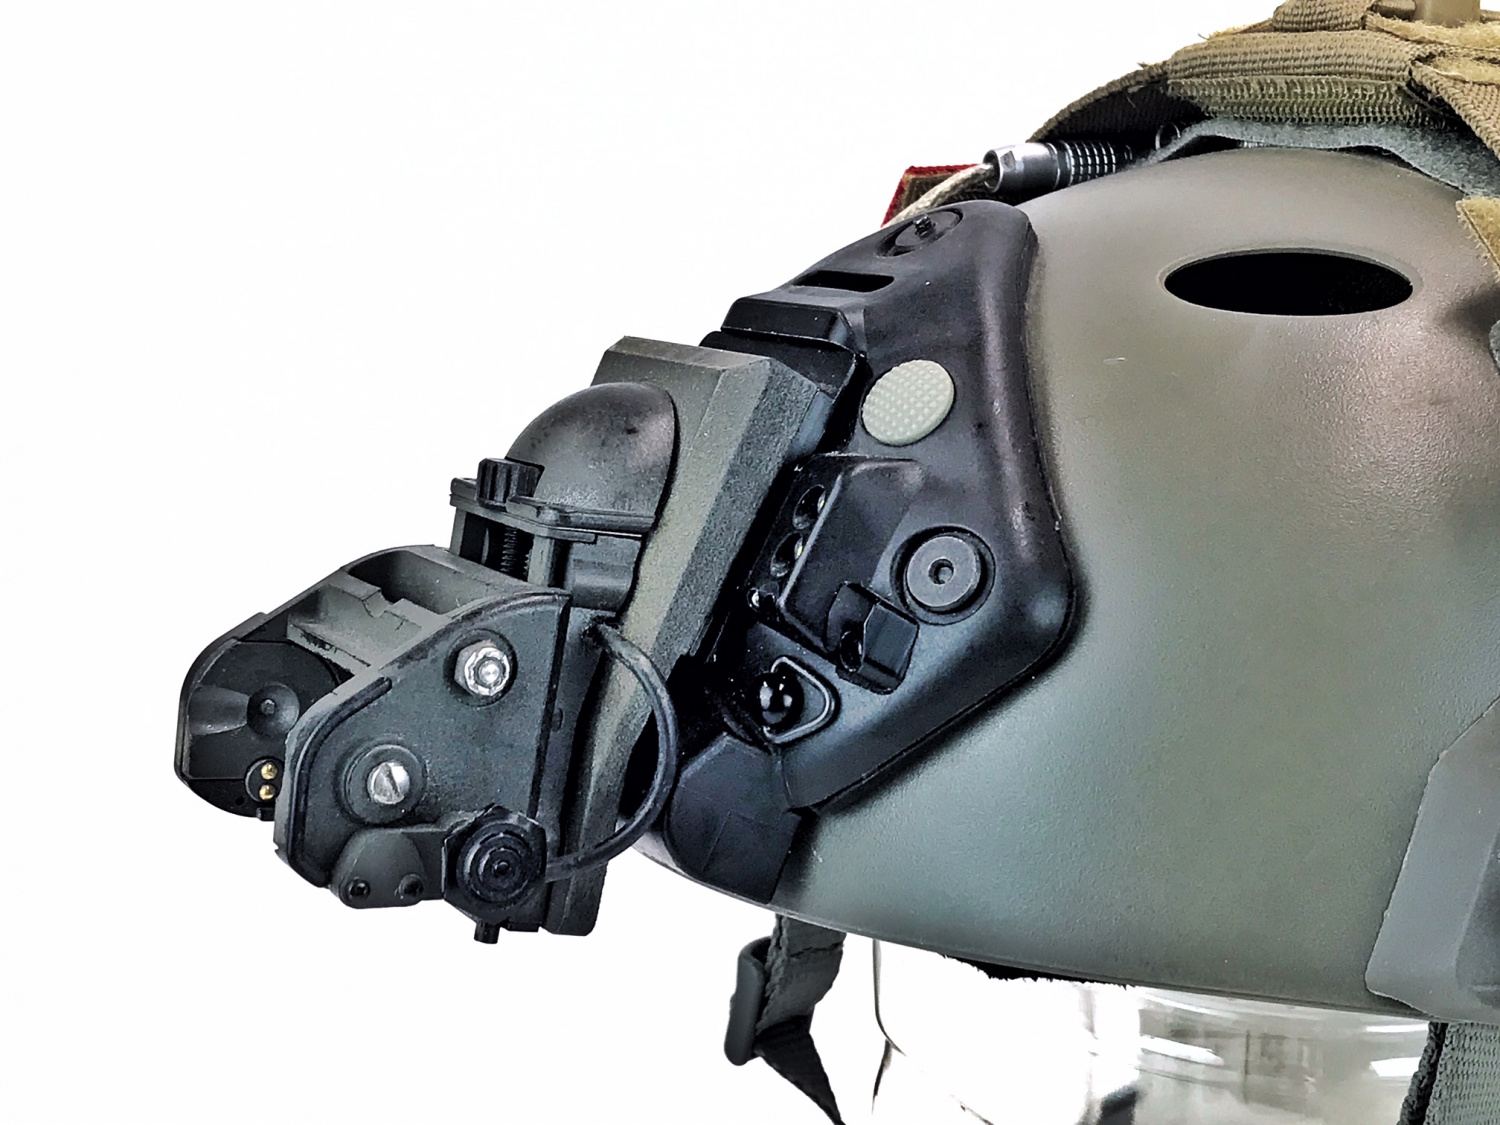
Most NOD mounts utilize the same mounting design to attach the mount to the helmet shroud. You can see the rectangular button sticking out the side near the bottom left corner of the Rhino mount.


Rhino II Mount
Norotos makes the Rhino mount and they upgraded it into the Rhino II. The main difference is now you have added adjustability and can raise or lower the entire mount which then brings the NOD up or down. This is great if you are using an unconventional helmet and the shroud is in a different position than usual.

On the left side of the Rhino II is a small lever. Flip it forward and you unlock the mount from the plate. Now you can adjust the vertical height of your NODs.

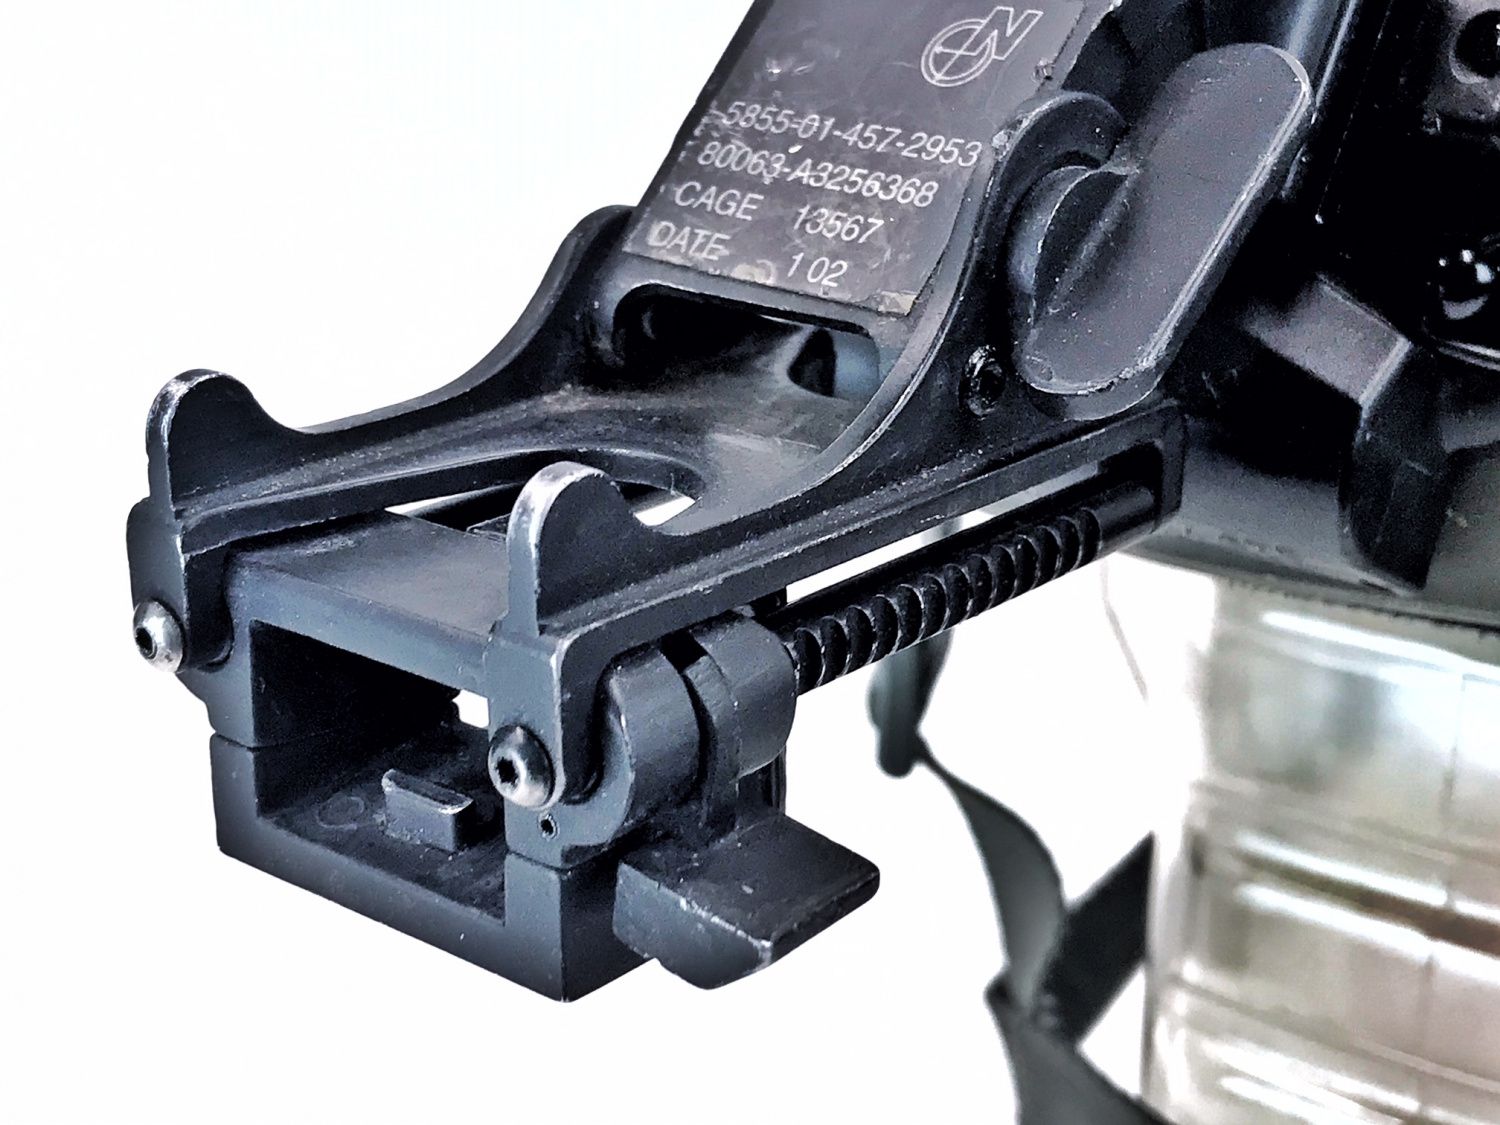
Just like the original Rhino mount, the Rhino II has tilt adjustment as well as forward/backward adjustability. Norotos updated the Rhino II so it comes in either bayonet or dovetail sockets. The night vision dovetail shoe is a more solid design and locks up much better than the obsolete bayonet-style attachment method.


The Rhino II mount is your next best option for upgrading from a standard Rhino. There are companies like Mod Armory that make upgrade kits for your GI standard issue Rhino mount. But the cost of these upgrades could be used toward a new mount like the Rhino II. It comes in bayonet/horn style or dovetail and you can typically get them for around $100 used.
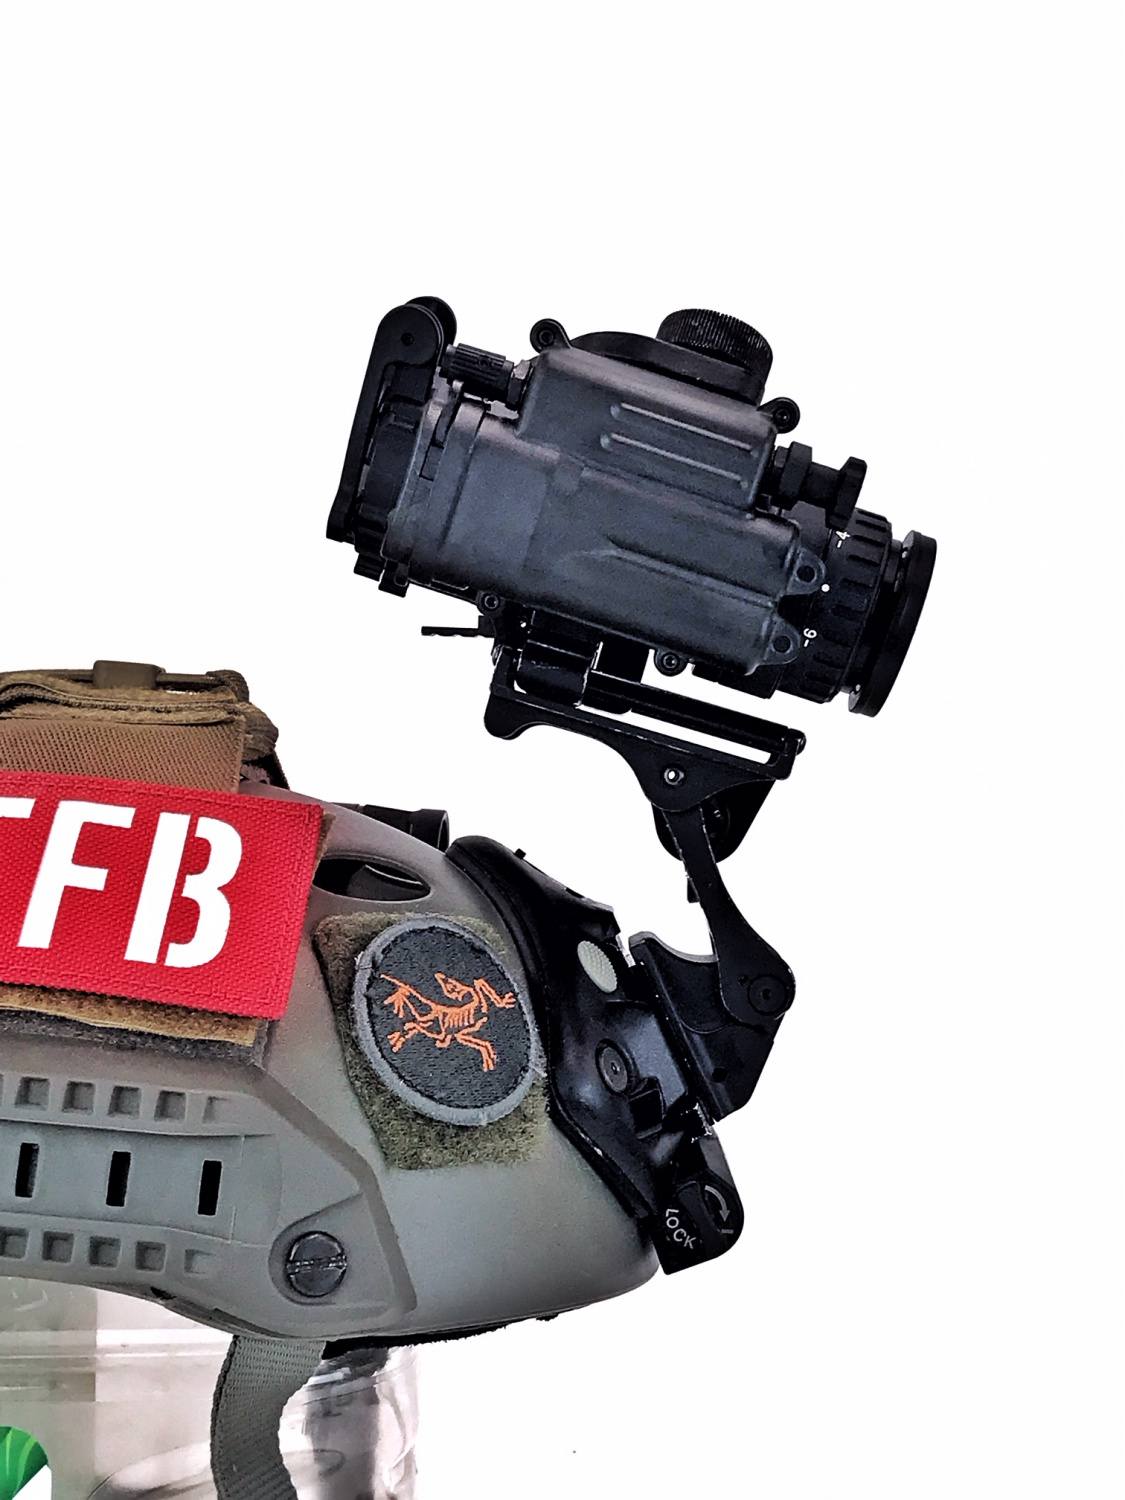
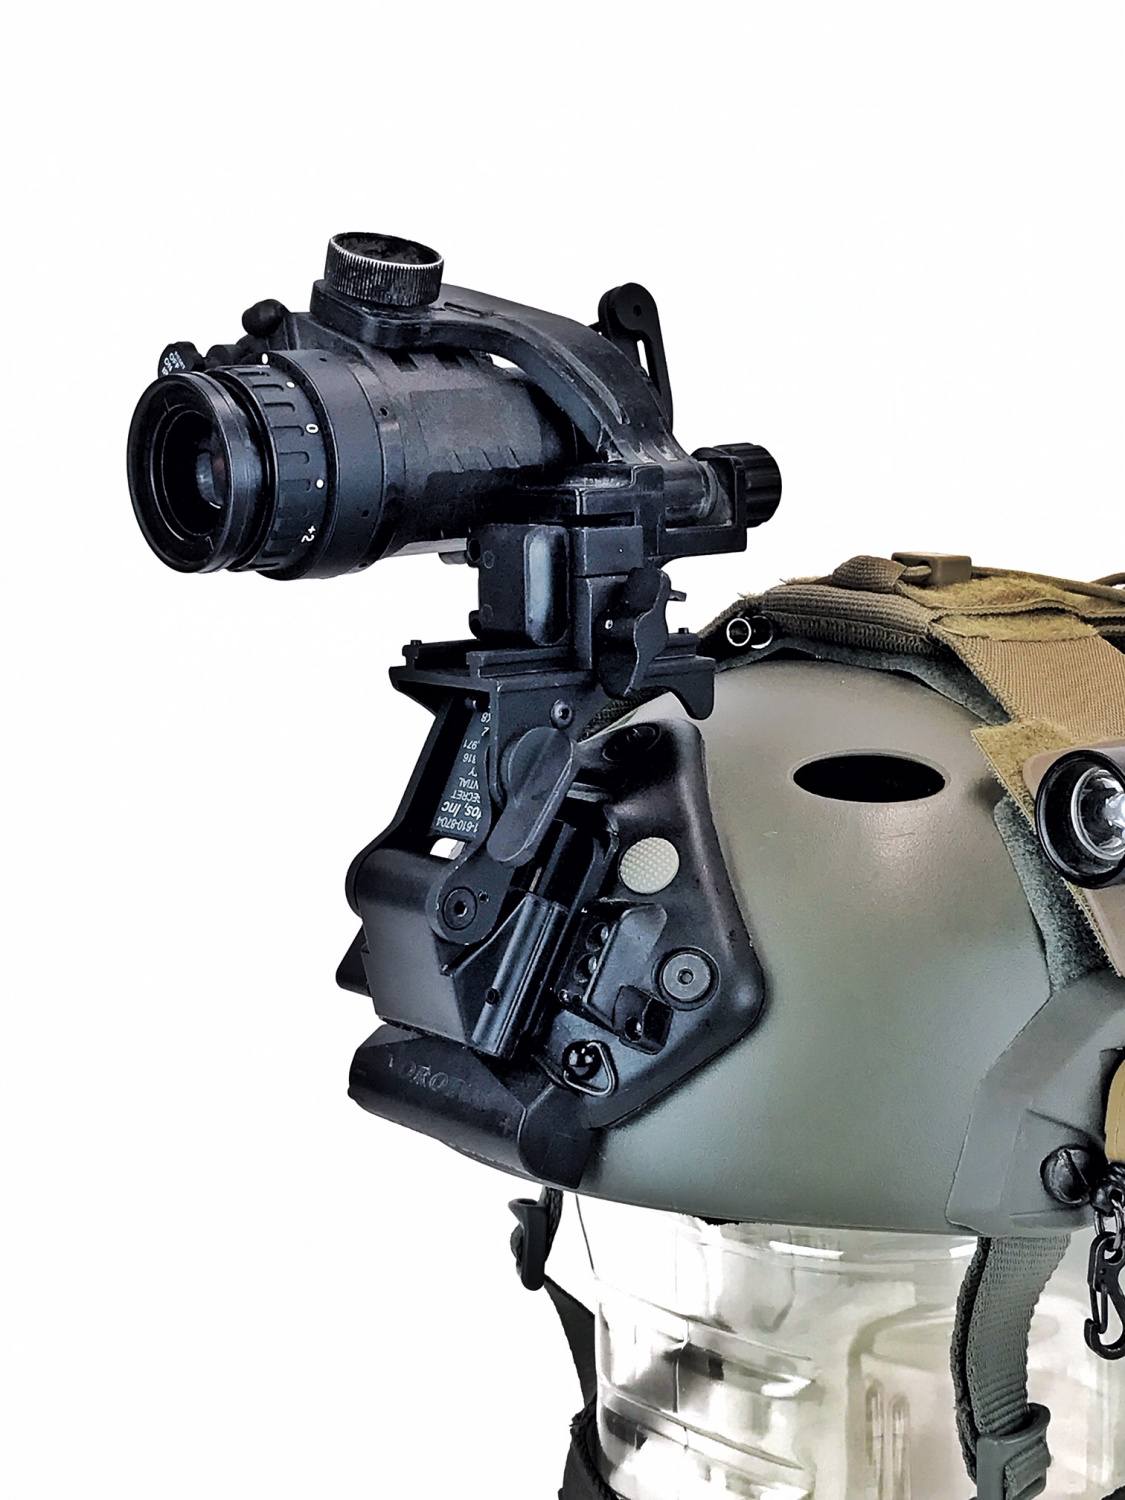
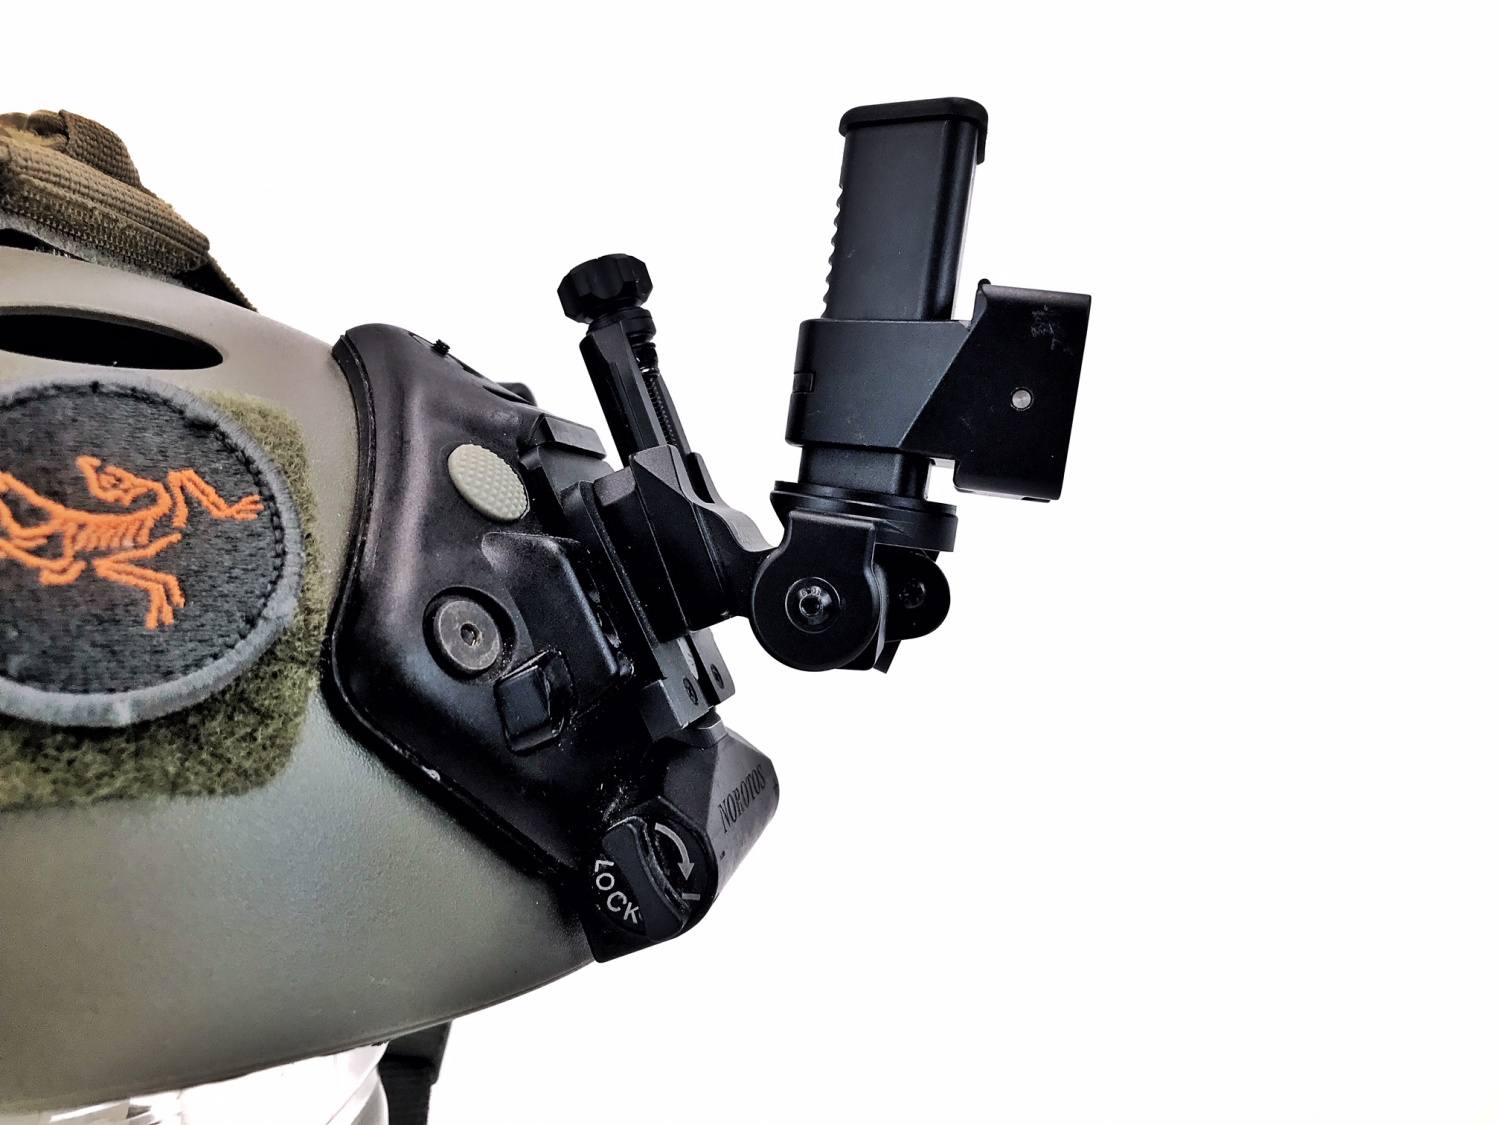
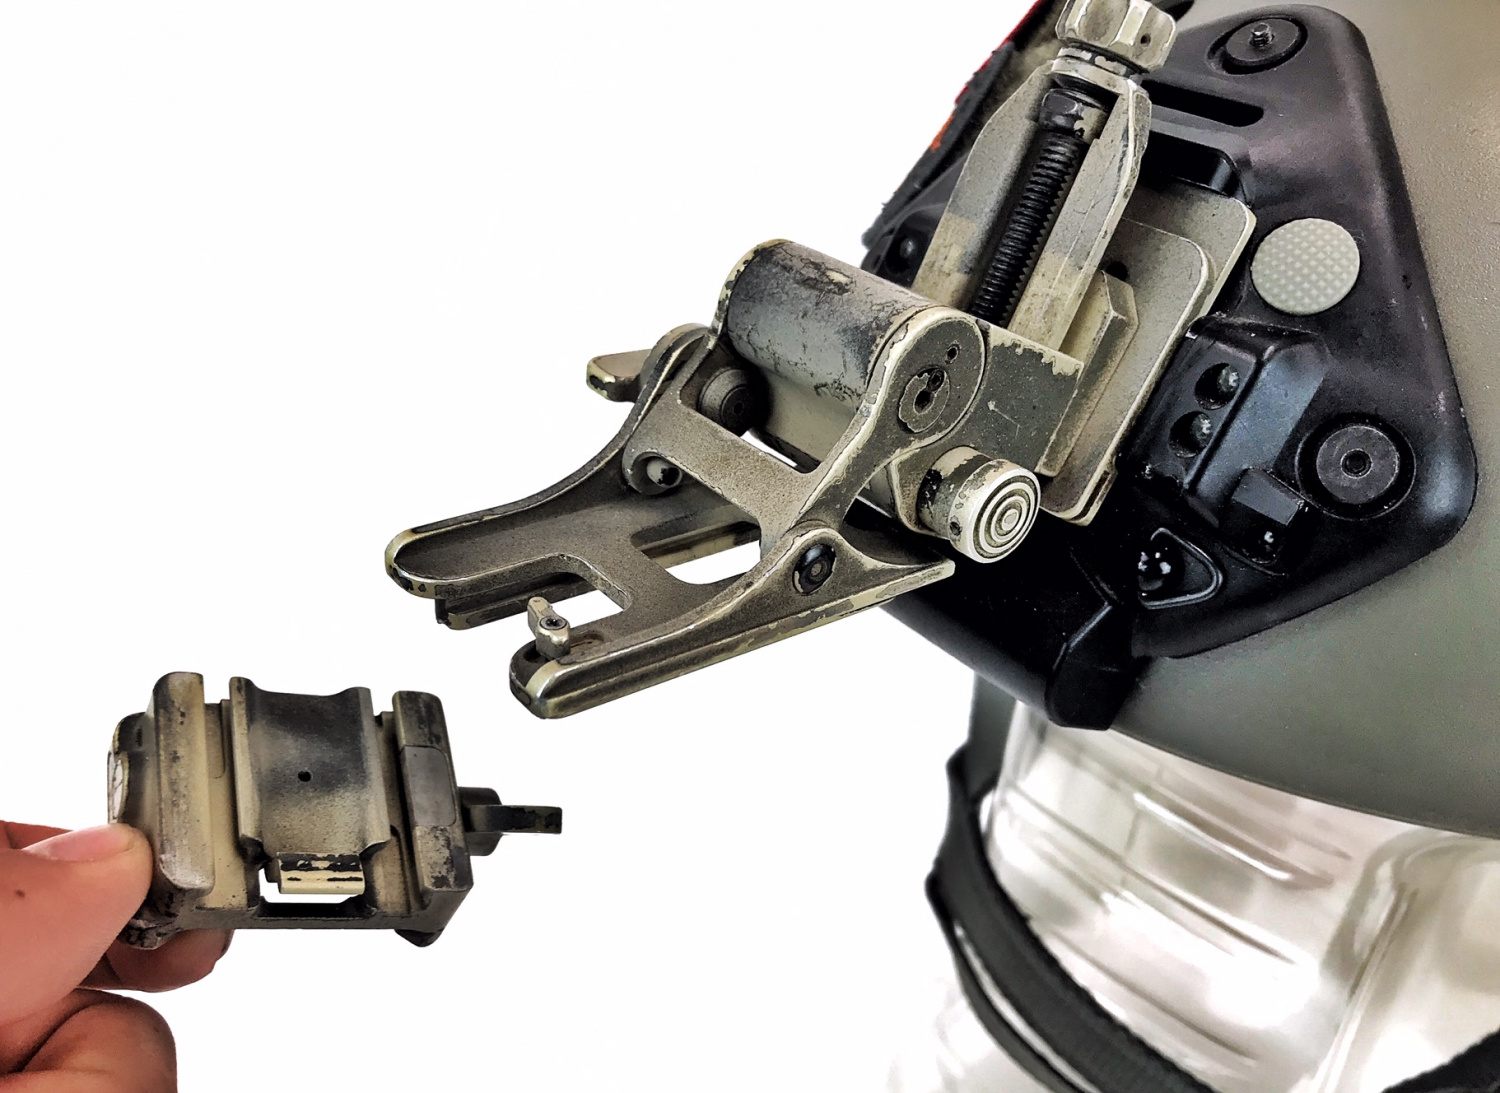
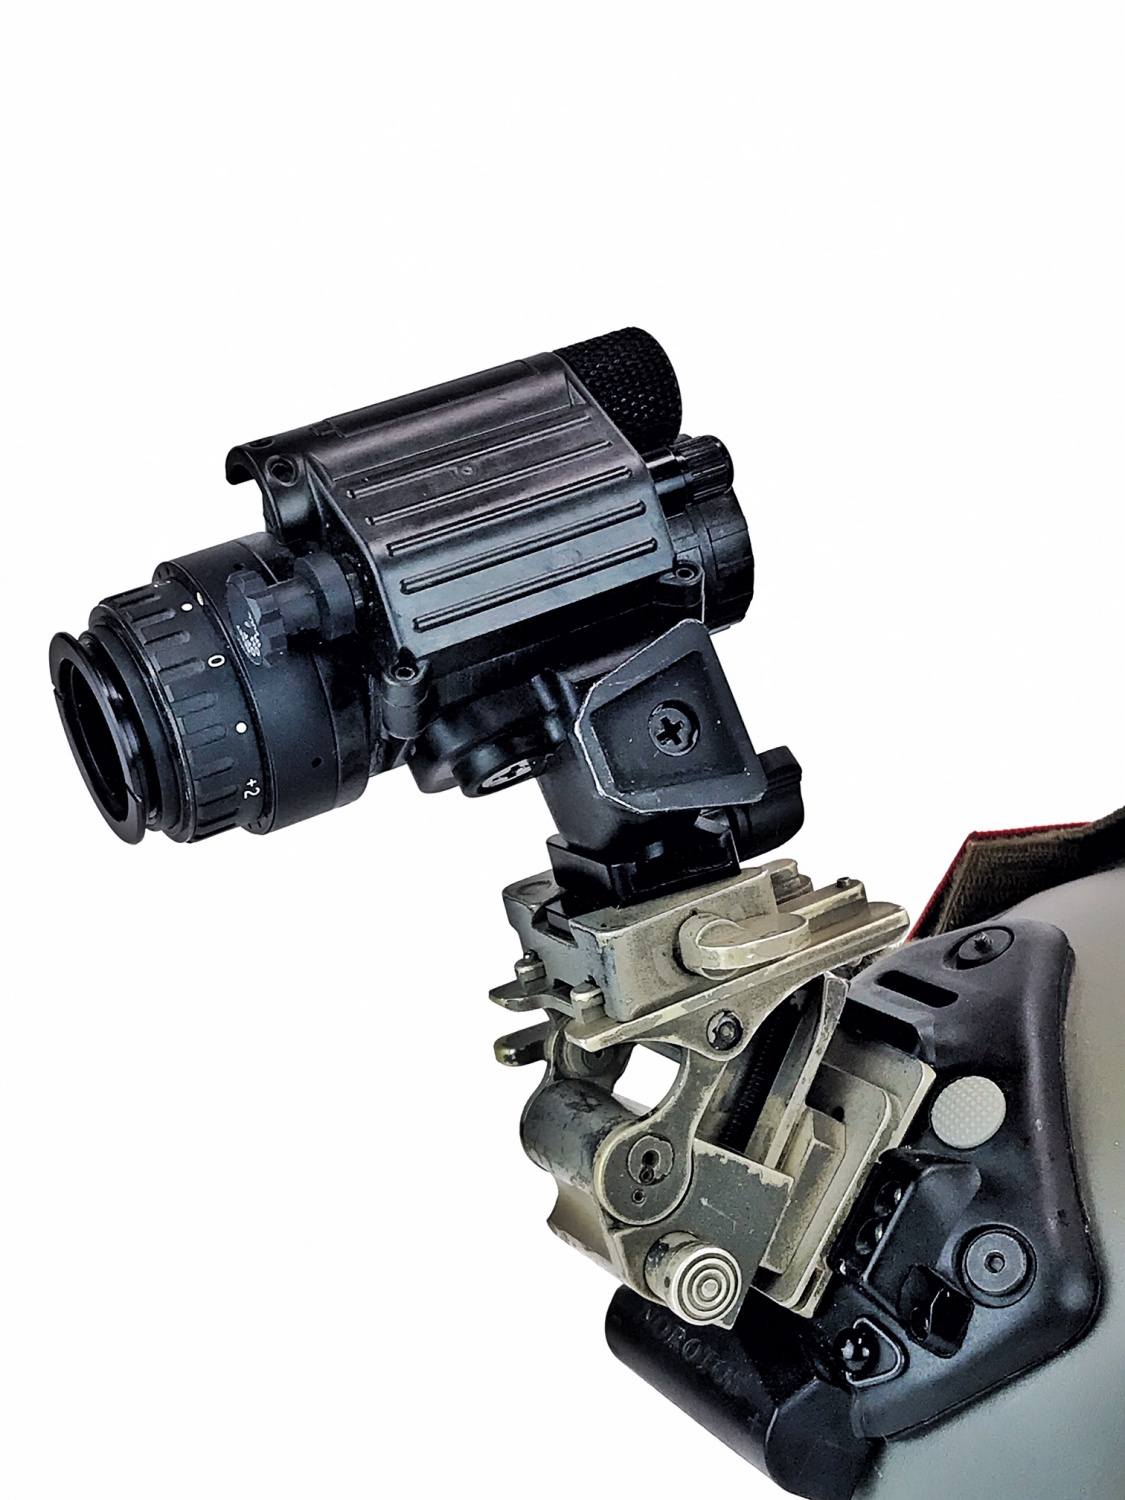
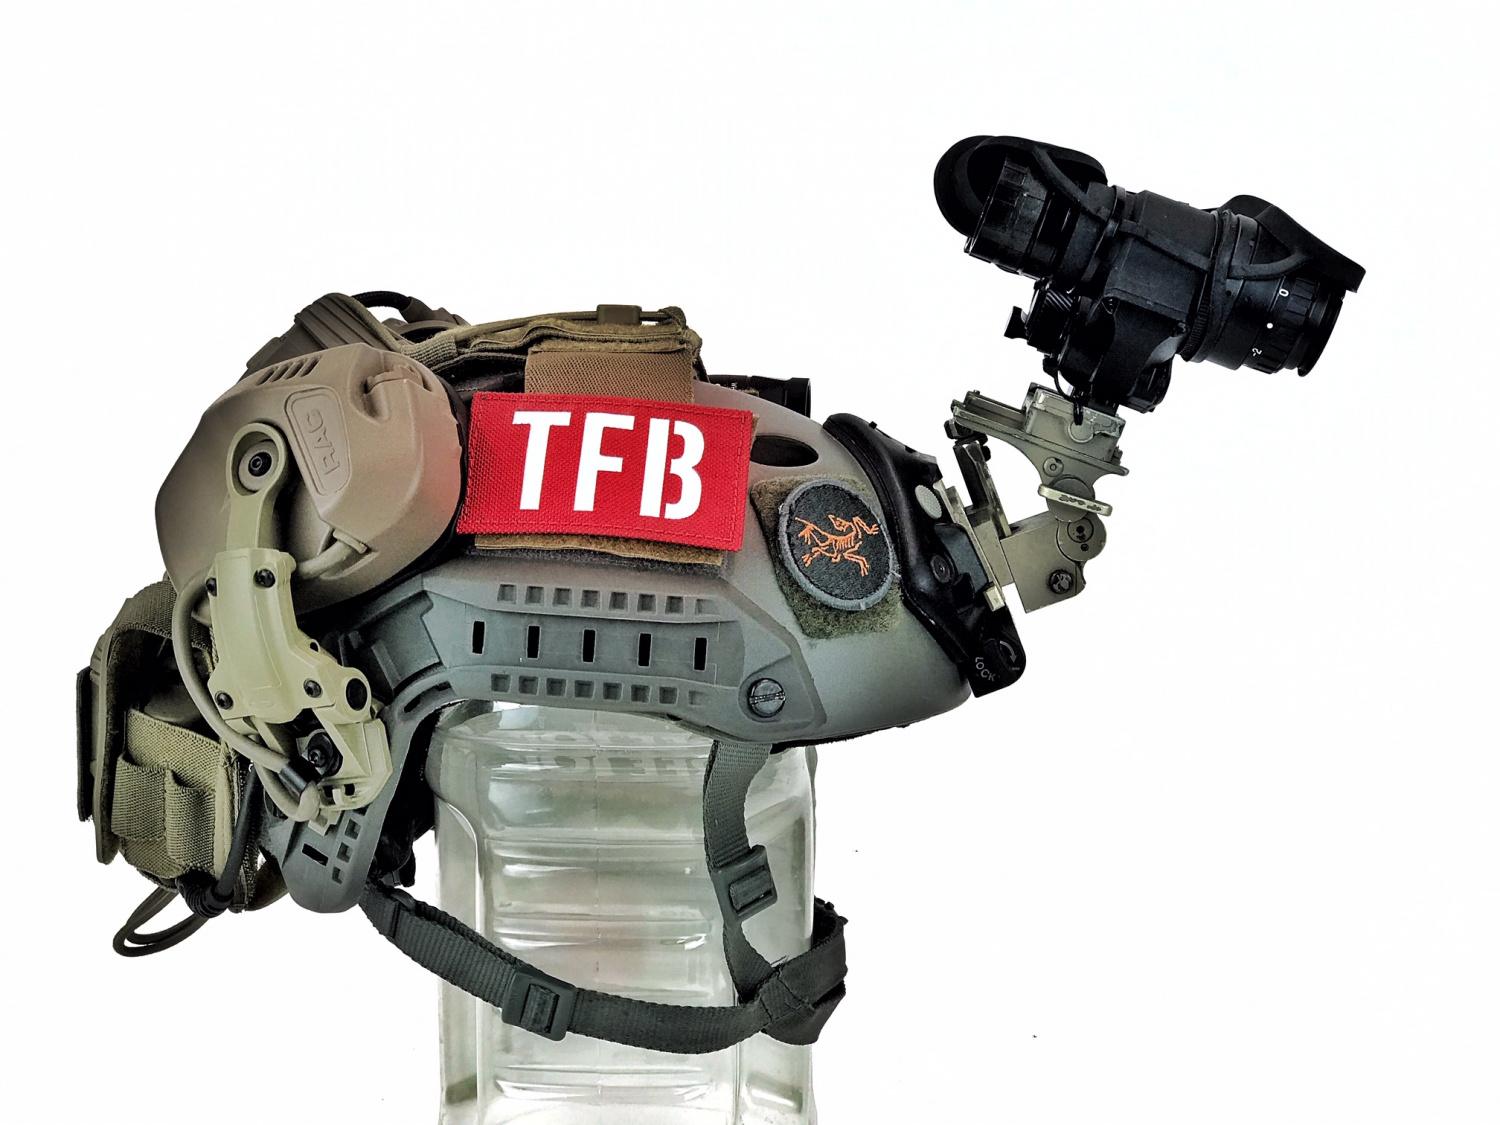
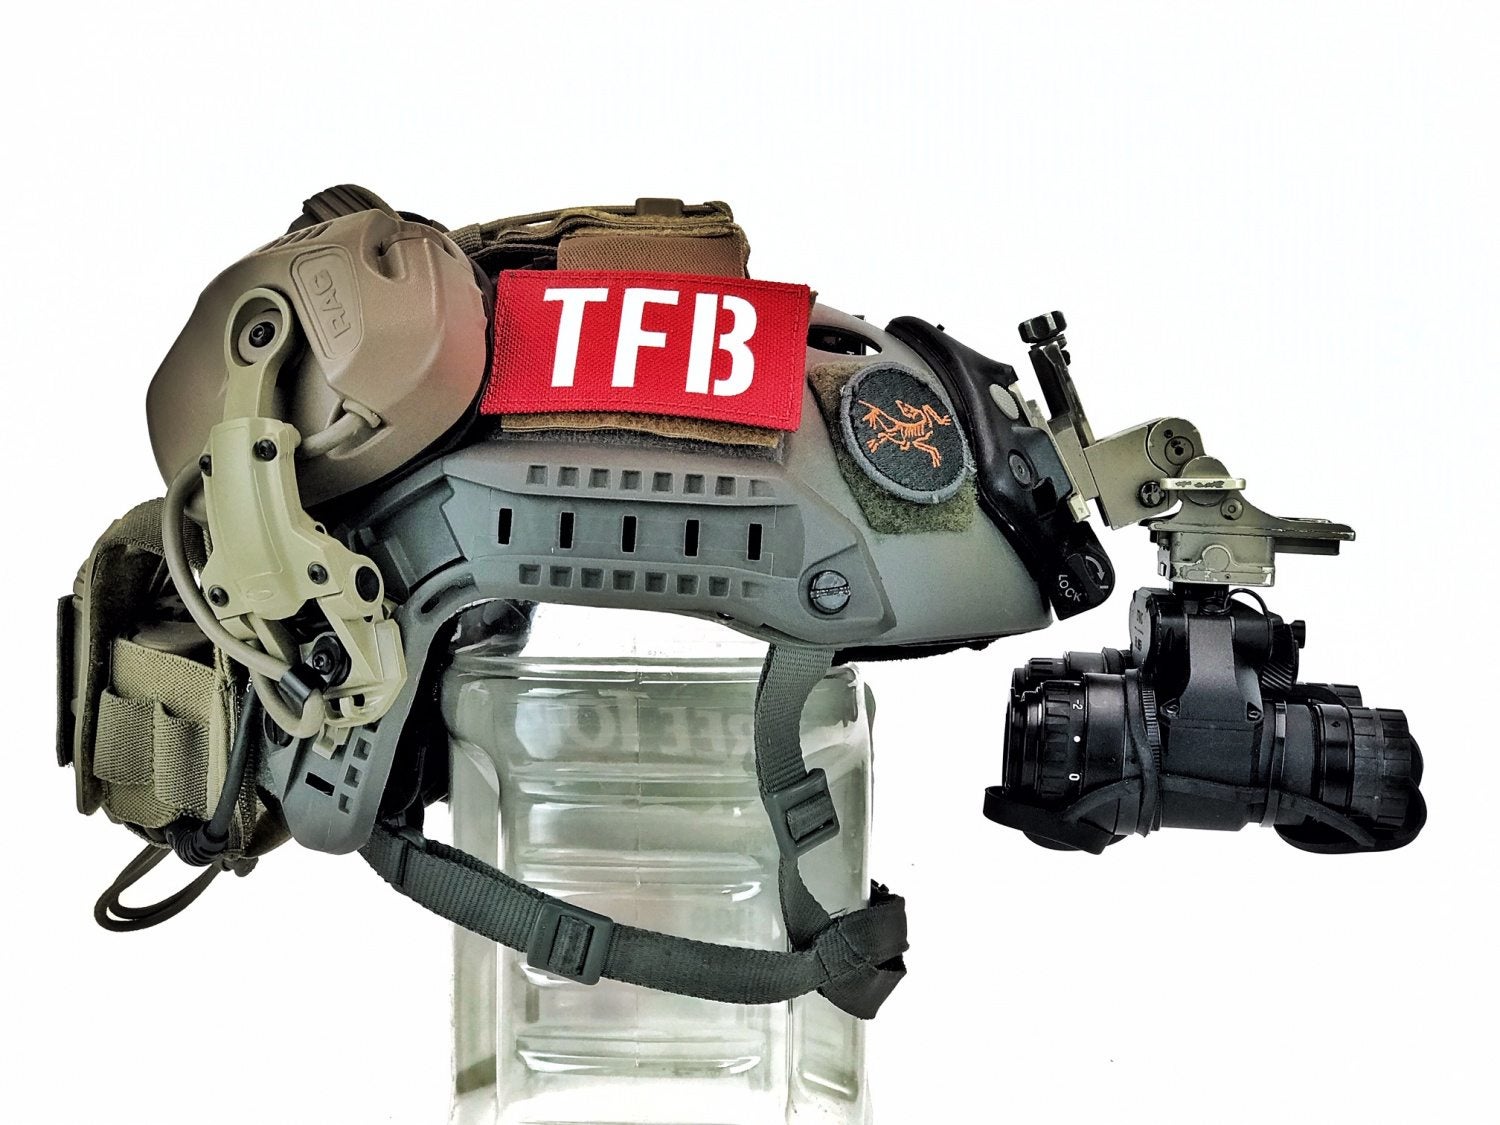
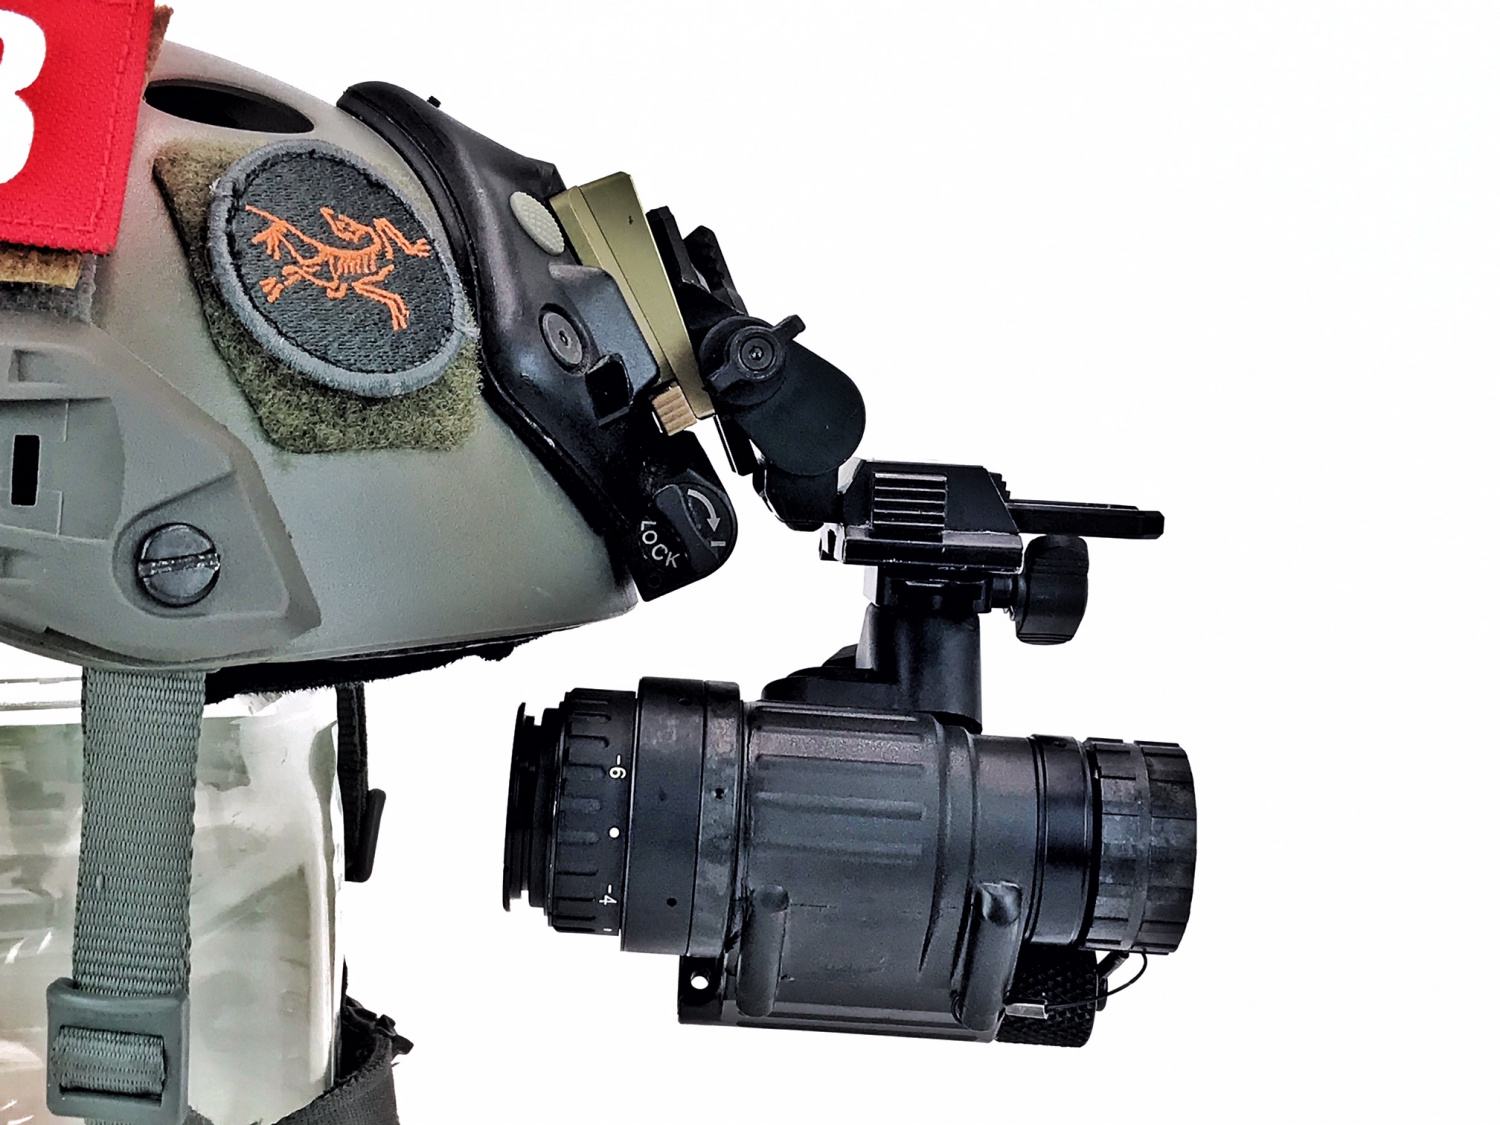
Norotos INVG Mount

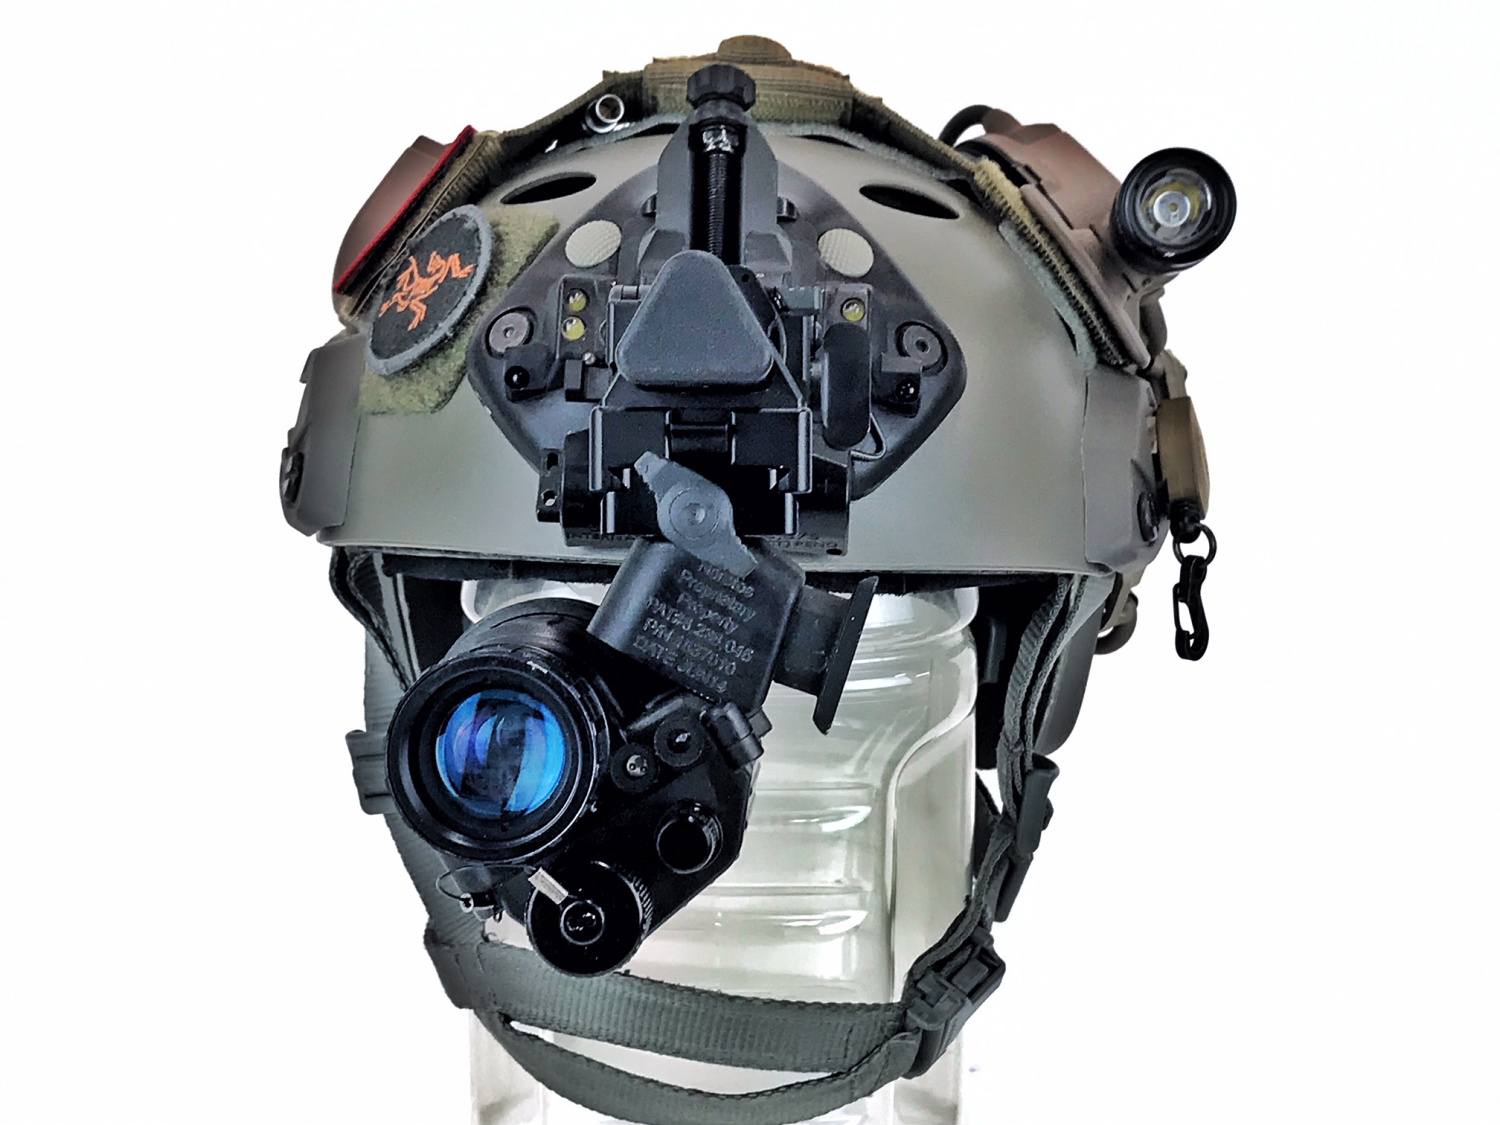
The INVG is the best mount for use with a single monocular NOD like the PVS-14. It offers the most adjustability and folding features than any other mount on the market. The problem with the Rhino mounts and pretty much any other mount is that they position the PVS-14 above or way out in front of the helmet. The weight of the PVS-14 can pull down on the front of the helmet. So Norotos came up with the INVG. It has the ability to stow the PVS-14 in 6 different positions. This is achieved with their rotating central triangular post.
Just like their other mounts, the Norotos INVG has tilt angle adjustability.

Unlike the Rhino II, the INVG featured a fine pitch screw to adjust the vertical height of your NODs.

INVG adjusted all the way up.

INVG adjusted all the way down.
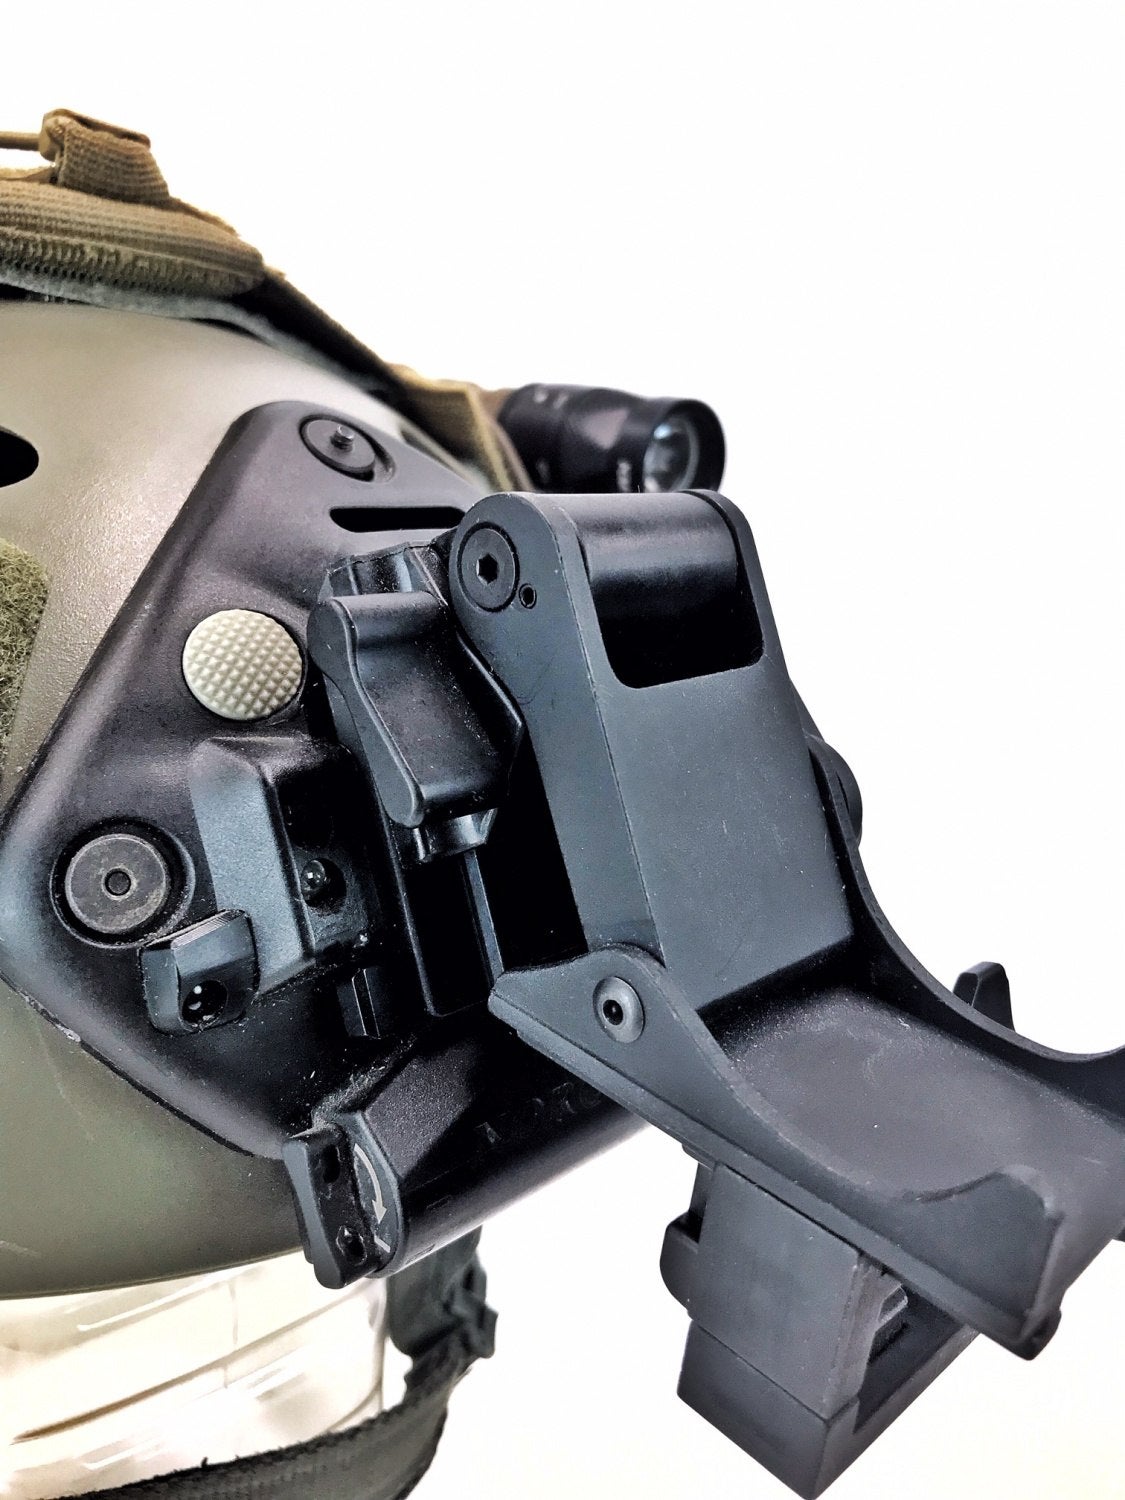
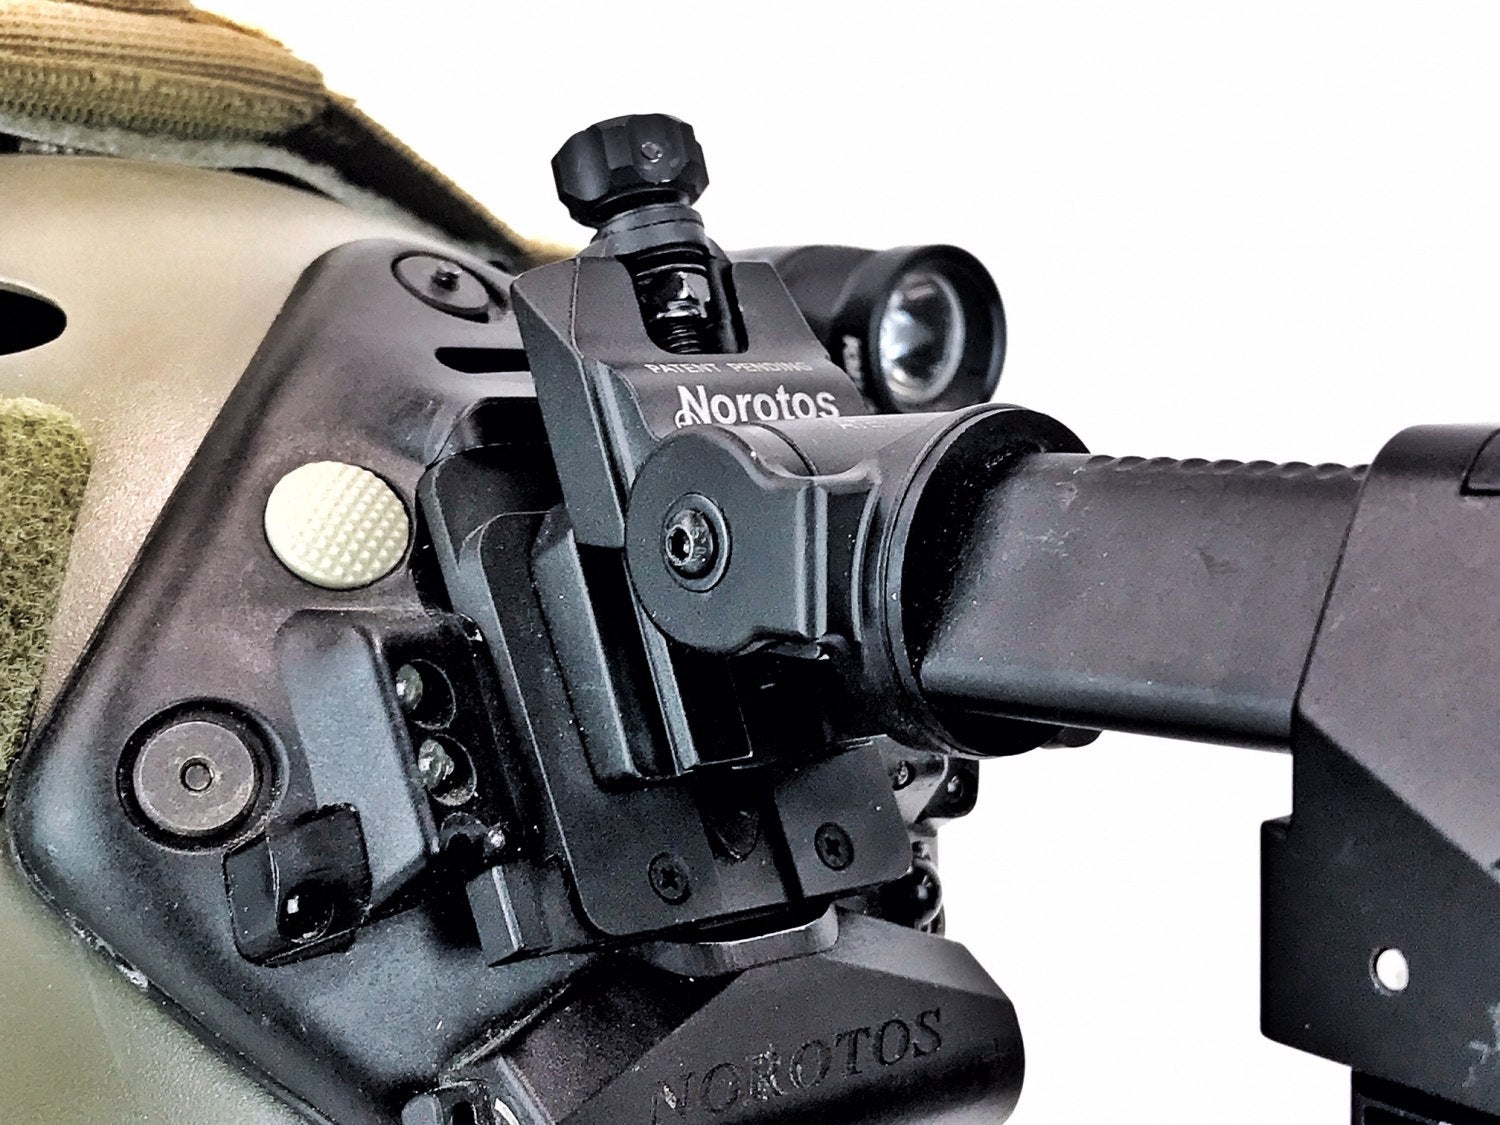
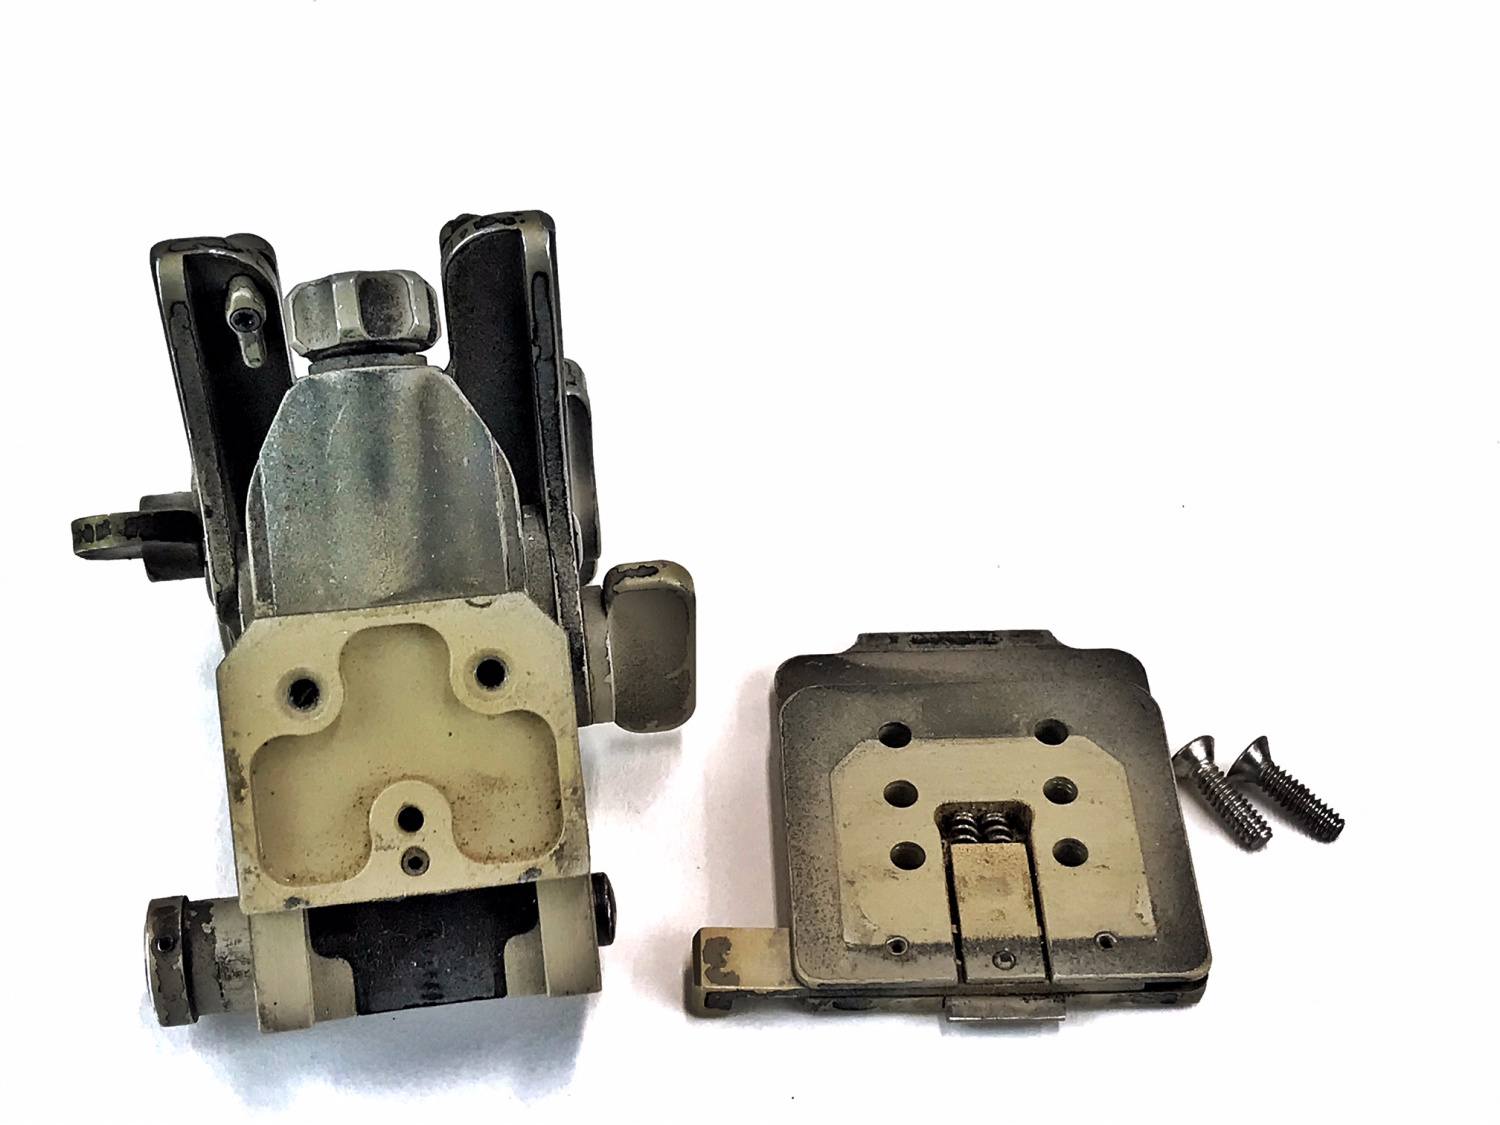
Norotos also made the INVG modular. The plate that interfaces with the shroud on your helmet has three positions for better gross height adjustment.

For forward adjustment, you just slide the dovetail socket forwards or backwards. Due to the design of the INVG, the PVS-14 cannot move too far back.
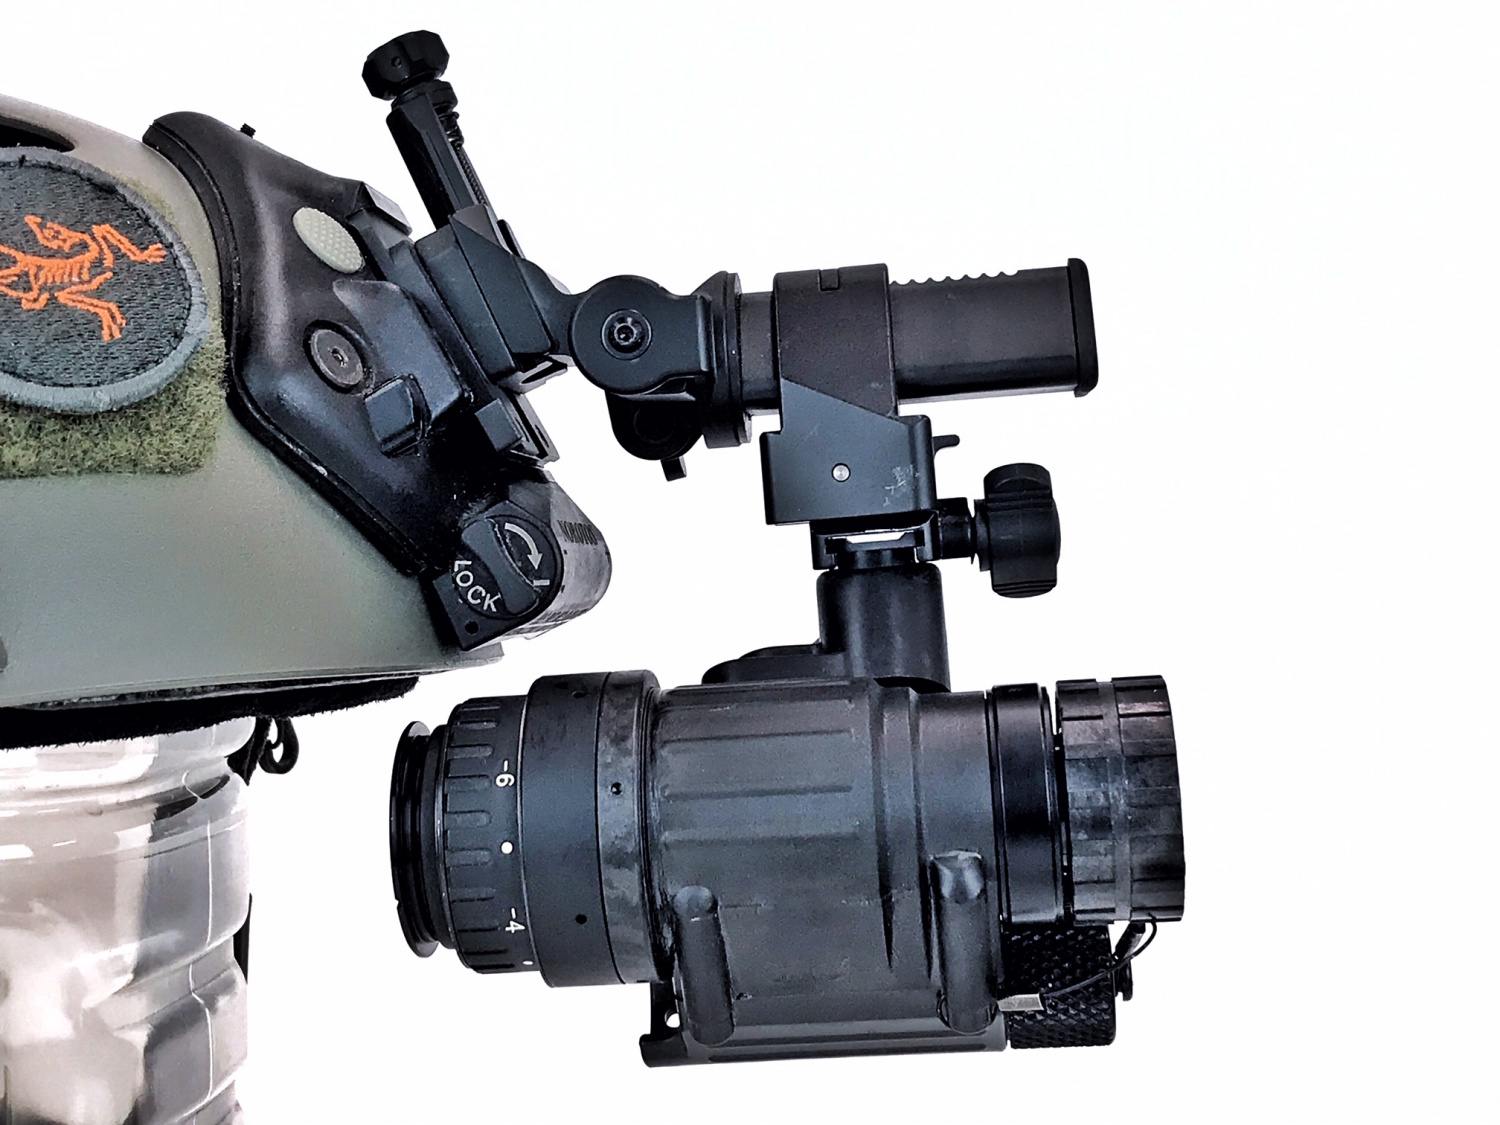
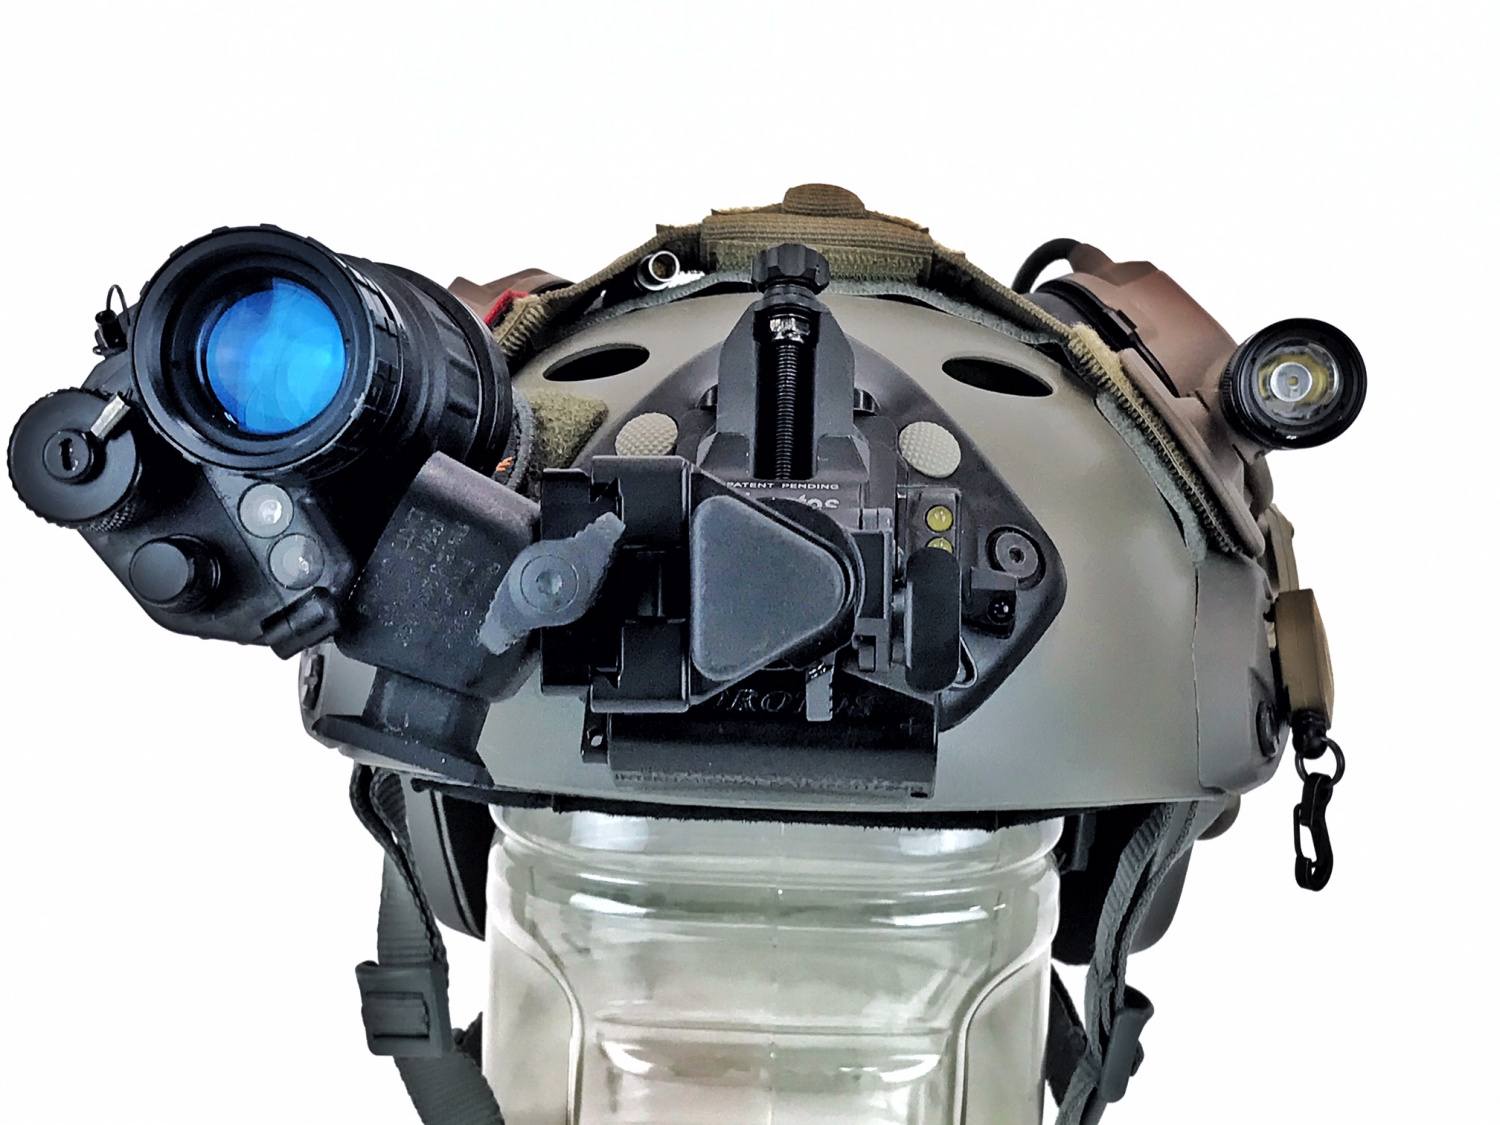
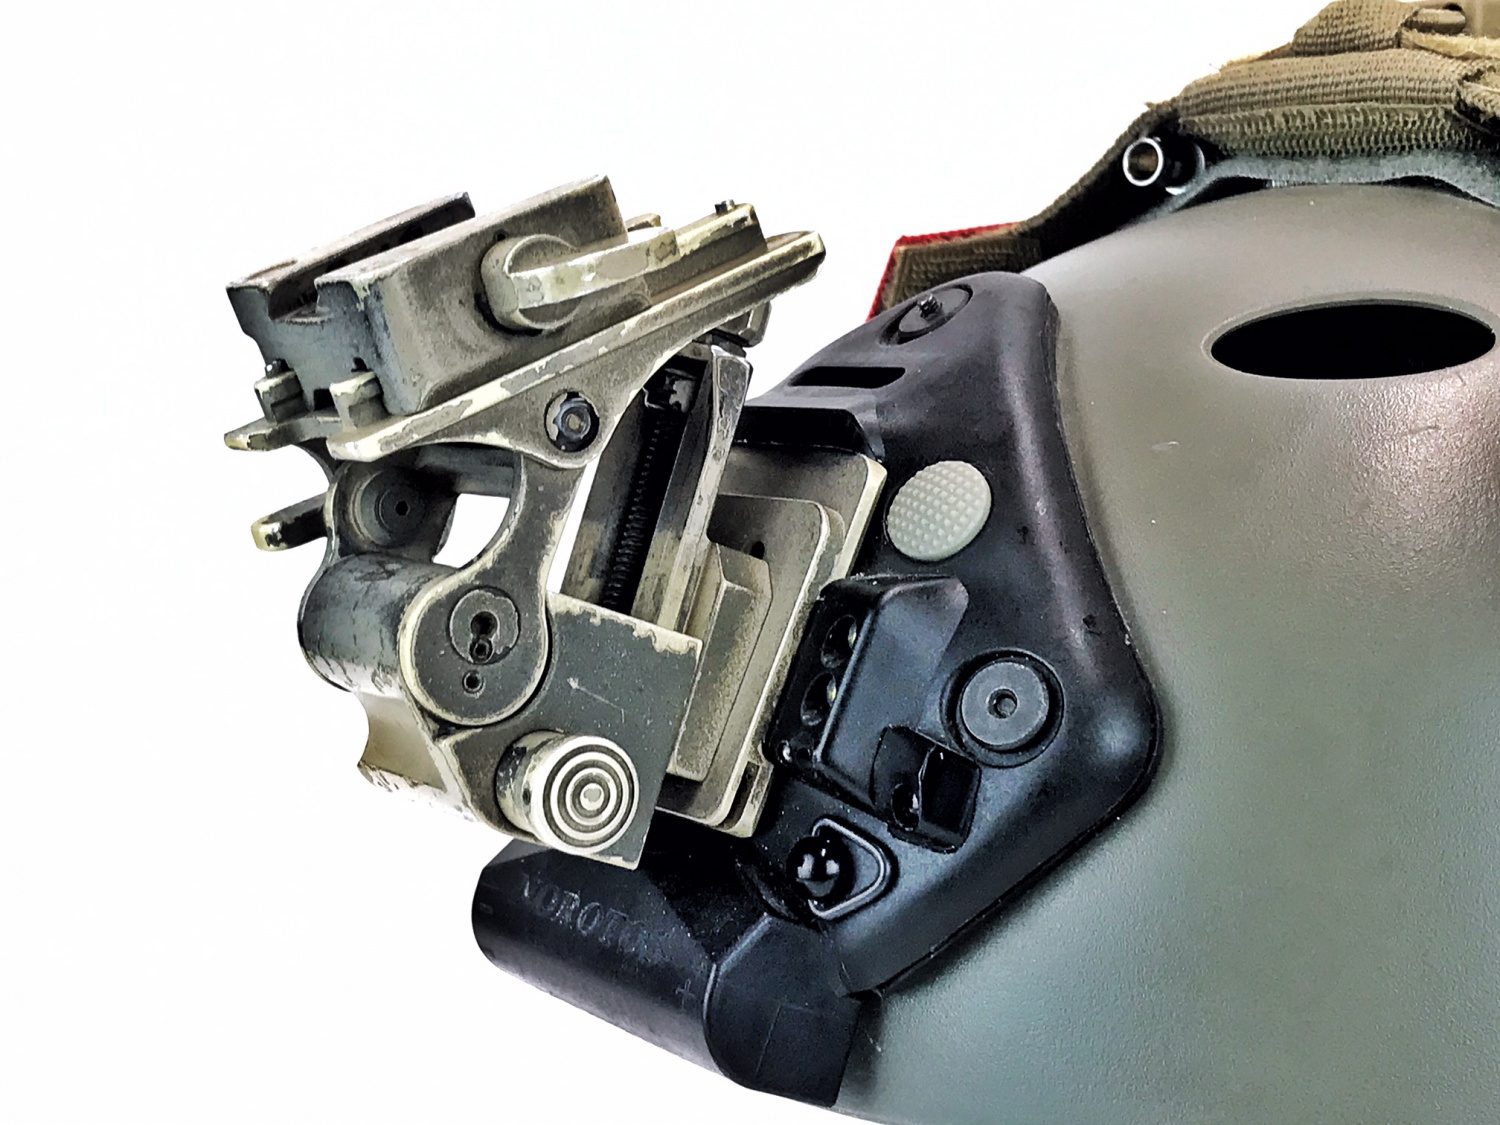
Here is the INVG in the upward stowed position.
As I said earlier, the INVG has the most adjustability and folding features of any other mount. Below is what a PVS-14 would look like if you just used force to overcome to fold the INVG upwards. The PVS-14 sticks out quite a ways and this will cause a headache wearing it like this for extended periods of time.

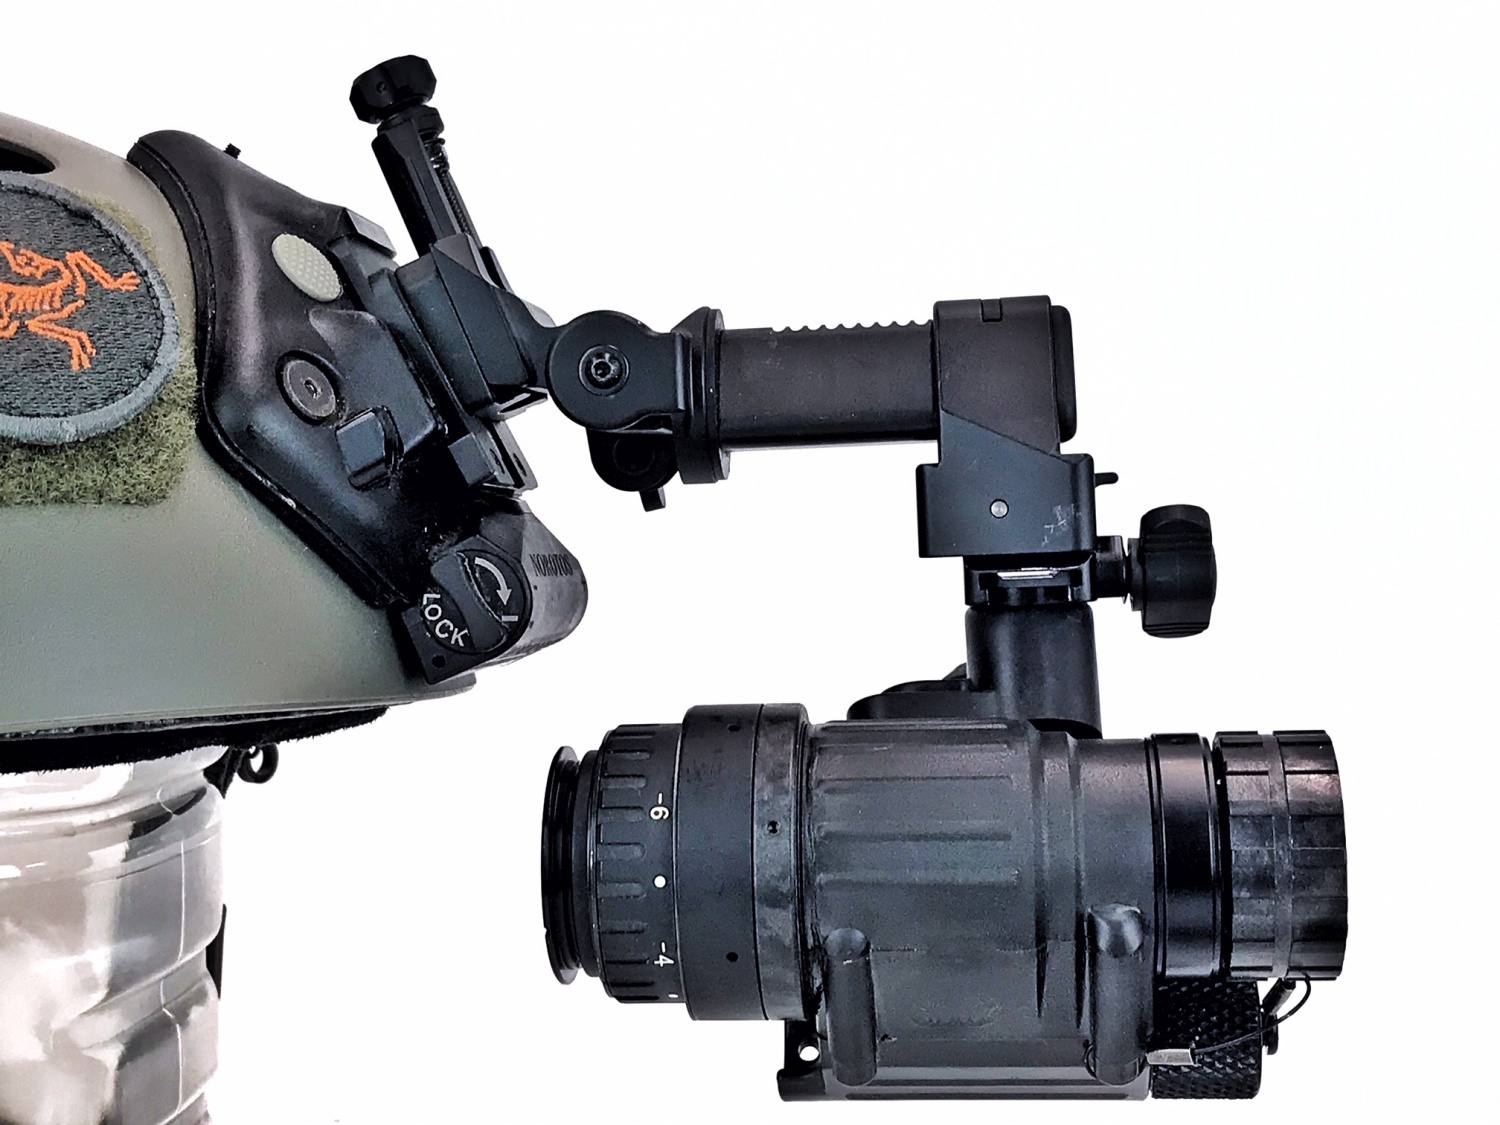
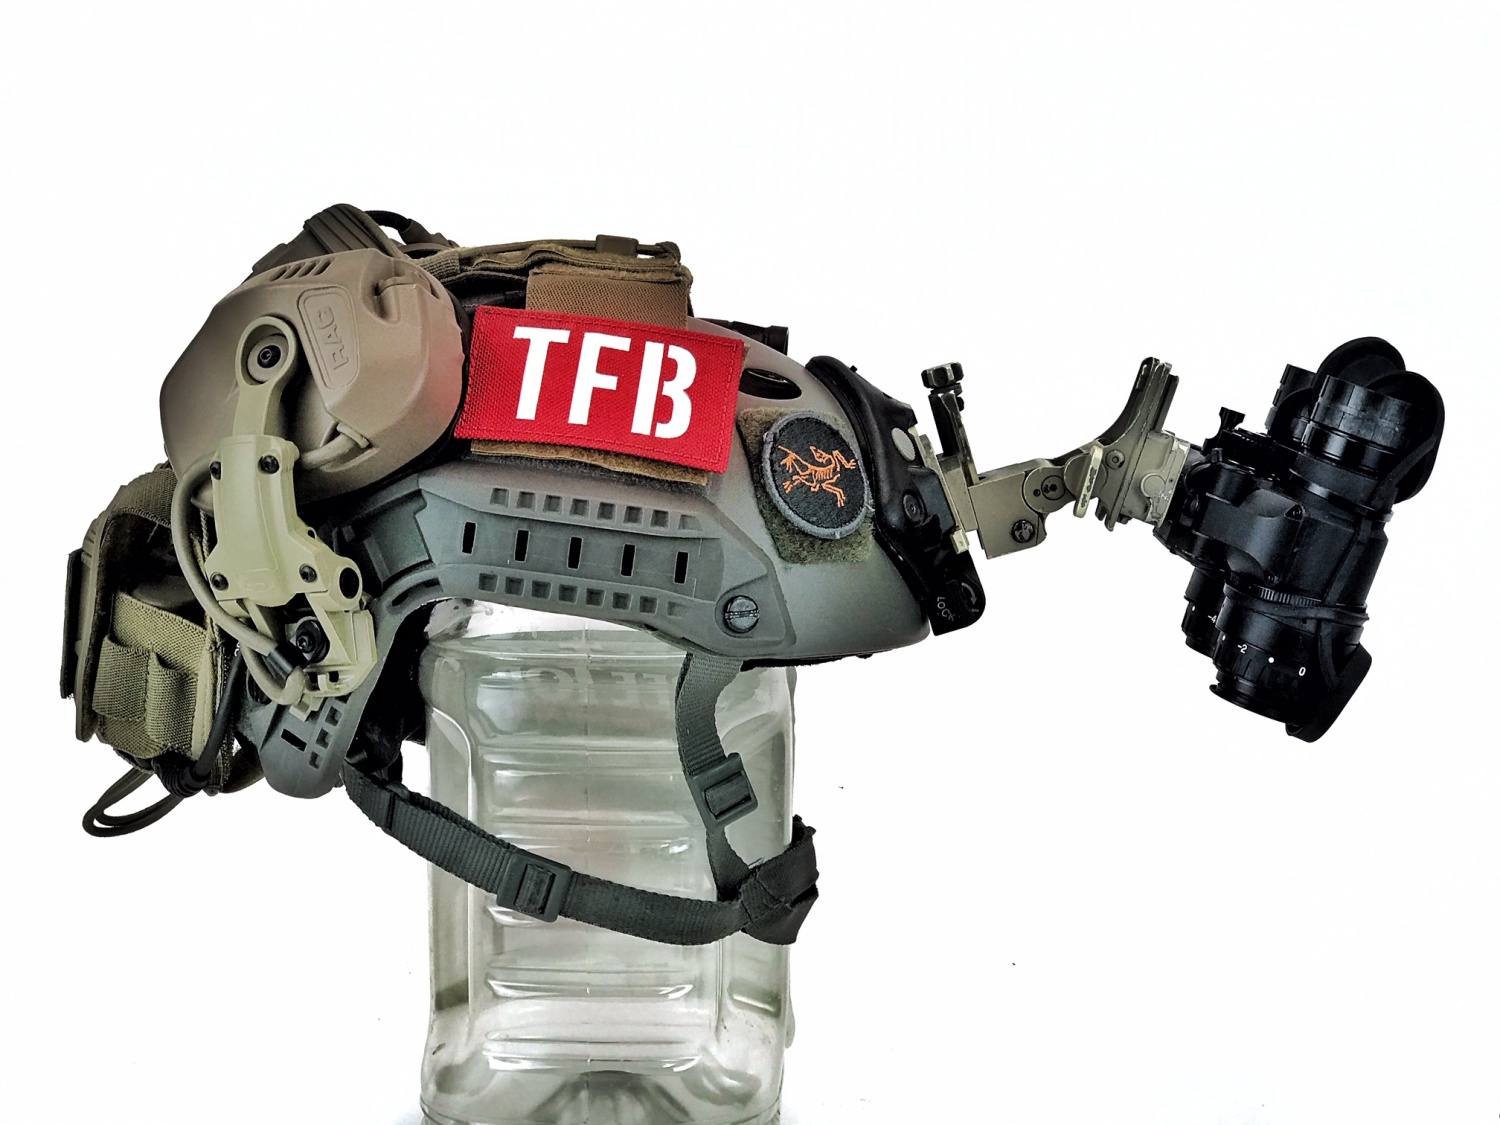
The triangular post can actually spin left or right.
PVS-14 deployed for use.
INVG rotated to the right with the PVS-14
The real magic comes when you fold the rotated PVS-14 all the way up against your helmet.

This small adjustment allows the PVS-14 to hug the helmet when stored. Another major benefit to the INVG is that it is force to overcome. That way if you happen to hit something against the PVS-14, the INVG will immediately fold out of the way.
If need to, you can swing your monocular to the other eye and you will be able to see through the PVS-14.

The INVG is the most versatile mount for a single monocular. But it is not great for running dual tube bino NODs. If you want an INVG then get ready to shell out some serious dough. They sell for $519.75 on TNVC. If you are lucky enough to find one used then get it. But they are highly sought after and are not sold second hand that much.
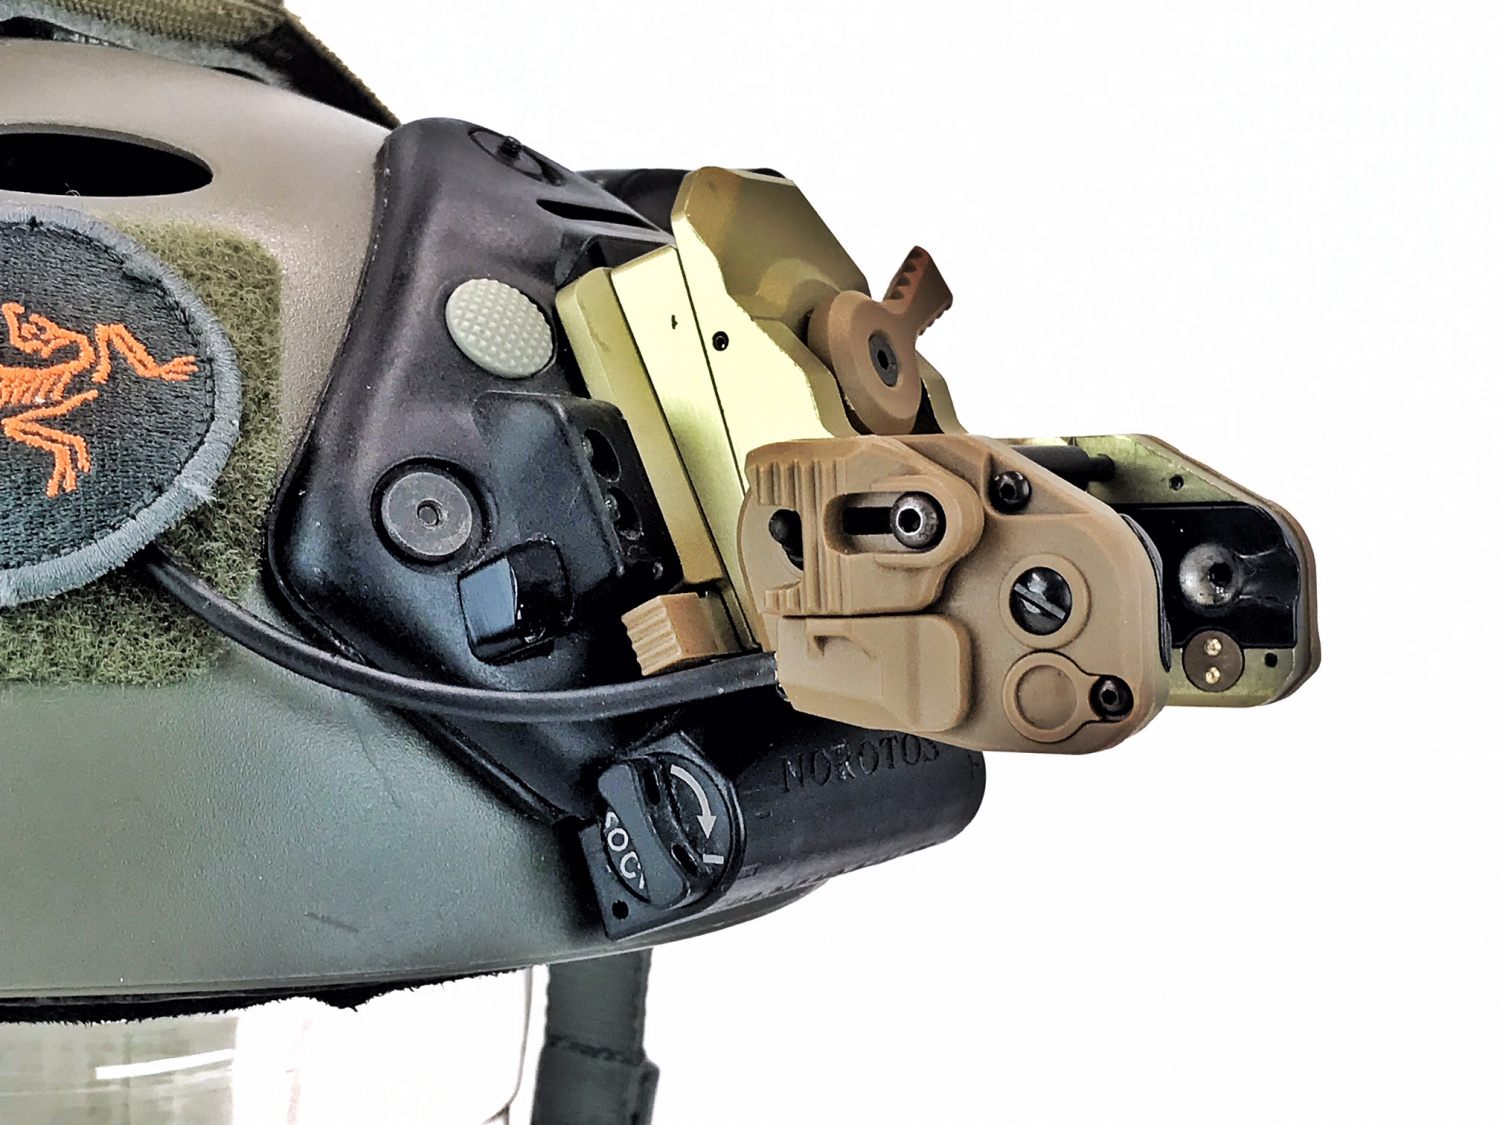
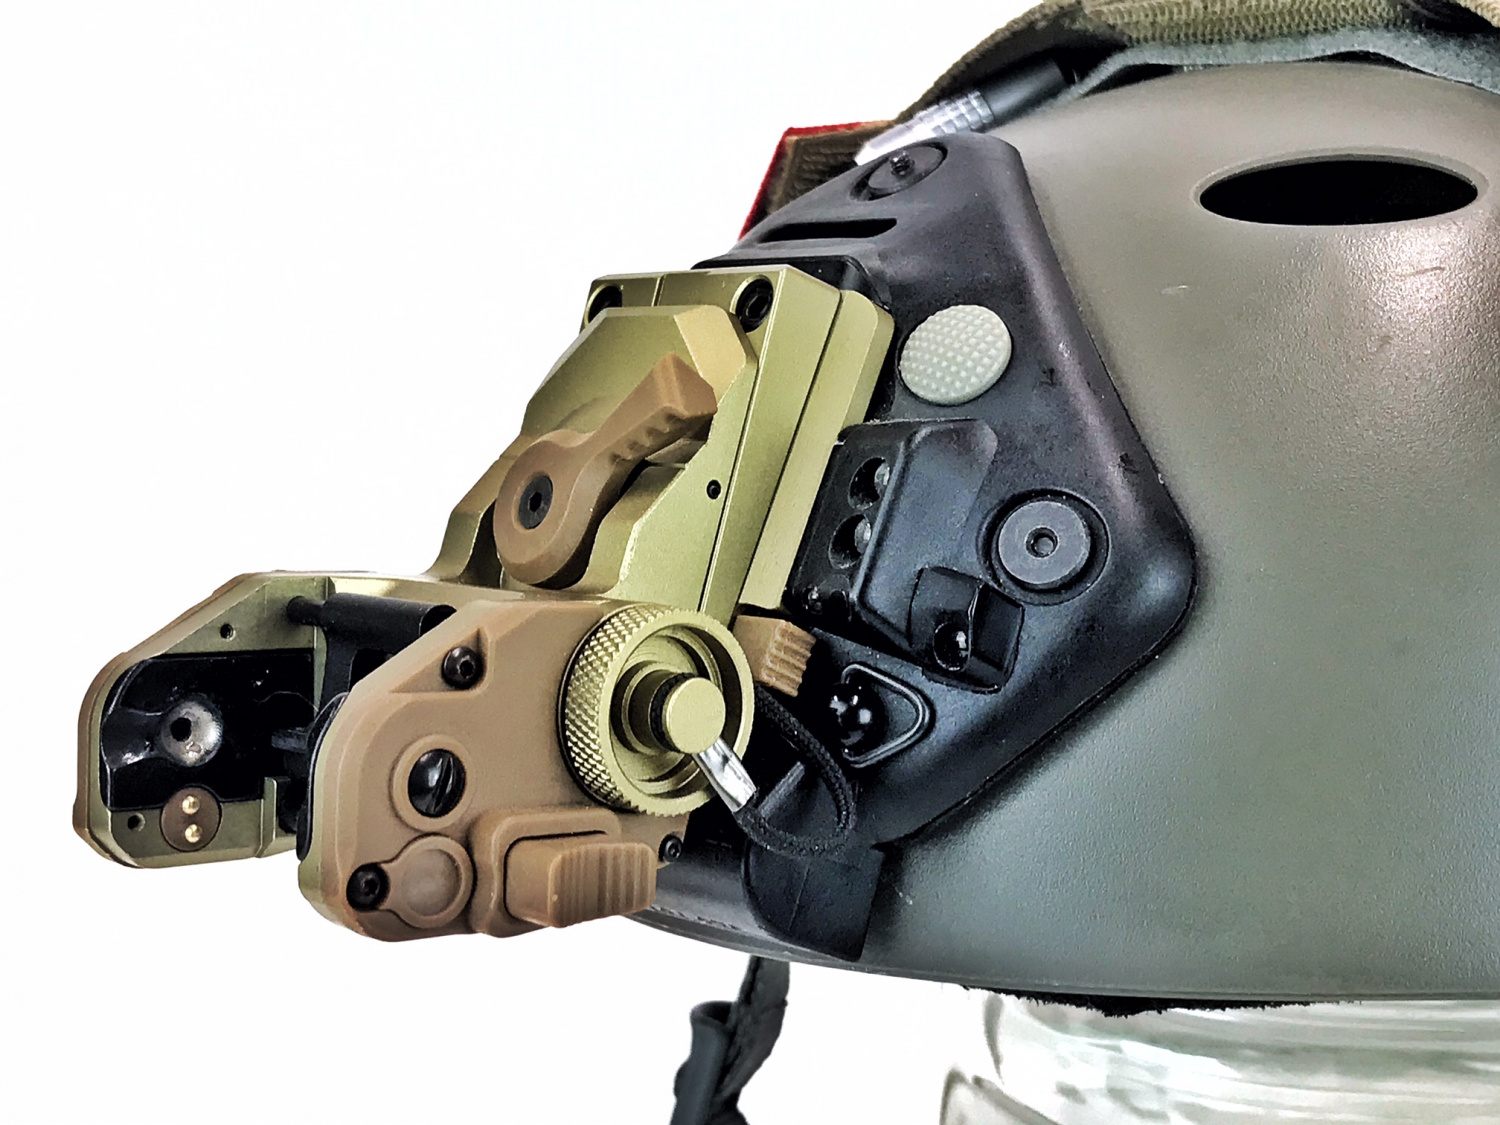
Norotos AKA II Mount

The AKA II or AKA2 mount takes features from the INVG and Rhino II into one mount. However, unlike the INVG and Rhino II, the AKA2 is not a force-to-overcome design. It is a push-button design. This makes the lockup for the folding mount more solid in each position.
Dovetail socket at the most forward position.

Dovetail socket in the most rearward position.
Unlike the Rhino II, the AKA2 has an interchangeable socket. So you can switch from dovetail to bayonet.
Just push up the stop and rotate it 90 degrees so you can slide the socket out the front.

Another feature that sets the AKA2 apart from other mounts is that it has a middle stow position.

Here is the AKA2 folded all the way up.
At full mast, night vision like this PVS-14 sticks up rather high. This can interfere in small confined areas like a vehicle.

Having a middle stow position helps get the NODs out of the way but not so high that it will hit the ceiling of a vehicle.

Just like the INVG, the AKA2 has the same height adjustment design. To adjust the mount up or down you use the fine adjustment screw and for gross adjustments, you have the three positions for the rear plate.
Stowed upwards, the NODs stick out like a sore thumb.
One issue with using the AKA2 with DTNVGs is the lever for adjusting the forward position of the NODs gets in the way of the left monocular housing. Roll up the left eye pod and it hits that lever.

Even with the eye pods aka monocular housings folded inward to the helmet, it is not that flush with the helmet.

The Norotos AKA2 mount is pricey at full retail around $500 but I see them often for sale used for under $200.
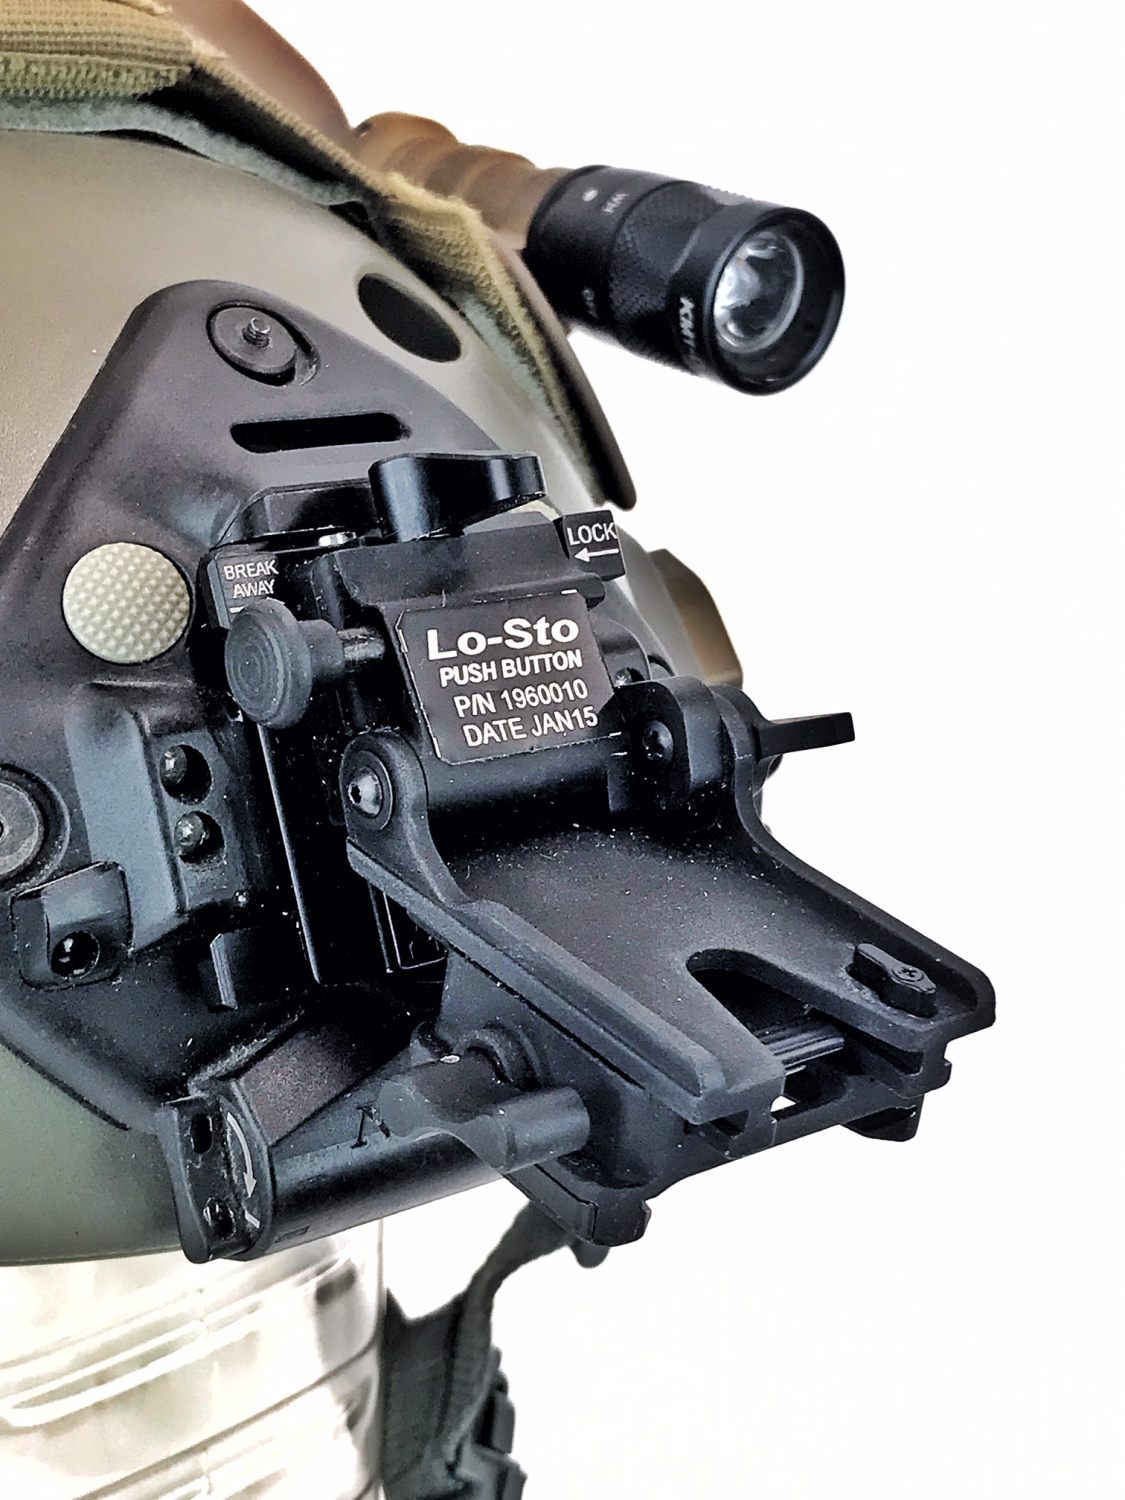
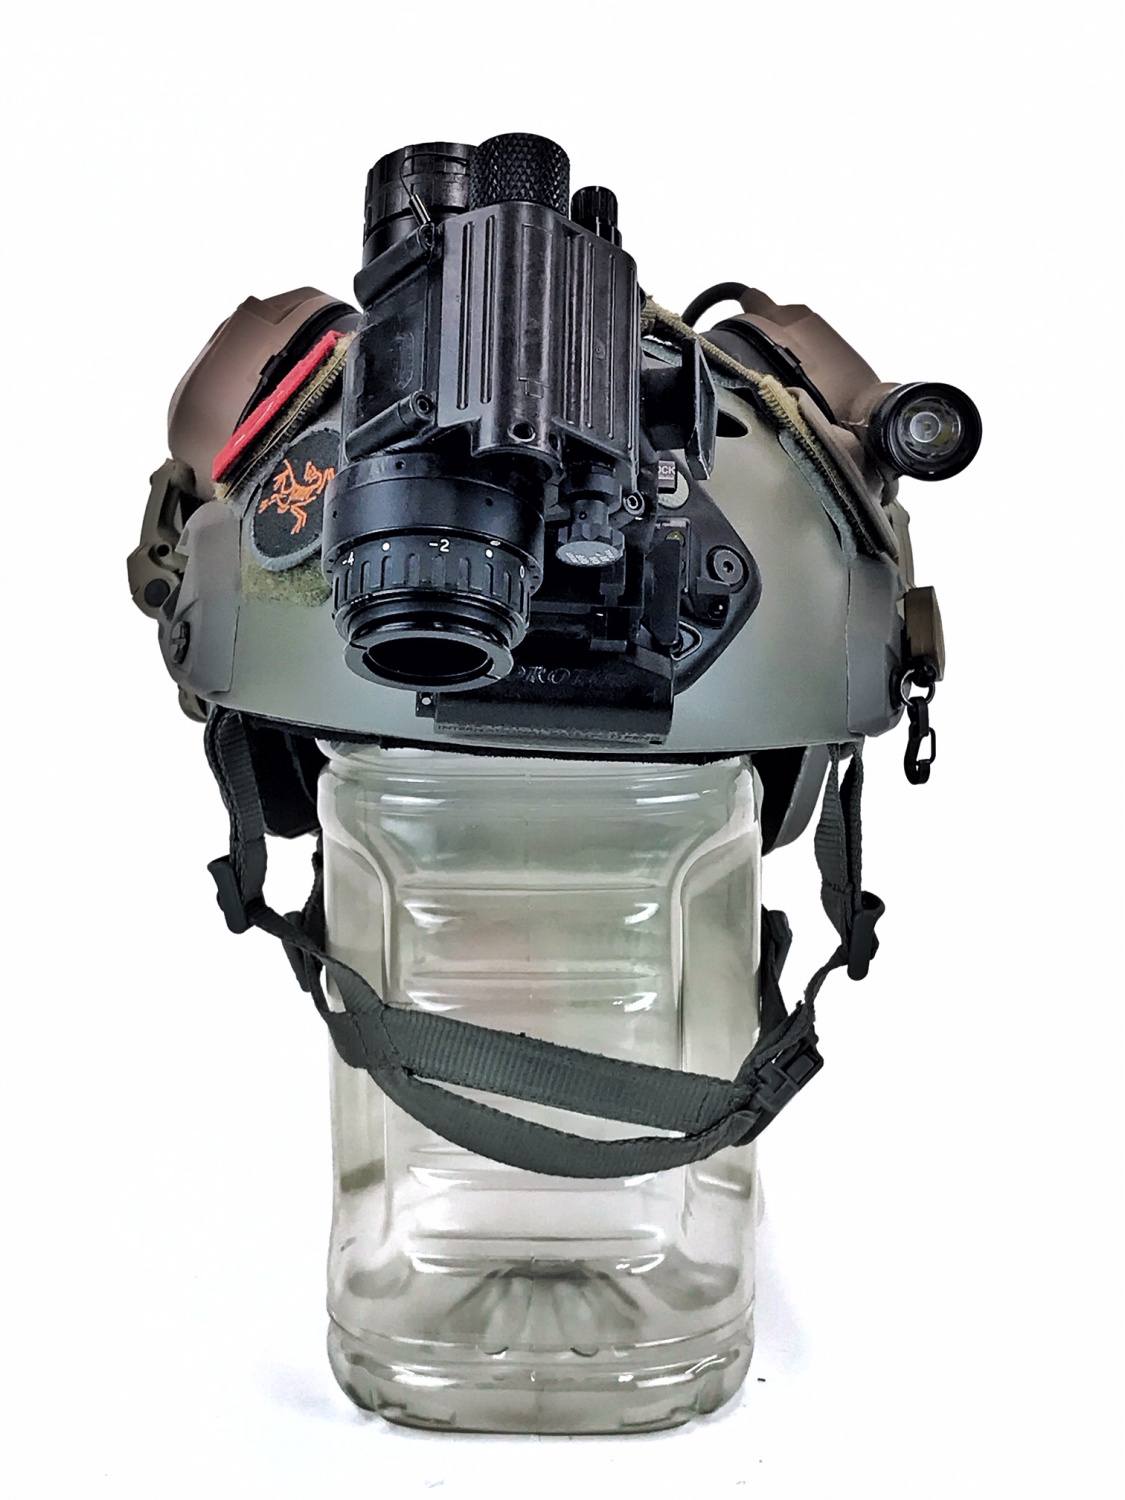
Norotos Lo-Sto Push Button Mount
The Norotos Lo-Sto is a lightest and lowest profile mount on the market. At least that is what Norotos claims.

Lo-Sto at the highest vertical position

Lo-Sto at the lowest vertical position
The Lo-Sto has the push-button release on the right-hand side of the mount. This is actually perfect for left-handed shooters. It is easier to reach up with your right hand, push the button with your right thumb and fold the mount upwards.


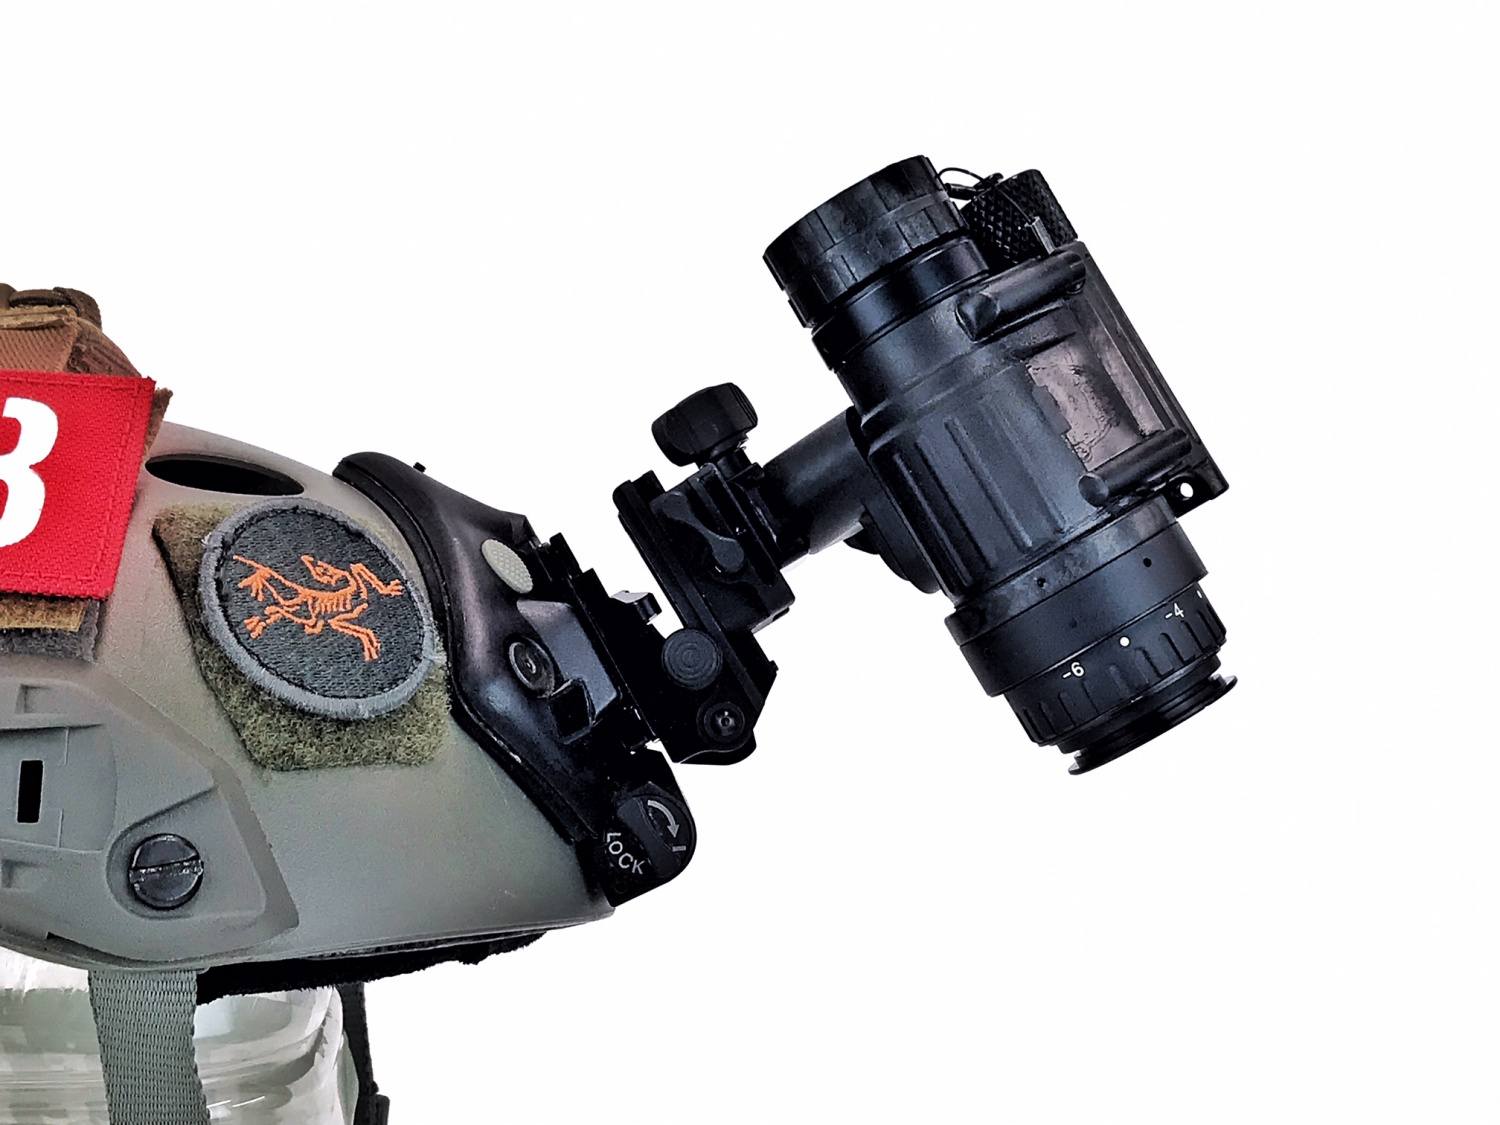
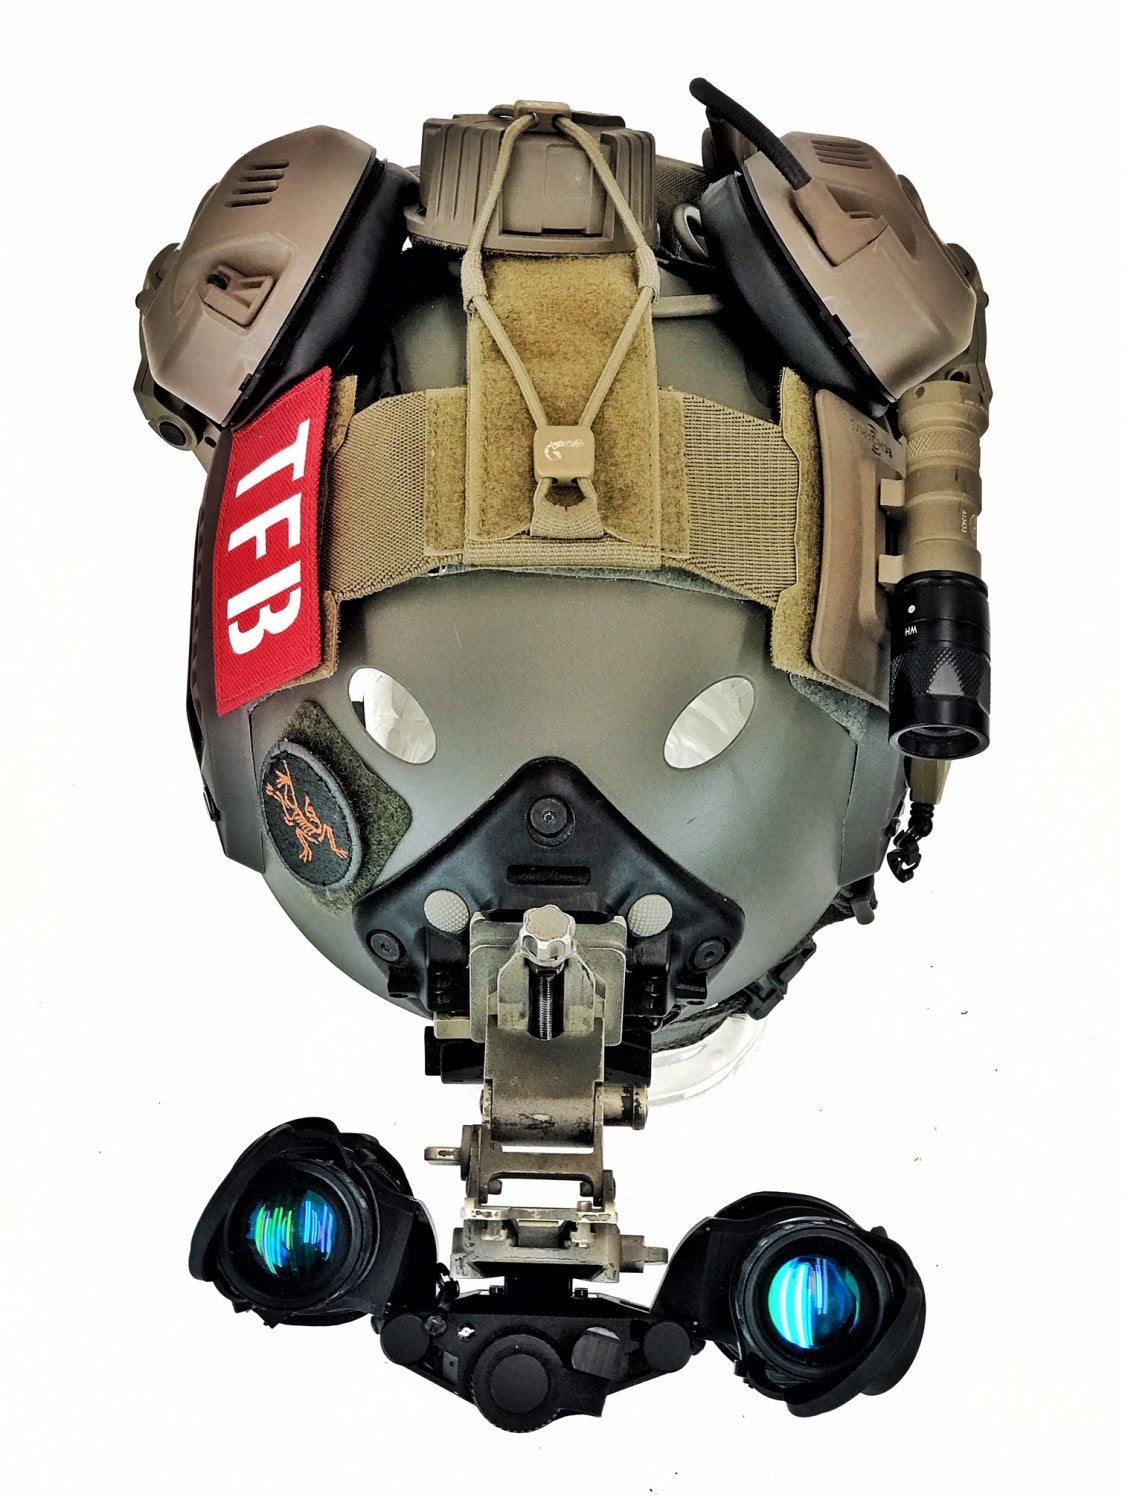
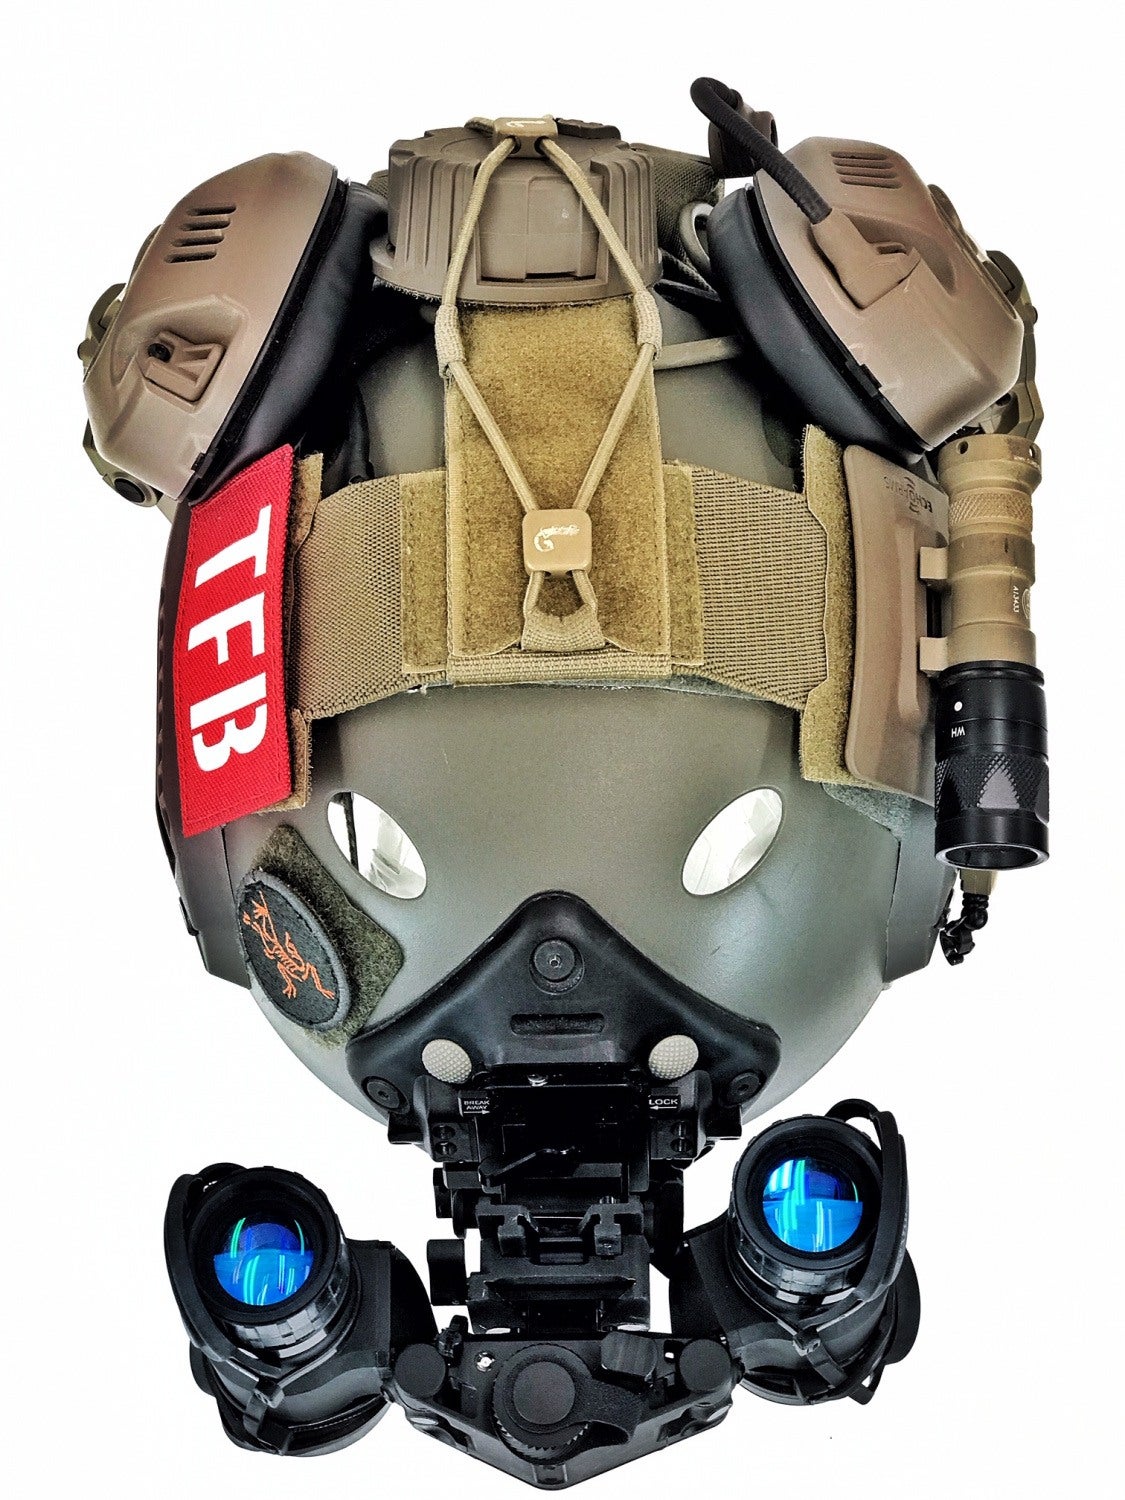
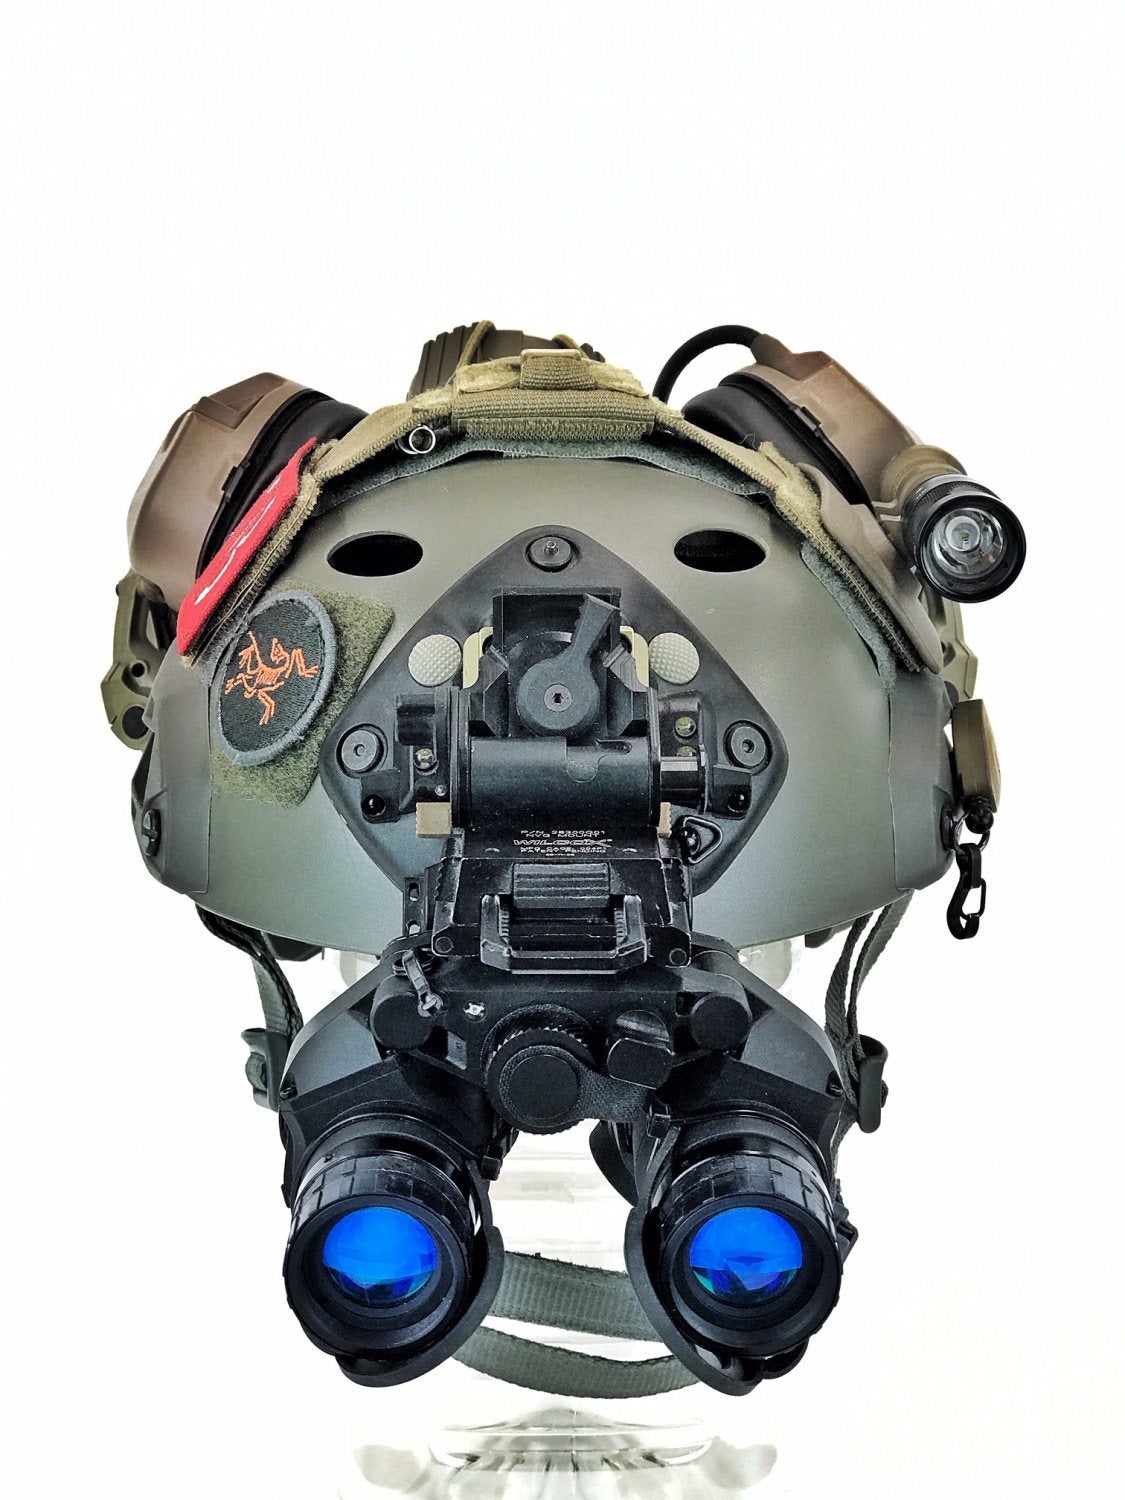
While the Lo-Sto works with monoculars like the PVS-14, it works better with dual tubes.
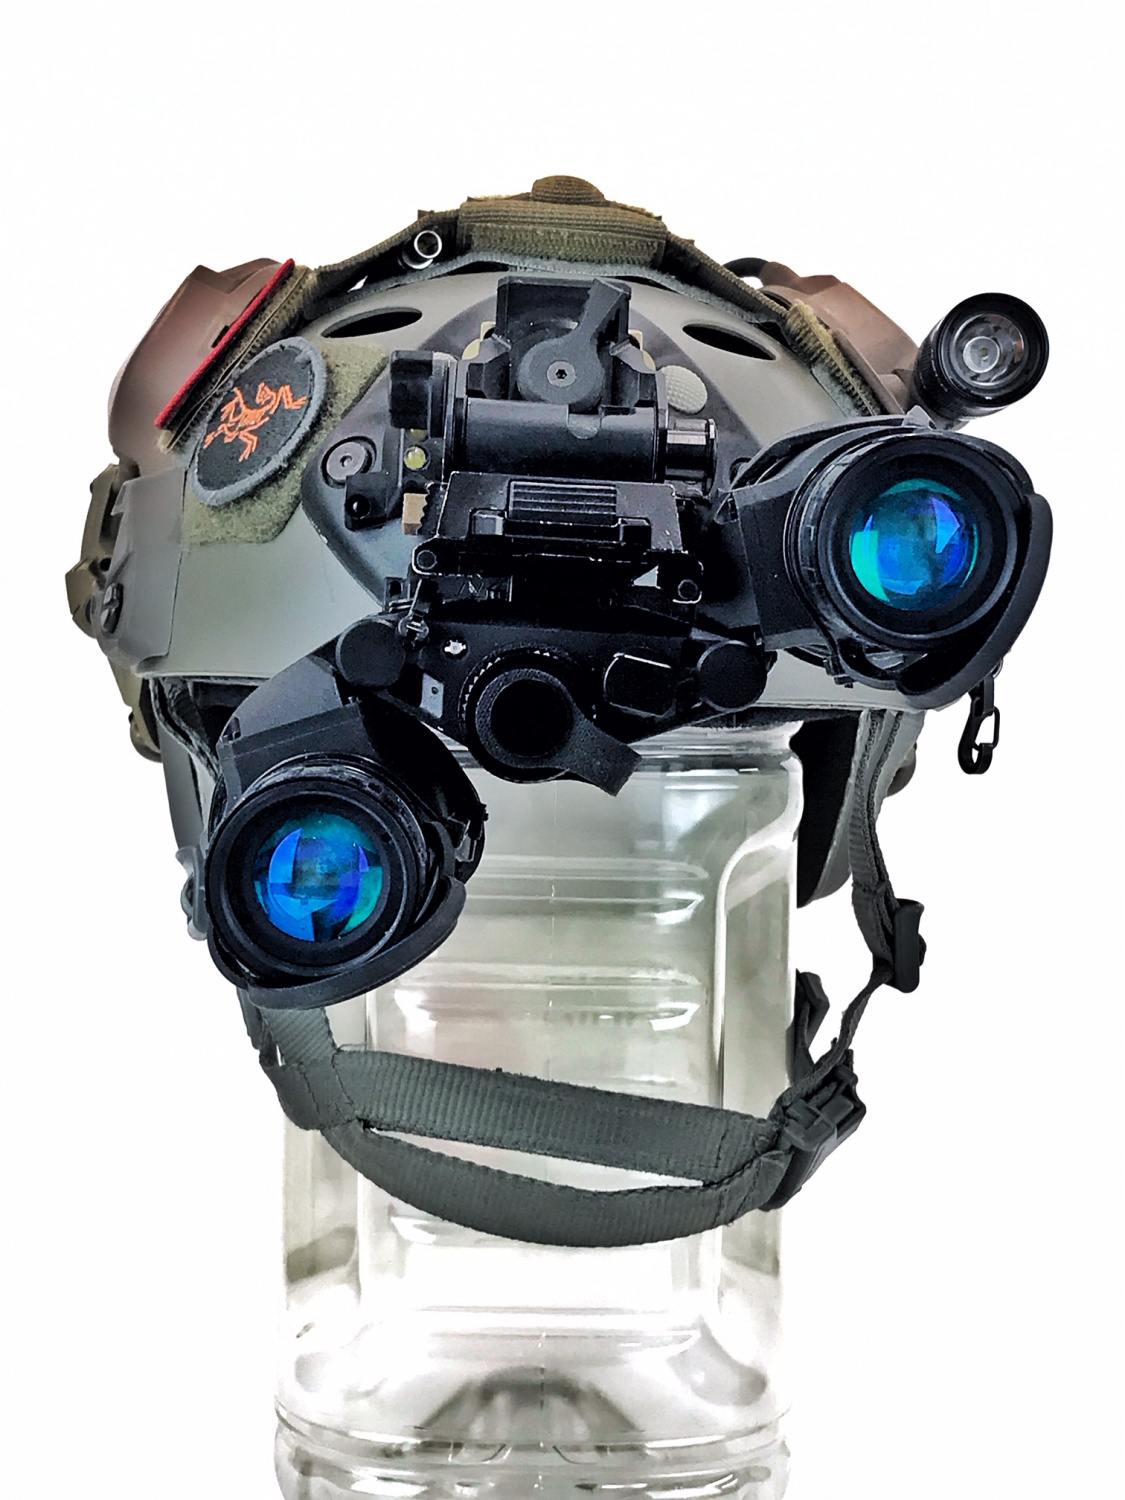
With dual tubes like these DTNVGs, you can roll the monocular housings inward and closer to the helmet.


The Lo-Sto is also pricey often fetching around $350 used and close to $500 brand new.
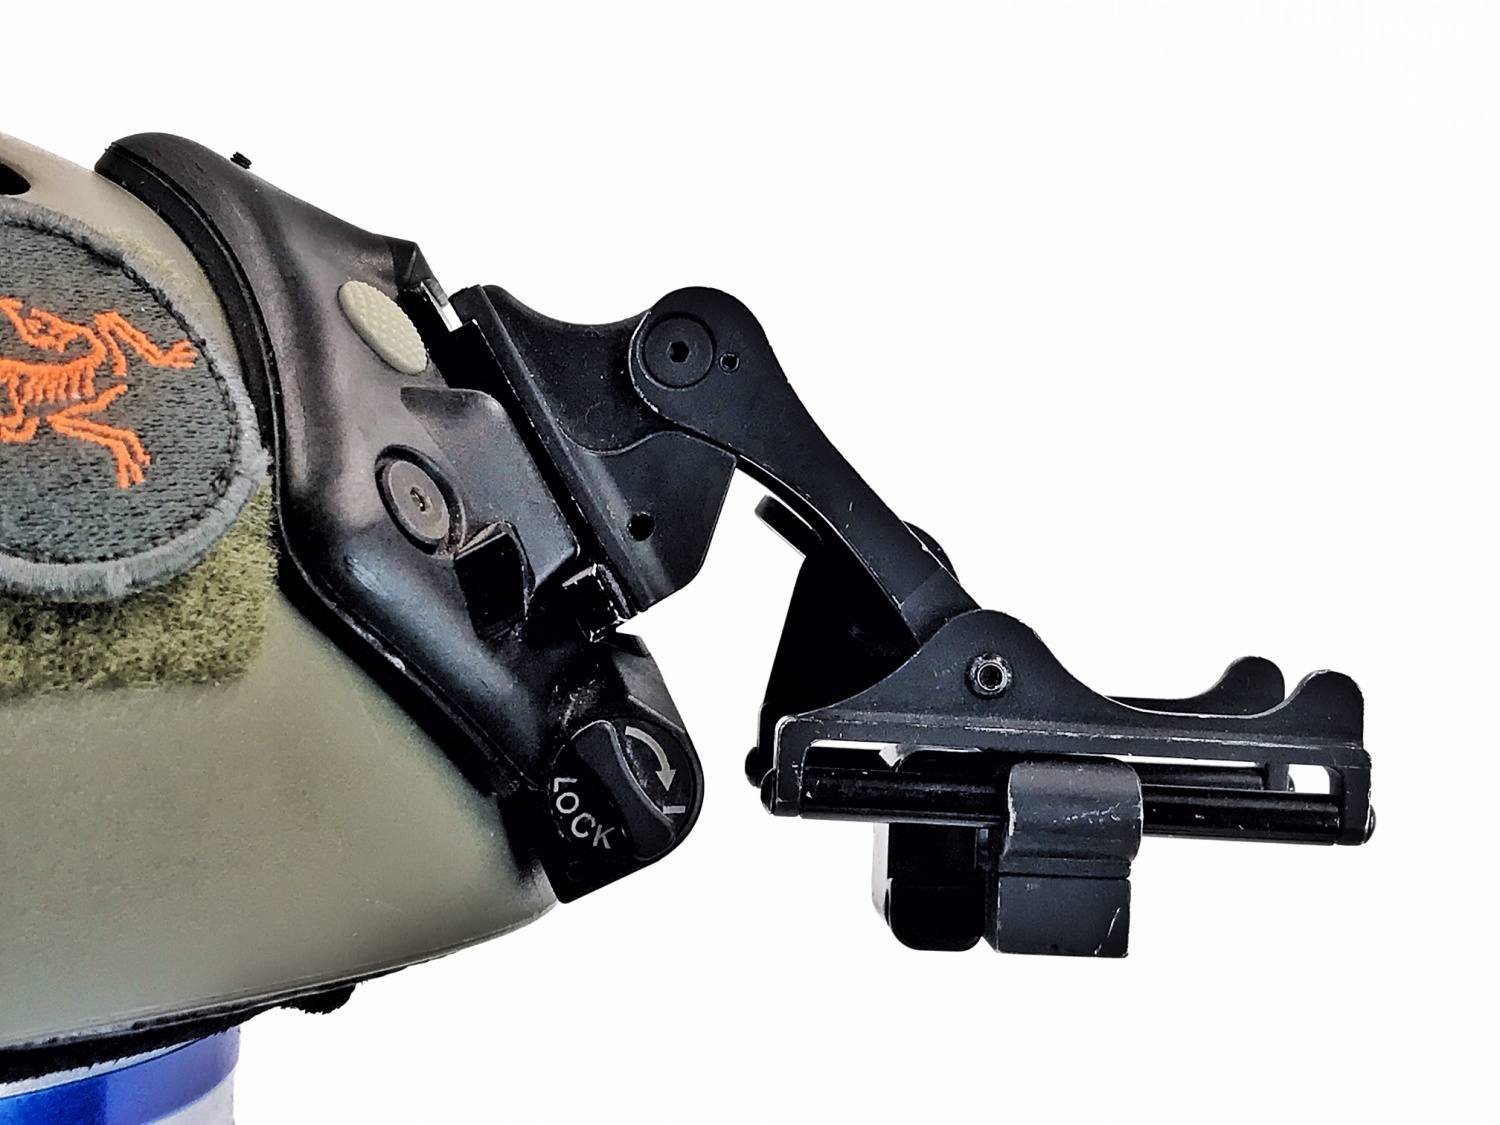
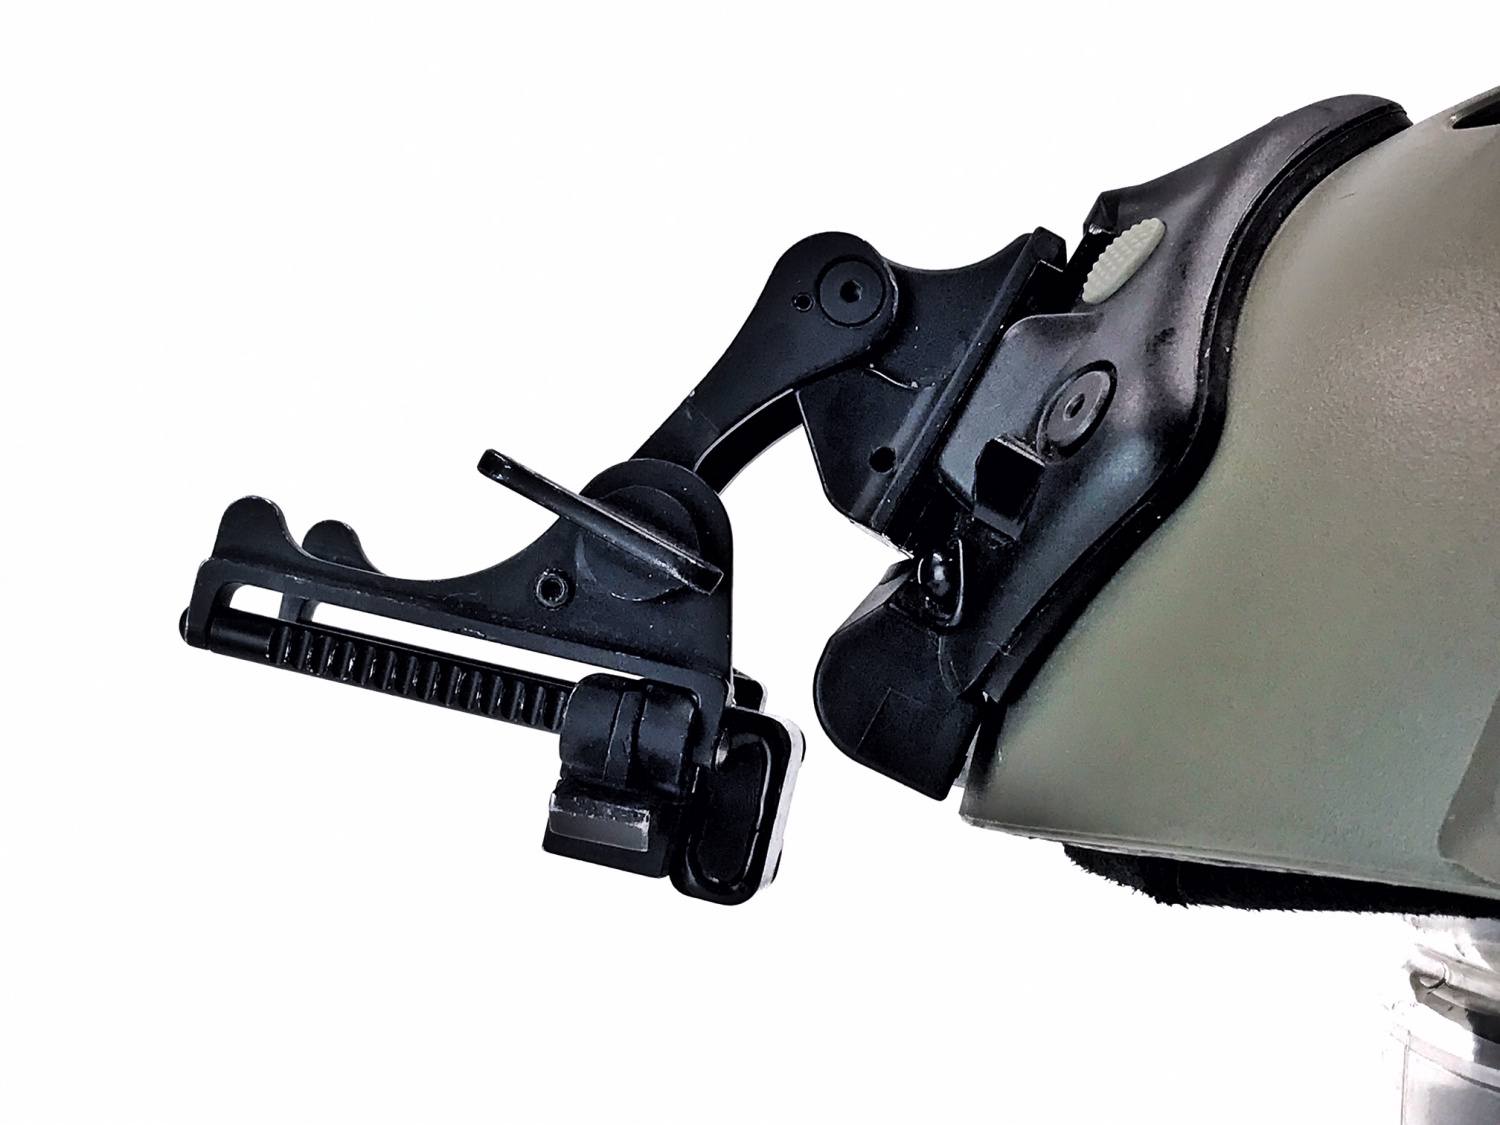
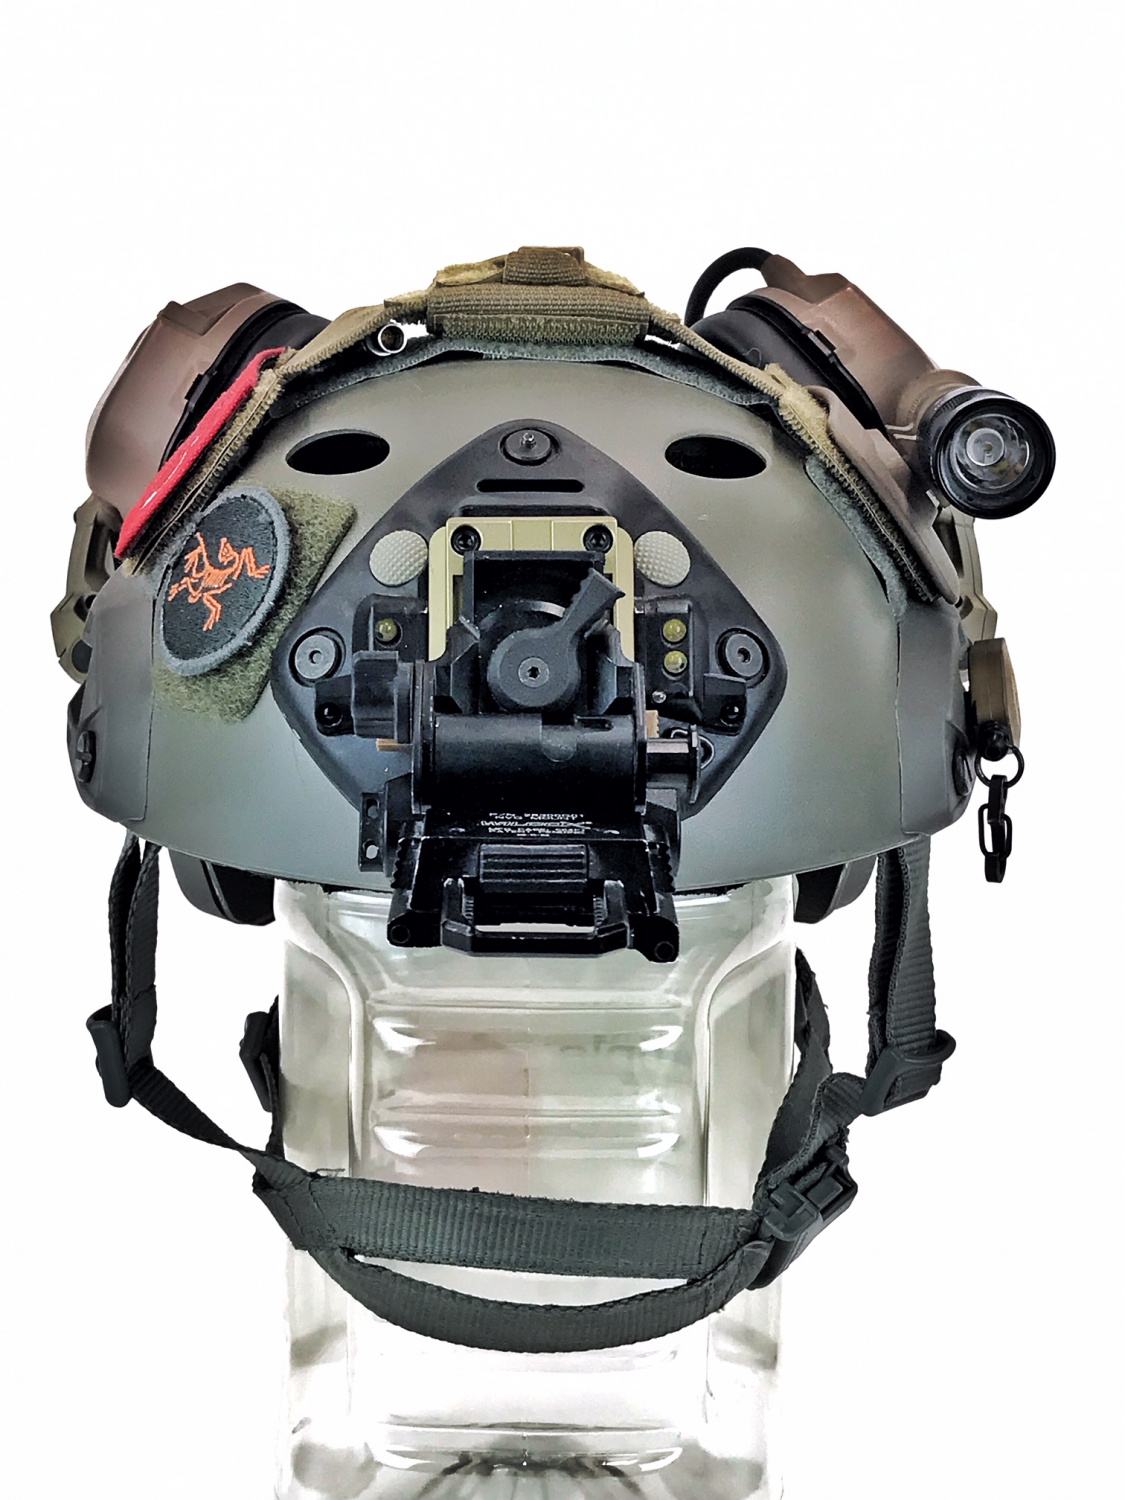
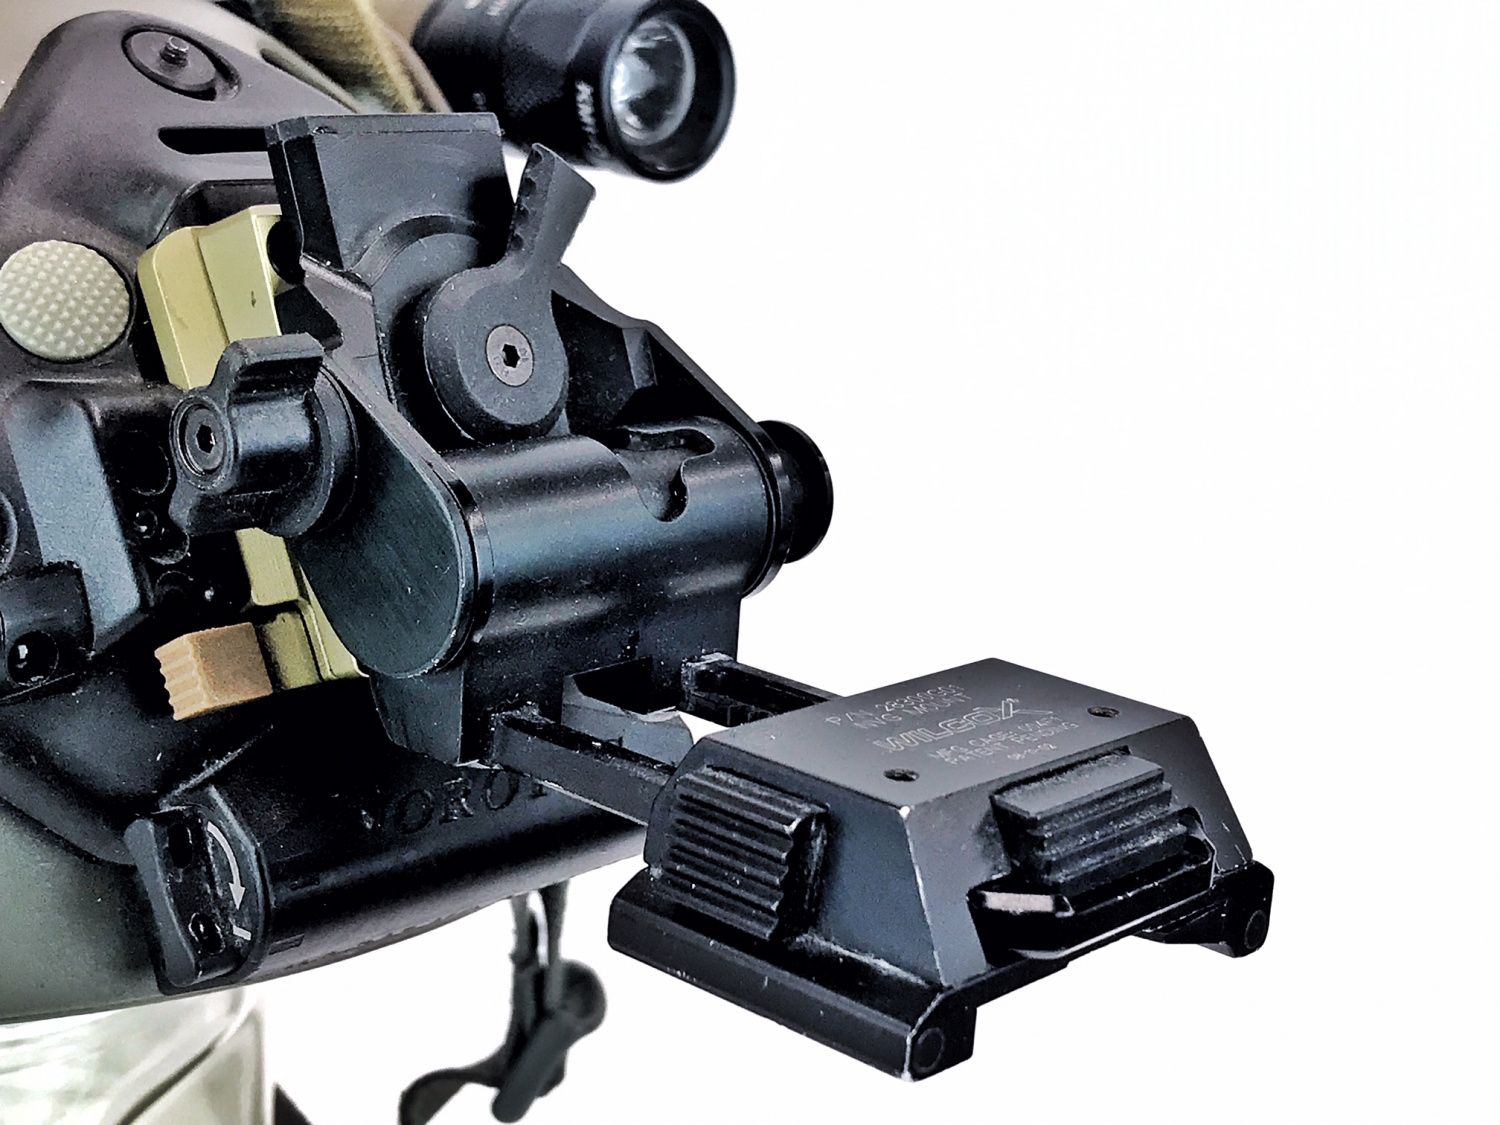
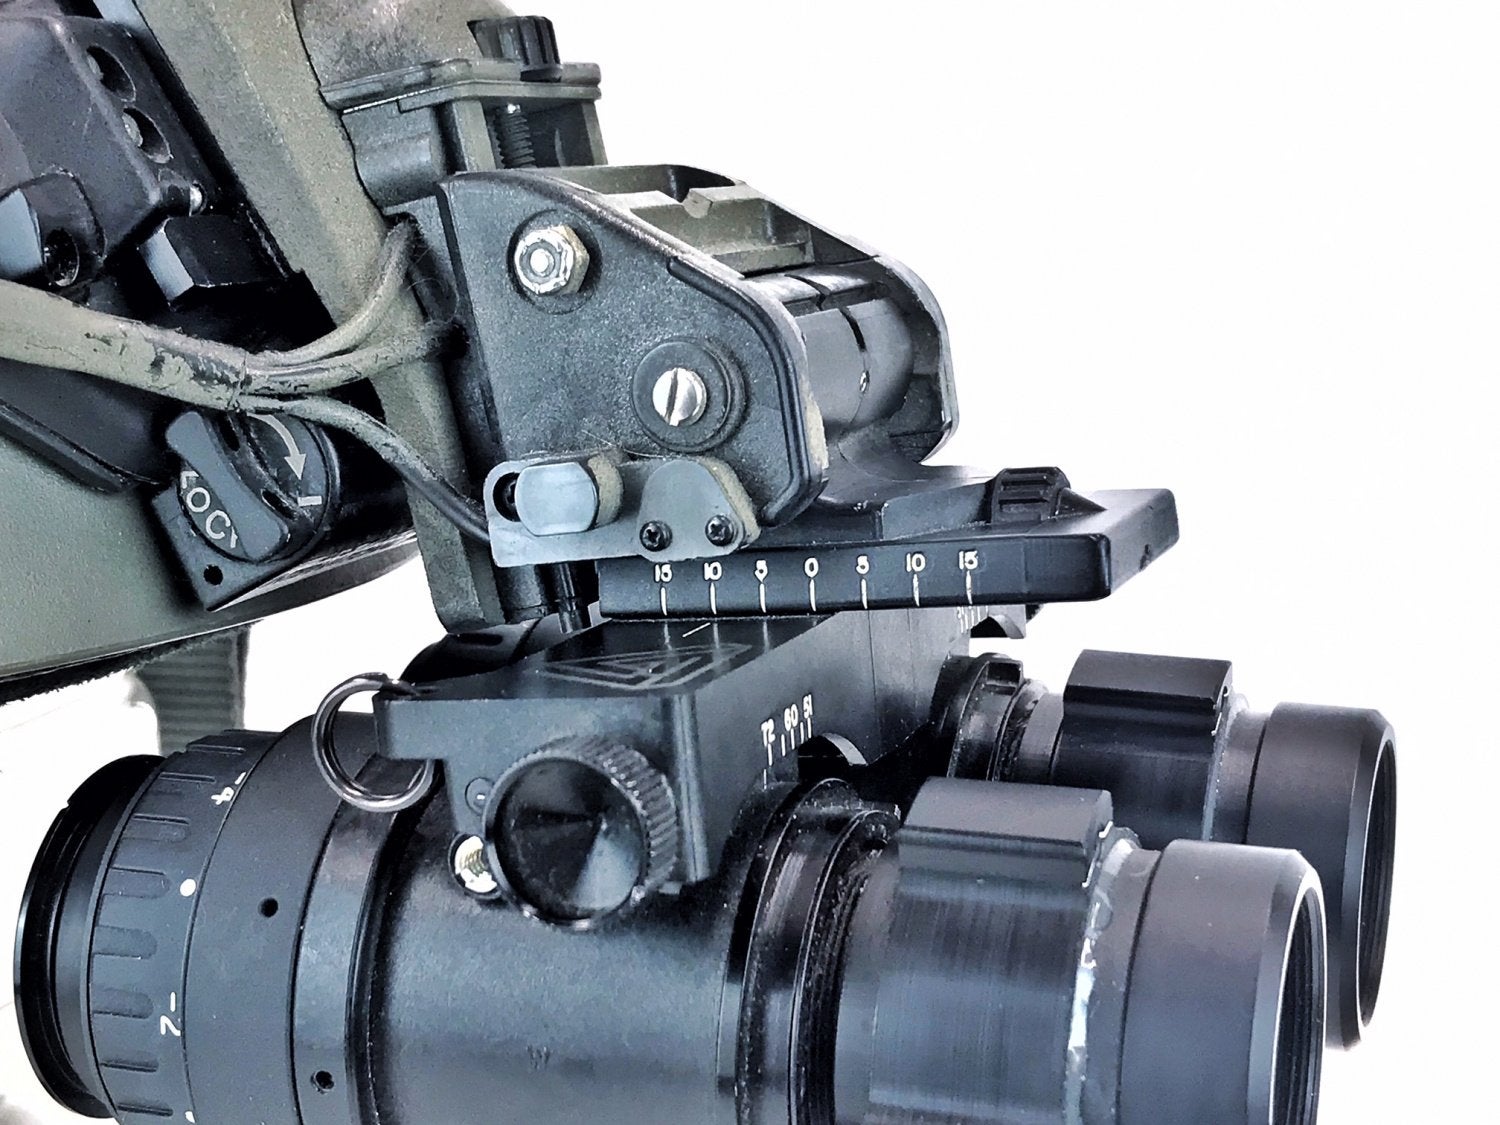
Wilcox L4 G24 Mount
In the night vision world, the Wilcox mount is one most people get when they start using more expensive night vision devices like dual tube binos. This is partially due to the name brand and that certain special forces units use Wilcox mounts for their night vision devices.
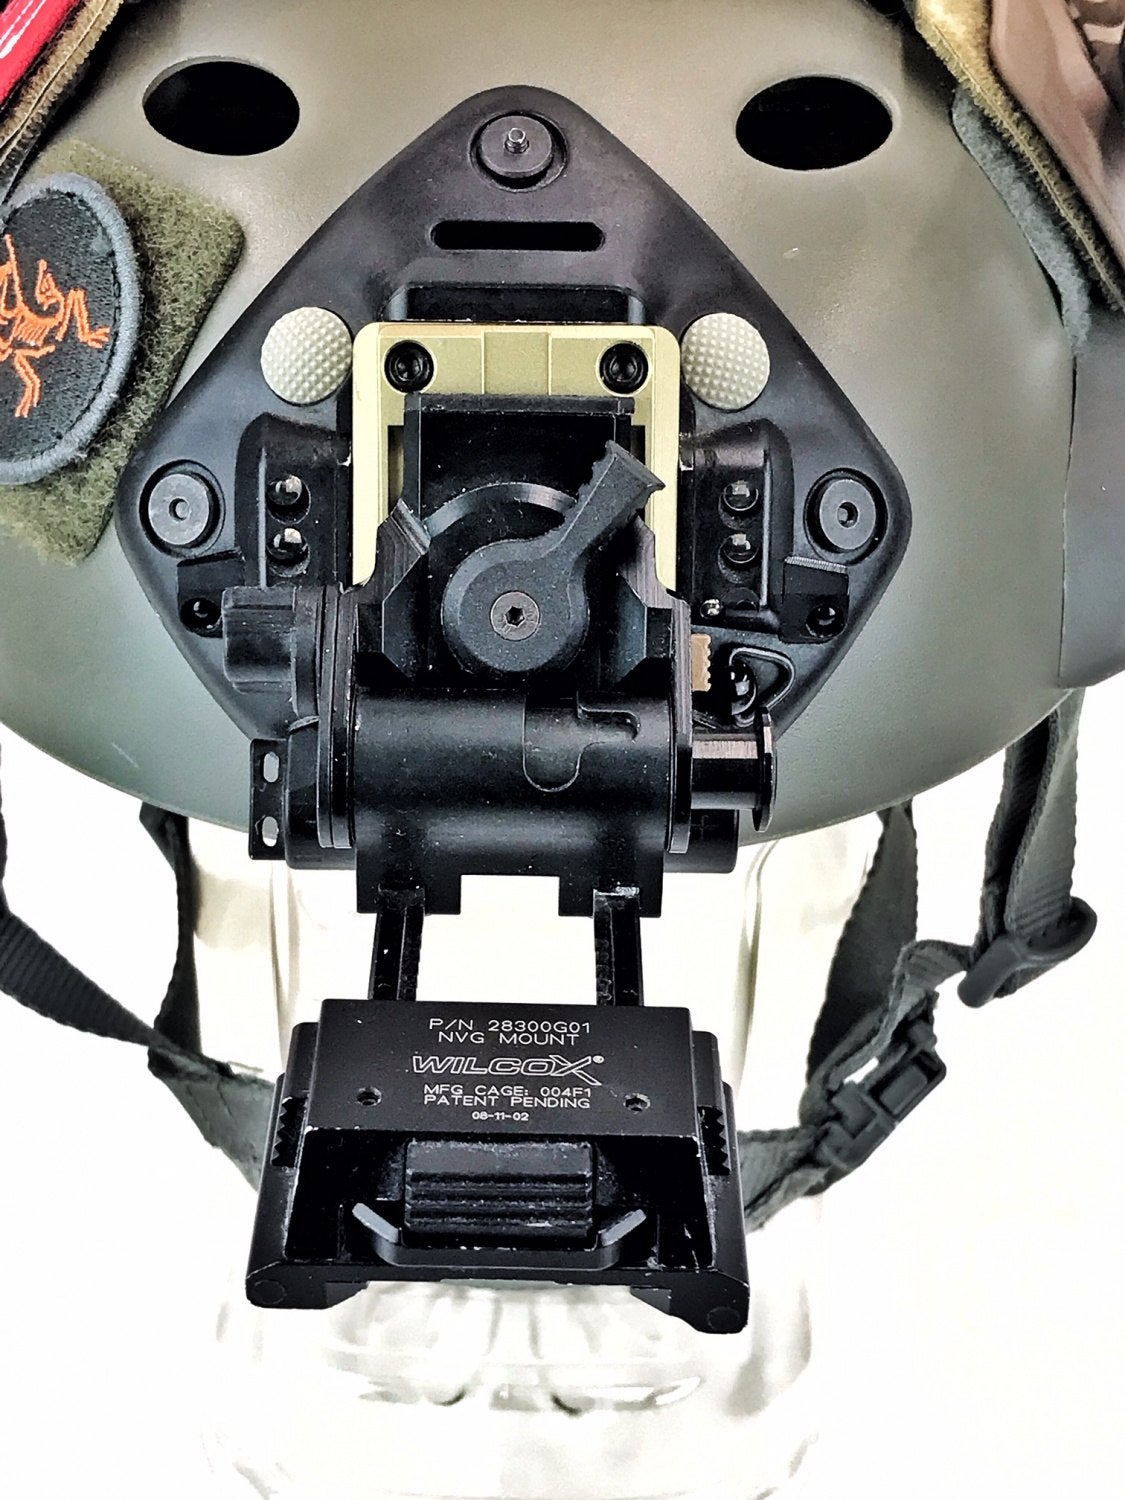
Turn the throw lever and you unlock the mount so you can adjust the vertical height.
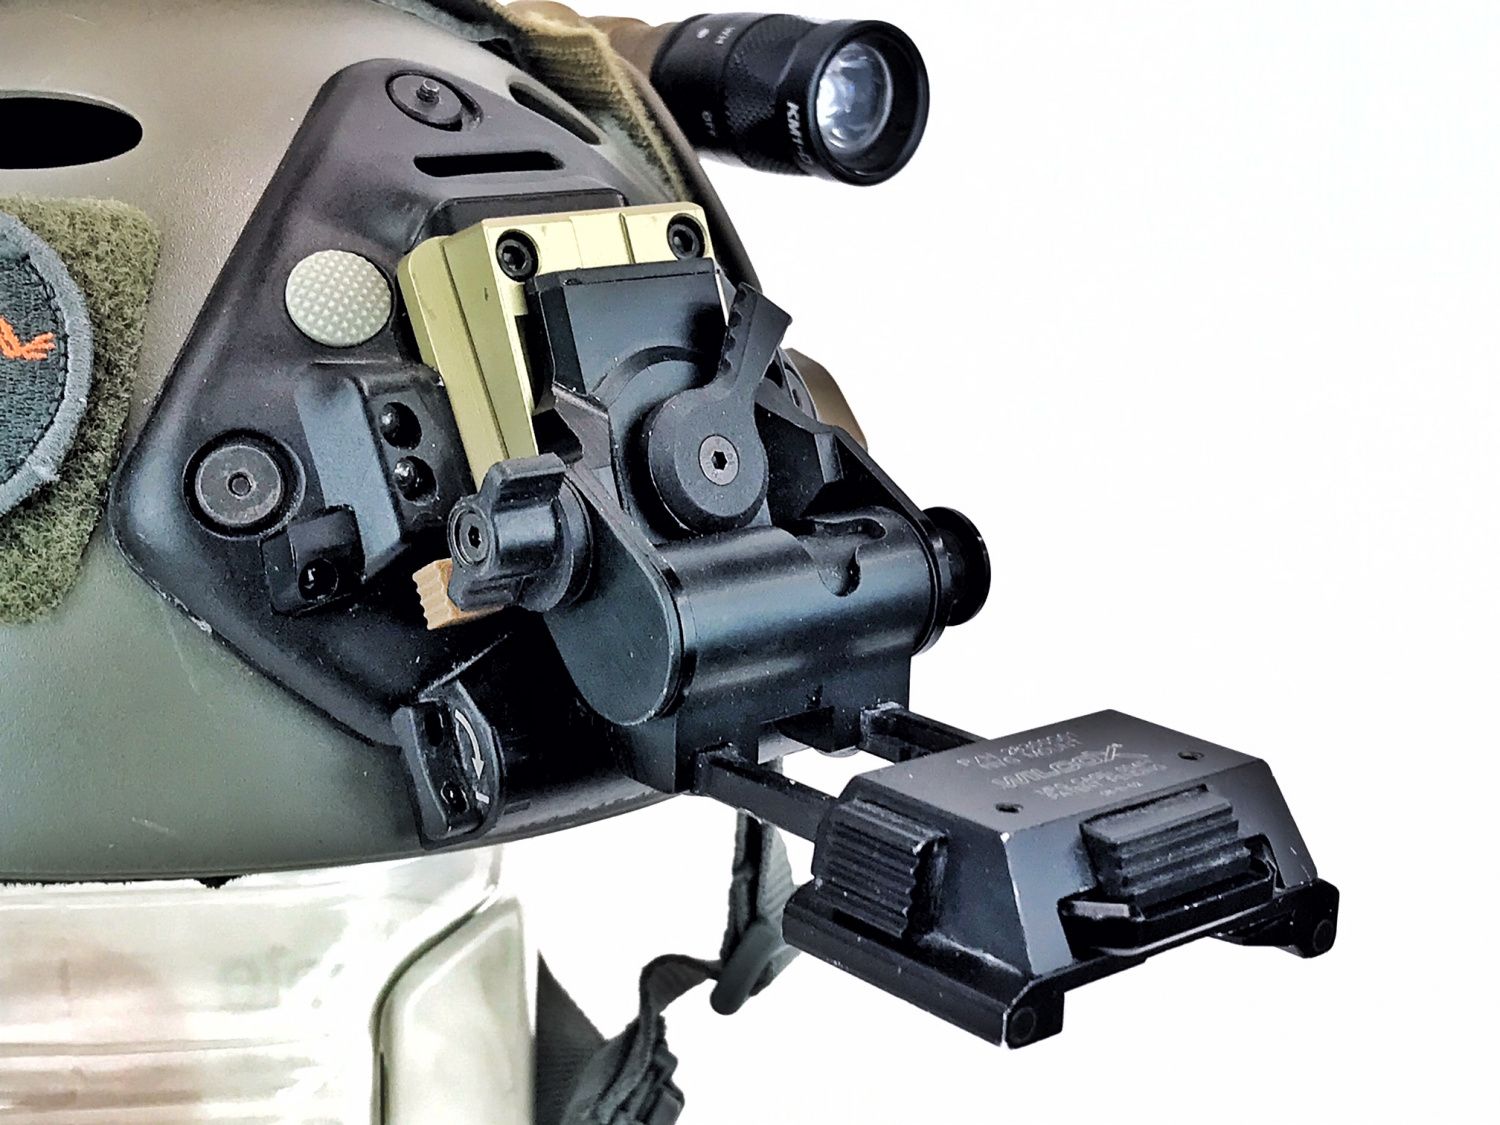
L4 G24 at the lowest height
L4 G24 at the highest position.
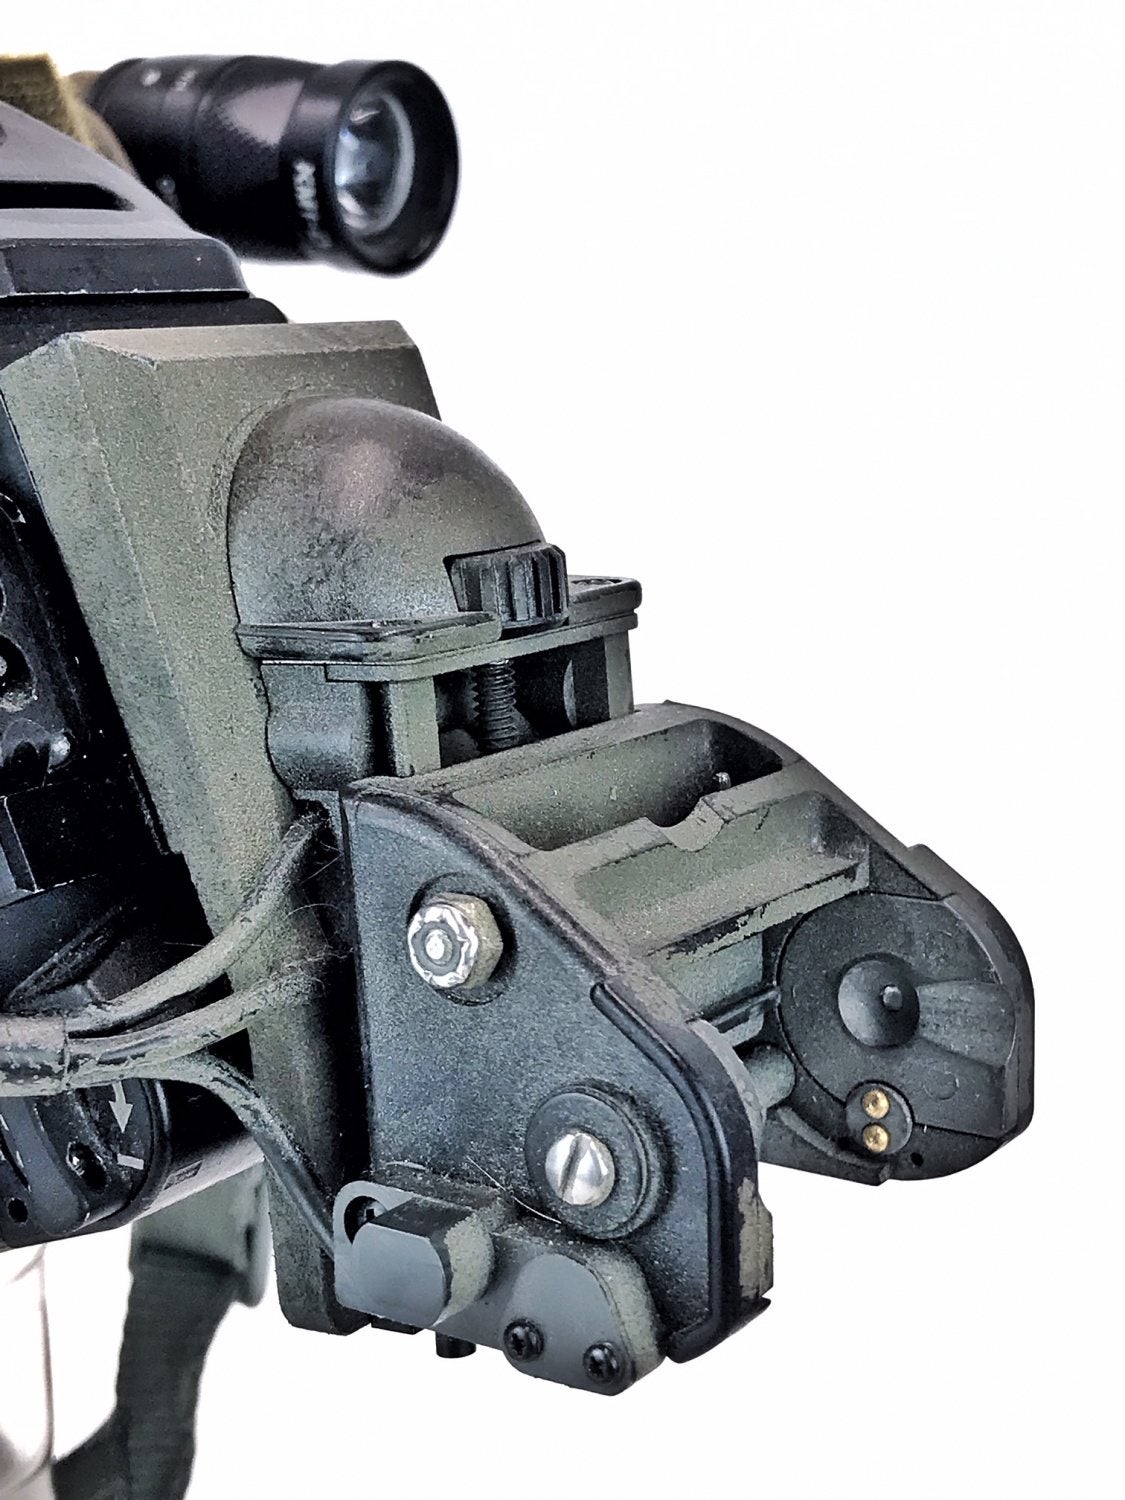
All the Norotos mounts have some sort of small lever on the front to unlock the NODs from the mount. The Wilcox L4 G24 uses a ridged button at the front of the dovetail socket.
One nice feature of the Wilcox L4 G24 is that it folds rather flat against the helmet compared to other mounts.


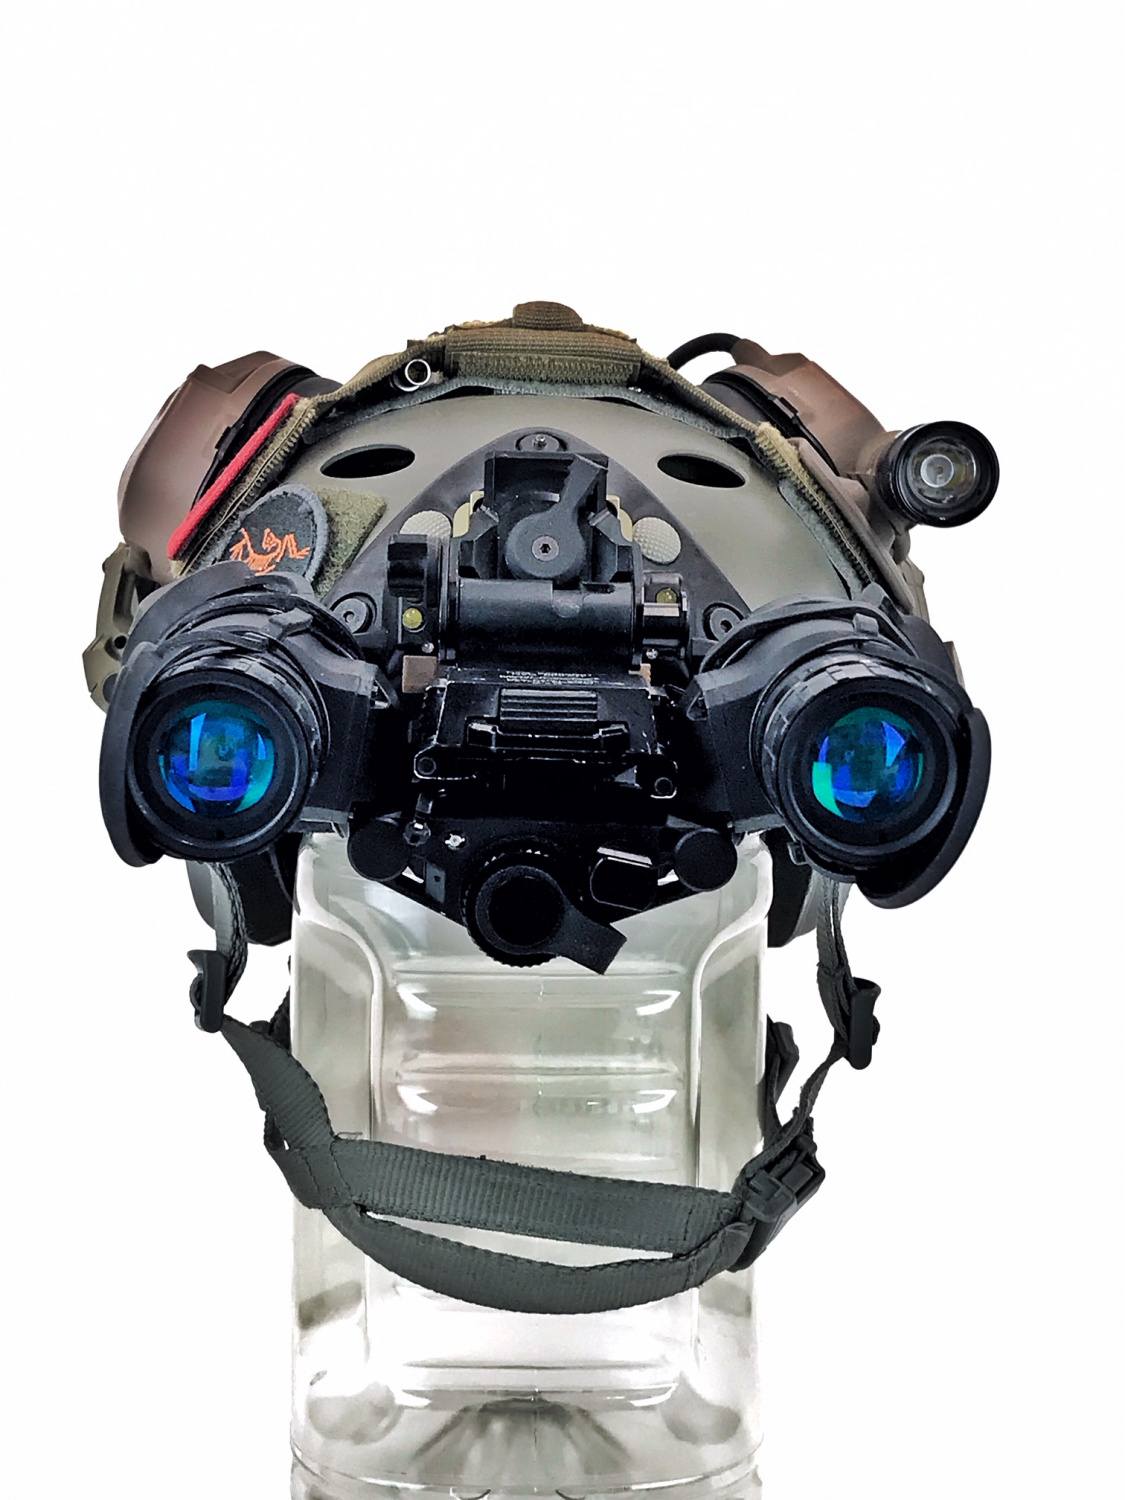
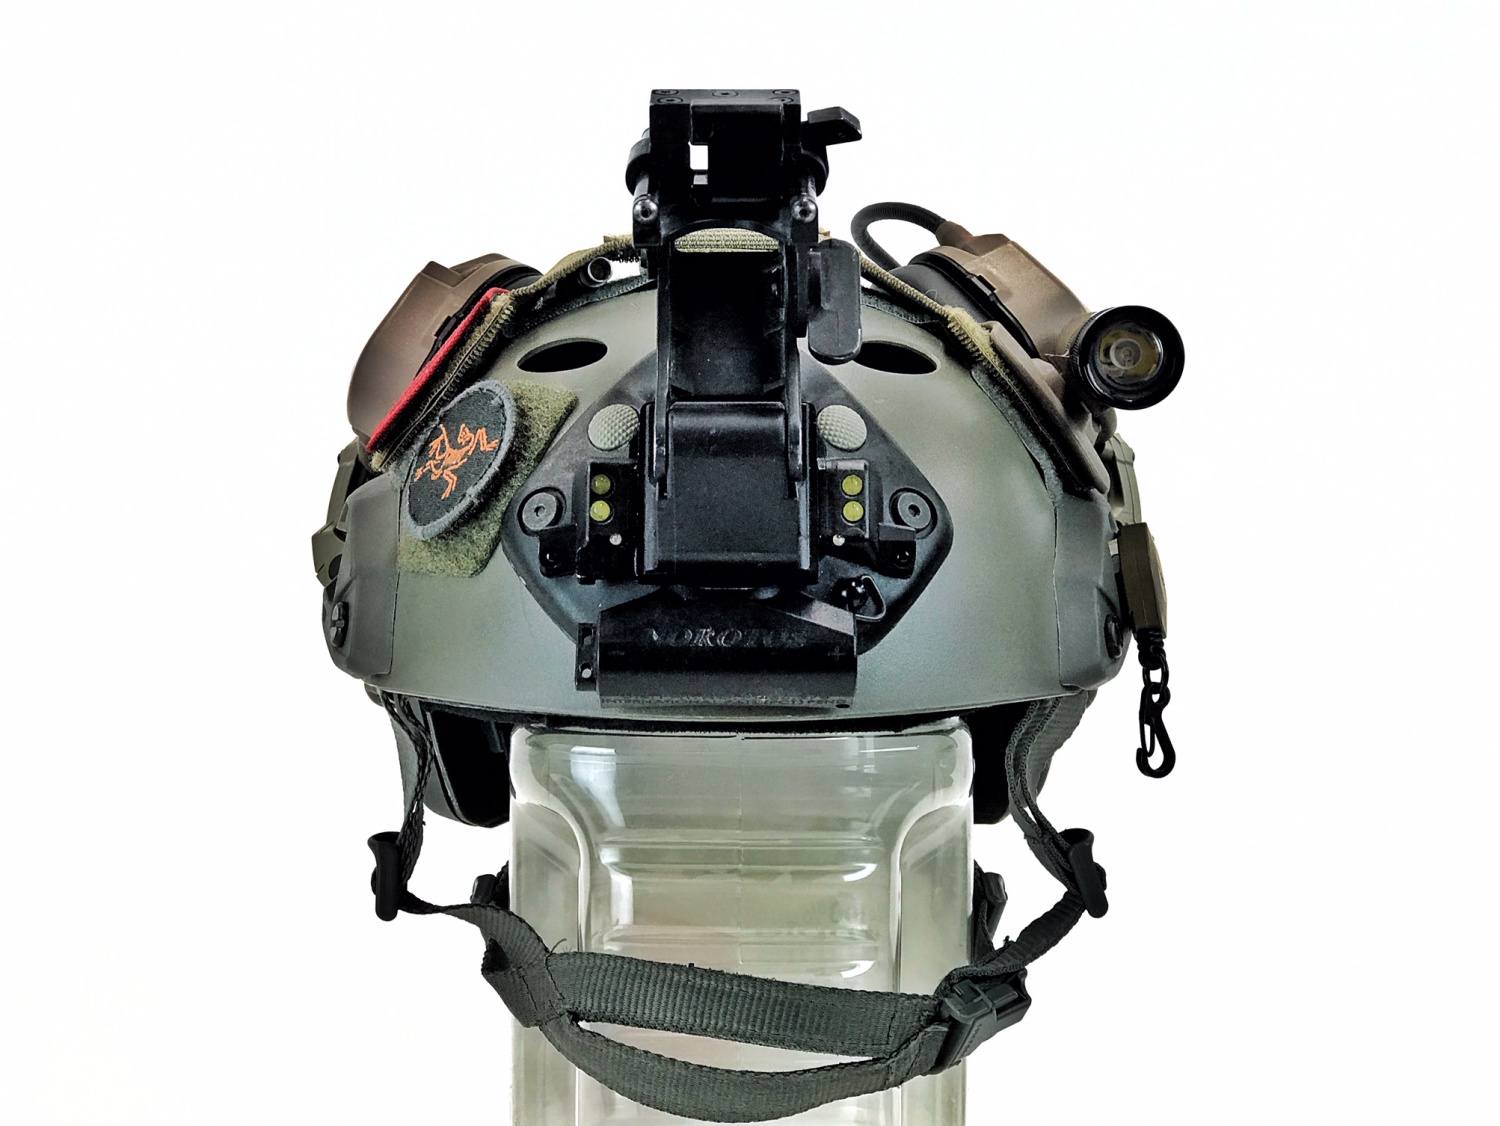
DTNVGs with monocular housings deployed for use but stowed upwards.
DTNVG monocular housings folded inward on L4 G24.
The L4 G24 is just as pricey as the Lo-Sto. I have seen and heard of the Wilcox L4 G24 tend to lose their rigidity and you get a little bit of wobble. So make sure you use bungees or lanyards to secure your NODs in case the mount fails if you happen to have a heavily used one.
ANVIS Ball Detent Mount
For a majority of night vision devices, they use either a dovetail or bayonet attachment method. But pilots use a different design for their ANVIS goggles. If you want to mount up your aviation goggles then you need an ANVIS mount aka ball detent mount.

Unlike the previous night vision mounts the ANVIS mount does not fold at all. In fact, it only has one type of adjustability. You can adjust the vertical height of the mount.
There is a small circular black button that locks the ANVIS into position. Press it to fold or unfold the ANVIS goggles.
Most night vision devices have onboard batteries to power them but that is not the case with ANVIS goggles. The ANVIS mount has a power cable that plugs into a battery pack that is mounted to the rear of a flight helmet. The mount delivers power to the goggles. You can see the two brass contacts inside the ANVIS mount.

Due to this design, the ANVIS goggles are only powered when they are deployed in the down position. As soon as you fold them upwards the power is disconnected to the goggles.


Since the ANVIS mount lacks adjustability, the forward position and tilt adjustments are built into the ANVIS goggle bridge.
Most aviation helmets lack a proper shroud and you will see ANVIS mounts bolted directly to these helmets. My ANVIS mount has a QD adapter that makes it work for ground use on a helmet with a shroud.
ANVIS mounts can be acquired relatively inexpensively on the second hand market. However, just know that many of them lack the QD adapter plate that interfaces with your typical helmet shroud. The ANVIS mounts can be purchased for under $200 upwards of $500 depending on the make and model.
Wilcox GSGM
The GSGM is one of Wilcox’s upgraded mounts for use with ball detent style googles. The ANVIS, GPNVGs and Sentinel goggles can all use a ball detent style mount.

The GSGM uses the same mounting plate as the L4 G24 style mount. What also sets it aside from the ANVIS mount is that it has onboard power as well as the ability to connect to a removable battery pack.
The GSGM houses a single CR123 to power ANVIS compatible goggles.


GSGM is the most expensive mount that I have seen. Retail starts around $1,600 and occasionally you may find one used for half that price.
NOD Mount Round-Up
There are still a few different models of night vision mounts that I did not cover simply due to the fact I do not have experience with them nor do I have access to them to photograph and test. But this list is rather comprehensive of the most commonly used night vision mounts typically used by the American night vision user.
Night vision accessories are rather pricey for no other reason than #becauseNightVision. But if you shop around you can find some decent deals on the second hand market. I hope you found this article useful to you.