 Your Privacy Choices

Some of you may recall I wrote a Concealed Carry Corner piece about Trigger Guard Holsters. In that article, I mentioned doing a how-to Kydex article in the future. Well, the future is now. Also known as “minimalist holsters,” they offer a zero-profile way to secure that your trigger won’t get snagged on something in your bag, purse or inside the waistband. The title image is of my daily carry Glock 22/27, however for this DIY pictorial, I’ll use the pictures I took while making a trigger guard holster for my friend’s Ruger LCP.
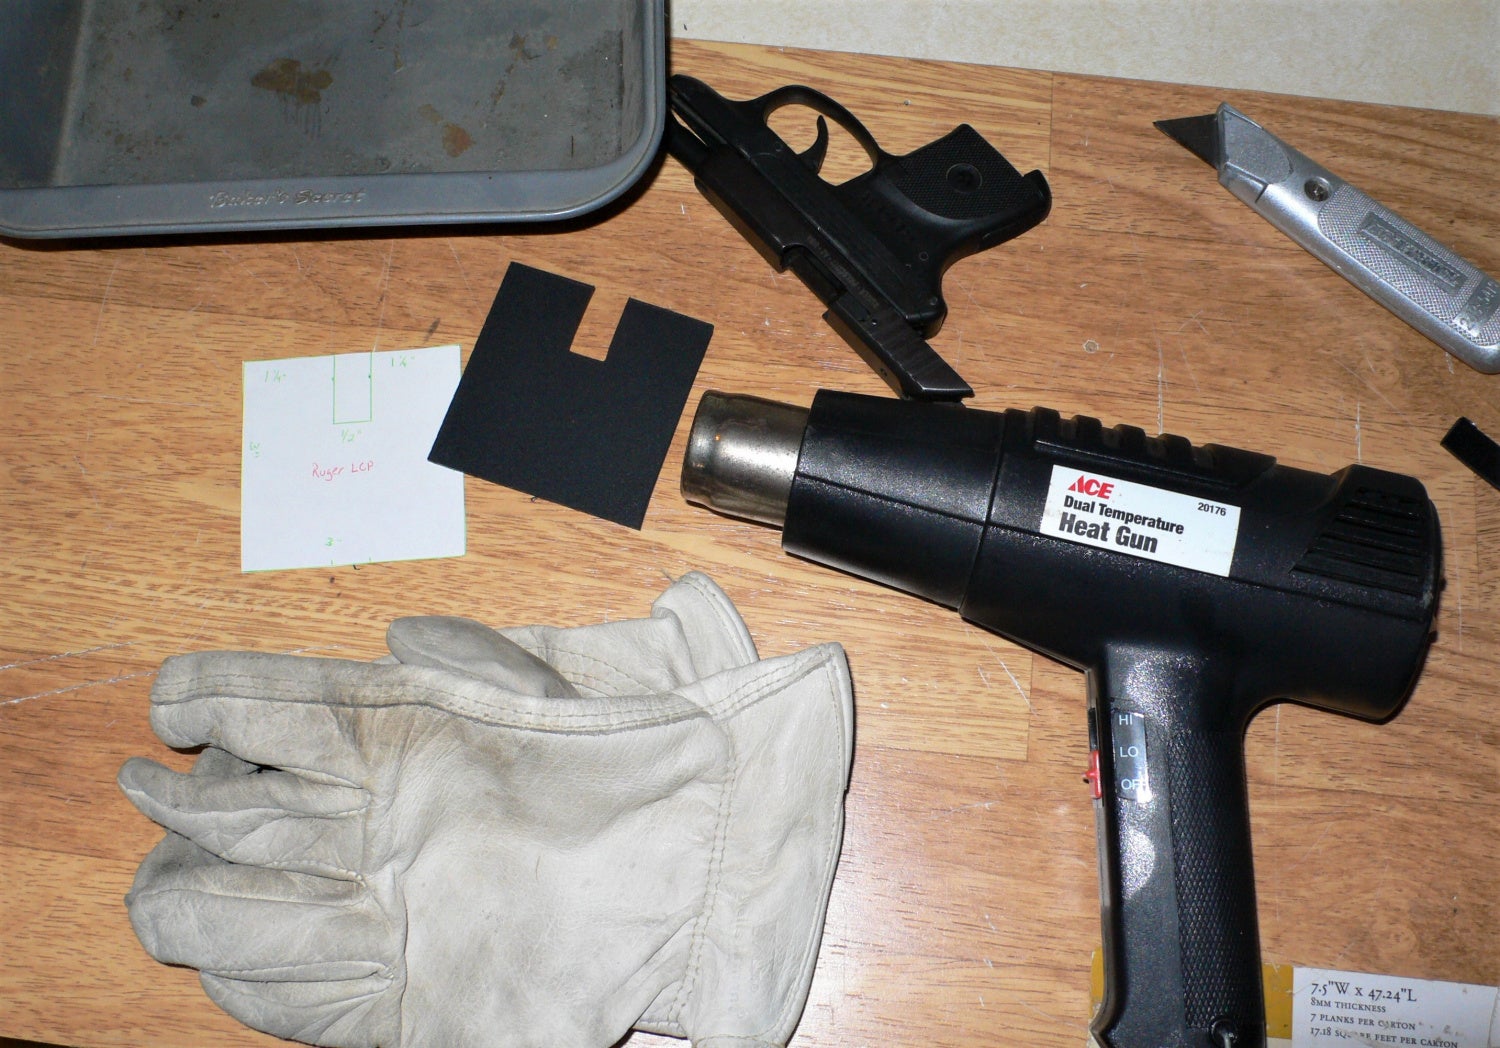
Making a trigger guard holster out of Kydex is quite simple and only requires a few basic tools to complete. I source my Kydex from Amazon.com, although Knifekits.com is another source of holster making supplies.
A DIY GUIDE TO MAKING YOUR OWN KYDEX TRIGGER GUARD HOLSTER
Step 1.
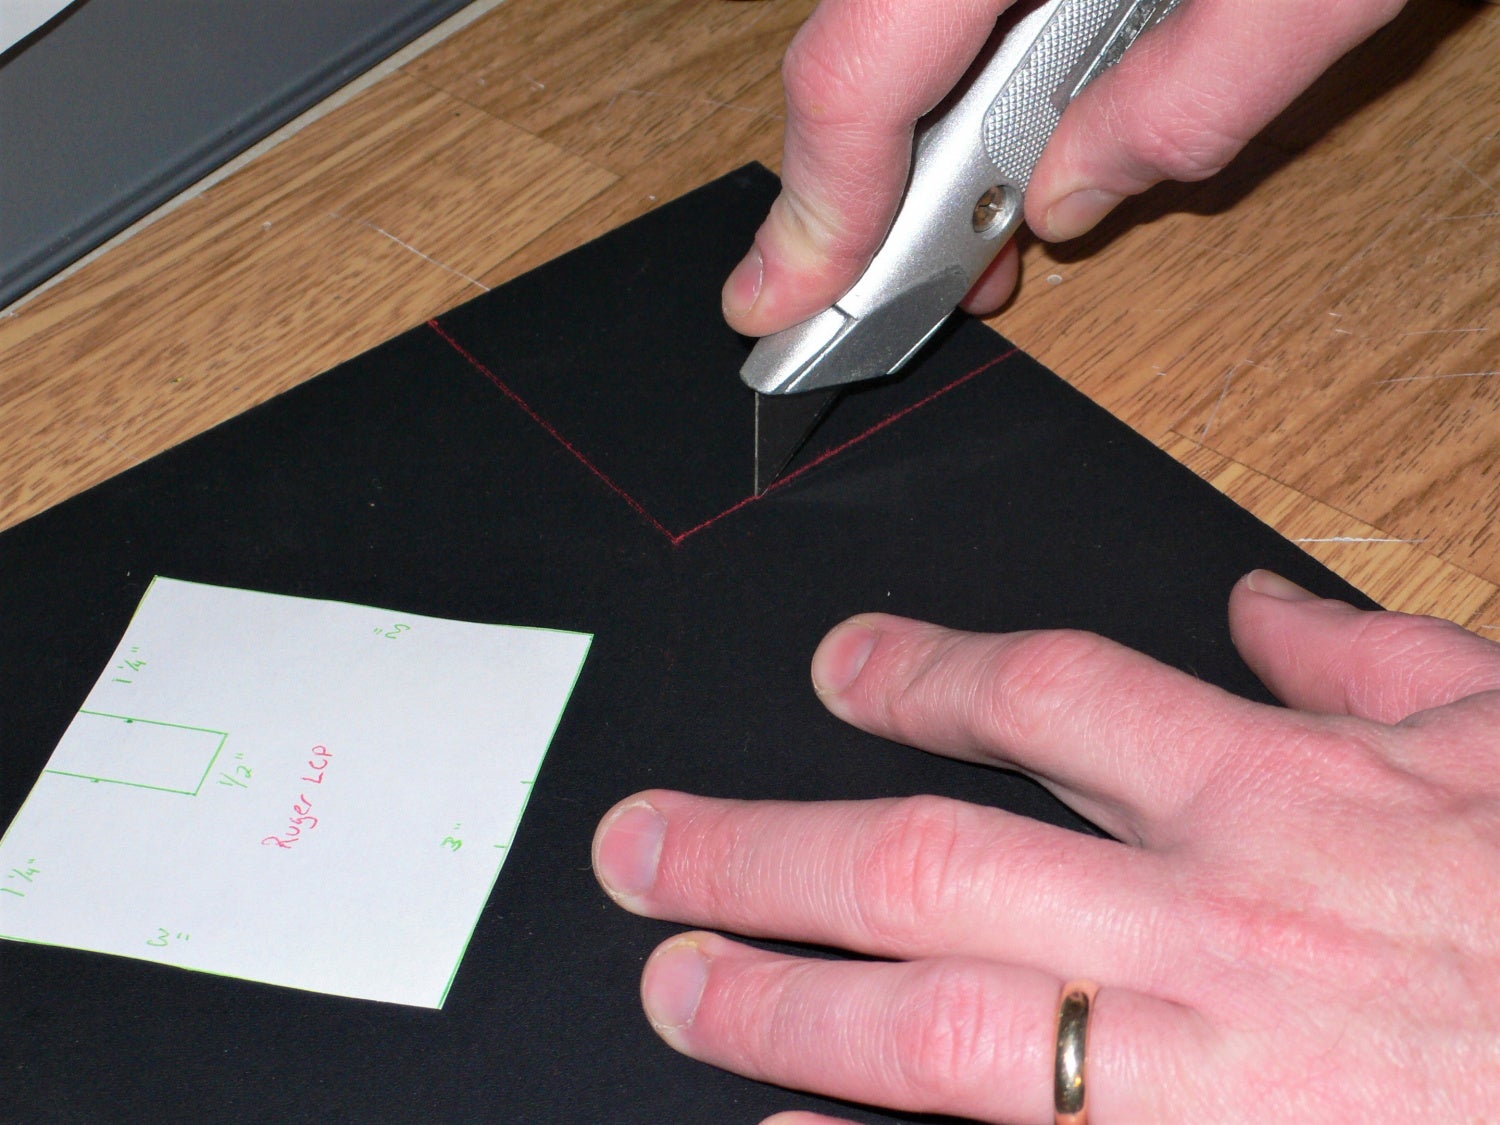
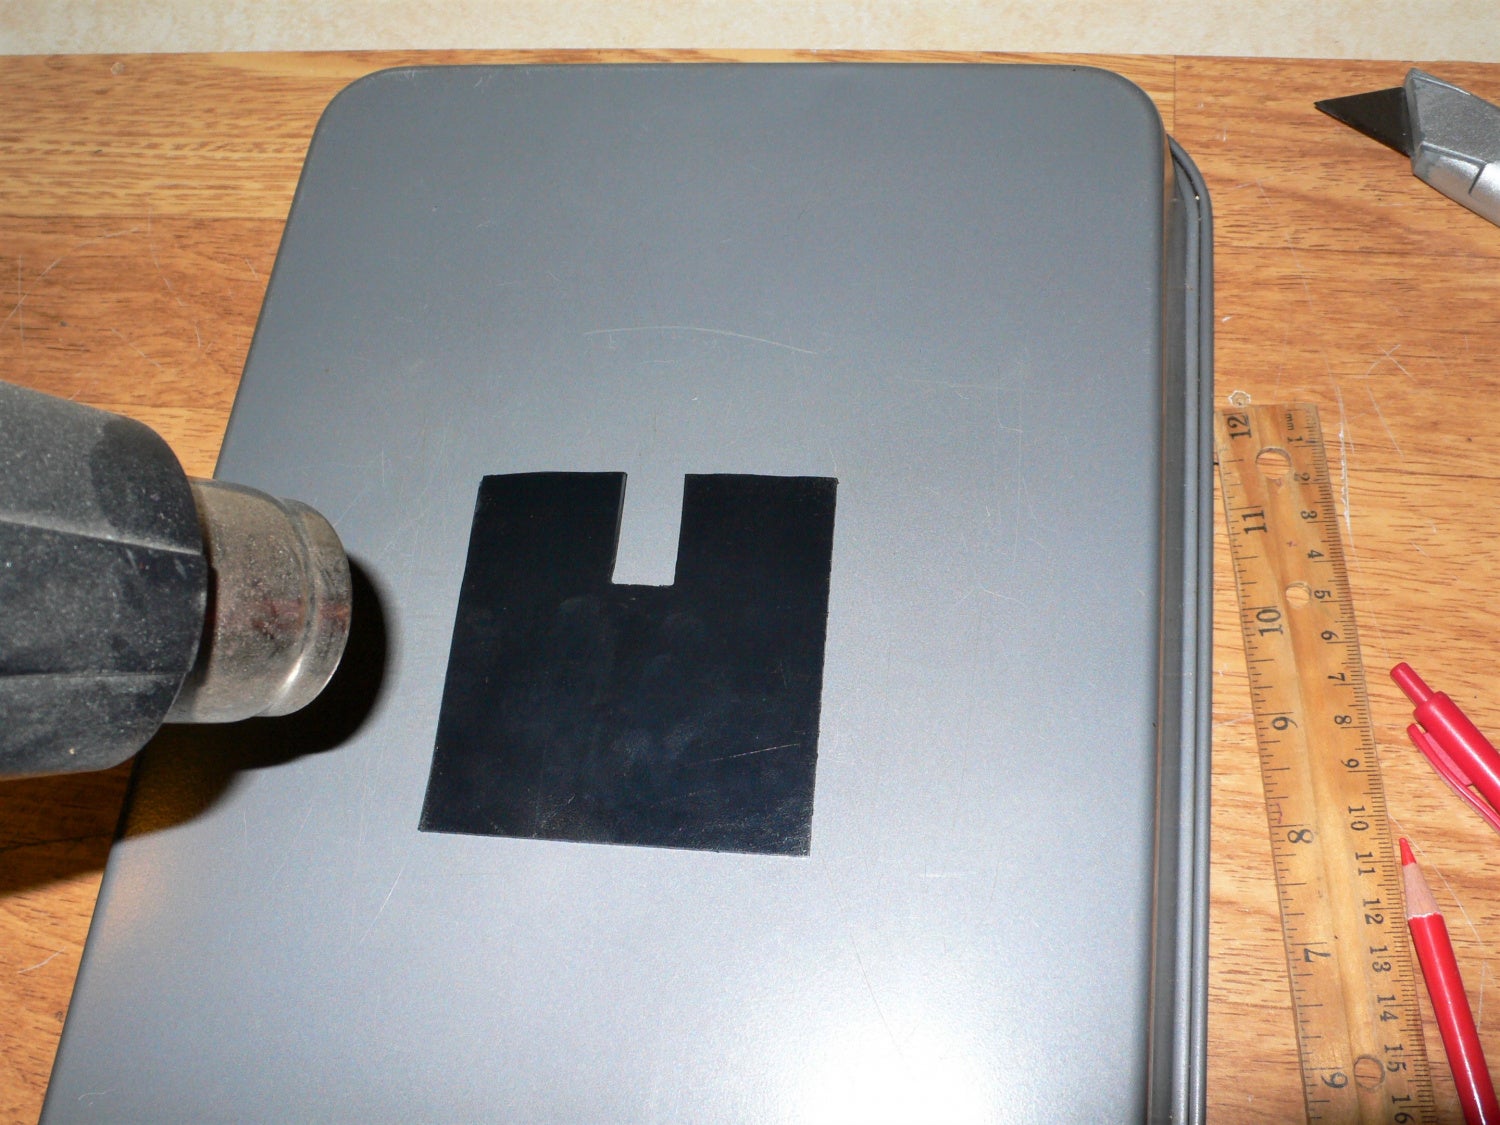
You’ll need to measure your trigger guard. Measure the height and width and make sure you account for the height twice. Make sure you leave enough space on the length for a lanyard tab. In the picture below you can see my paper template with the starting shape to aim for. A colored pencil is a good way to mark your lines and it can be washed off later.

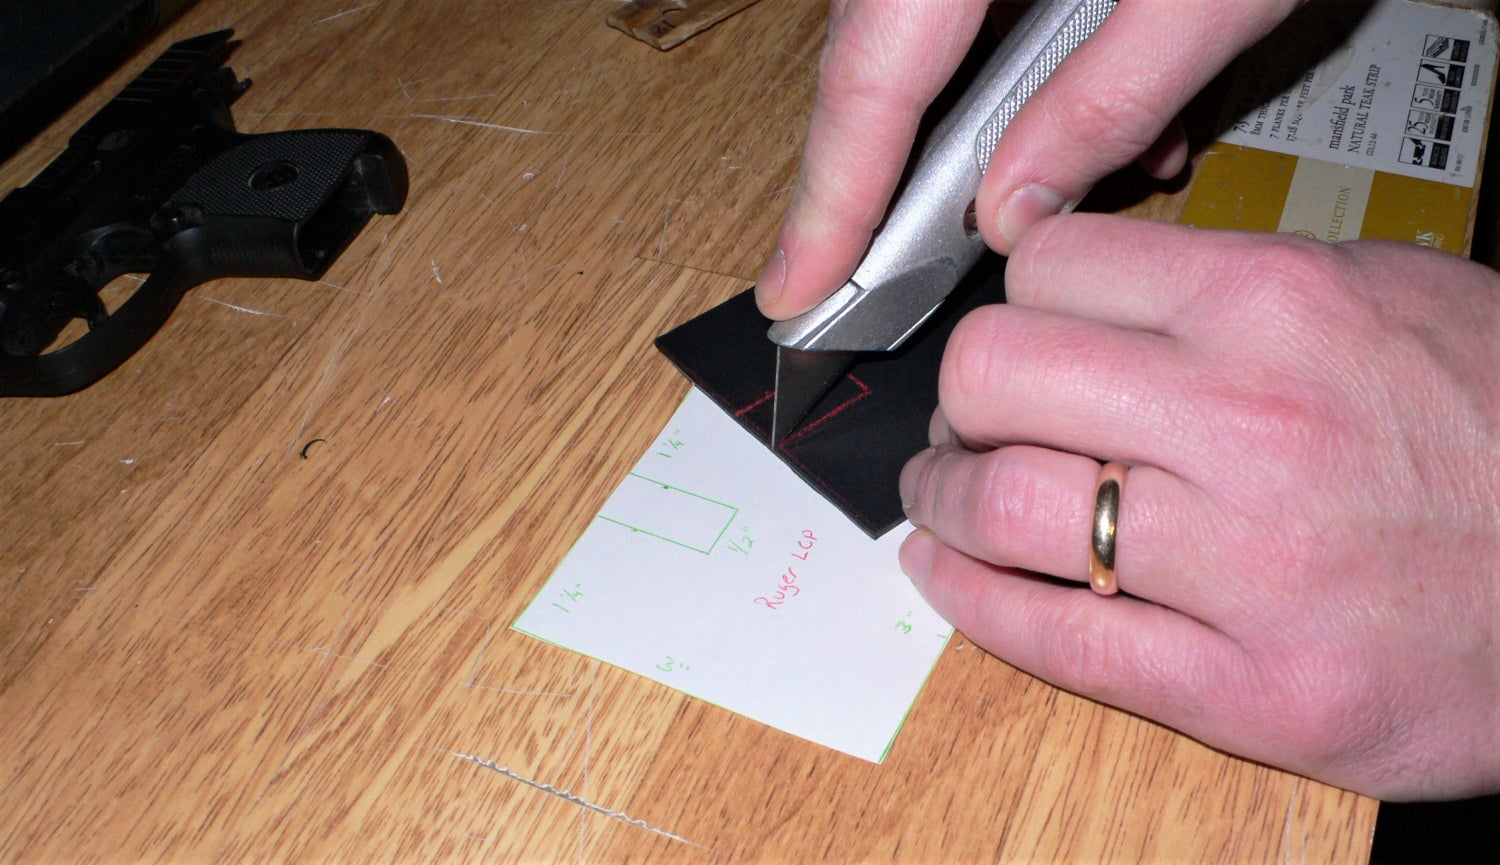
Step 2.
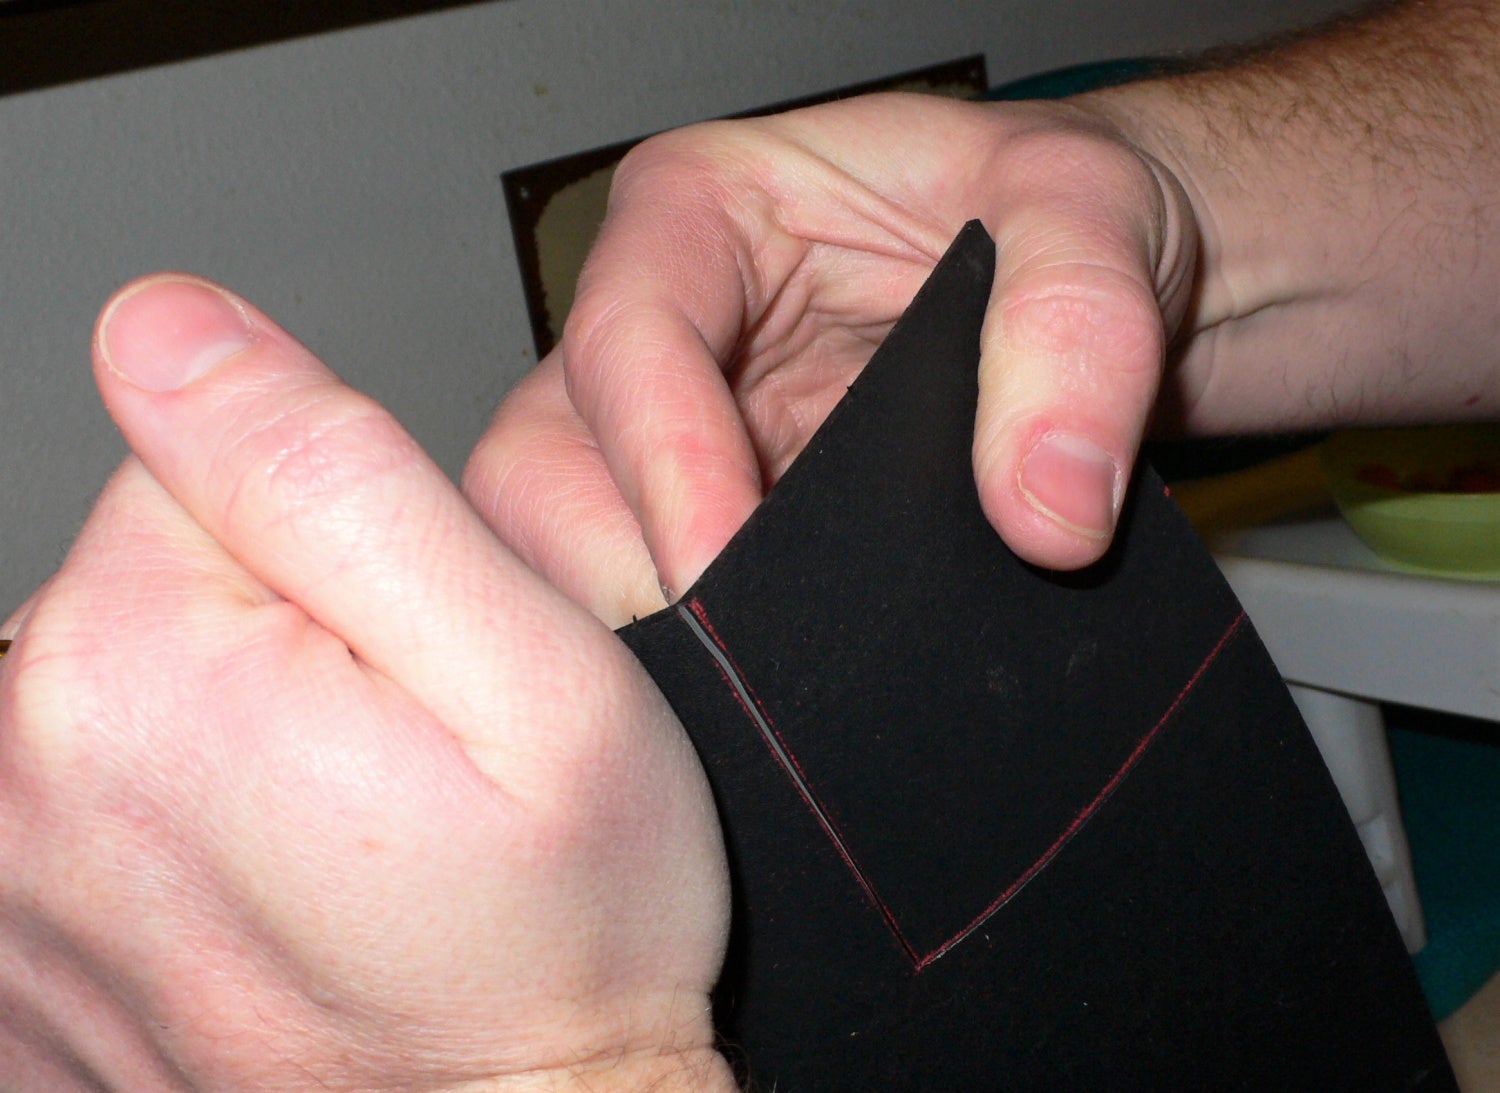
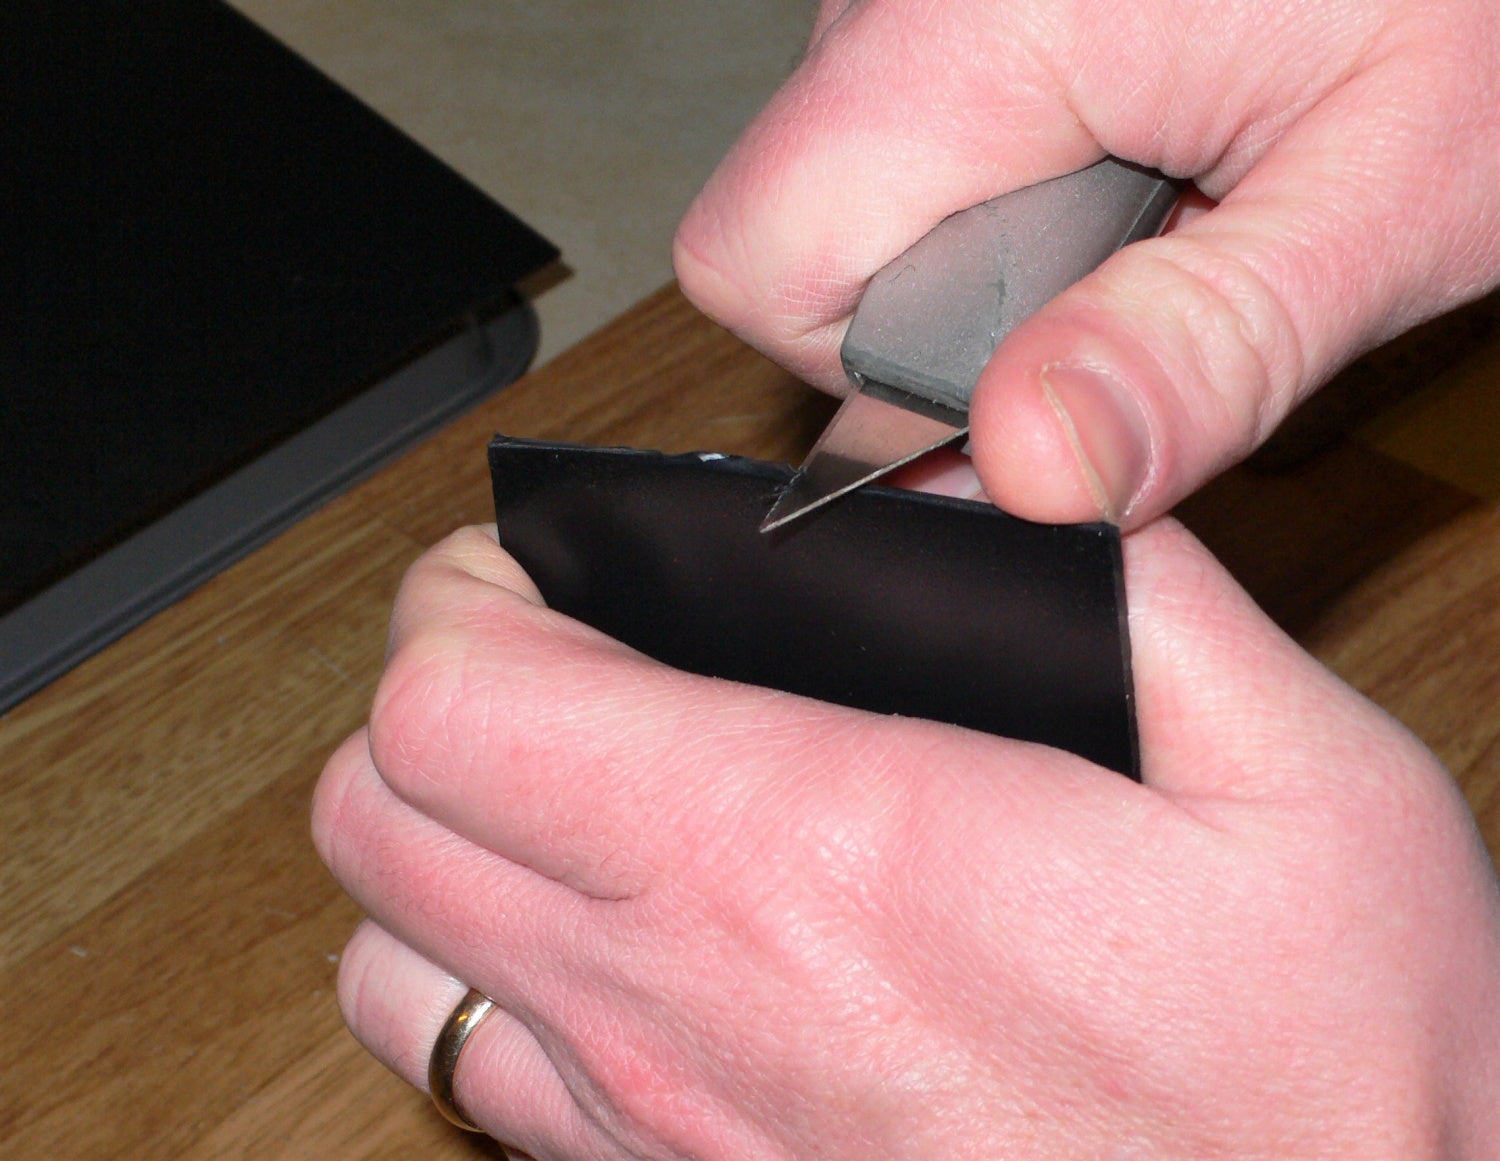
Use a sharp utility knife to score the Kydex along the lines you need to cut. I typically do three scoring cuts per line. The Kydex can then be bent on both sides of the cuts, snapping the scoring lines. Then peel the starting shape from the sheet. You can also use the knife to remove the sharp edges from the Kydex.
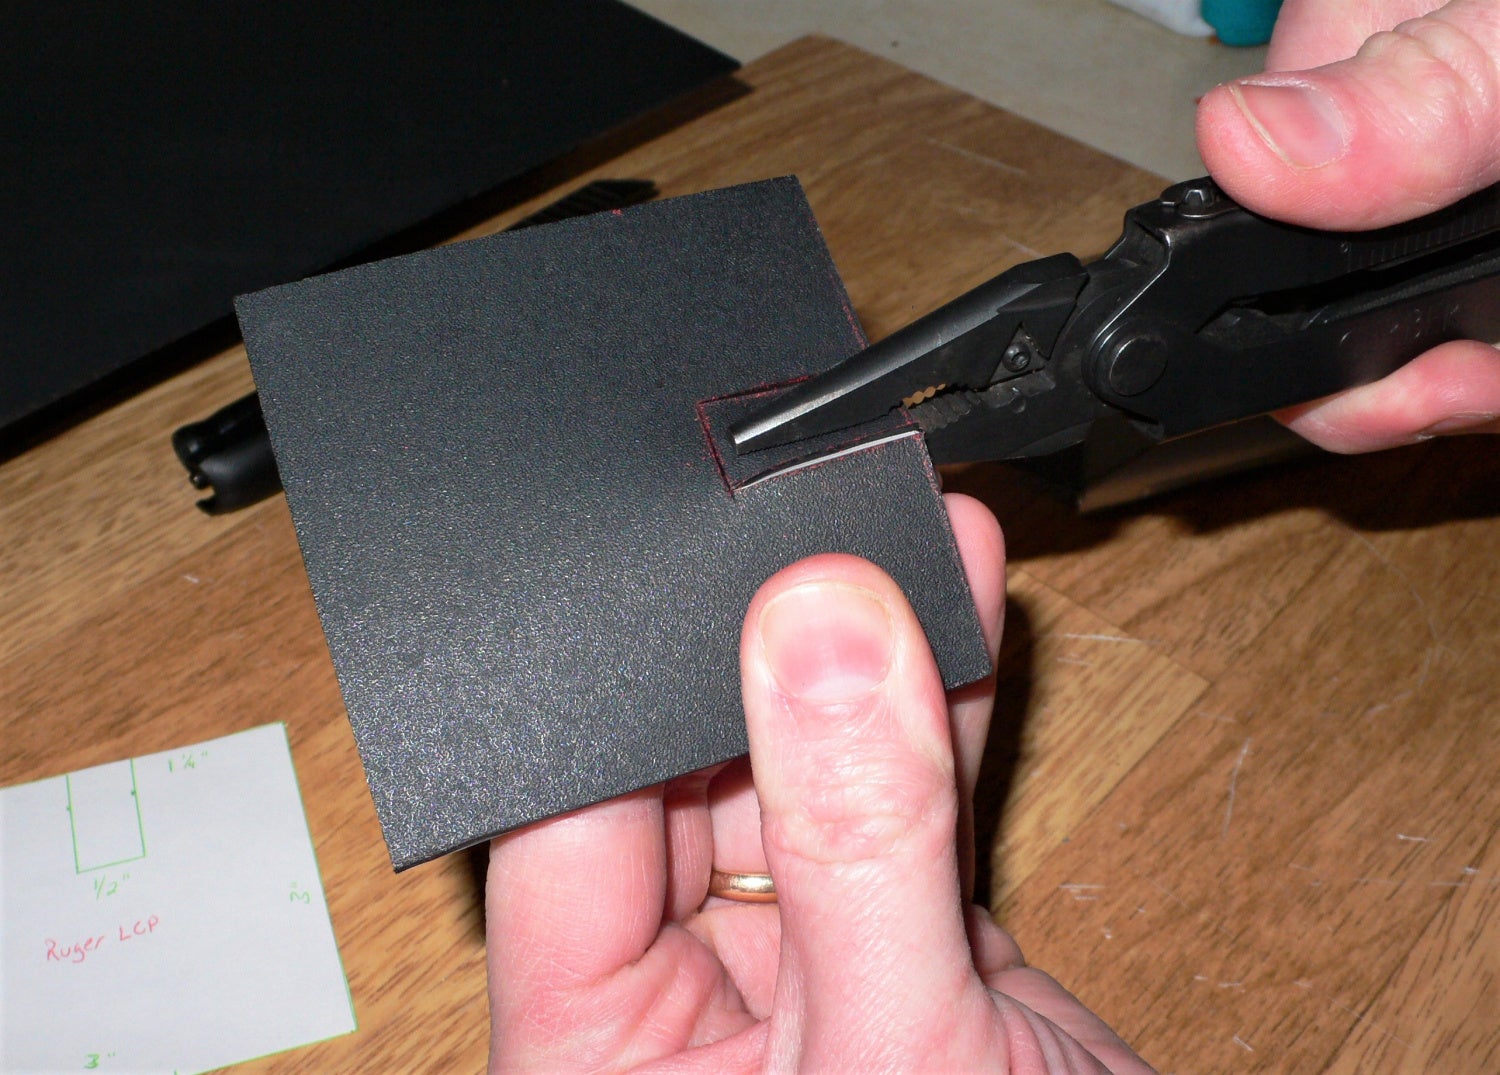
Step 3.
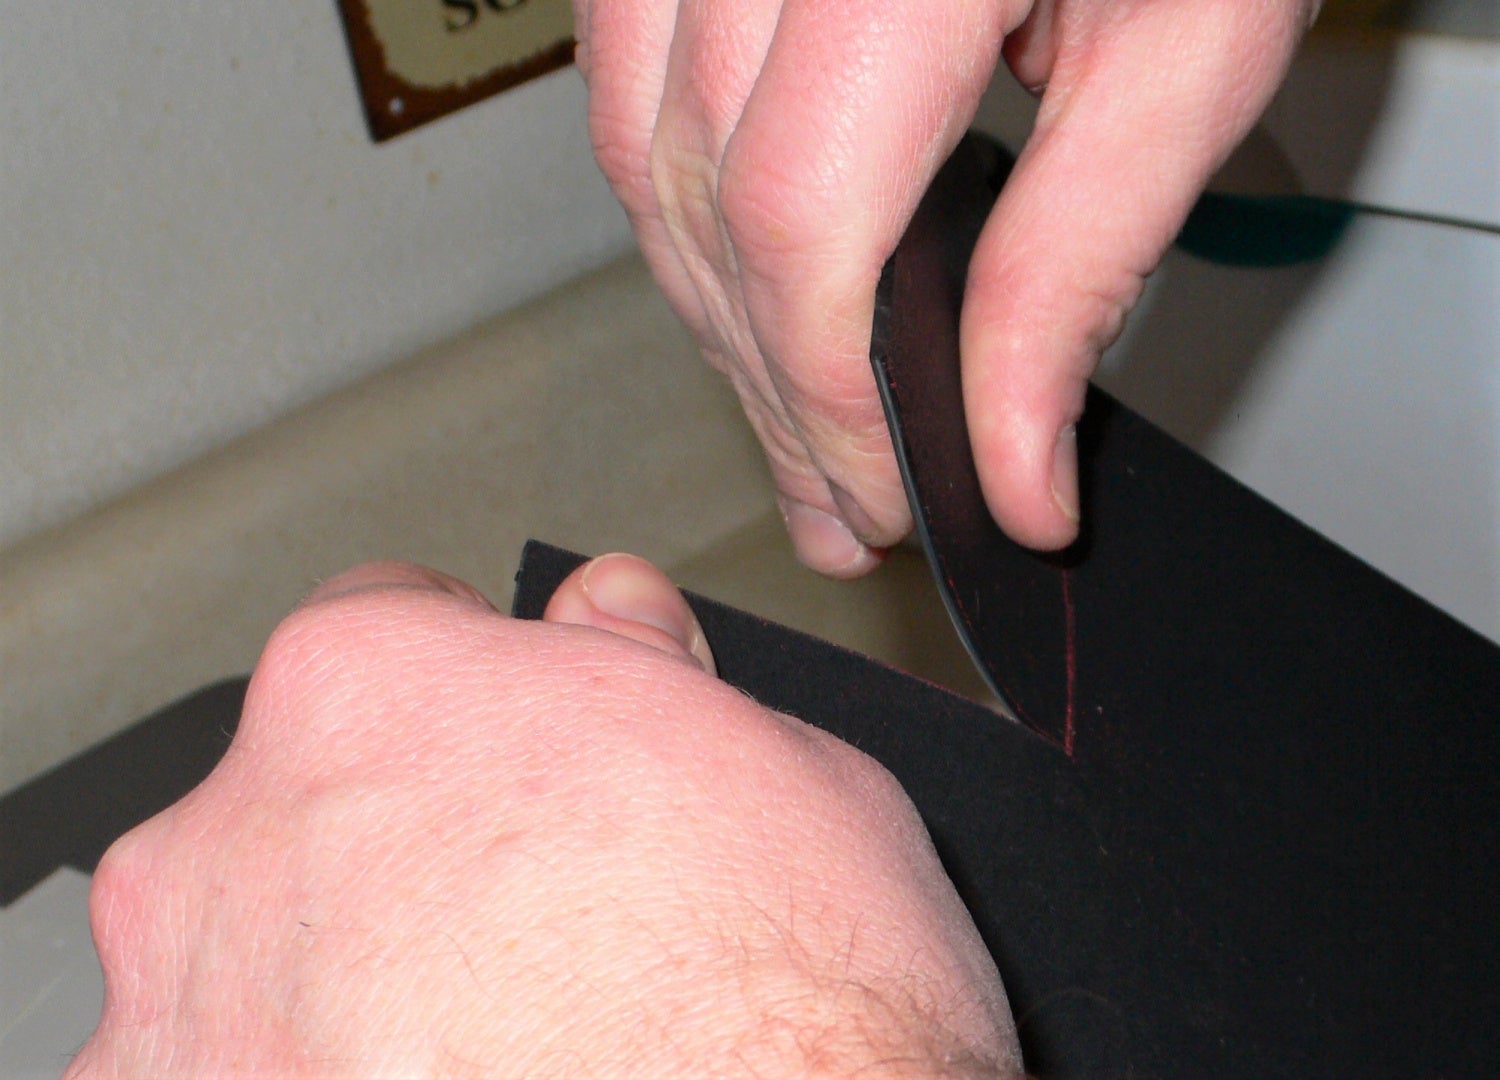
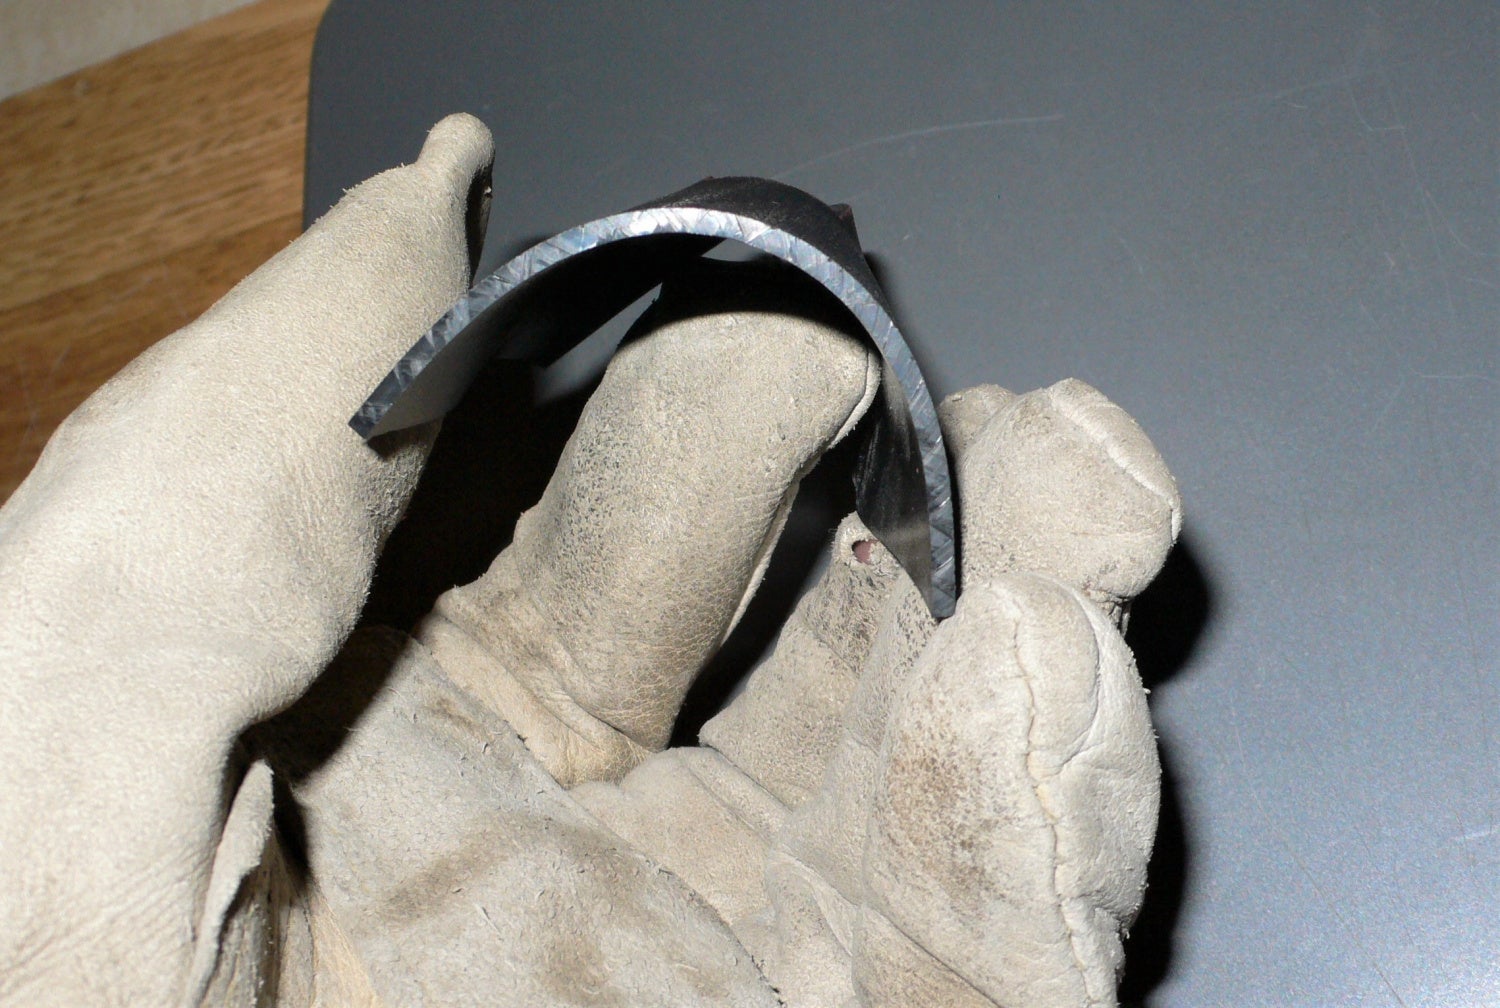
Repeat the scoring and removal process for the notch that will be in front of the trigger guard. Once molding begins, the void left by the notch will be filled by forming the lanyard tab. Use of pliers can help remove the notch piece.
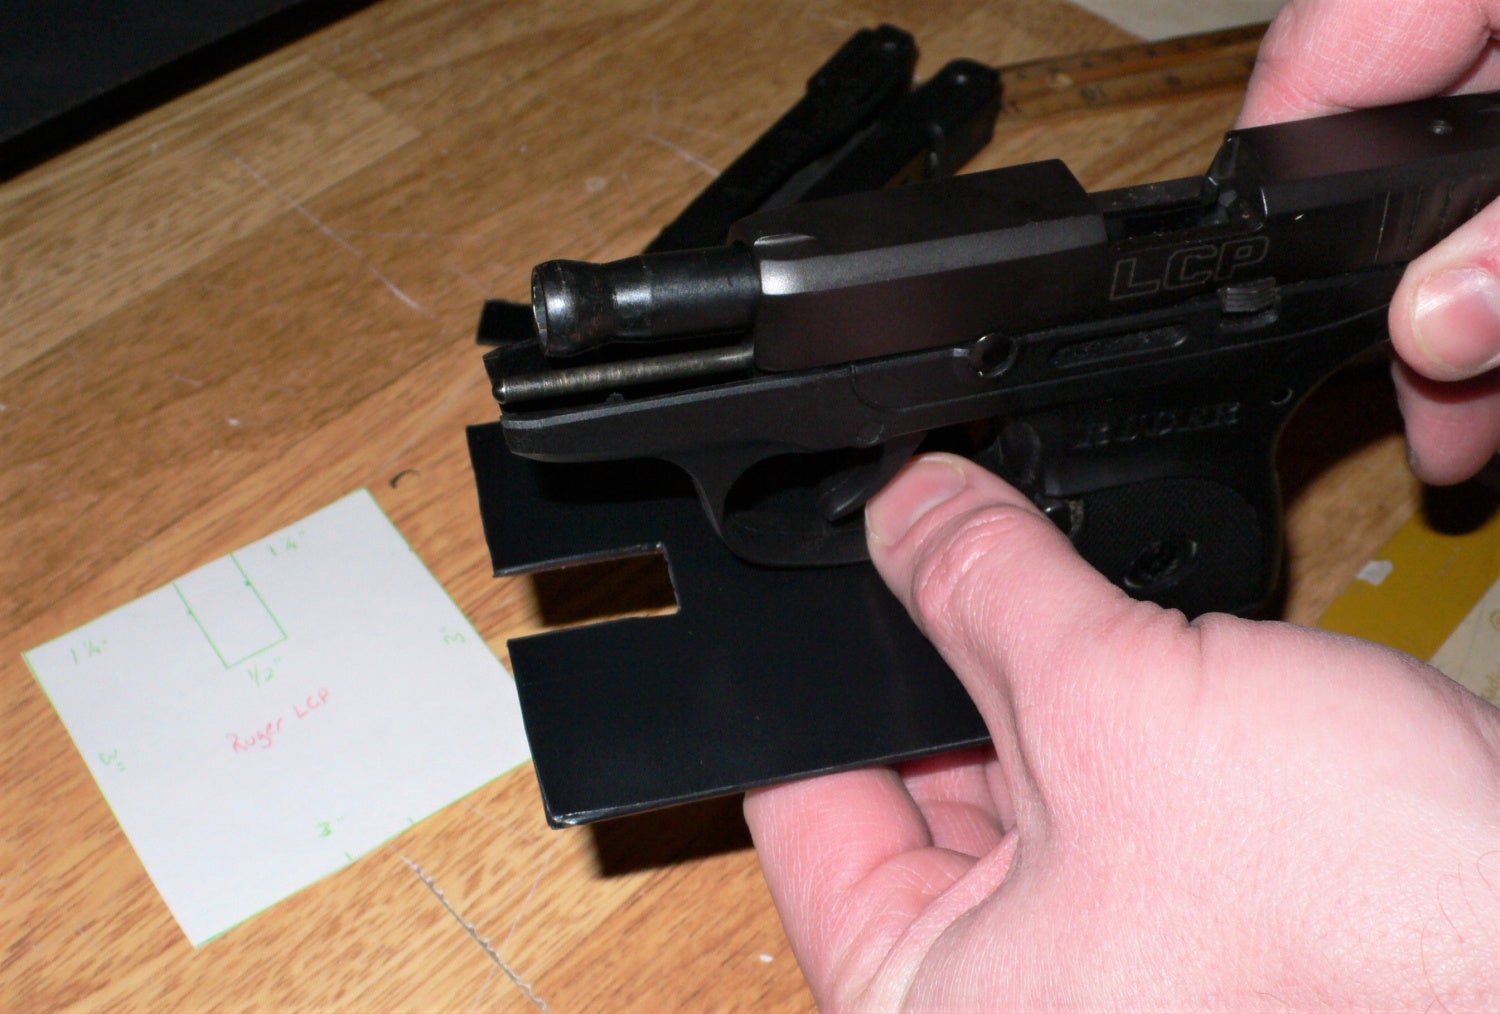
Step 4.
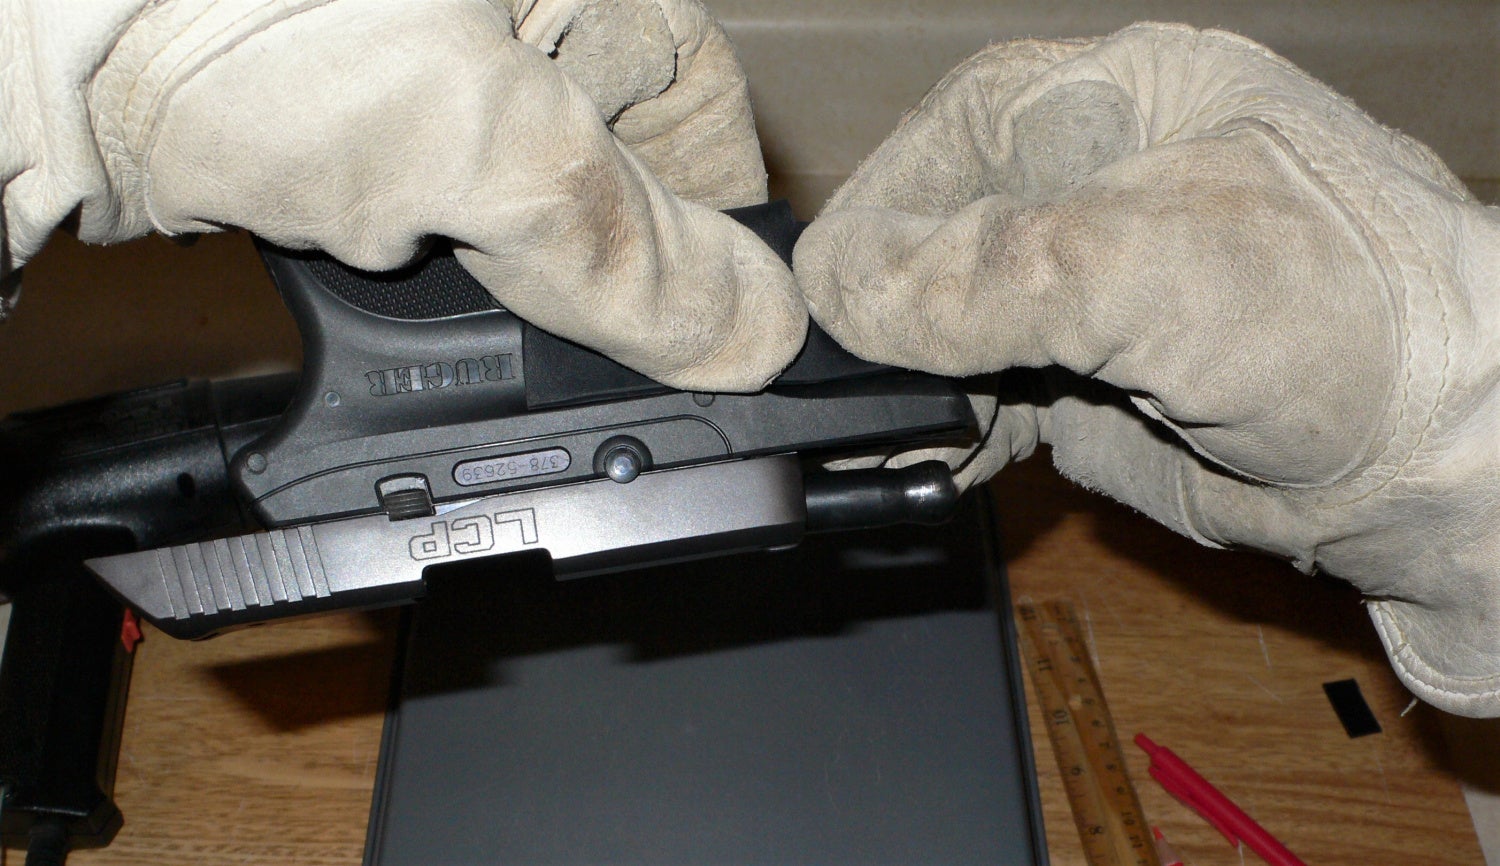
Next up is the molding process. Some people use a toaster oven to heat up their Kydex, but I prefer to use a heat gun. Heavy gloves are a must if you plan to mold by hand. Trigger guard holsters mold easy by hand and don’t require a press. Just make sure you heat the Kydex evenly and don’t get too close with the heat gun, about 5-10 inches away from your Kydex should be okay. You want to heat the Kydex to the point that it’s floppy and bendable.
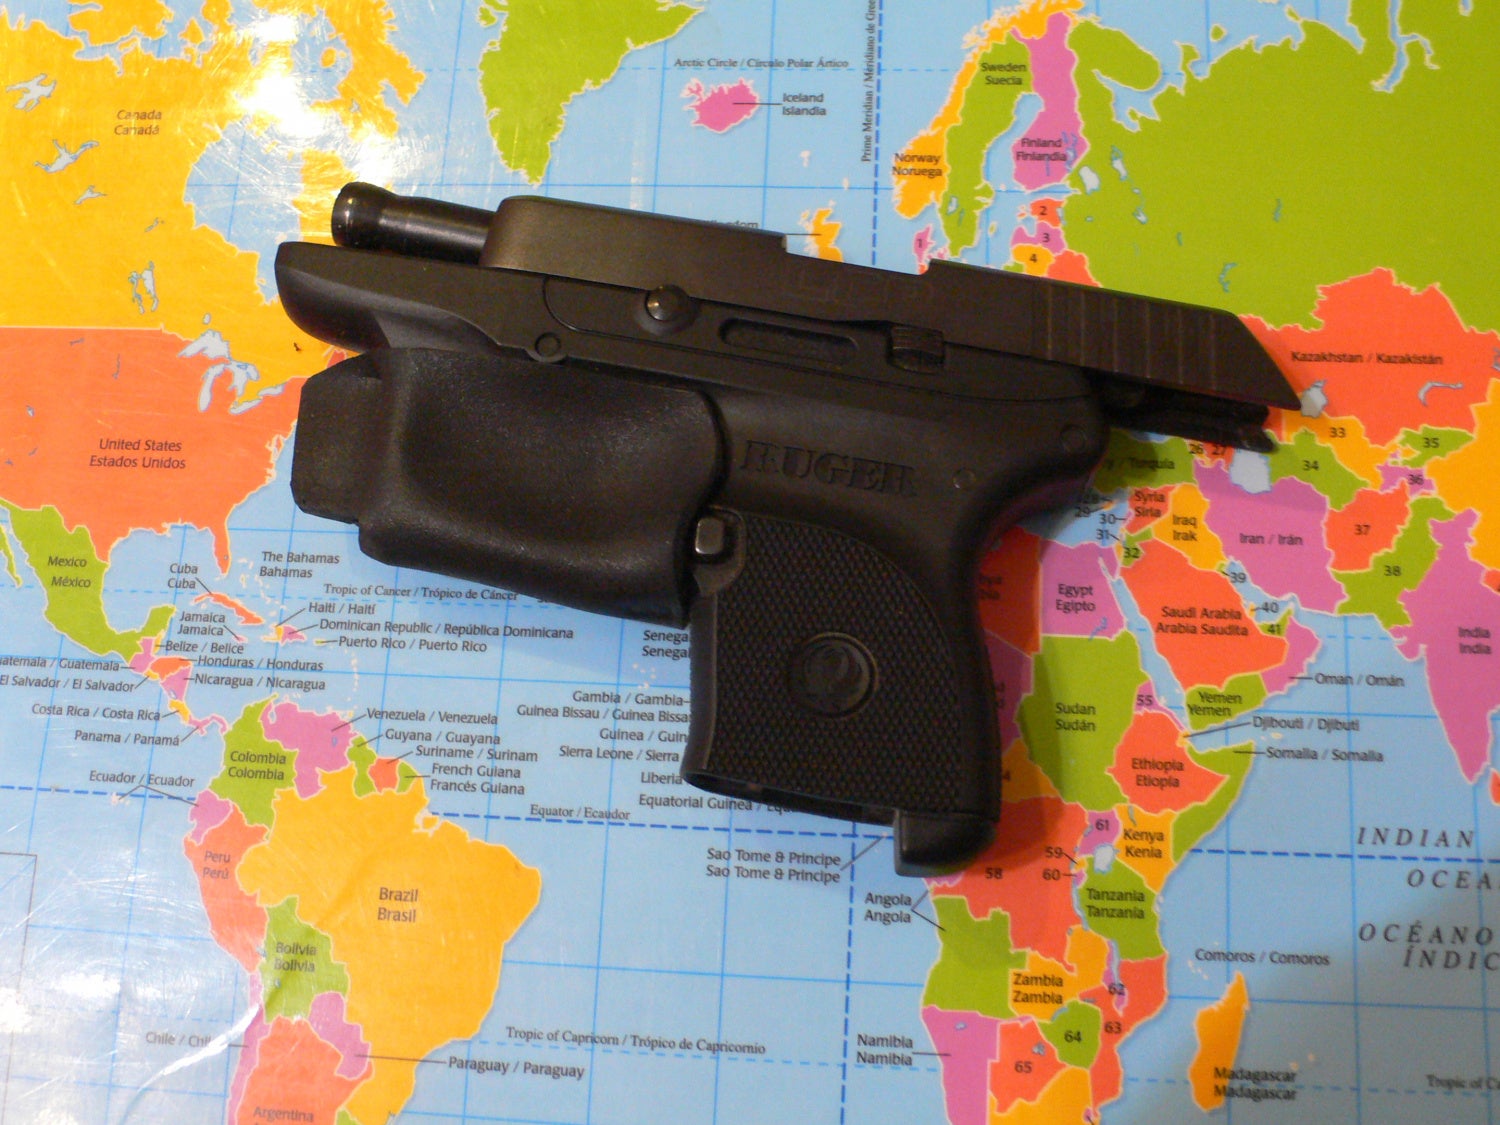
Once you’ve reached that point, quickly place your Kydex under the trigger guard (as in the photo above) and fold up the edges around it. One hand can hold the pressure on the guard while the other hand holds the lanyard tabs together. Hold the Kydex in place for a minute or two and allow it to cool in a way that it will have retention on the trigger guard, but not so deep as to touch the trigger. If you’re not satisfied with the retention, reheat it and try again.
Don’t forget to feed the kids.

Step 5.
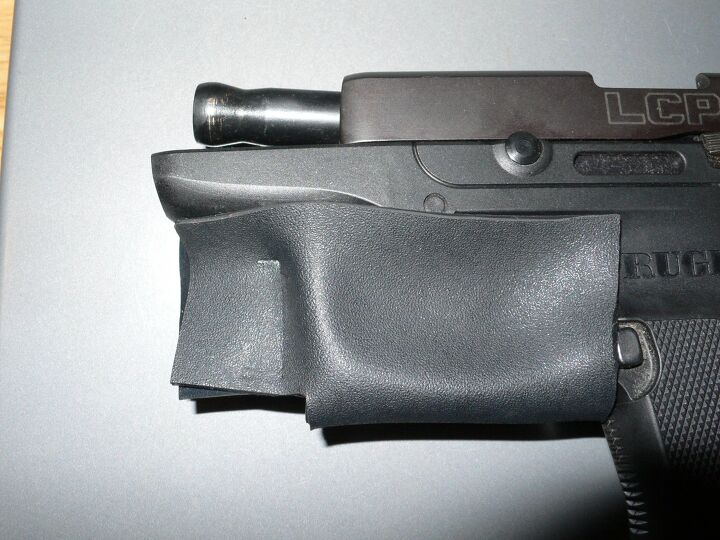
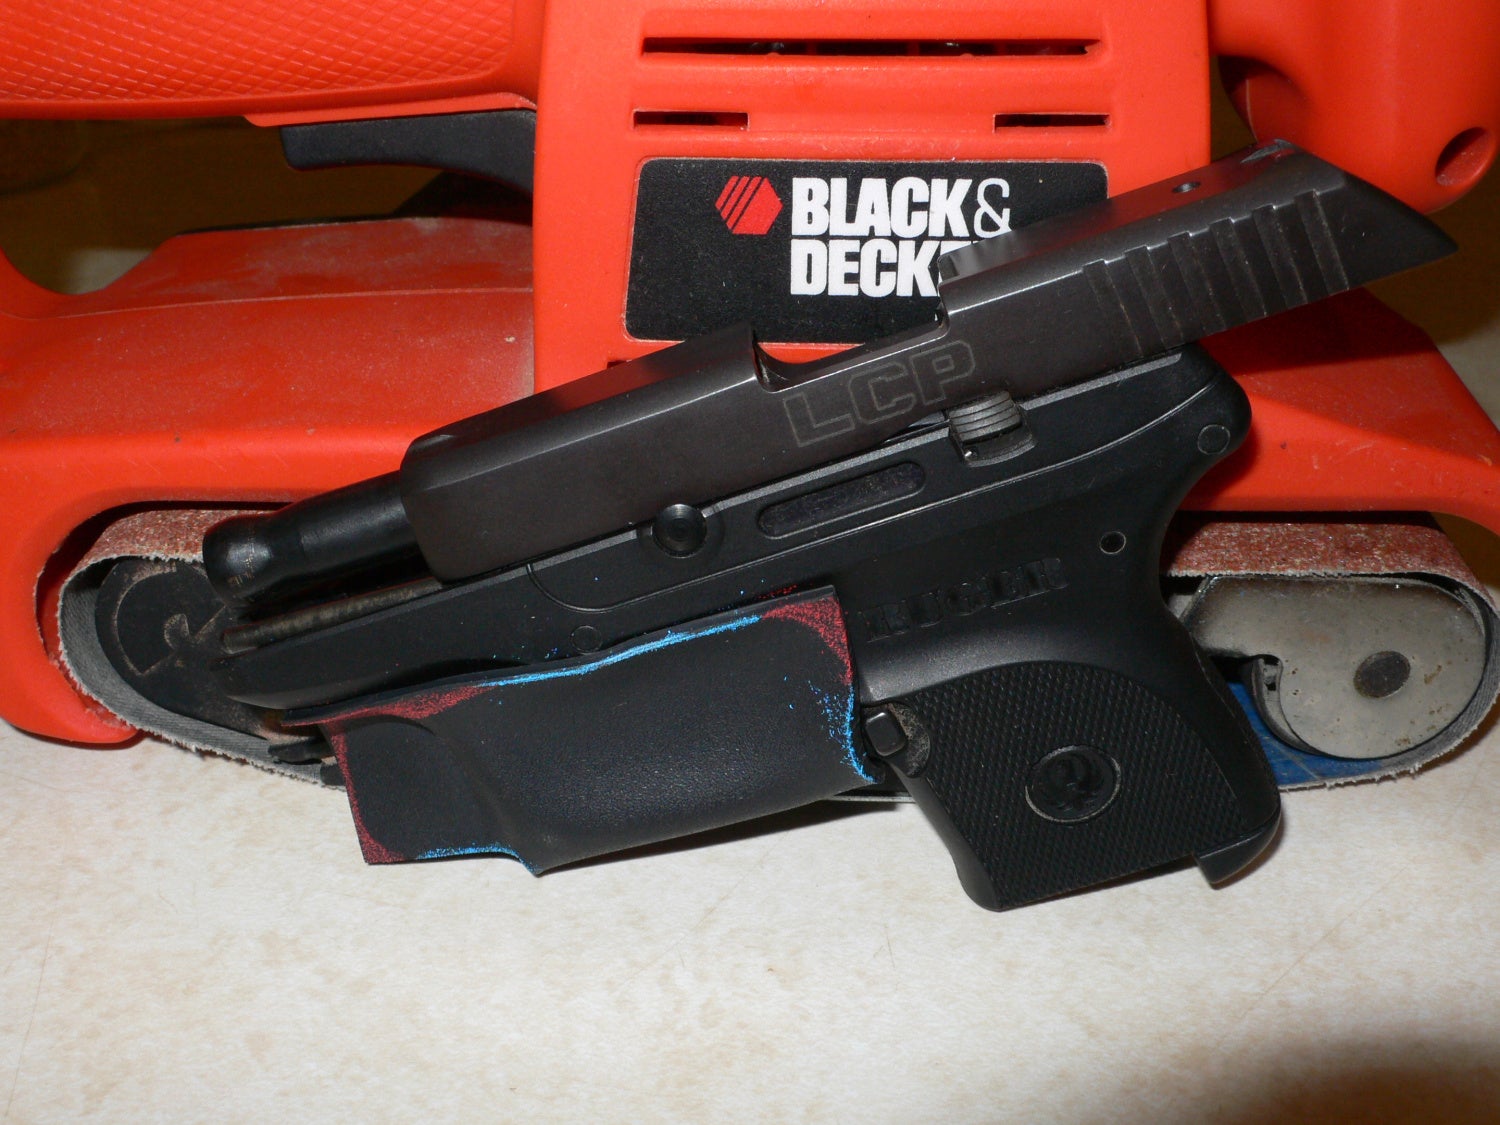
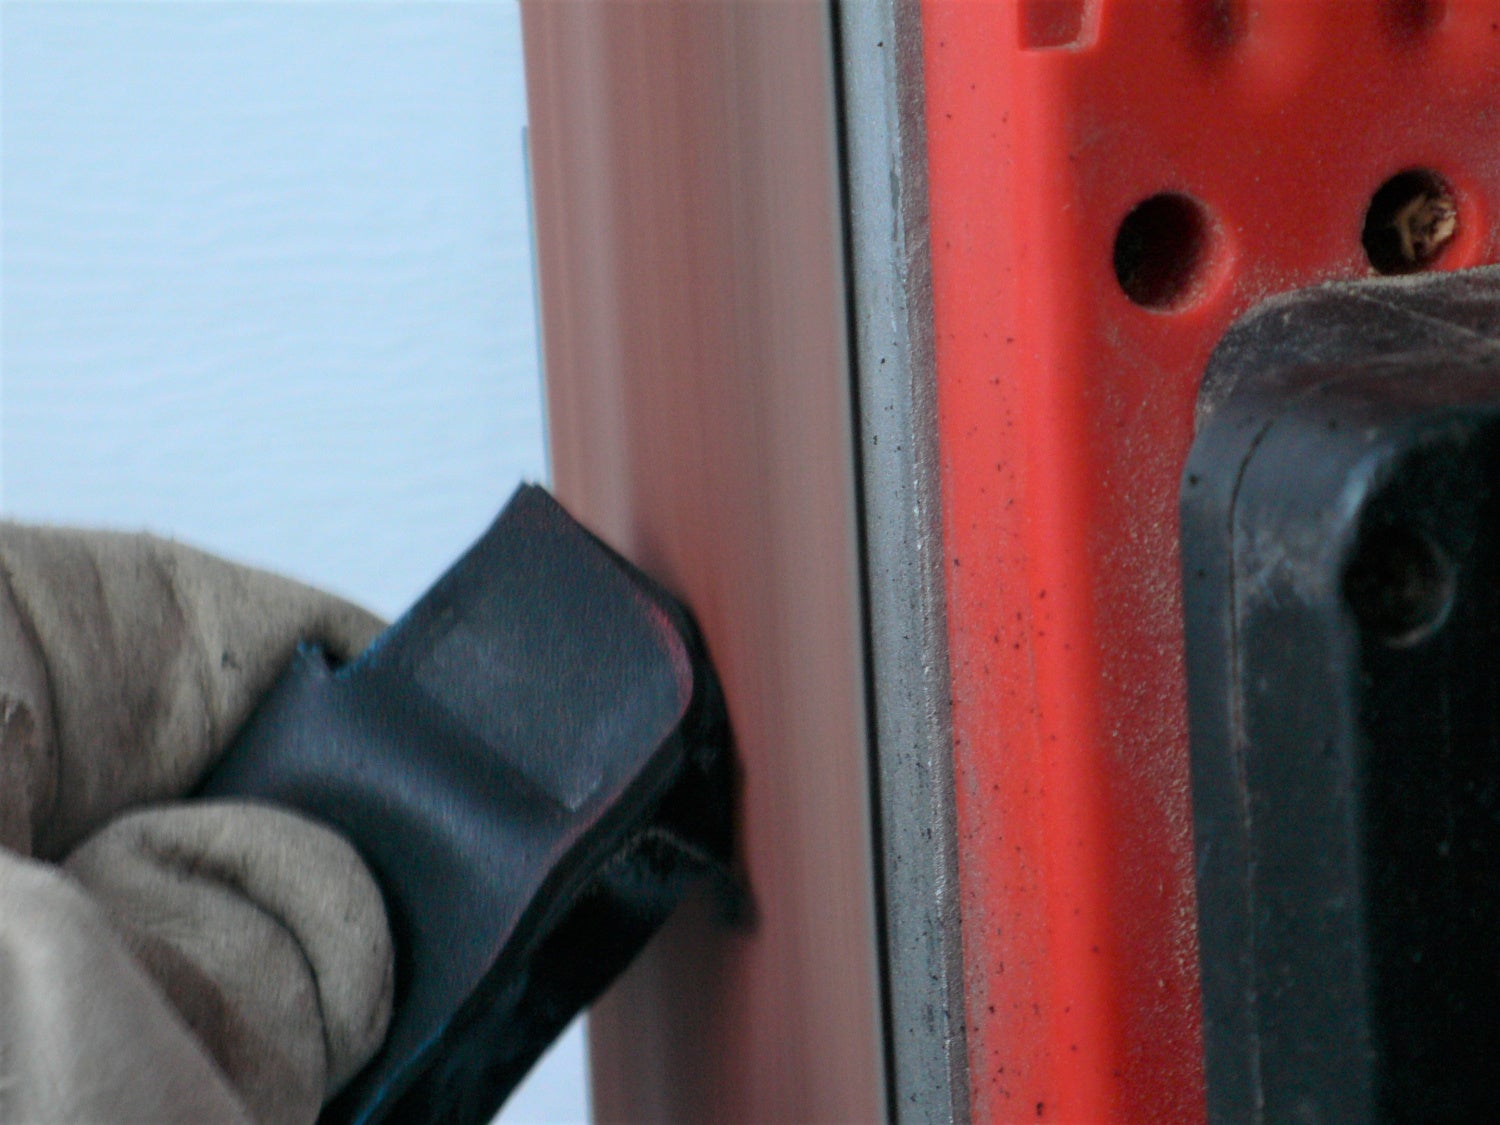
Once the Kydex is molded with retention, it may not look great, but shaping it to a more functional shape can be easily done with a belt sander. I colored the bits that needed to be rounded off in RED, and the BLUE is for edges that need to be rounded so that the material isn’t too sharp.
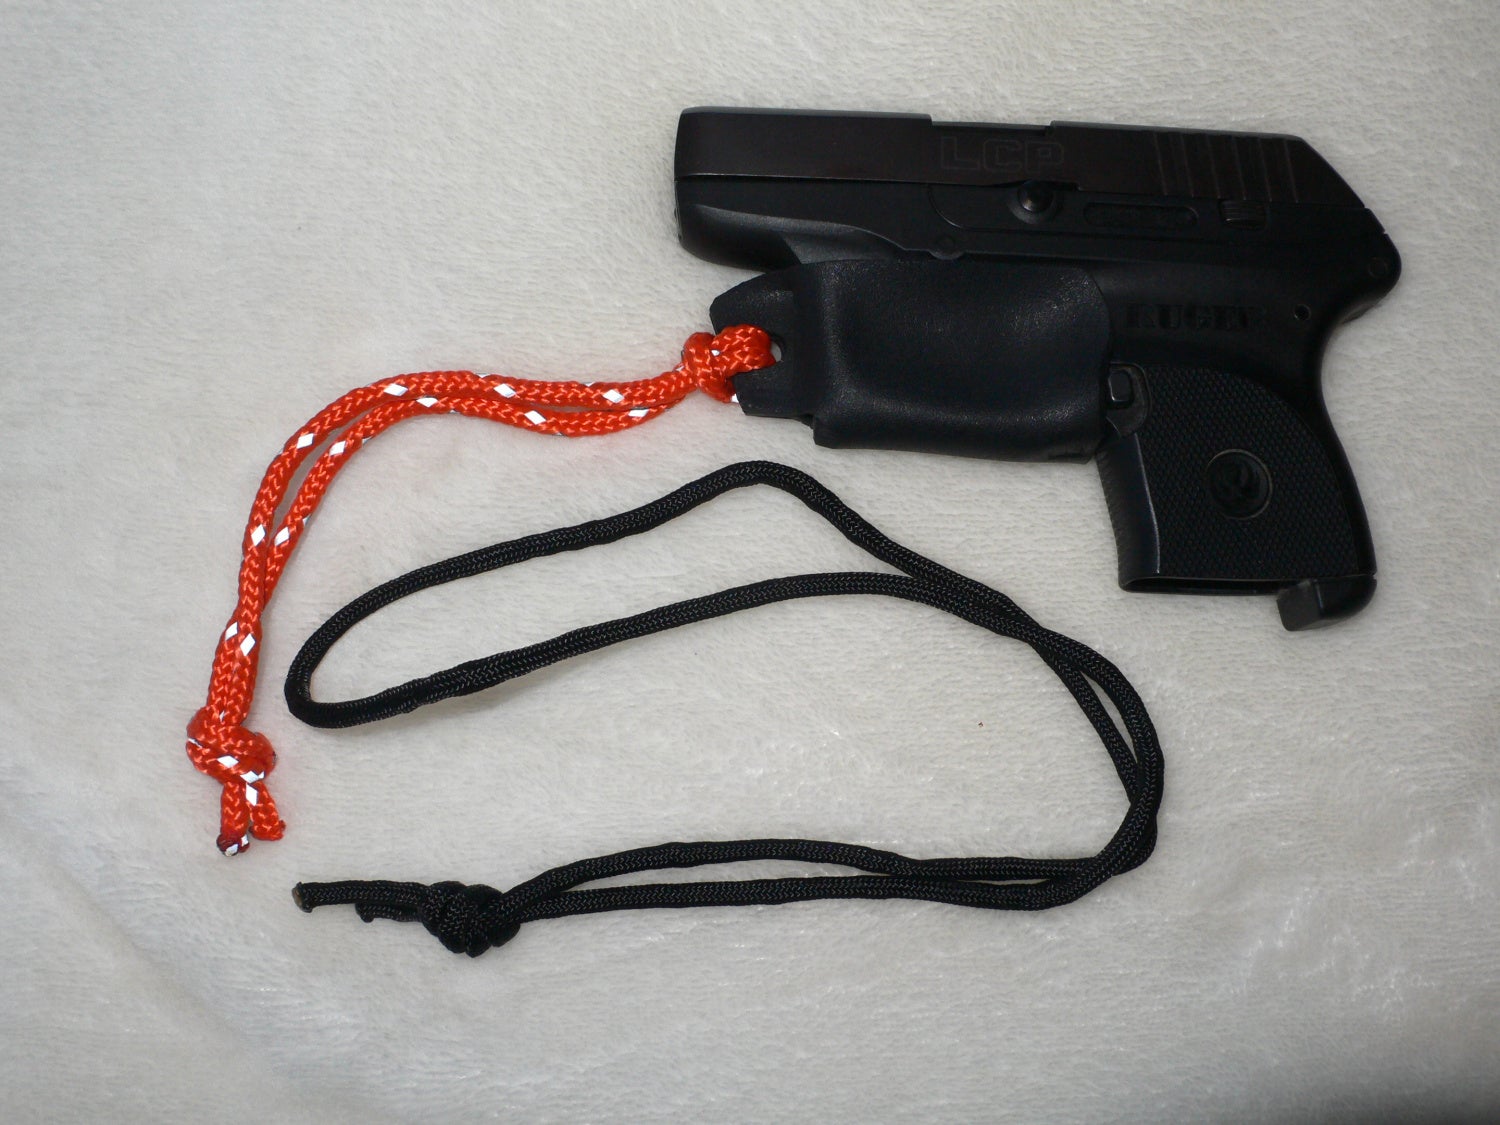
Step 6.
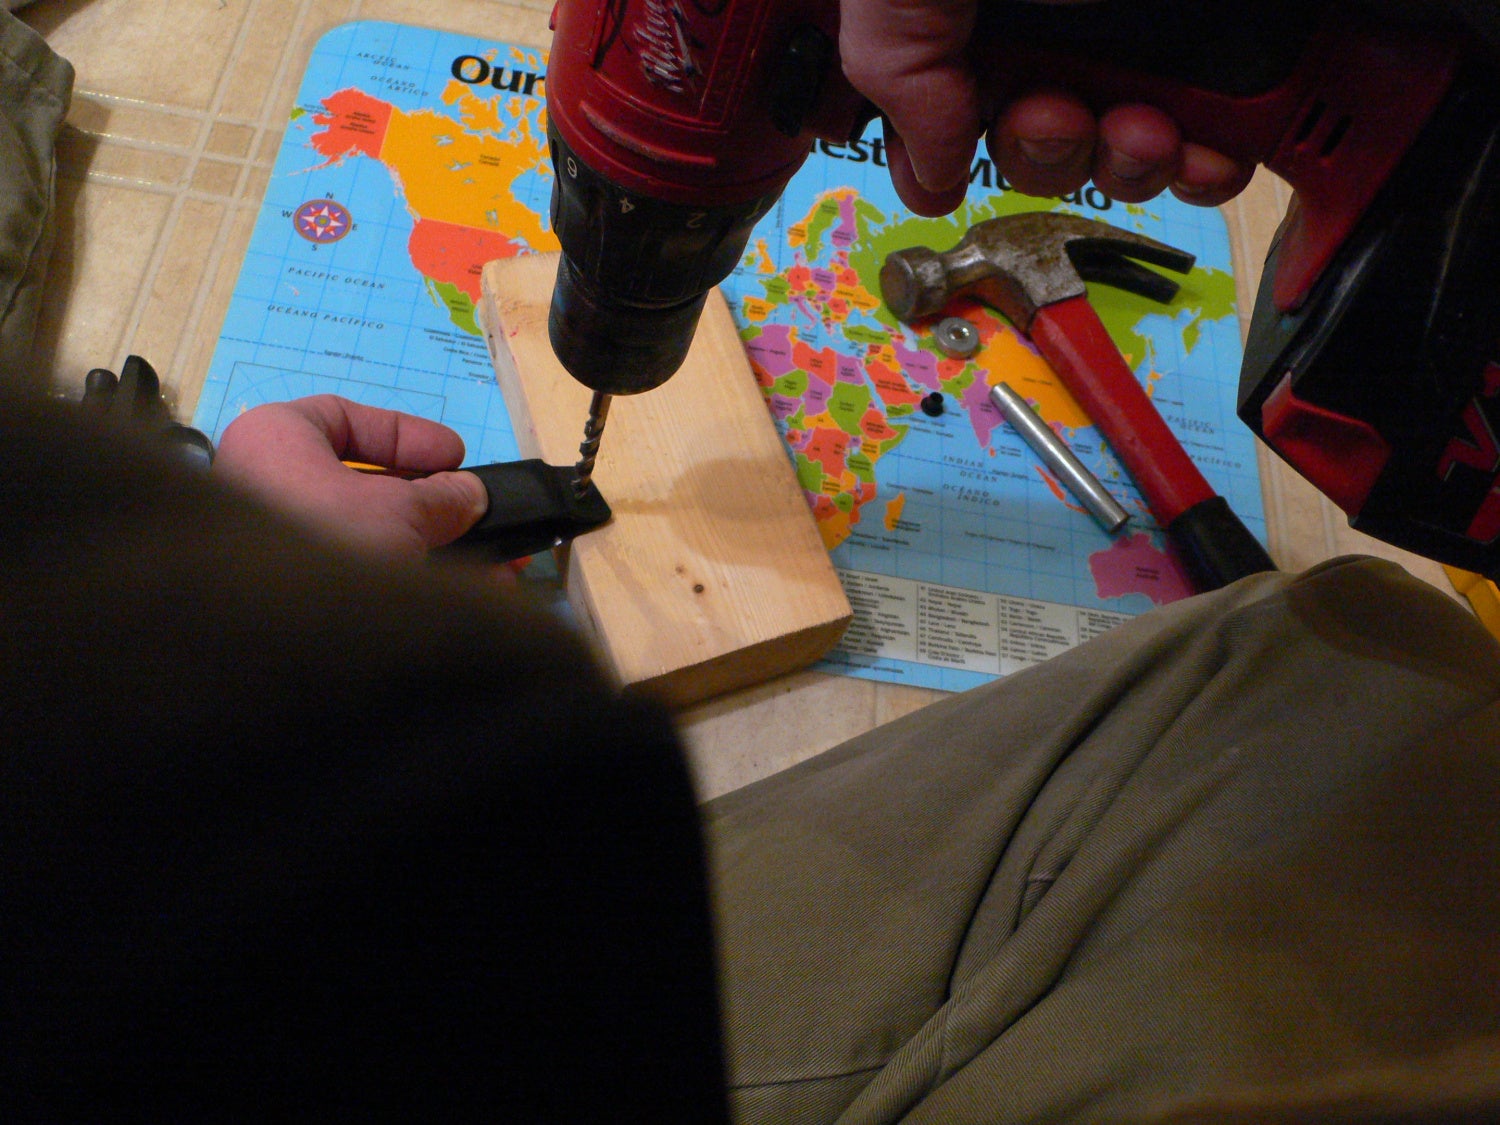
The last step is to add a hole for the lanyard. The lanyard is a pretty important piece that gives the extra leverage for removing the holster from the pistol. I typically add an eyelet, but in this example, I didn’t leave enough room on the tab to install an eyelet, but it’s not a big deal if you don’t use an eyelet. Drill a hole in the lanyard tab in front of where the trigger guard would be. Then attach the desired length of 550 paracord.

I hope this pictorial on making your own Kydex trigger guard holster has been helpful. Feel free to check out the merits and limitations of trigger guard holsters in the aforementioned Concealed Carry Corner article linked above for more information. Let us know your thoughts about trigger guard holsters or homemade Kydex holsters in the comments section.