 Your Privacy Choices

As an owner of a FLIR T50 ACTS, I was excited to check out FLIR’s latest offering in handheld thermal imagers. I remember drooling over the FLIR Q14B when they debuted it at SHOT Show 2017. Was it worth the 2.5-year wait? We shall find out in this FLIR thermal showdown. We will take a look at the SCION OTM and see how it compares to the Breach PTQ136.
Side By Side Comparison
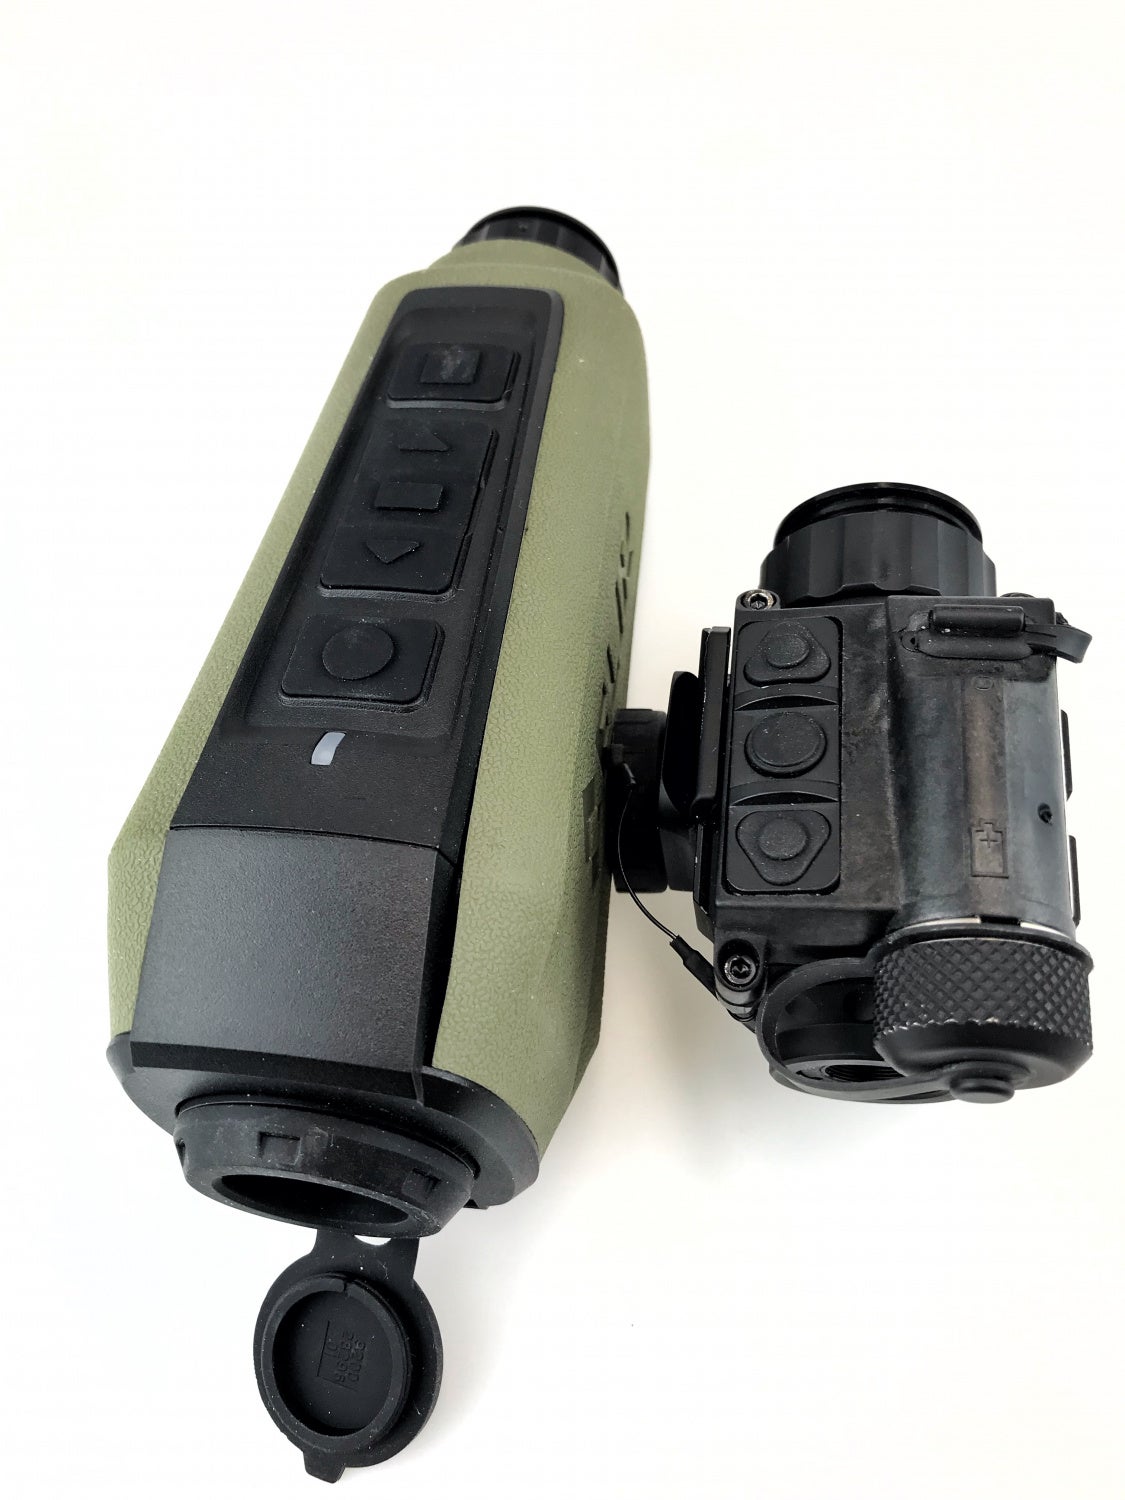
Thermal handheld imagers are not something new. FLIR and various other companies have come out with a wide array of thermal imaging devices in the past. However the SCION OTM is their latest handheld thermal imager and the Breach is one of the smallest of its class and price range. Let us take a closer look at the Scion OTM compared to the Breach PTQ136. As you can see in the photo above and at the top, the green Scion OTM is twice as long as the Breach PTQ136.
Overall length is not the only difference. FLIR sent their Scion OTM266. It has a 640×480 detector compared to the Breach’s meager 320 × 256 VOx Microbolometer. The 18mm germanium lens on the OTM266 is twice as big as the puny 9mm lens on the Breach.

The Scion OTM boats a 4.5 hour run time versus the Breach’s minuscule 90-minute run time. At first glance, it seems like the Scion is better than the Breach right? Not quite. The Scion’s size is partially due to the giant battery tray and the fact it needs six CR123s to get a full 4.5 hours of run time. If you calculate and compare the Breach PTQ136 run time of 90 mins per single CR123, then six batteries will give you a whopping 9 hours of run time!! Sure, you have to swap out the battery every 90 minutes but to get double the run time than the Scion for half the size? That is not a terrible compromise.
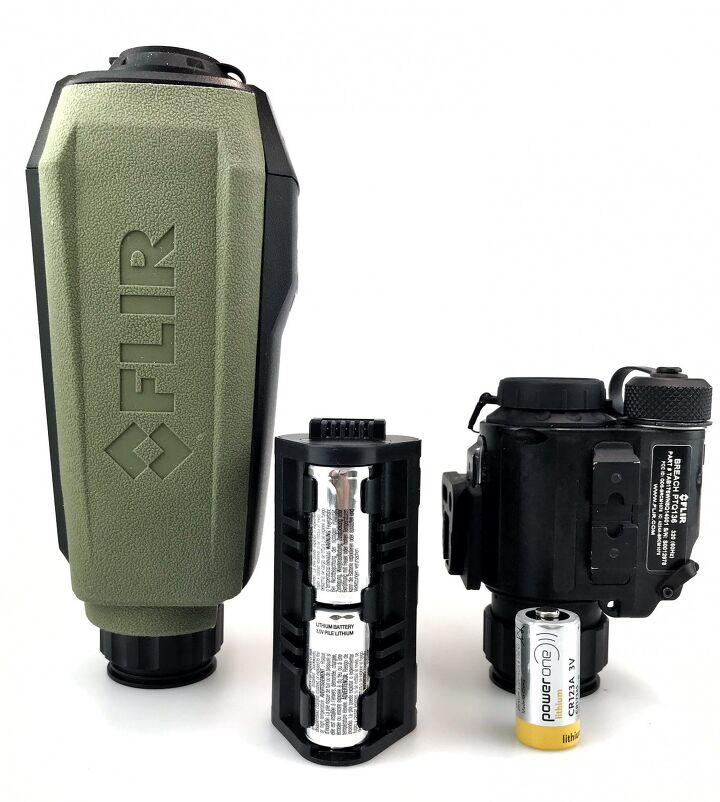
Scion OTM and battery tray next to Breach PTQ136 and single CR123.
Bigger Is Not Better In This Case

Here is the Scion OTM and Breach next to a FLIR Scout TK. The TK is not great and the price reflects its performance. It works but has so much lag and low resolution that it is almost better to not use it. While the Scion OTM is leagues better in thermal detection and resolution over the Scout TK, I only see a marginal difference compared to the Breach.
Here are some side by side images taken by the Scion and Breach.

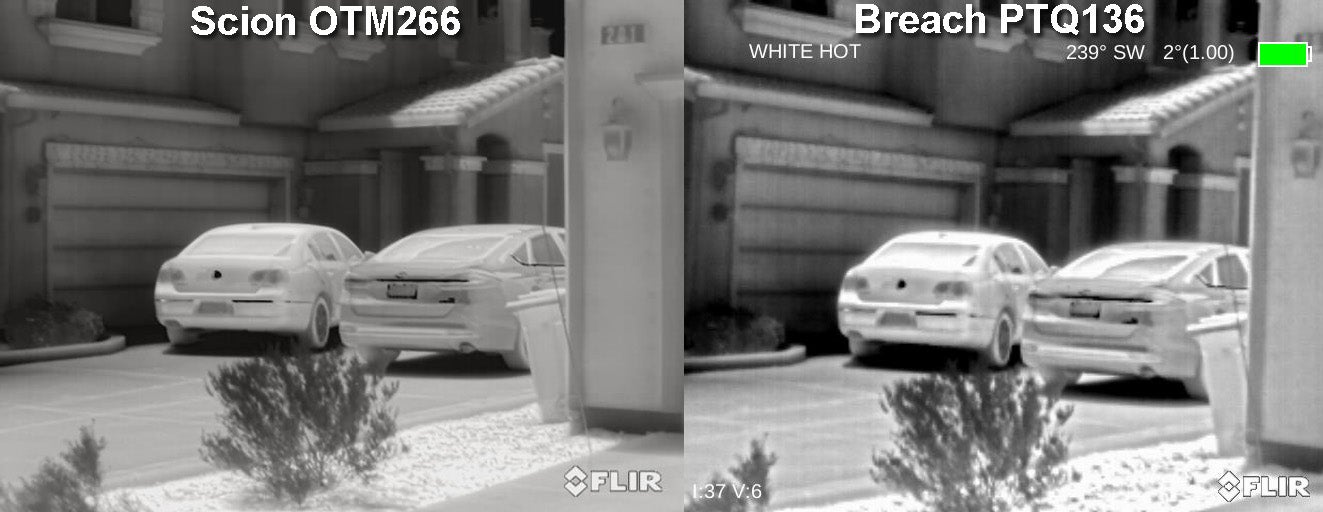

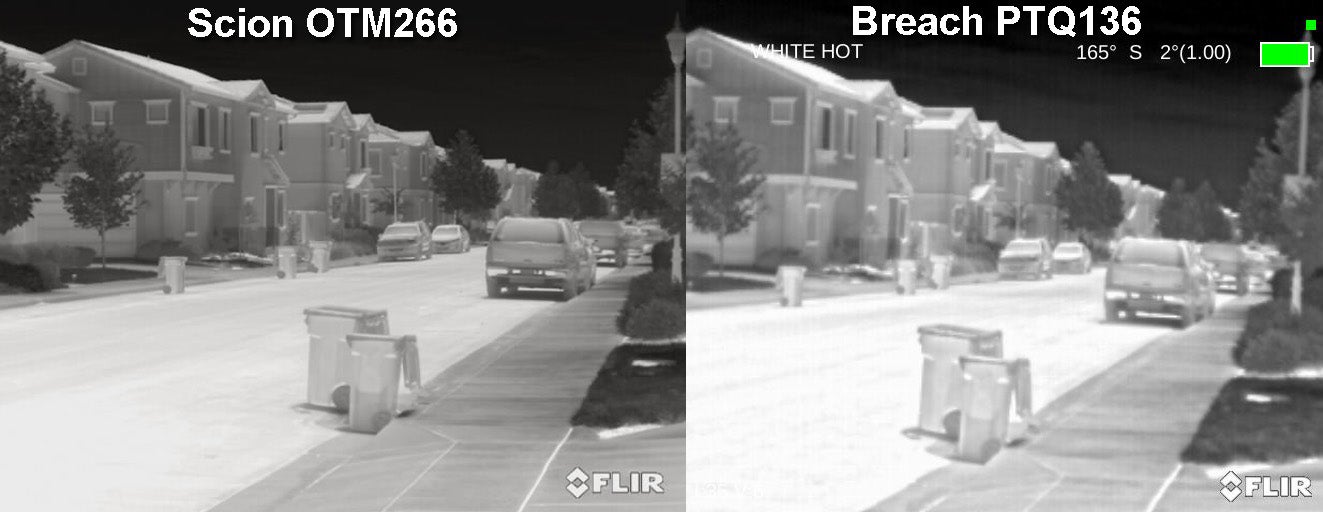

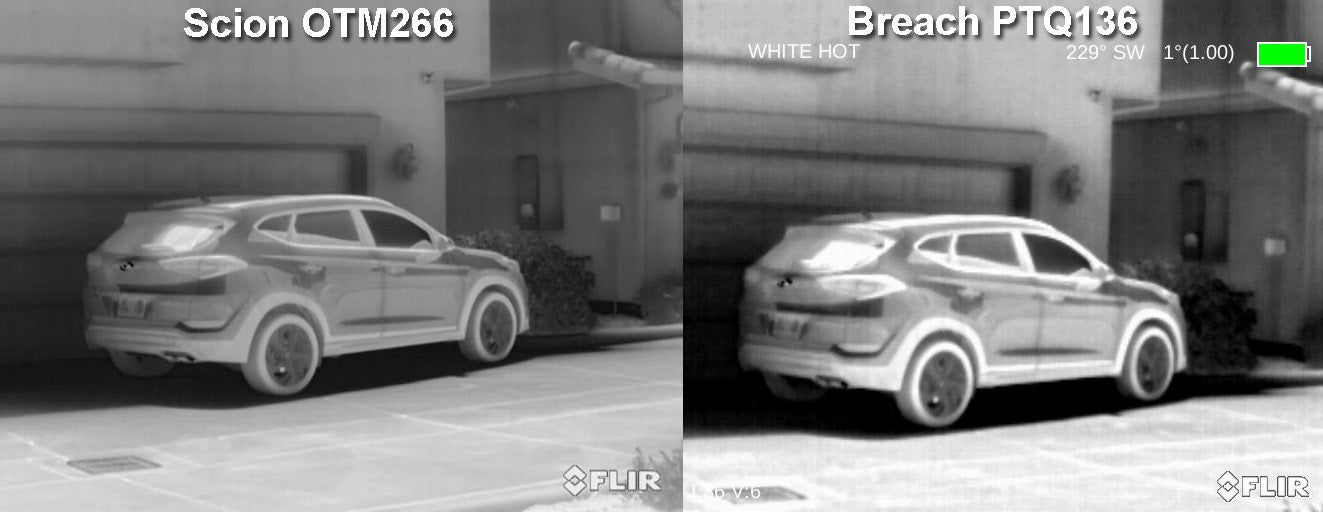
The Scion OTM definitely has a better resolution but does it really matter? Not from what I am seeing. Also, take into account the Scion eats up six CR123s in half the time as the Breach and it is twice as big. The size is a bit of an issue for the Scion. As I have mentioned, it is twice as big as the Breach. Think about how you will carry the Scion? It is the size of a camcorder. It weighs 572 grams or 20.17 oz (with batteries) versus the Breach is at a mere 210 grams or 7.4 oz and the Breach can fit in your pants pocket with ease.The Scion OTM is too big for anything other than a cargo pocket.
Helmet Mounting The Breach PT136
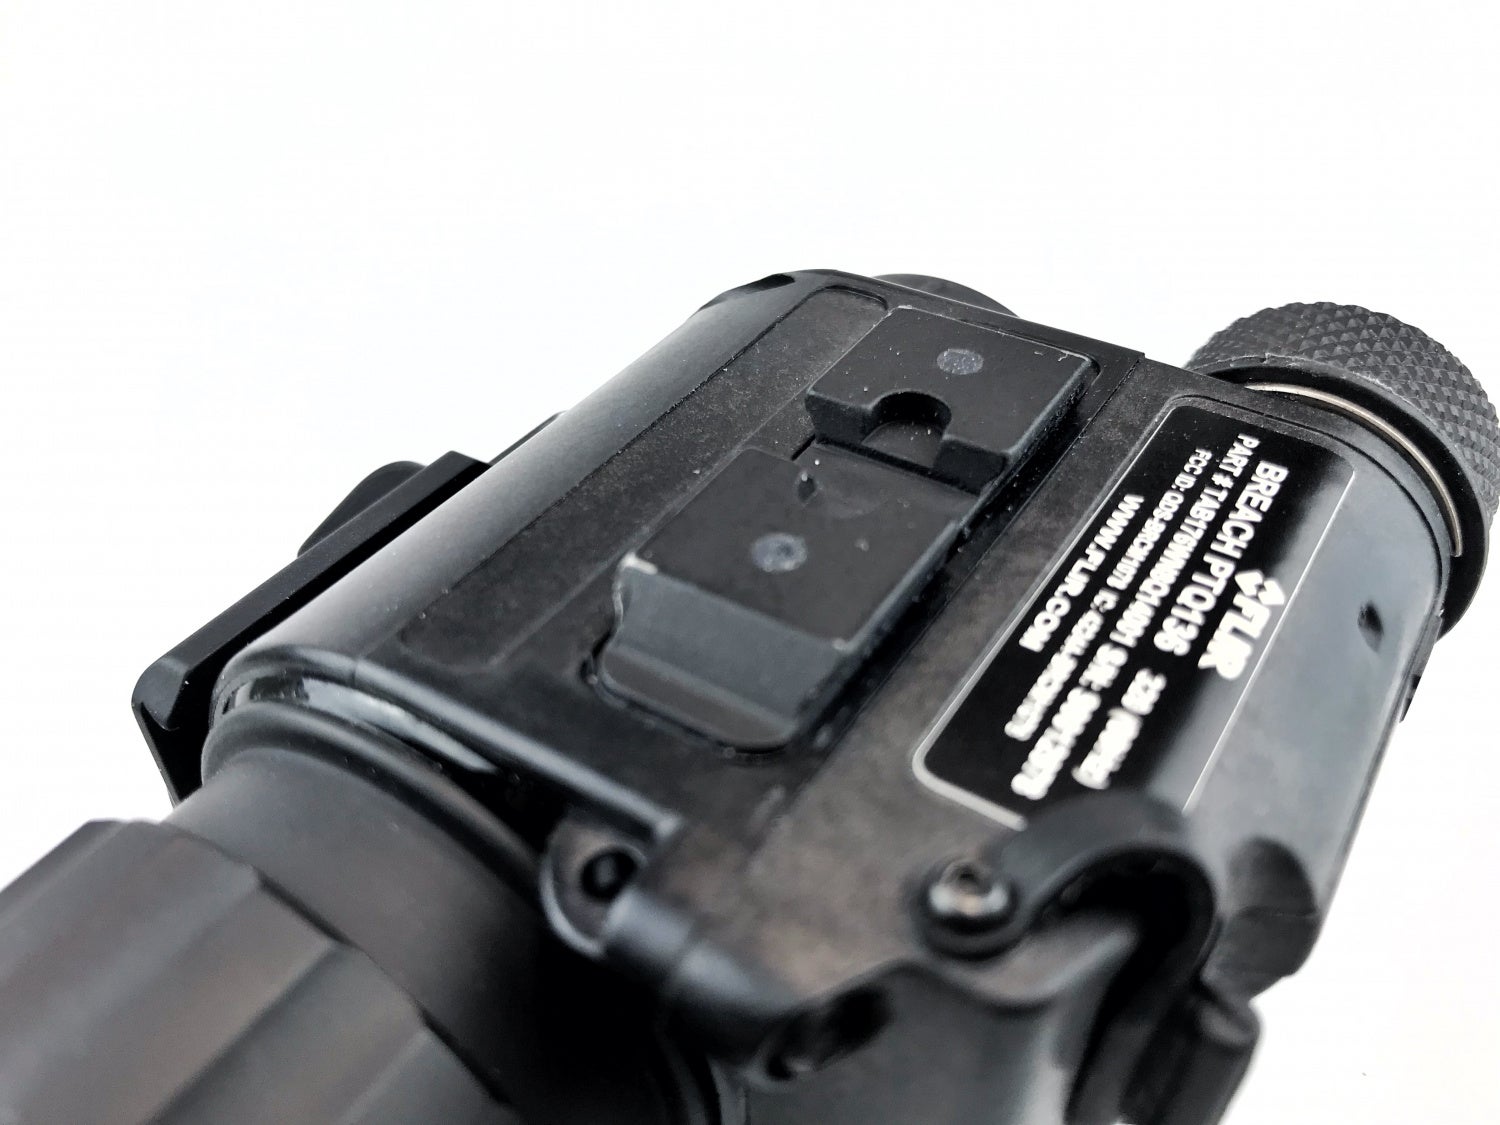
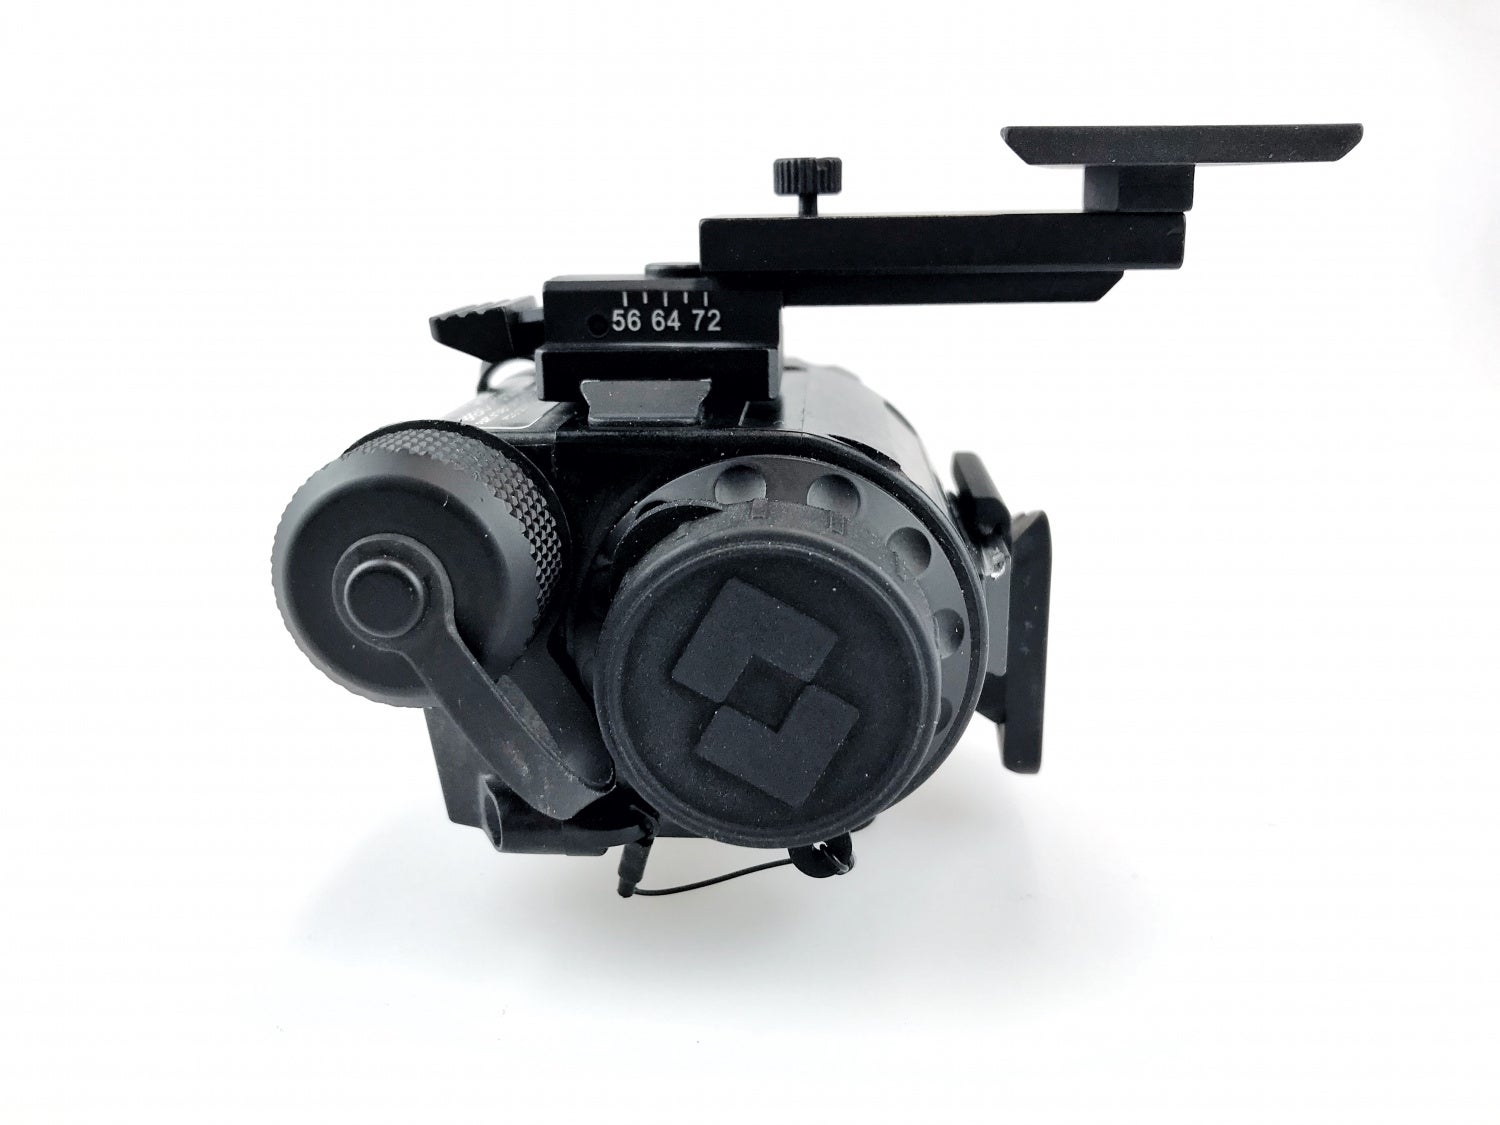
One feature that the Scion OTM lacks is the ability to be mounted onto anything other than a tripod. The FLIR Breach PTQ136 was designed in part by Armasight back when it was called the Q14B. It has three dovetail rails colloquially called MUM-14 rails after the MUM014 night vision monocular.
Armasight makes an offset rail that fits this type of rail and it is called the Armasight Swing Arm #172.
Thanks to Teddy at TNVC for letting me borrow their #172 arm.
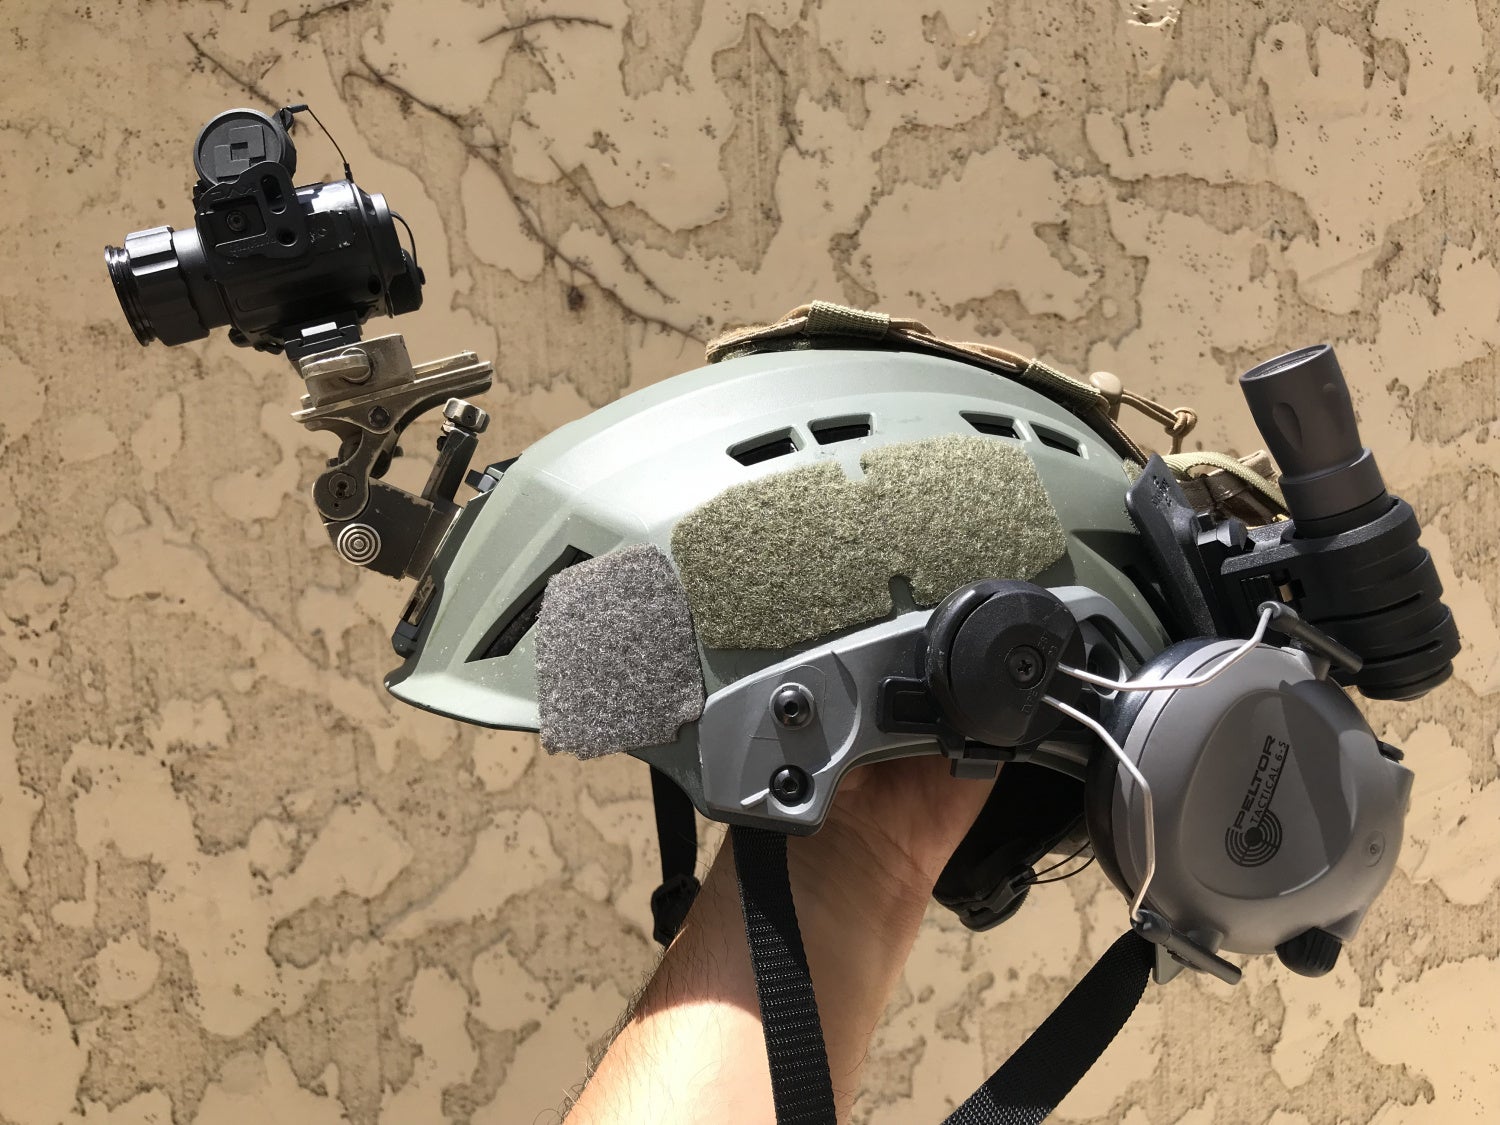
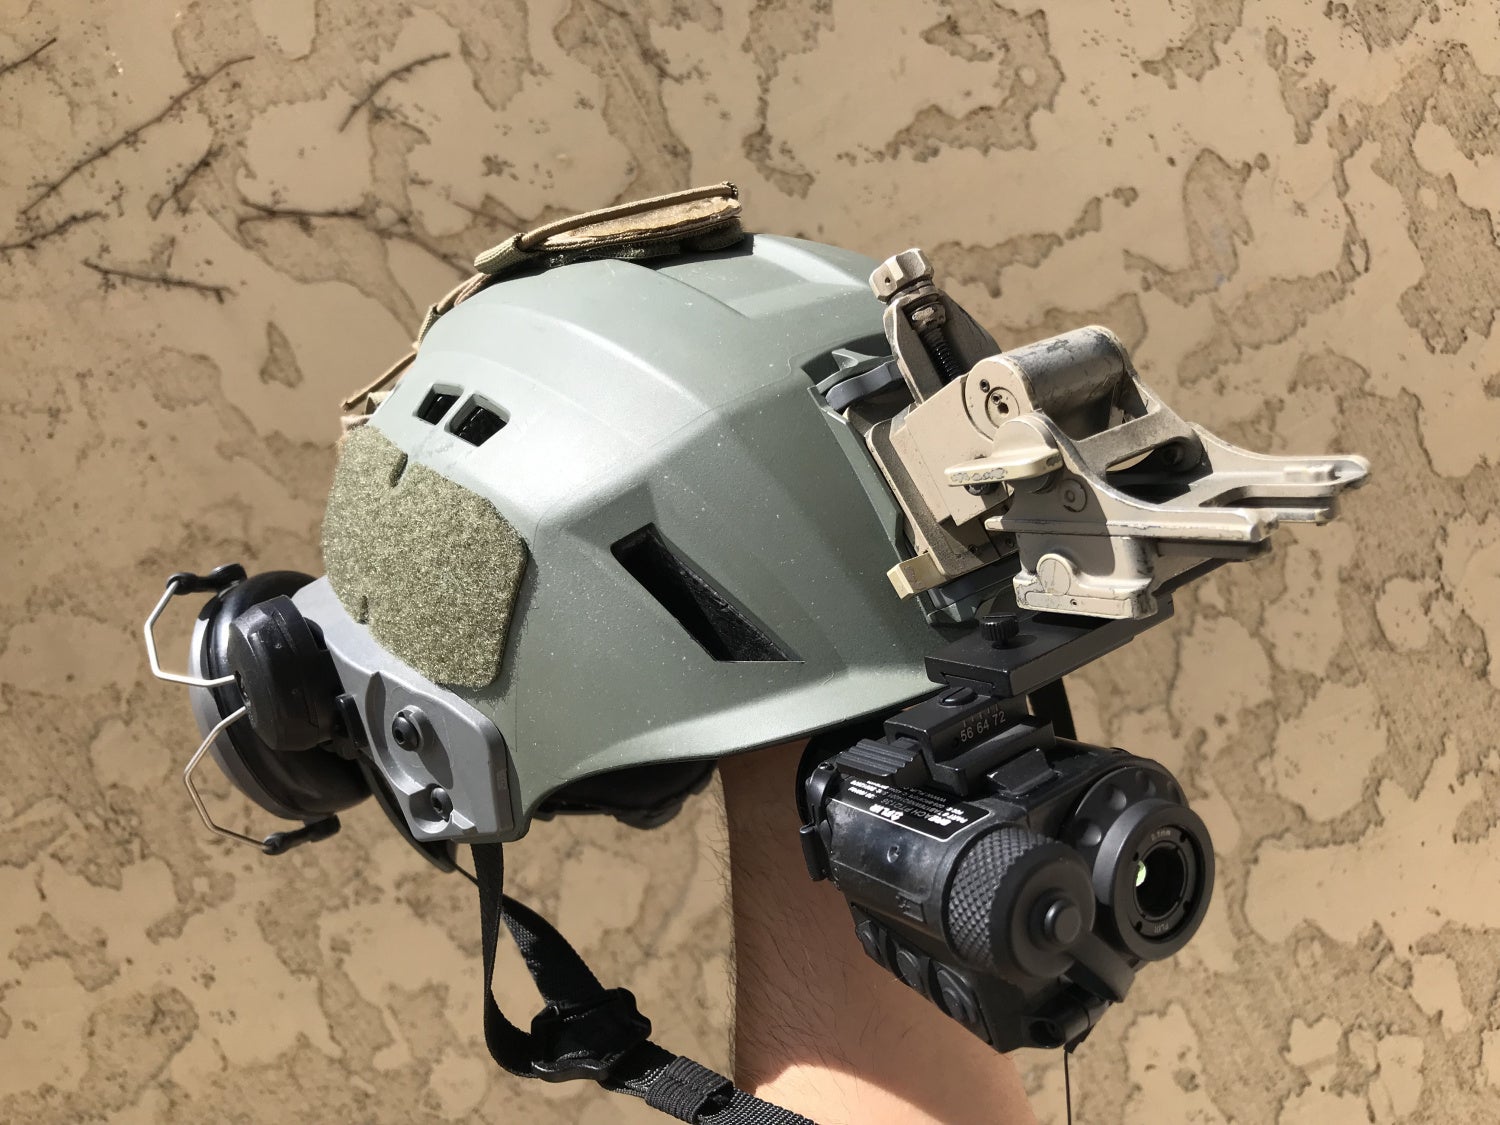
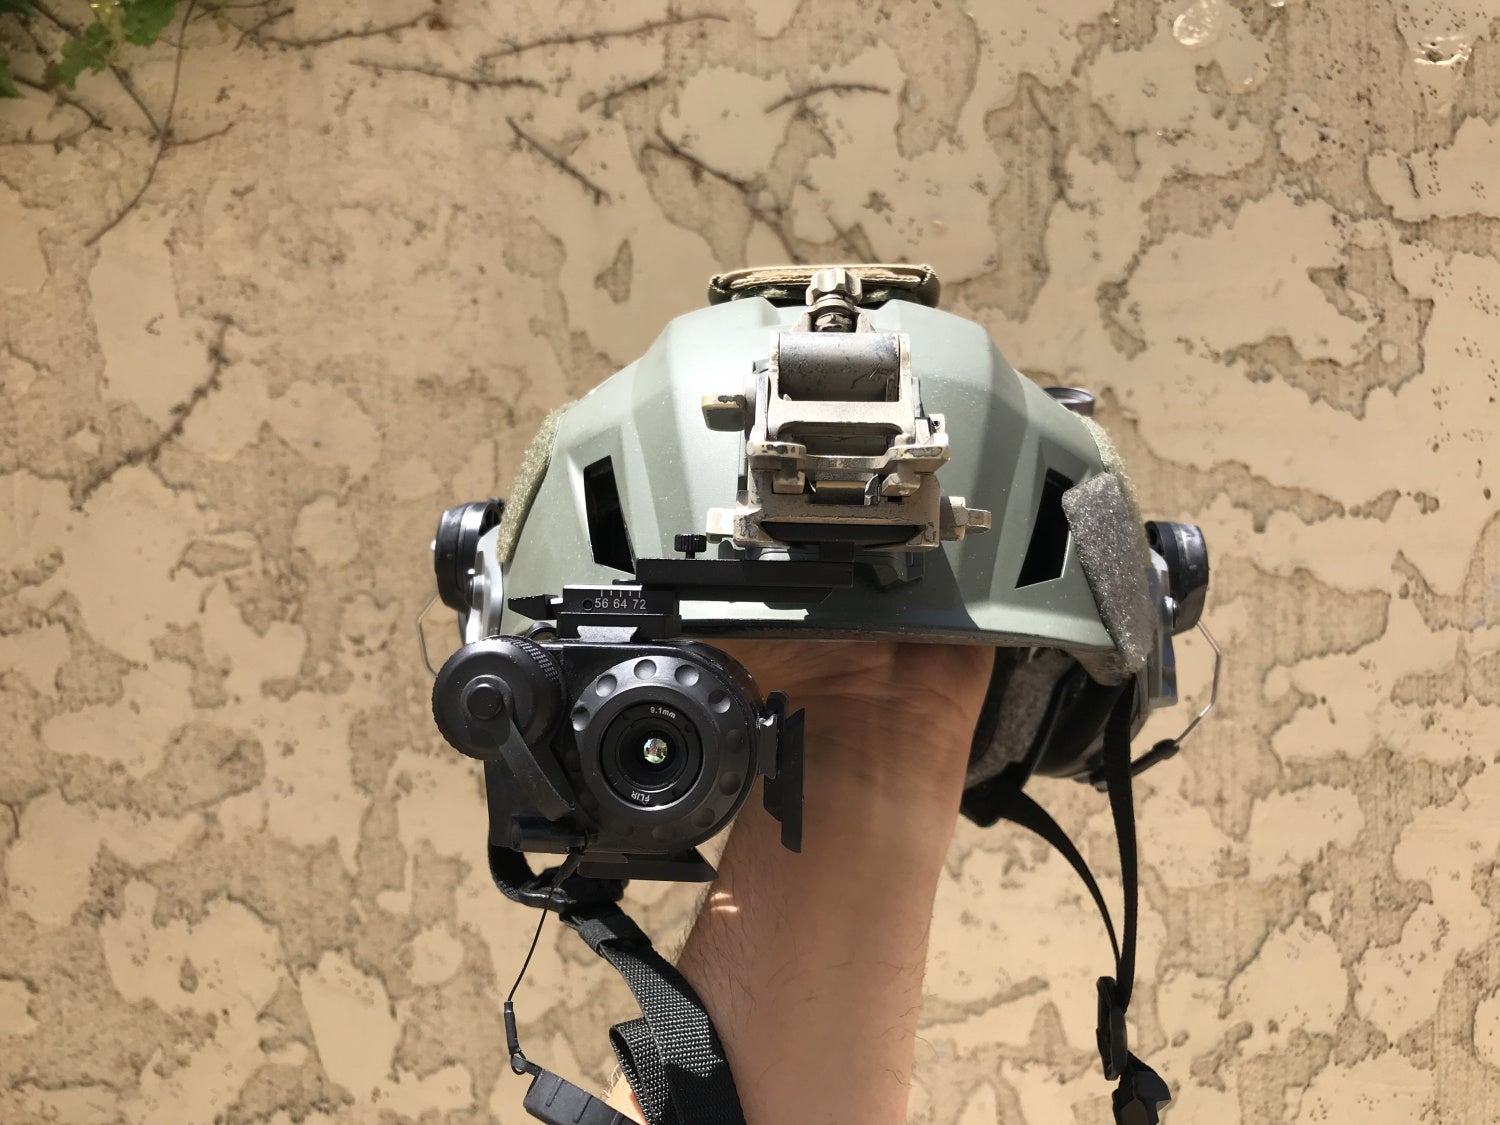
The #172 swing arm allows you to use the Breach PTQ136 like a monocular if you are only using thermal over one eye.
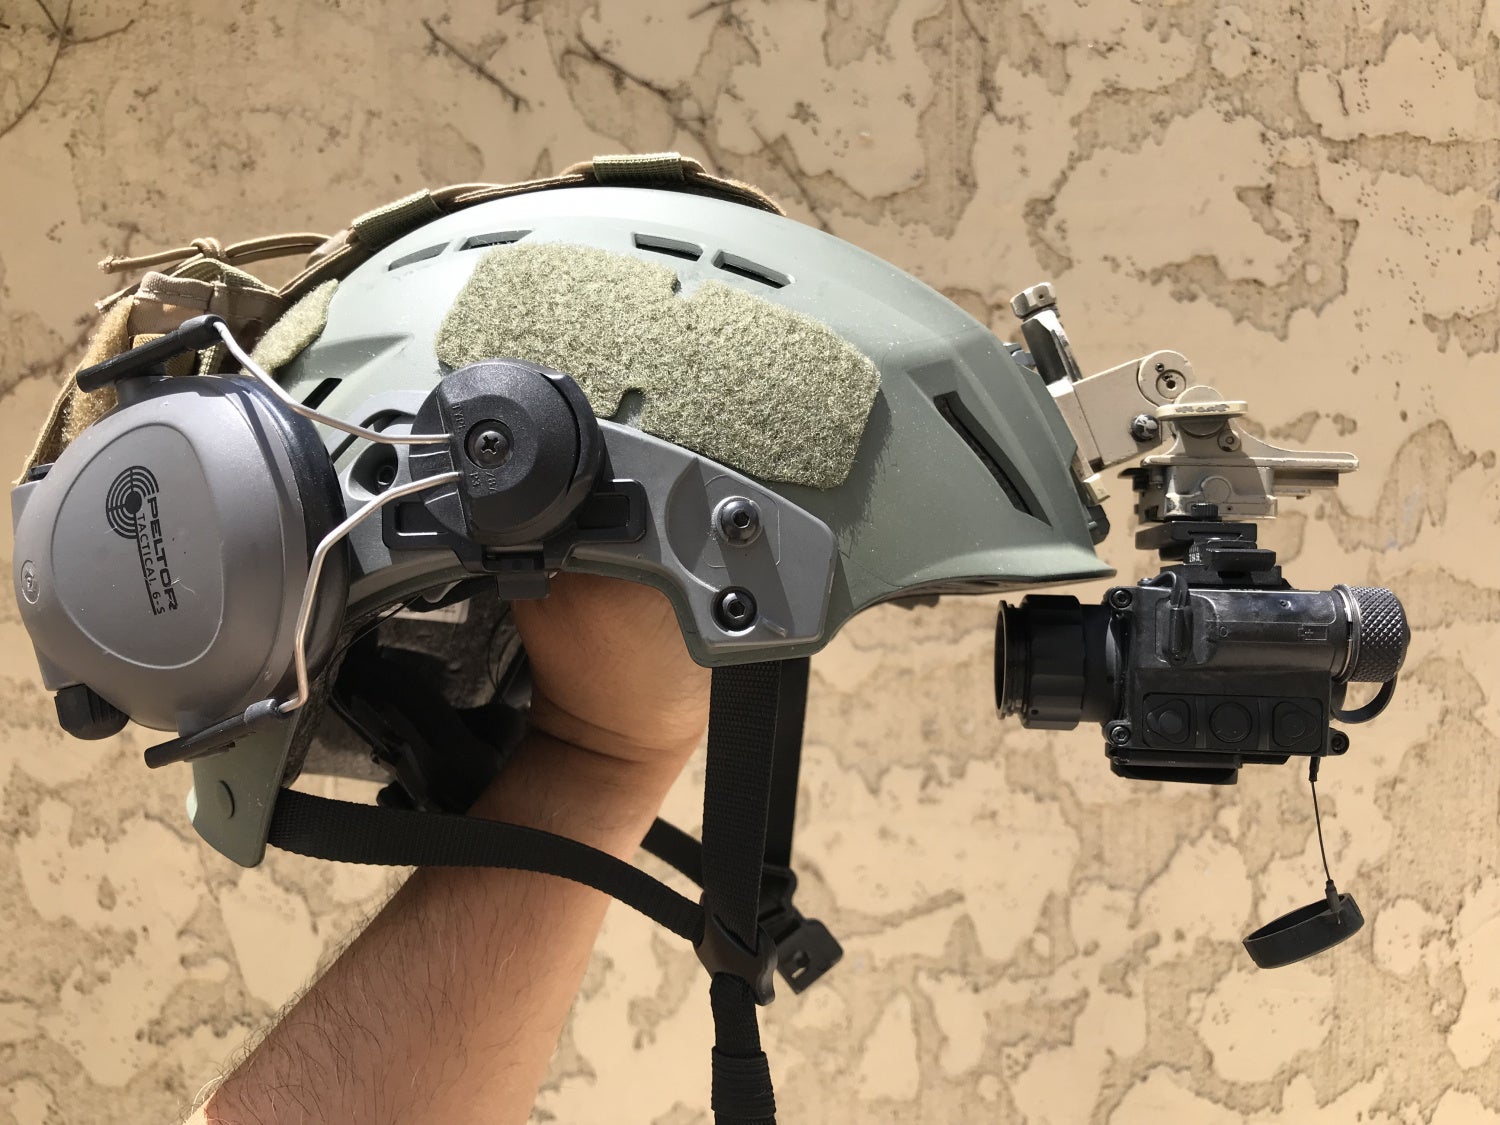
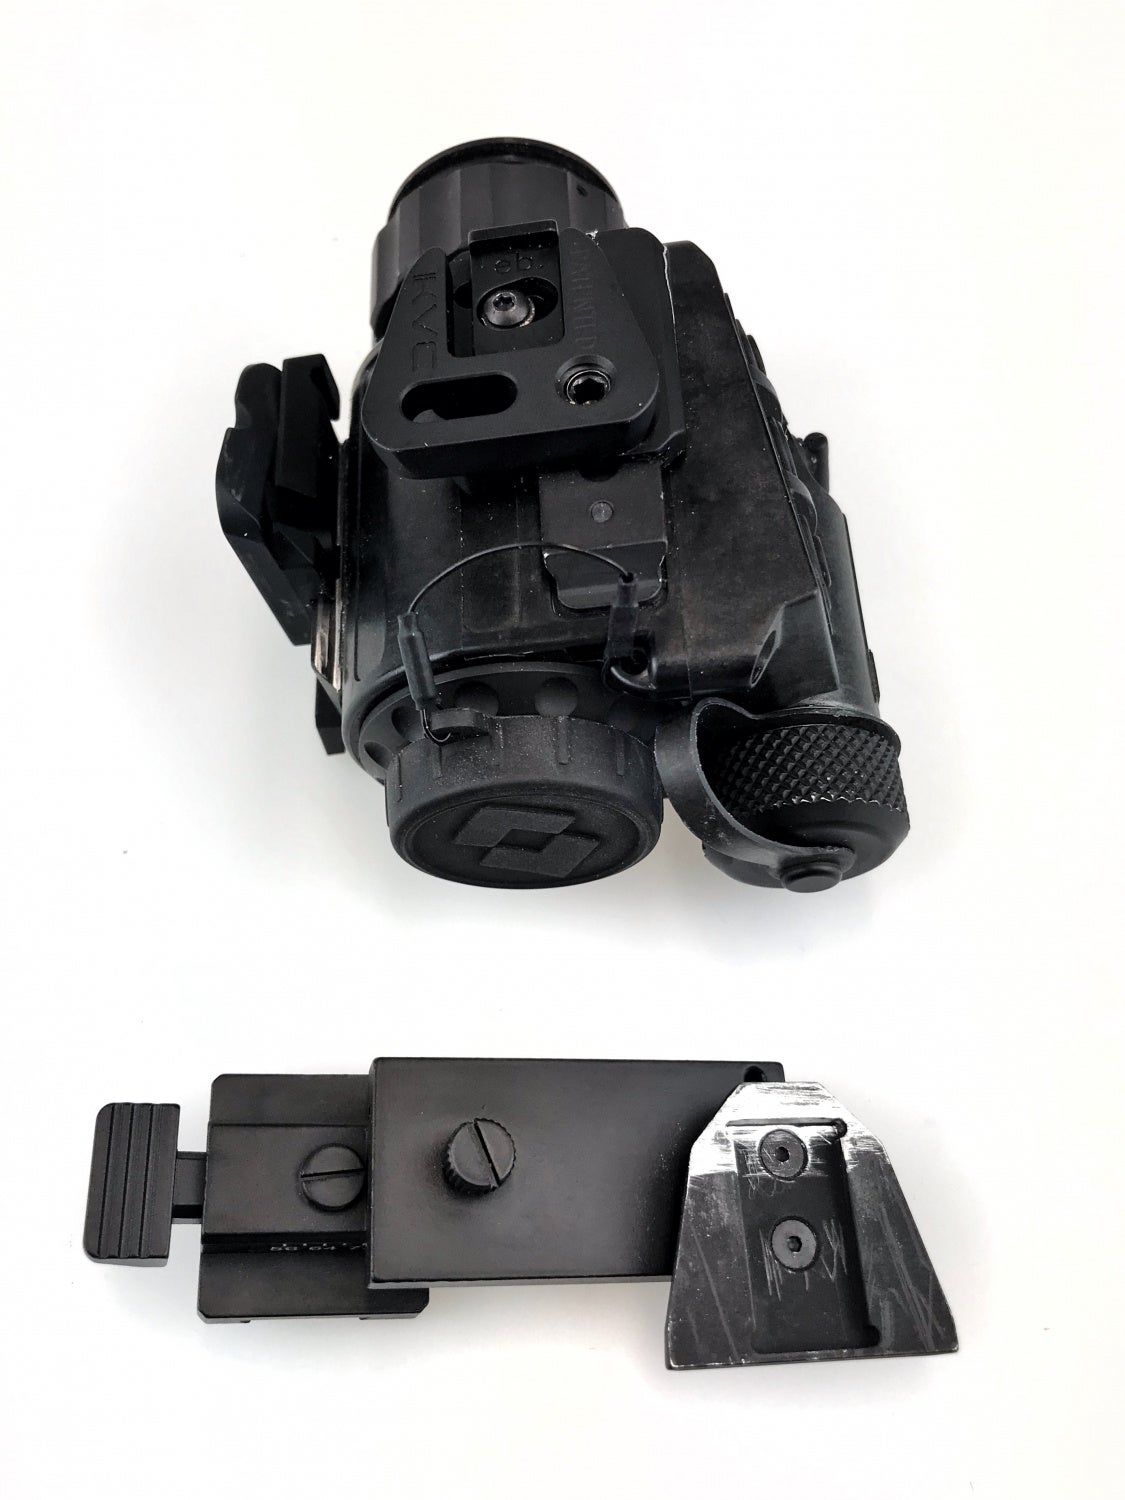
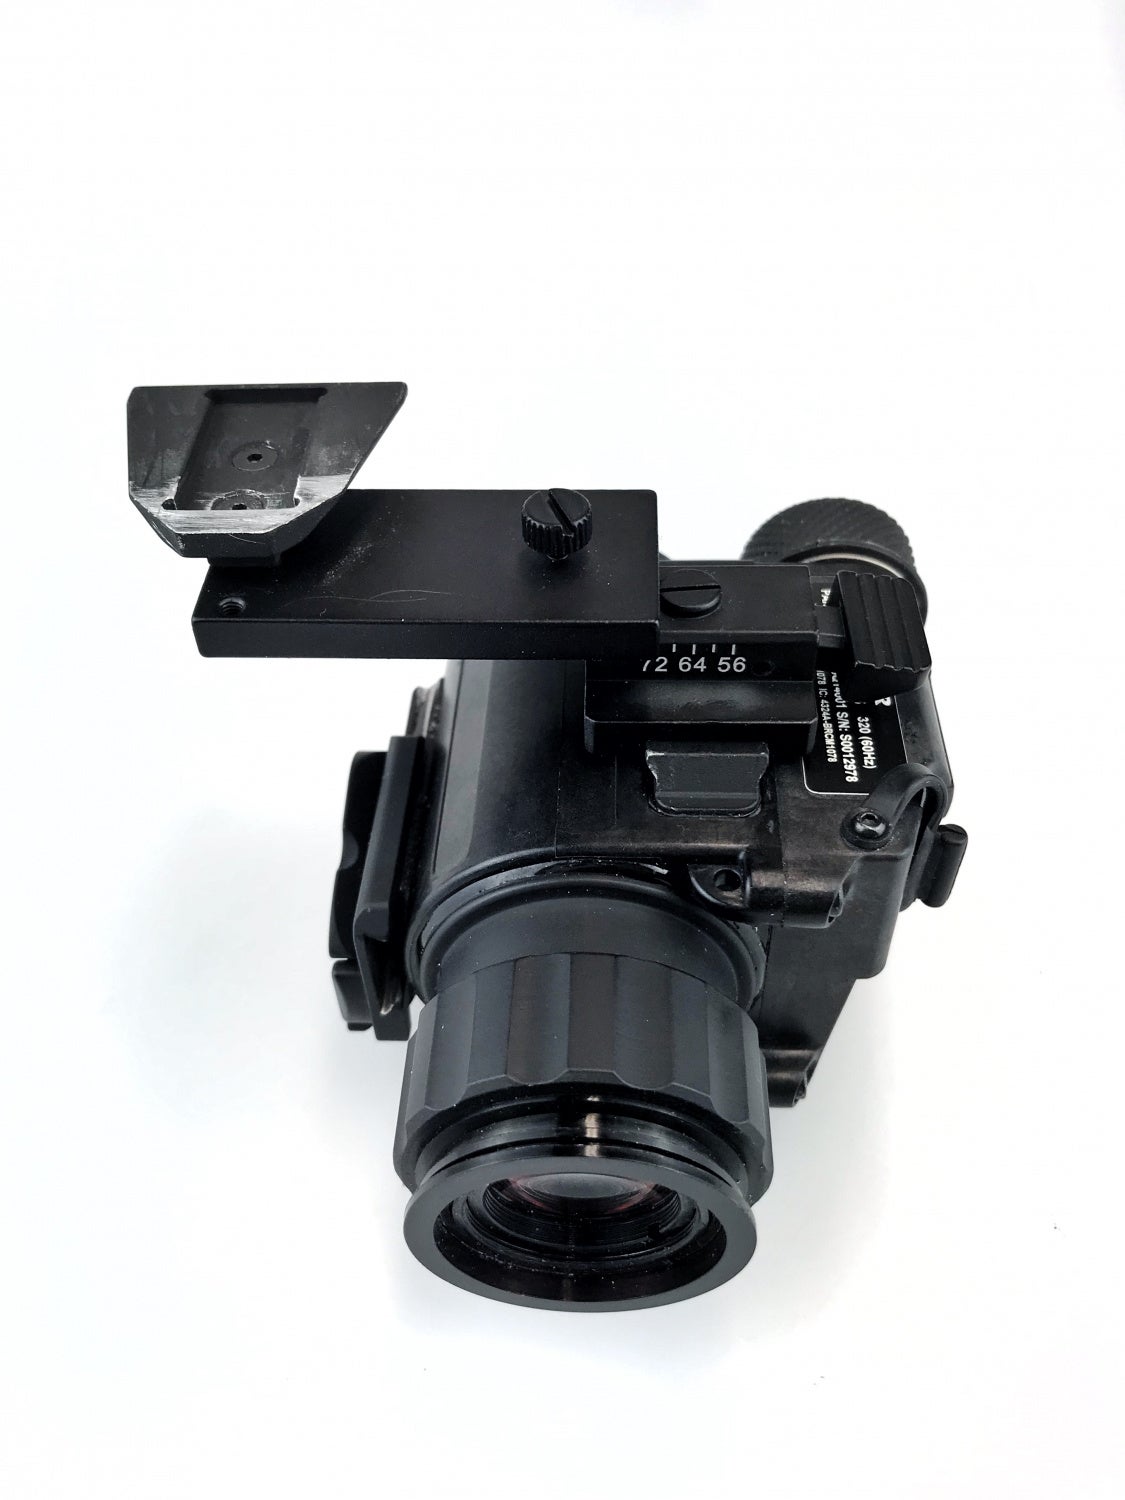
The better way to mount the Breach PTQ136 is with a bridge. RQE, which is now Knight Vision under Knight’s Armament, makes the M-Clip which is an adapter to convert the MUM rail into a dovetail.
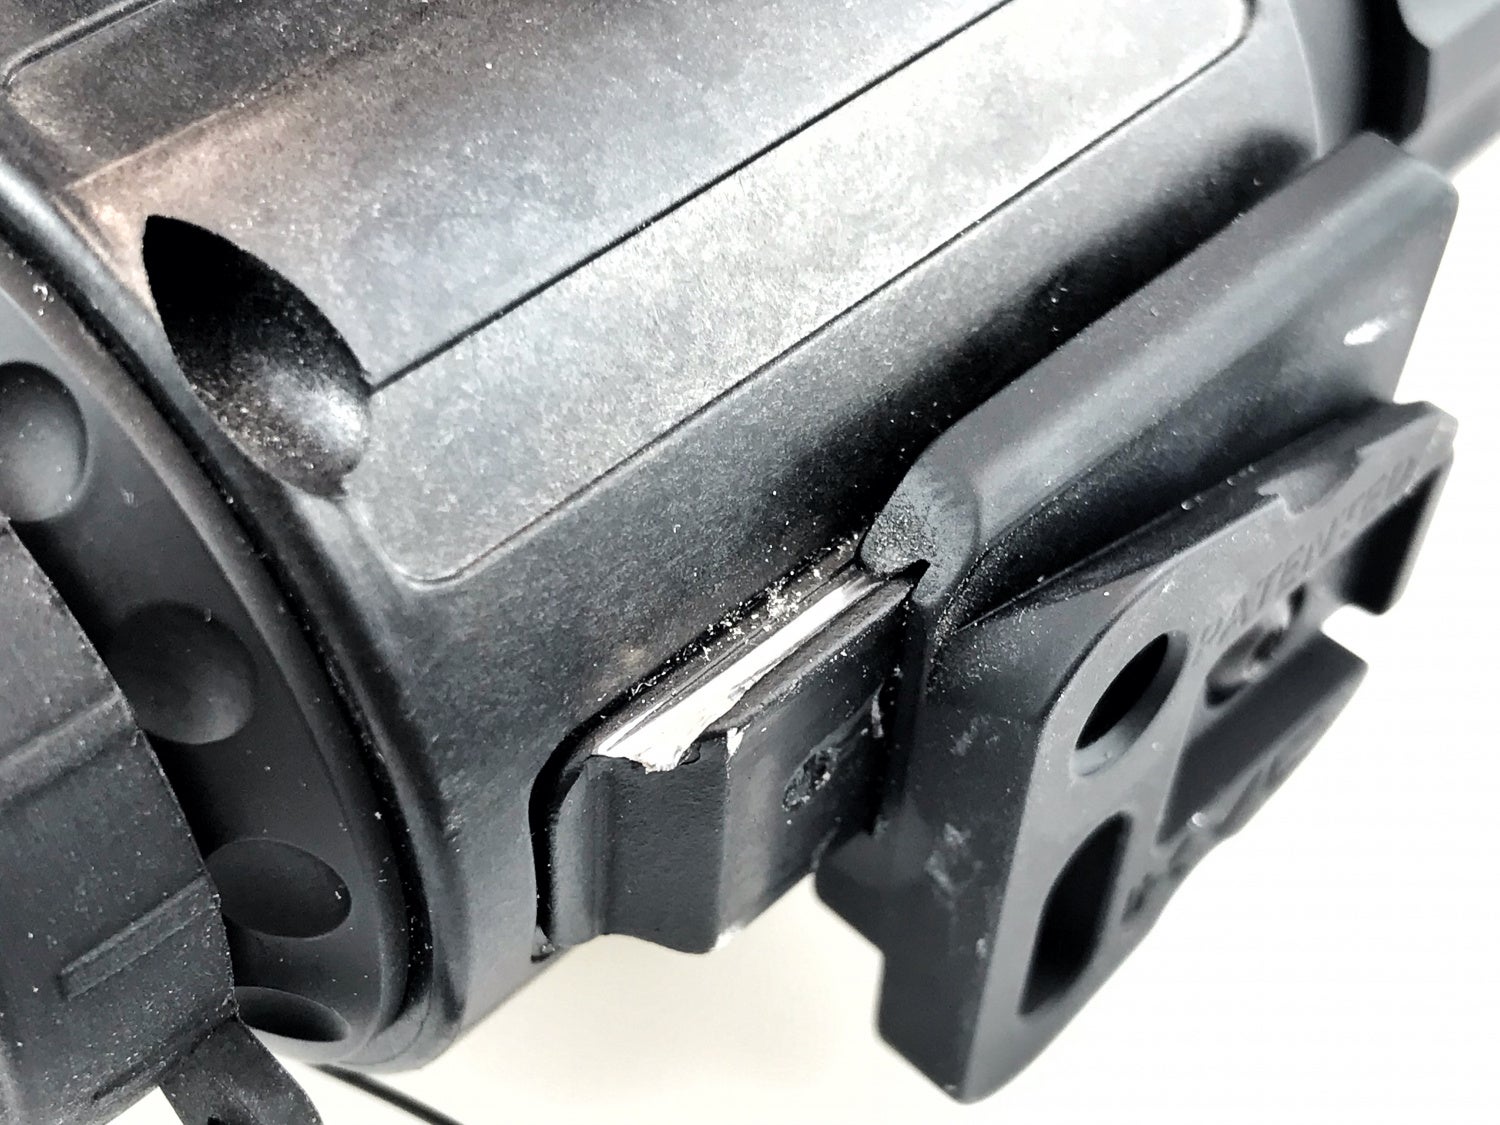
I bought a set from TNVC, it has a left side and right side dovetail so you can mount the Breach on a bridge either on the left or right side. However, I ran into an issue. The FLIR Breach rail is slightly out of spec. I tried forcing the M-Clip on with a rubber mallet and wooden dowel. It cracked one of the M-Clips. You can see the hairline crack below.

I did not want to repeat that issue with the other M-Clip dovetail adapter so I filed down the MUM rail a bit and now it fits better. Slightly annoying that FLIR and Knight’s Armament can’t get their stuff to work together. Even the Armasight #172 swing arm is a bit too tight.
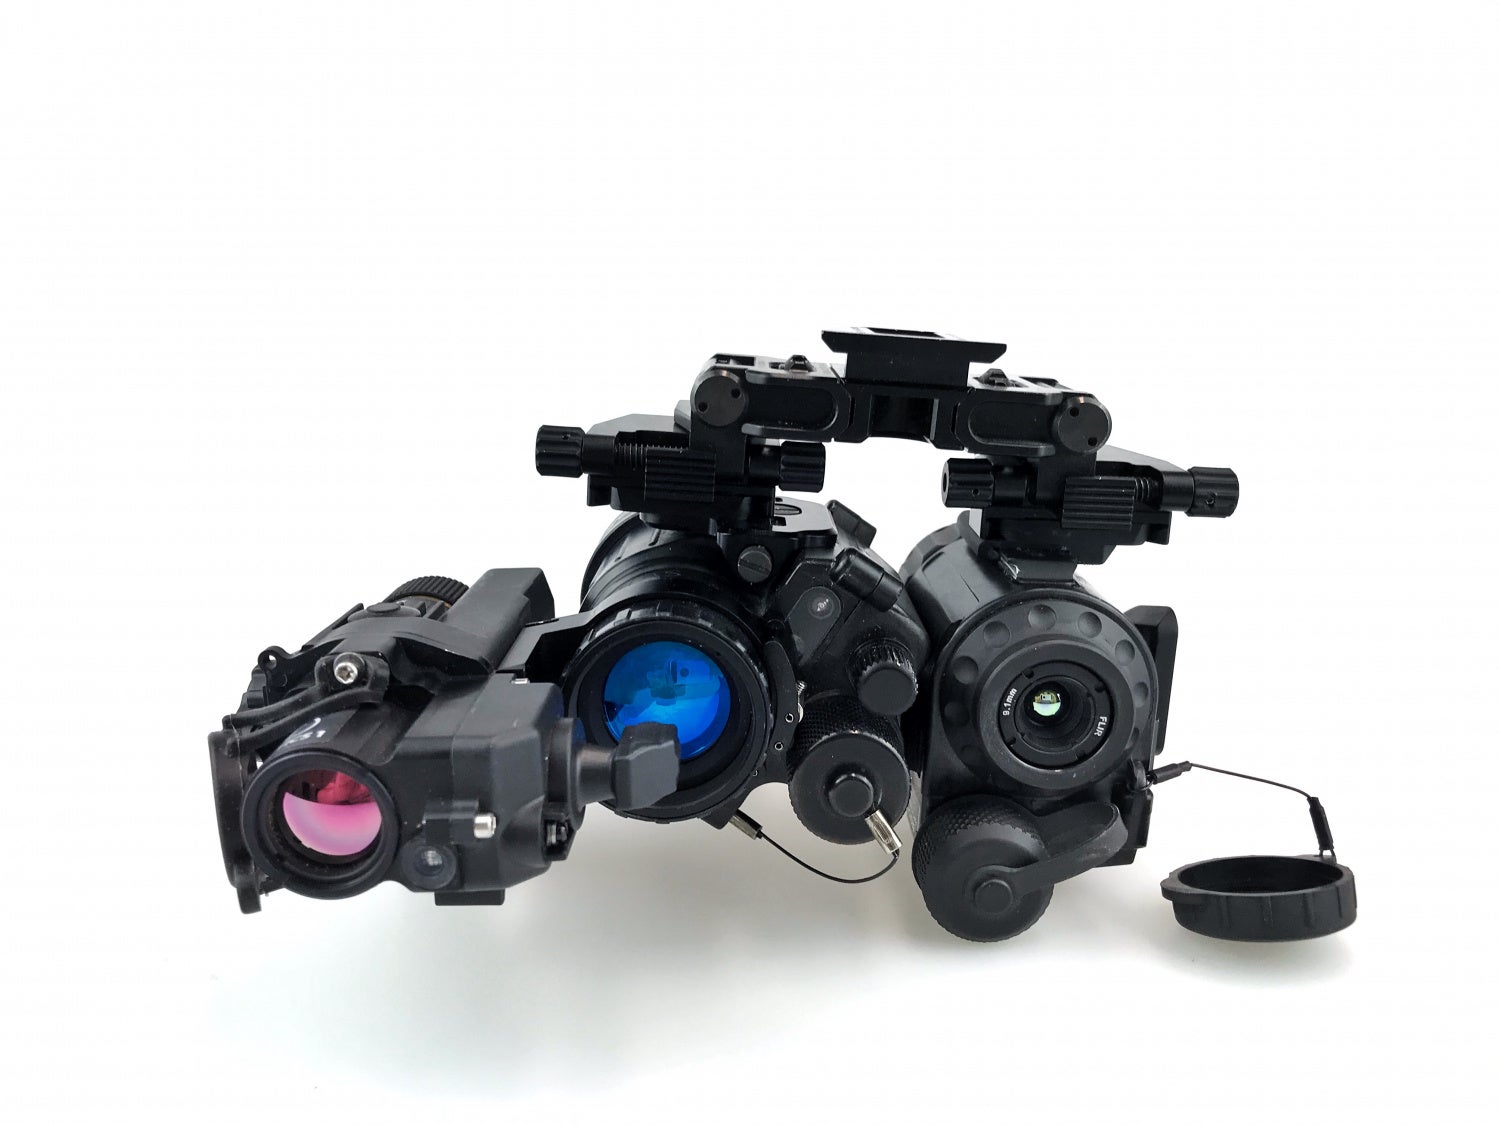
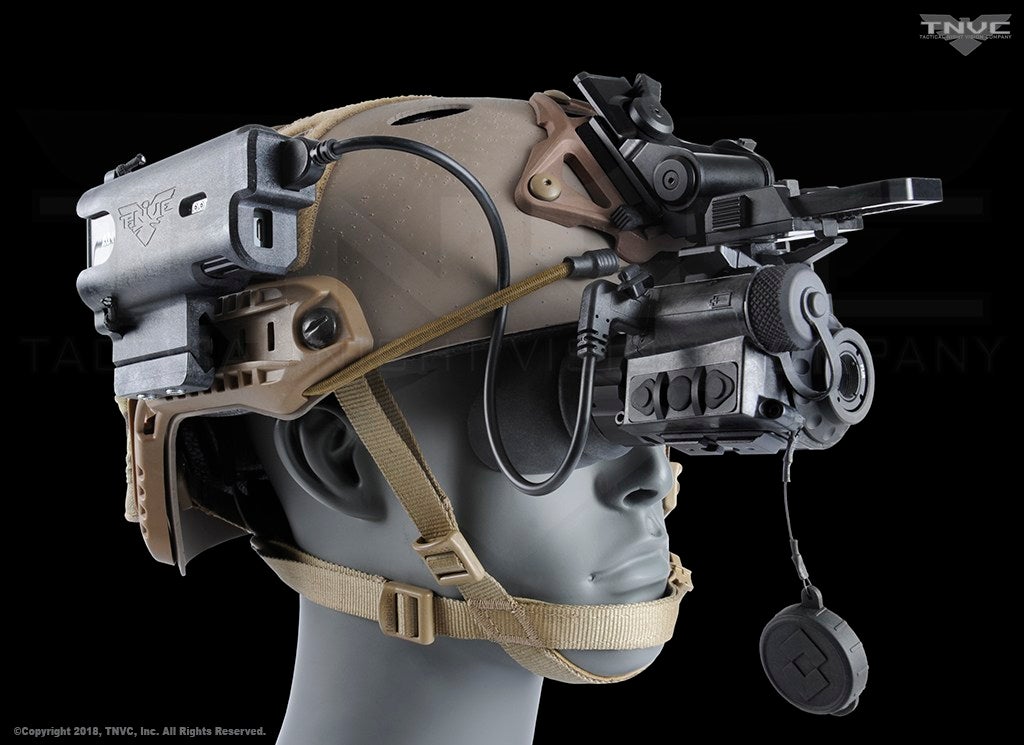
However, once you do manage to get the M-Clip onto the FLIR Breach PTQ136 you can use a bridge and merge it with a PVS-14. Thanks to my friend Aaron for lending me his Wilcox bridge for this review. Below you can see my PVS-14 with COTI AN/PAS-29.

Since the bridge is modular, you can switch the PVS-14 and Breach positions. But the battery housing of the PVS-14 gets in the way a bit. However, I prefer this setup so I can see through the PVS-14 with my right eye and aim with a red dot if I had to.
Here is a side by side comparison. You can play the video in a smartphone and put that phone into one of those VR goggles and you can get an idea of what I was seeing through both eyes.
I added the COTI AN/PAS-29 to compare it’s thermal abilities to the FLIR Breach. Obviously, the Breach looks a lot better. You can see a lot of detail that the COTI cannot. However, they are used quite differently. The COTI does not have different palettes but makes up for it with three different detection modes: Full Therm, Patrol, and Outline. Check out my review of the COTI for more information. You can see the differences in the video above. The COTI gives you thermal detection inside the night vision field of view. You can still see the night vision image even through the thermal image of the COTI. You can see my friend Kyle turn on his IR light and other lights whereas the Breach cannot see this at all.
The COTI is great for detecting people and game but I doubt it would be good at recognizing game. The Breach is perfect as a handheld thermal monocular for scanning your environment and then switching to night vision. Ideally paired with a good dual tube bino night vision setup like a DTNVG where you can roll one eye pod up like a gull-wing door so you can use your unaided eye to look through the Breach. Then roll the eye pod back down to go back to normal night vision.
One problem I had with the Breach worn on a helmet is the lag. It reminds me of the lag found in the SiOnyx Aurora.
The other issue is that the two images are not collimated. When you wear collimated dual tube night vision systems, the two monoculars are collimated so that you see one cohesive image instead of two images that don’t line up. You know when you rub your eye a little too vigorously that eye gets a little messed up for a minute and you see a double vision? That is what is happening with the bridged Breach and PVS-14. Another issue is this bridged setup is rather hefty at just a whisker over two pounds. This is heavier than dual PVS-14s but with the right amount of counter weight on your helmet it is not terrible.
Issues With The Scion OTM and Breach PTQ136
Before I get into the negatives the Scion OTM actually does one feature that I do like that the Breach does not. And that is the picture in picture (PIP) magnification window. When you zoom in, you can get a PIP of what you are zoomed into. You can see near the end of the video below. Oh, and there is no sound since both the Breach and Scion do not have microphones to capture audio.
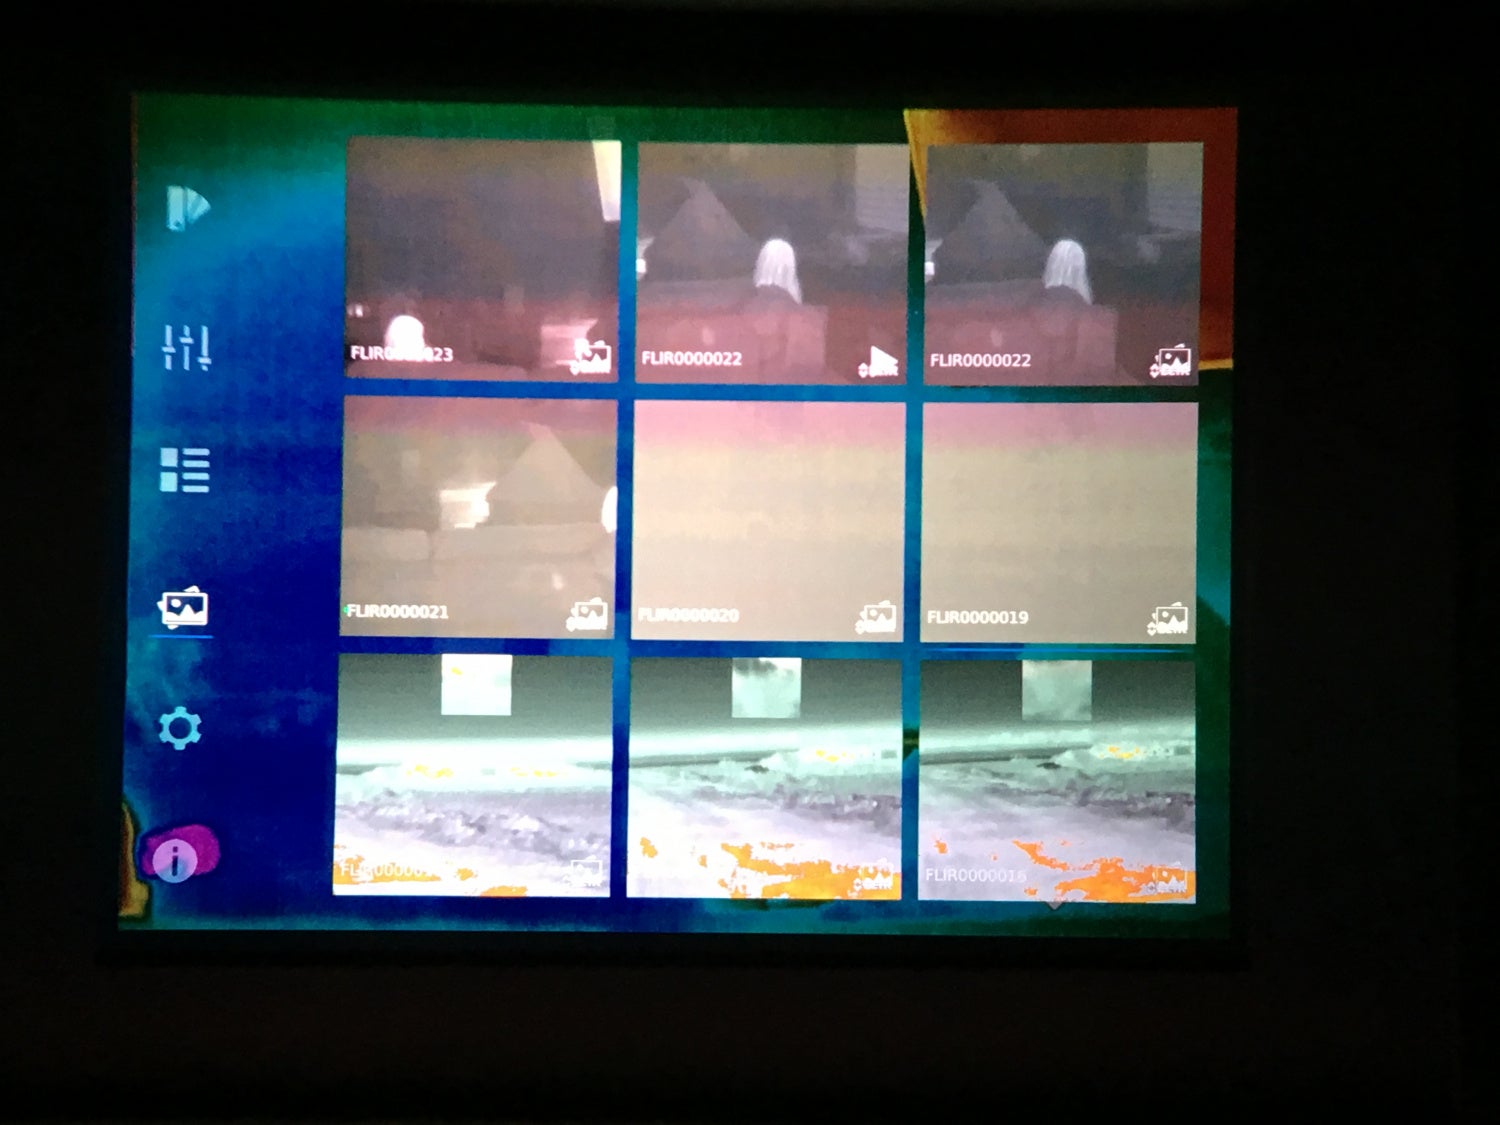
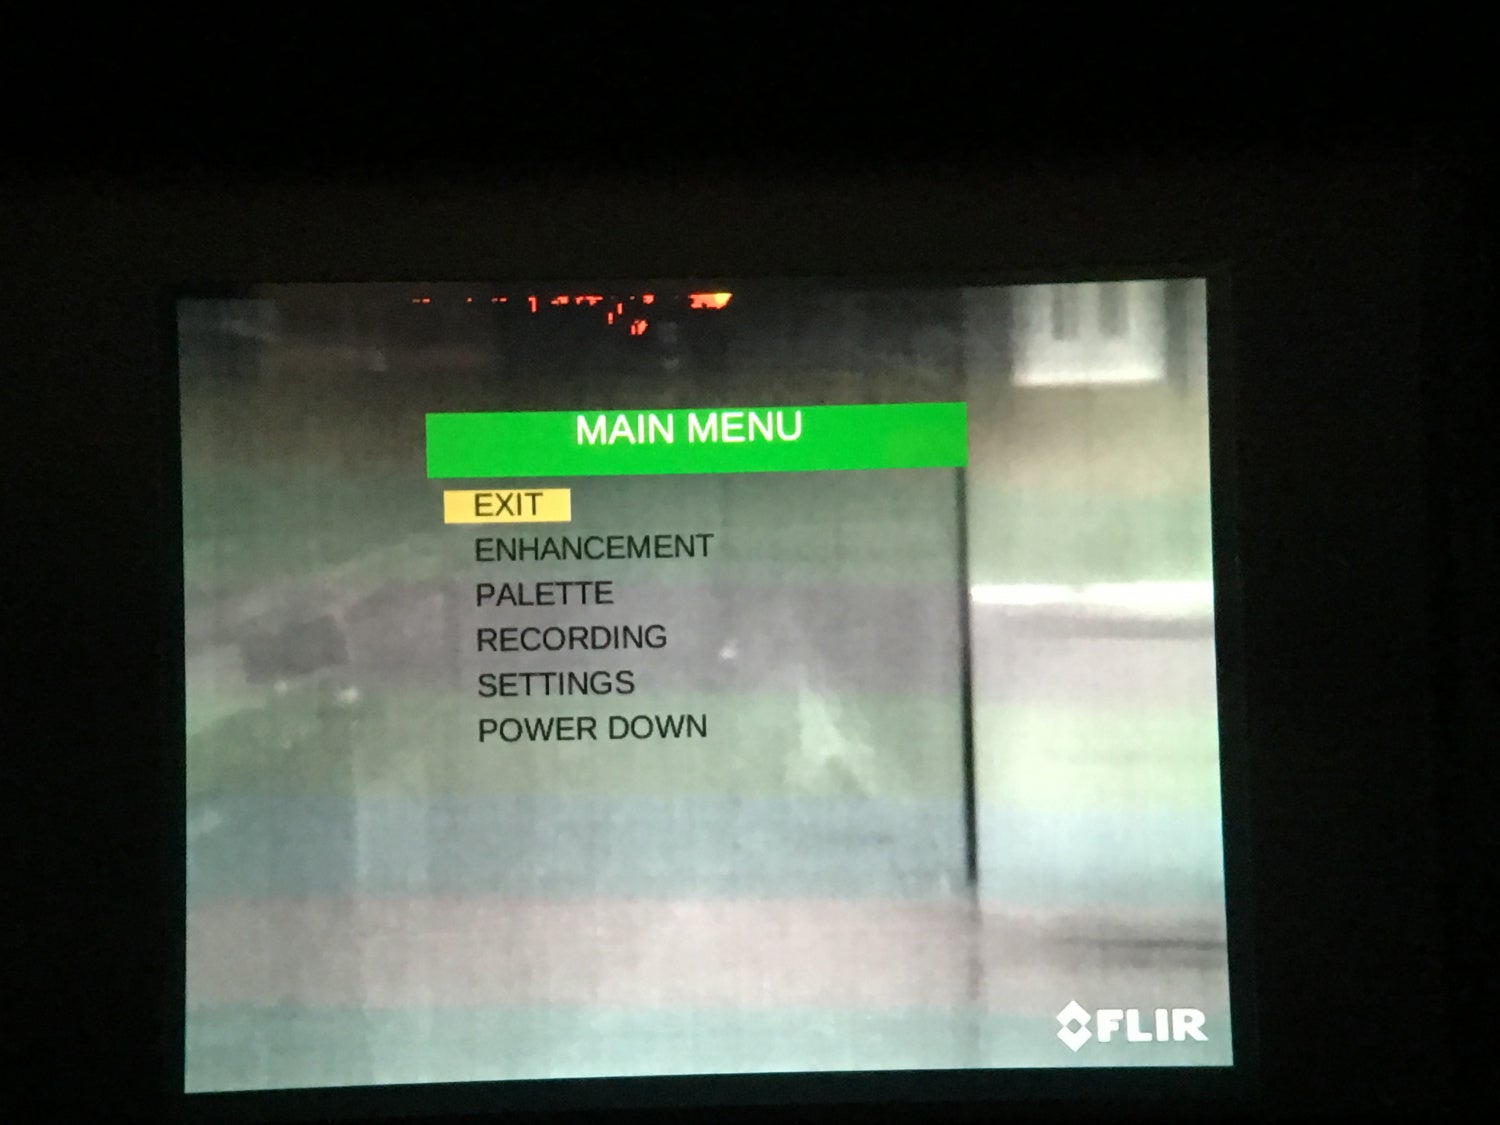
One of my biggest complaints about the Scion, other than size and battery inefficiency, is the onscreen menu. It is purely symbols. While I could get used to what they are and learn what they mean, they are not exactly universal. The Scion did not come with a user manual. I found out from my contact that newer versions of the Scion will have a copy of the user manual stored digitally in the onboard memory for the Scion. This T&E version did not have that. I can understand that having a menu of icons makes it more internationally friendly and should cross language barriers, my issue is that these symbols are not as intuitive as they think they are. I had to guess what they were and use the manual to confirm what they mean. Kind of annoying.
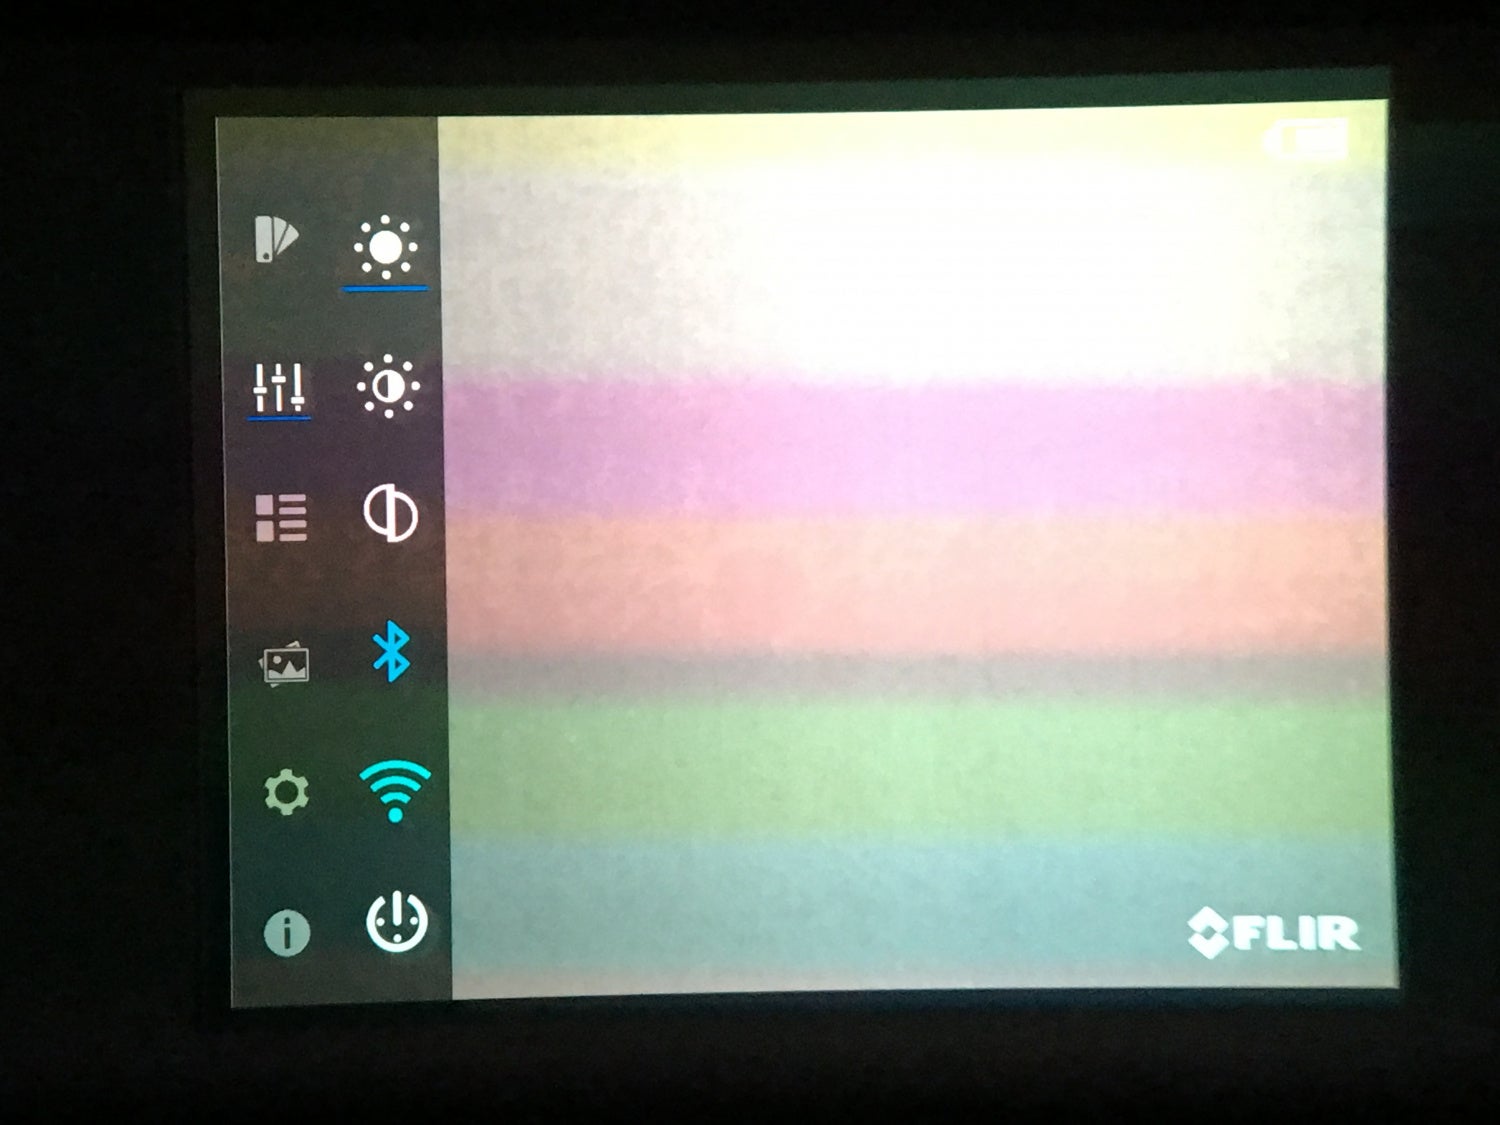
Take a look at the picture below. This is the media gallery where you can review the images and video you took. There are nine thumbnails. Which one is currently selected to be viewed? Can’t tell? It is the middle row far right thumbnail. How do you know? There is a faint blue line just under that thumbnail window. You can see a similar blue line under the highlighted icon on the left. I found this to be SUPER annoying. The blue line is too subtle and I often have to hunt for it. FLIR needs to redesign this user interface and make things like menu selection highlights more obvious.
Edit: Thanks to commenter MP for correcting me. When you hold down the center button it brings up the onscreen menu however if you continue holding for a total of 8 secs the Breach will power down. Much easier than navigating the menu to turn the Breach off.

The orientation of the Breach is also a slight issue. When bridging the Breach I prefer to hang it vertically so the buttons are on the bottom. This orients the screen the correct way in landscape mode. If you use either MUM rail on either side to mount the PTQ136, this positions the screen sideways in portrait mode. I suppose if you do not care about proper video playback then it is fine. The Breach will auto rotate the onscreen information but only when the screen is in landscape mode. So either with the buttons pointing up or down is the correct way to hold the Breach. However, just like the Aurora, this is just for you looking through the eyepiece. The actual video recorded could be upside down and you will need to rotate it after you download it.
Remember the Q14B article? What attracted me the most to that one was how versatile they claimed it will be. Unfortunately, the Breach fell short of their lofty goals. The Breach is not weapons rated so you should not mount it to a gun. Also, they fell short of their target pricing of a sub $2,000 thermal monocular.
Did These FLIR Thermal Devices Get You Hot And Excited?
While the Breach did fall short of the Q14B promises, it is rather useful. It is small, lightweight and has the ability to be mounted, albeit with some minor hand fitting, to a helmet for hands-free use. The Breach PTQ136 has an MSRP of $2,495. TNVC includes a free remote battery pack for increased battery life. A $96 dollar value. Instead of 1.5 hours, the battery pack will power the Breach for 13 hours!
The Scion OTM fell short the most when compared to the Breach. While it does have better resolution it is overshadowed by the size, weight and frustratingly annoying hieroglyphics of a menu system. Add to the fact that the OTM266 has an MSRP of $2,995. $500 more for something bigger, heavier, and less battery efficient than the Breach? I’ll pass. The FLIR PTS233 is almost $1,000 cheaper and looks to be more useful as a dedicated thermal weapon scope. Hopefully, I will get a chance to review one of those.
We are committed to finding, researching, and recommending the best products. We earn commissions from purchases you make using the retail links in our product reviews. Learn more about how this works.