 Your Privacy Choices
Technology has advanced exponentially with regards to night vision and thermal. Thermal imagers have improved and become more and more affordable each year. You can get a thermal imaging device for under $3,000. Night vision and thermal can be used to see in the dark, however, they are not exclusively independent systems. In some cases, you can perform a little DIY thermal fusion to get the best of both worlds.
Night Vision Vs. Thermal
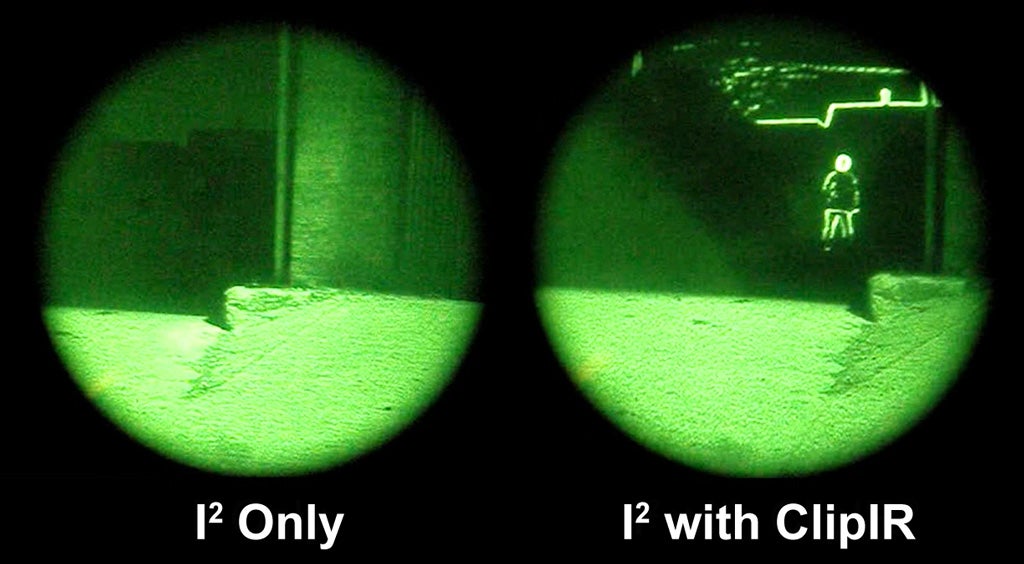
photo credit Thermoteknix
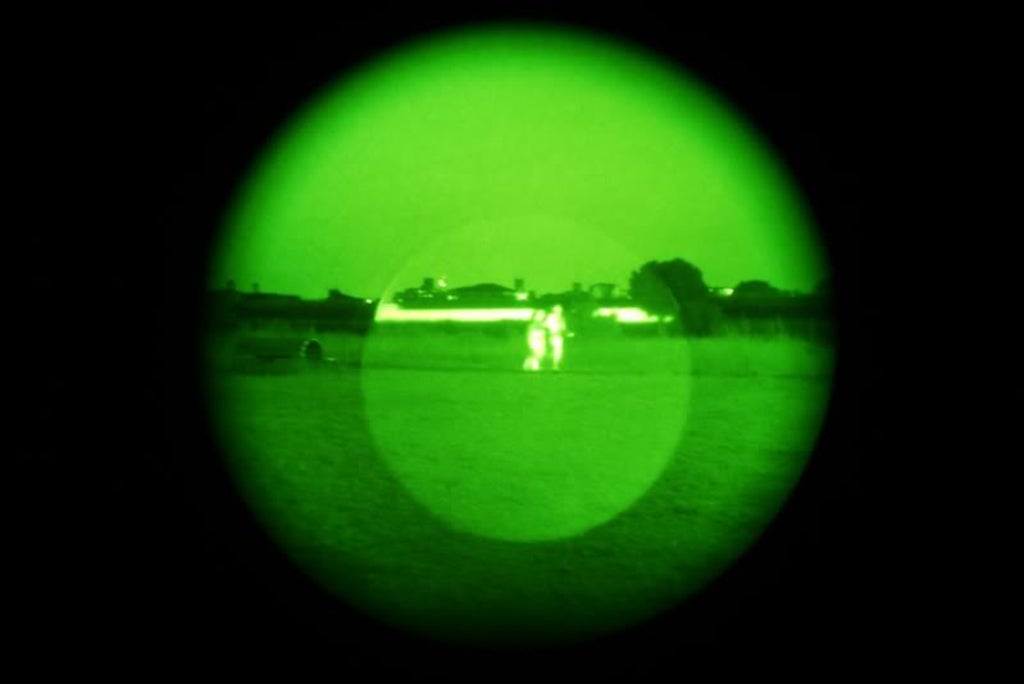
Night vision is amazing. It is like magic goggles that allow you to see in the dark. However, they do have their drawbacks. While typical image intensification allows you to see more in the dark you can have areas that have high contrast. This is usually in urban environments with photonic barriers. A photonic barrier can be a strong light, like a street light, casting a harsh shadow. See the photo above. See how there is a person hiding in that shadow? While you can compensate for this with a powerful IR illuminator, it is not a good idea to use an IR light if your opposing force has night vision as well.
photo credit PR Infrared
This is where thermal scopes excel past night vision. They allow for easy detection regardless of lighting conditions. The downside to Thermal scopes is that they cannot see IR wavelengths so you cannot use IR lasers to aim. In some cases, you can put a red dot behind a thermal device but eye relief becomes a problem.
Many hunters use a night vision device to navigate in the dark but use a thermal scope to detect prey. This usually manifests as a dedicated thermal scope and head-mounted night vision. Often they will have to switch between one or the other.
Thermal/Night Vision Fusion
There is actually something called thermal fusion. It merges both thermal detection with image intensification of night vision so you see both at the same time.
The military has thermal fusion systems but they are extremely expensive. The PSQ-20 ENVG is a fusion monocular for soldiers. It is a night vision monocular with built-in thermal overlay.
How much is a PSQ-20? Around $18,000. Ouch.
Another option for Thermal Fusion is a Clip-On Thermal Imager a.k.a. COTI.
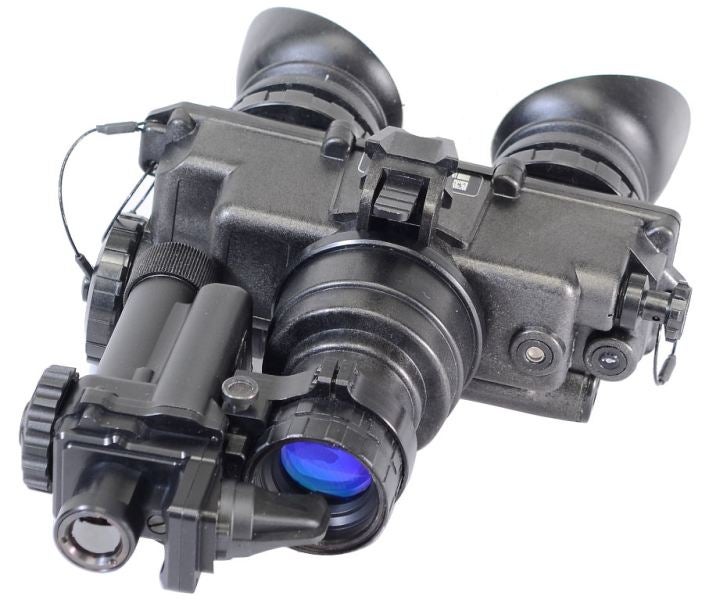
A clip-on thermal imager on a PVS-7
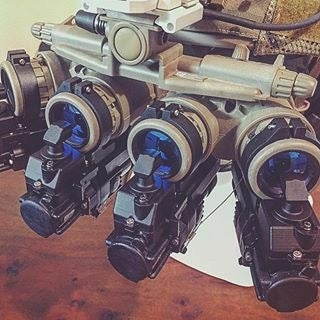
4x COTIs on GPNVG-18. Most likely dummy repro for Airsoft LARPing.
The AN/PAS29 COTI costs on average around $6,000 depending on where you look. The AN/PAS29 clips onto the objective lens of night vision devices like the PVS-14.
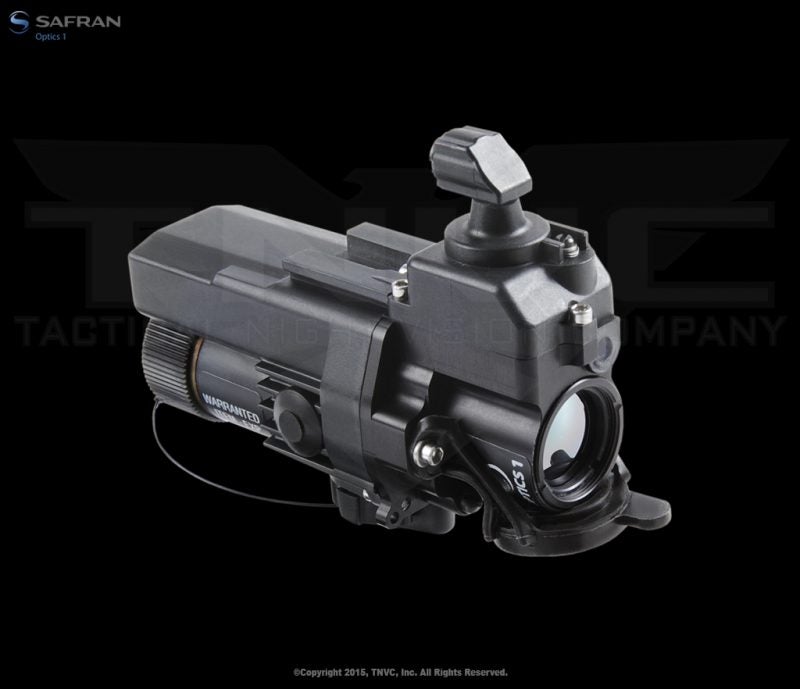

The COTI superimposes a thermal image into the objective lens of the PVS-14 or similar night vision device. If you recall the Steiner PVS-21 has a similar ability but it superimposes images after the intensifier tube so you can see color images. Since the COTI is placed in front of the objective lens, you will not see color like the PSQ-20’s orange hot.
Affordable Thermal Spotters
Night vision is somewhat of a fixed cost. A PVS-14 can cost under $3,000 but thermal scopes and handheld devices are becoming more and more affordable.
The FLIR Breach is around $2,500. And the FLIR Scouts start at $500.
Since the FLIR Breach can be helmet mounted, you can actually wear it in conjunction with a PVS-14 for a pseudo thermal fusion.

PVS14 on the left, FLIR breach on the right.
This is a little bit difficult for some people because now you are seeing two dissimilar images. However, some people can bridge the two images in their brain.
A more expensive option would be the BAE Systems SKEETIR. Trijicon licensed BAE Systems OASYS line and is offering it on their website.
Just like the FLIR Breach, you can pair the SKEETIR with a PVS-14.
Photo Credit @SilenceTheNight
For people with money burning a hole in their pocket, you can double up on SKEETIR and rock bino thermals.
photo credit @frosty_ams
One downside to rocking bridged thermal and monocular night vision is the lack of depth perception. Thermal does not see that well that you can use it for navigation in the dark like you can with night vision. And monocular night vision is not as good as dual tube binocular night vision. I notice that my eyes are aging and while I can still see 20/20 that is with both eyes open. When I close one eye, like looking through a magnified scope, the image seems reduced in clarity. The same applies to night vision. When I notice that I can see more detail with both eyes aided with night vision compared to just one when using a monocular. If I bridge a thermal, I sacrifice having binocular night vision.
DIY Thermal Fusion
Bridging a thermal device with night vision can work but as I said, it can be difficult for many to merge those two images. A COTI is easier but requires specialized equipment. There is another way to get thermal fusion and that is to simply look through your thermal optic while wearing night vision. It is such a simple method I am surprised more people haven’t stumbled across this or even use it.
My friend Aaron K. has a SKEETIR and came out for a night shoot with me and my other friends. I tried holding the SKEETIR in one hand and a night vision monocular in the other. It worked for me but I had to concentrate on the two images. That is when he showed us that you can use the SKEETIR on a weapon and look through it.
The video above was not great. I was using my iPhone to try and show what my eye sees. It was not successful. Recently I met back up with Aaron and borrowed another friend’s POV camera for use with night vision. The results were much better. Also, it helps there was moonlight out so the SKEETIR did not overpower the camera like in the video above.

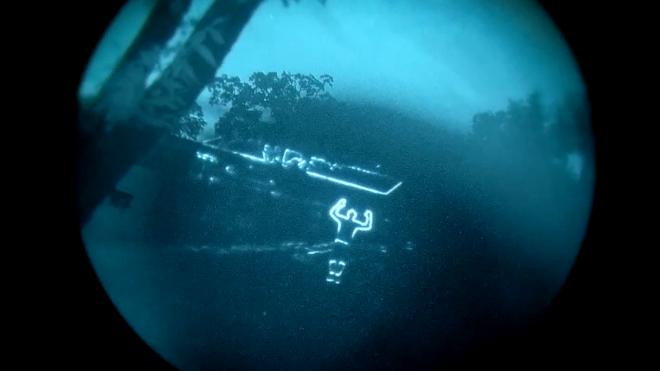
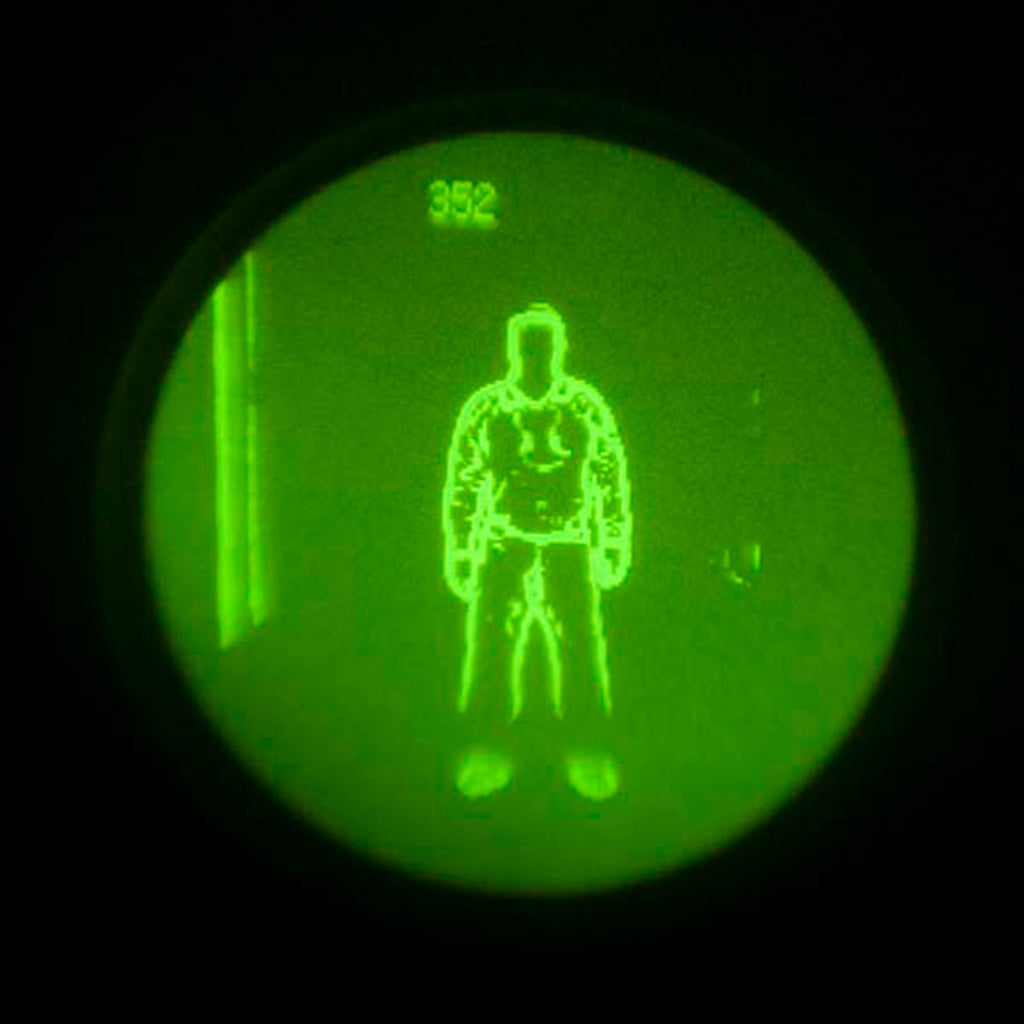
Regular night vision without DIY thermal fusion
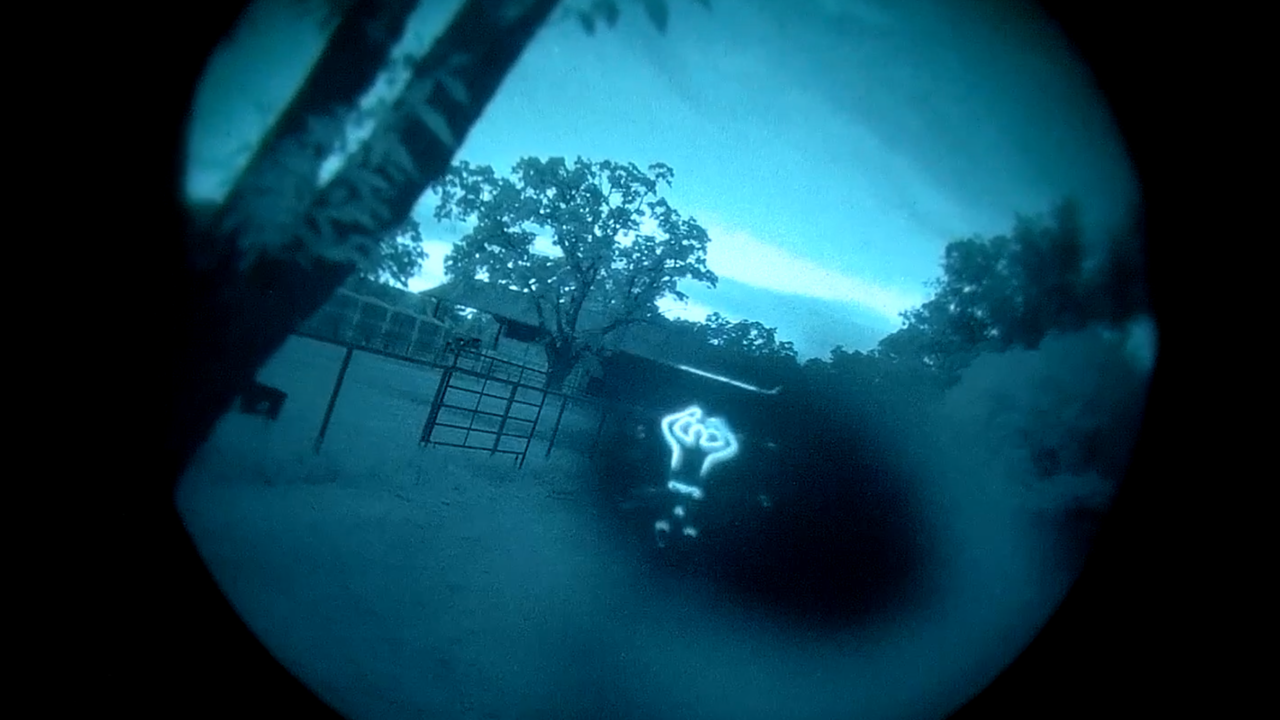
Looking through a SKEETIR with night vision
Take a look at the video below.
One downside to this setup is that I am hand holding the SKEETIR. We went for a ride in Aaron’s Polaris RZR and the bouncing was too much to track his dogs running alongside with us. Also, there is a little bit of lag with the SKEETIR so the image kept bouncing up and down. If it was helmet mounted, it would be more stable.
However, this DIY thermal fusion is not exclusive to the SKEETIR. I was able to get similar results using an ATN THOR4 thermal scope and my FLIR T50 ACTS.
I mounted my FLIR T50 in front of an EOTech HWS so I could have something to aim with.
One thing that I could not show is the benefit of using a dual tube binocular night vision device. I look through the right tube which is looking into the thermal device. For 1x thermal sights like the FLIR T50 and SKEETIR, I could see the thermal image overlap what my left eye was seeing. It was a perfect match. My left eye is aided by night vision but uncluttered by a thermal device, I can still see IR lasers if I need to use them. With an IR laser, you do not need a red dot unless you are shooting targets that can see the IR spectrum.
This DIY thermal fusion technique does not work with just any thermal device. I tried it with a Torrey Pines T10 and it did not work. My friend Irfan tried it with his Leupold LTO thermal tracker with the same failure rate. There is something going on with a proper thermal sight that has lenses between the LCD screen and your eyeball.
Conclusion
I can see how DIY thermal fusion can be useful for people who hunt at night. There are many people who use both night vision and thermal to hunt hogs. However, I have not seen many to use both simultaneously other than bridging them. Some may have a COTI or fusion system but with this DIY thermal fusion technique, anyone with night vision and a thermal scope can more than likely combine the image amplification with detection abilities of thermal without compromising one for the other. Here you can have your cake and eat it too only it is night vision with thermal detection.