 Your Privacy Choices
It is widely accepted that night vision is expensive. PVS-14s with gen 3 image intensifier tubes cost on average $2,500-$4,000 depending on the tubes used inside. However, just like building a budget AR-15, you can save some money by building it yourself. Now if you lack the mechanical aptitude to build an AR-15 then this is not for you. Building a PC tower is more complicated than building a night vision device. Some people in the night vision industry will scare you and claim that building your own night vision is not for the light-hearted. “You need proper equipment and testing measures otherwise you will have headaches, eye strain and nausea”. This is the same scare tactics some gunsmiths use to scare you out of building your own AR-15. If you can turn a wrench you can dodge a ball. Wait . . . I meant I can show you how easy it is to build your own PVS-14.
Get All The Parts To Build Your Own PVS-14
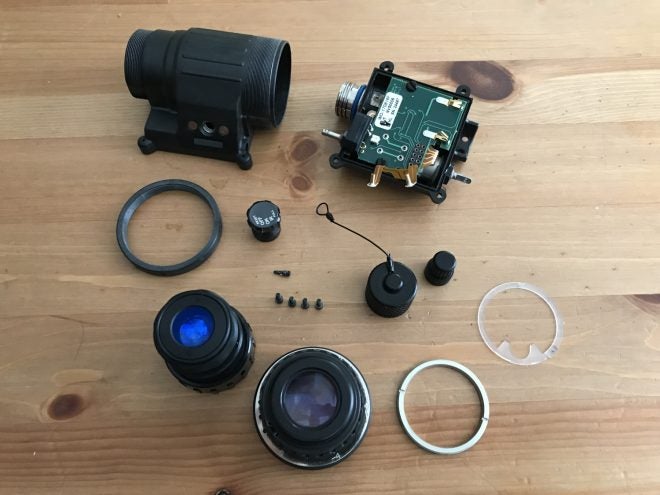
The easiest way to build your own PVS-14 is to get a PVS-14 Housing Kit. Think of it like an AR-15 parts kit that has everything you need to build an AR-15 except the lower. With regards to a PVS-14 housing kit, it is everything minus the image intensifier tube.
Here is a list of the parts you typically get in a PVS-14 housing kit.
- Battery Housing (Single Battery Configuration) (274422-2)
- Battery Cap w/ Tether (275113-2)
- Monocular Housing (277705)
- Tube Retainer (5002569)
- 25mm Eye Piece Assembly (5009545-1)
- Neck Cord (A3144306)
- Purge Screw (A3144315)
- Purge Screw O-Ring (A3144316)
- Objective Lens Cap (A3144318)
- Close Focus Stop (A3144322)
- Objective Cell O-Ring (A3144323)
- Eye Cup Assembly (A3144422)
- Objective Assembly (A3256342)
- Eye Cup Adapter (A3256354)
- Battery/Monocular Housing O-Ring (A3256356-2)
- Light Pipe (A3256358)
- Objective Lock Ring (A3256360)
- Lens Paper
- Battery Housing Screws x4 (MS16995-2B)
- Operator’s Manual (TM11-5855-30610)
There are some parts in there that you don’t really need. I have made them BOLD in the list above. PVS-14 housing kits cost anywhere from $700-$1000 depending on which retailer you go to. You can also go with upgraded components like Vyper housing or the Hyper aluminum housing by DEP Technologies. They also make titanium lock rings for added bling and you pay more for such things.
Image Intensifiers
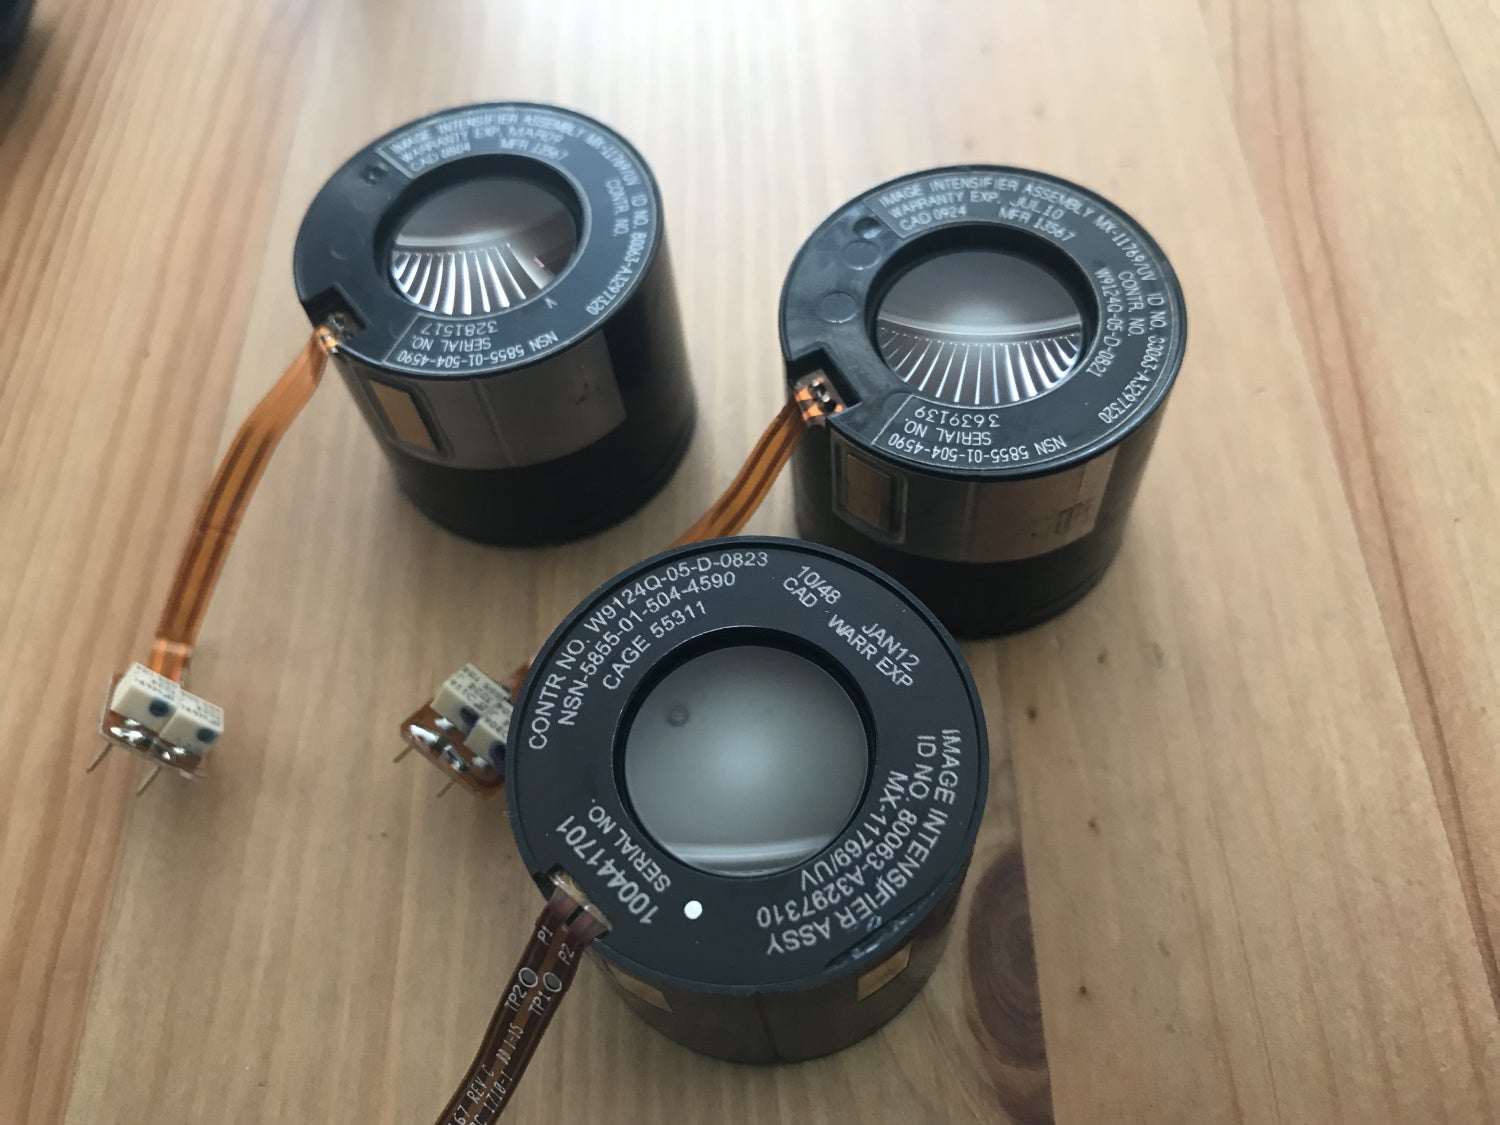
There are two types of image intensifier tubes. MX-10160 and MX-11769. The difference is manual gain vs no manual gain. Gain is like the brightness of the screen in the tube that you are looking into. There is a knob on the PVS-14 to adjust the gain if you have a 11769 style tube. See the pigtails in the three tube in the photo above? The pigtail is how you know it is a 11769 style. 10160 tubes do not have the pigtail. In some cases, you can de-solder a pigtail on a 11769 and turn it into a 10160 tube if you need to.
Why would you need a 10160 tube vs a 11769 tube? Well, not for a PVS-14 build. But many dual tube binocular night vision devices do not have manual gain so the pigtail is not used and there is no room for them in those housings.
PVS-14 Parts: ASSEMBLE!!
The tools you will need to assemble your PVS-14 are not specialized.
- allen wrenches 0.050 & 5/64
- small flat head screwdriver
- air duster aerosol can
- lens cleaning pen
- hotel keycard or similar rigid plastic credit card that you can cut up.
First up is to assemble the PVS-14 battery housing. Most battery housings will have these parts pre-installed but just in case here is what you need to do.
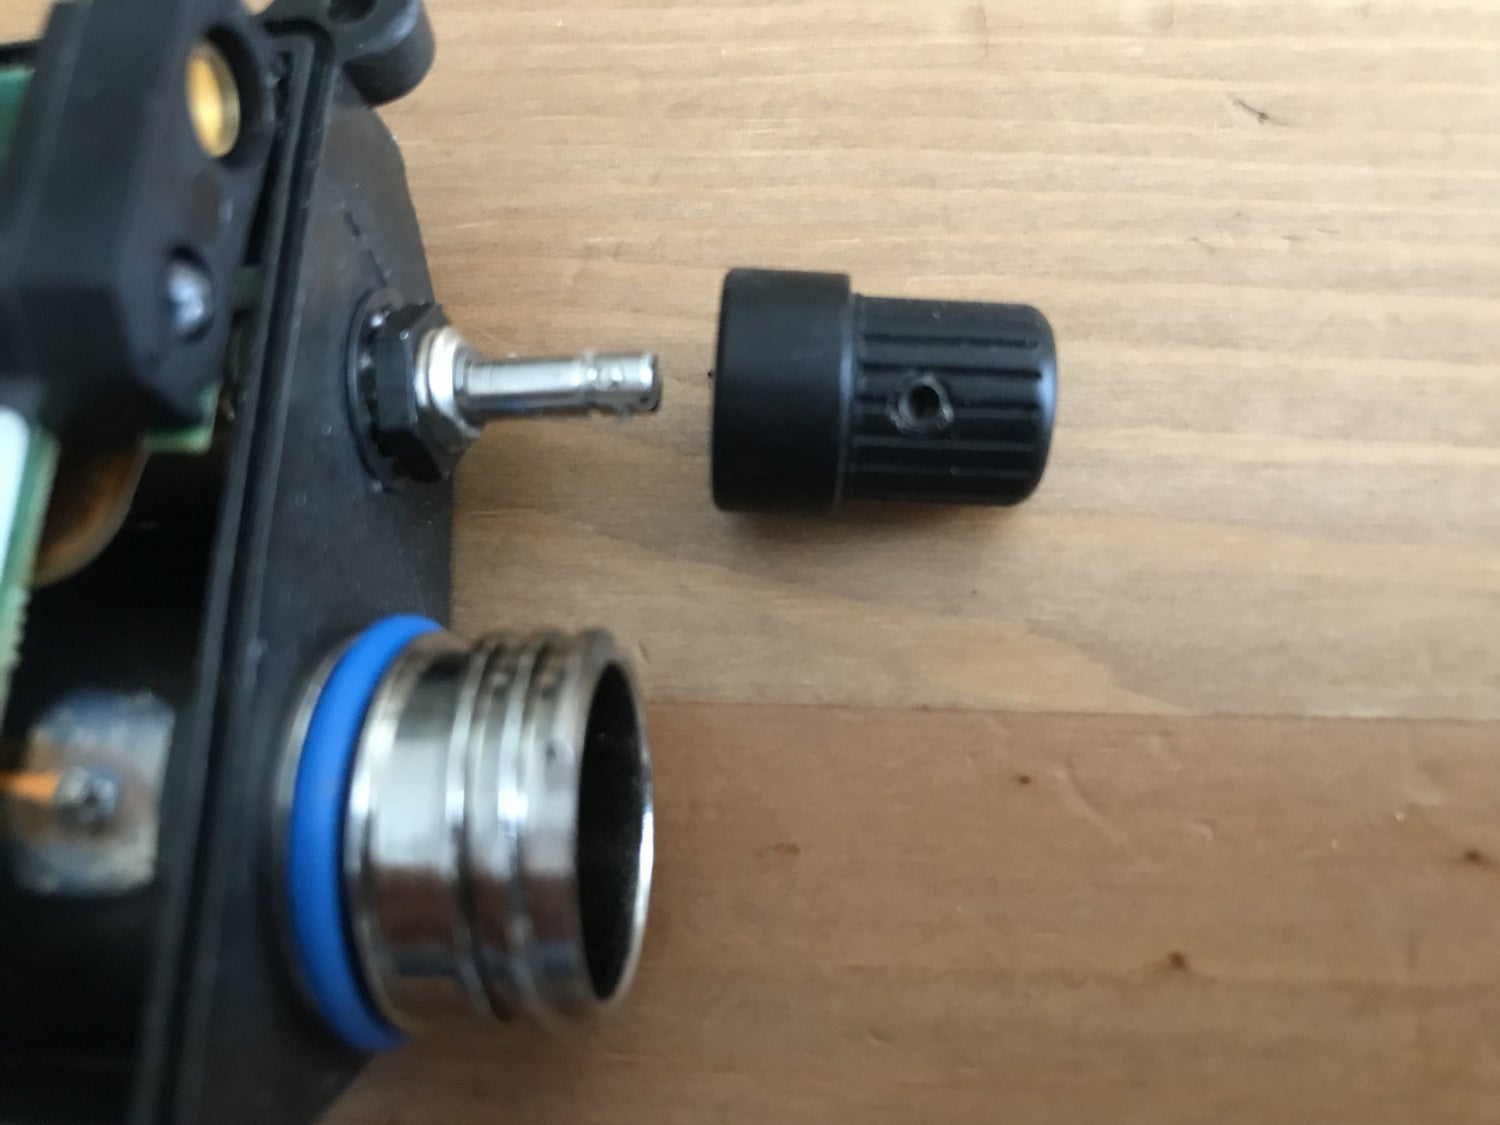
The power knob has a small set screw/pin. You need a 0.050 Allen wrench to tighten it. Be careful when you install this screw. The pin can bottom out if the knob is not properly aligned and if you try and force it the hex screw will strip really easily. I’m talking about the hex socket for the Allen wrench, not the threads.


Next up is to install the manual gain knob. It uses a similar size set screw, just without the pin. Slide the knob over the silver rod. Use your 0.050 Allen wrench to tighten the set screw into the indentation you see on the silver rod in the photo below.
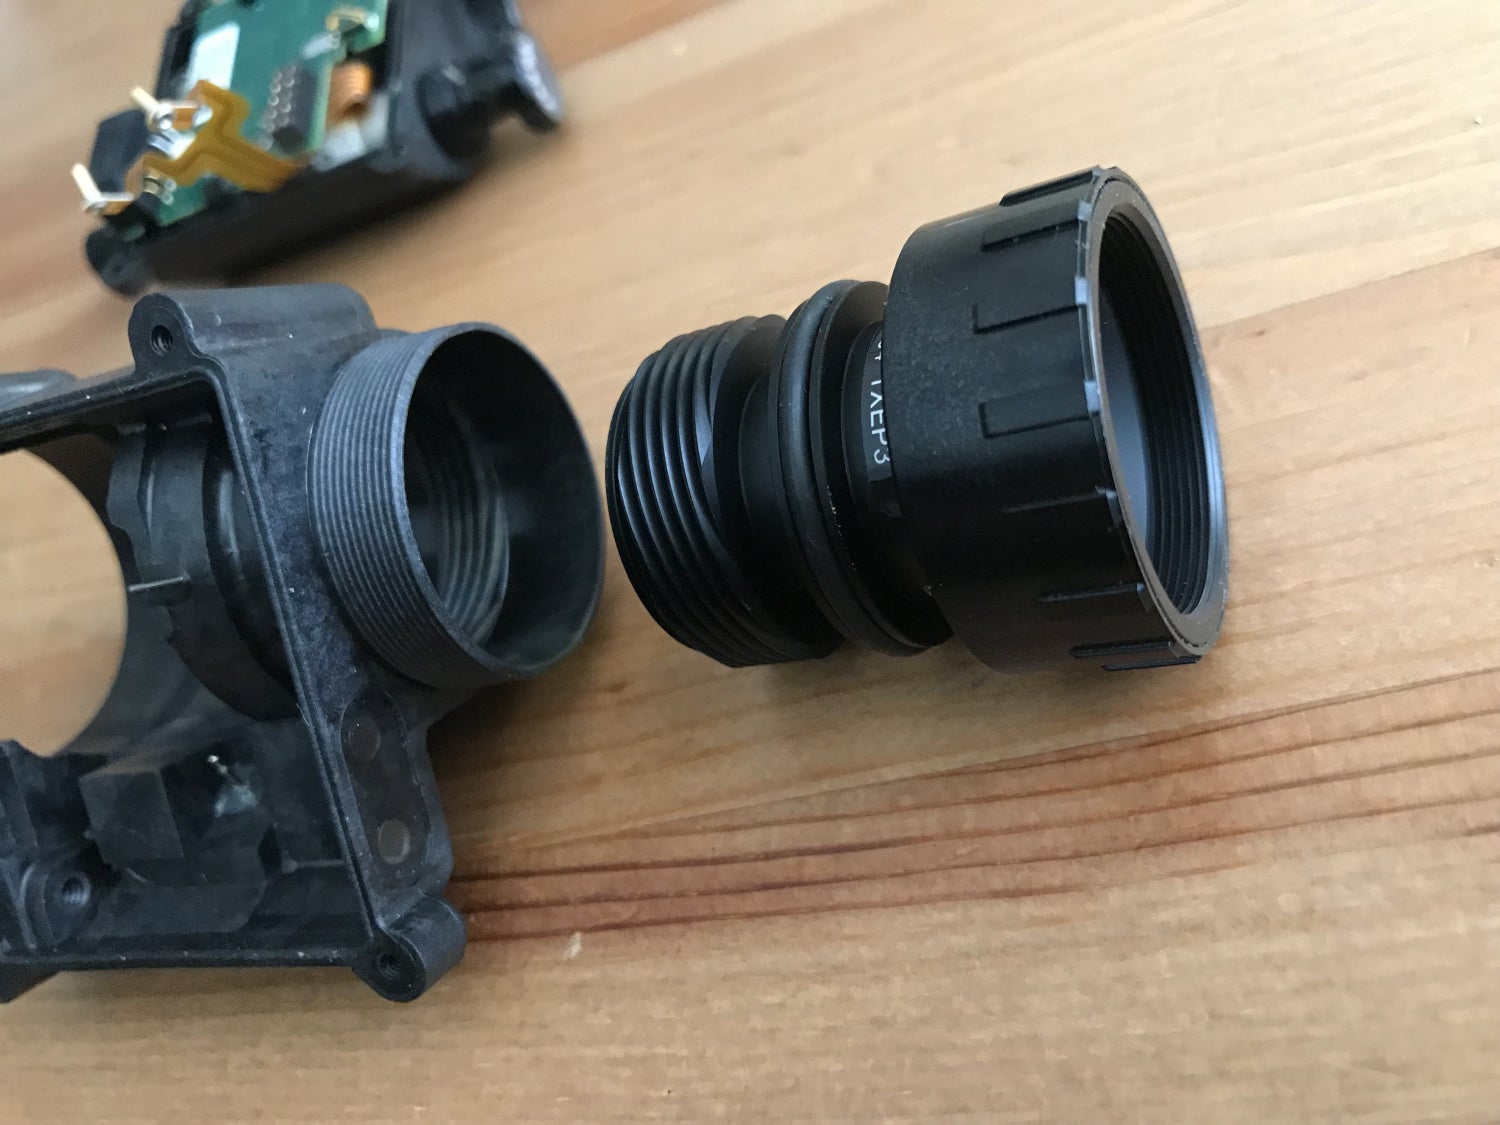
The second step is to install the objective lens into the housing. You need to install the objective lock ring before you screw in the objective lens. Before you screw in the objective lens, use the lens cleaning pen or cloth for cleaning glasses and clean the back of the lens. There is also a close focus stop. I am missing both the lock ring and close focus stop on this PVS-14 so I cannot show you those. But once you install the lock ring and the objective lens you need to screw on the close focus stop from inside the housing. This prevents you from unscrewing the objective lens right out of the housing. The PVS-14 has a shallow depth of field. You can either focus at infinity and everything close will be out of focus or you can focus on something close but everything far away is out of focus. In order to focus on close things, you are unscrewing the objective lens. If you unscrew it far enough it will come out if you don’t have the close focus stop installed. Do you need it? Not really just be mindful of how far out you unscrew the objective lens.
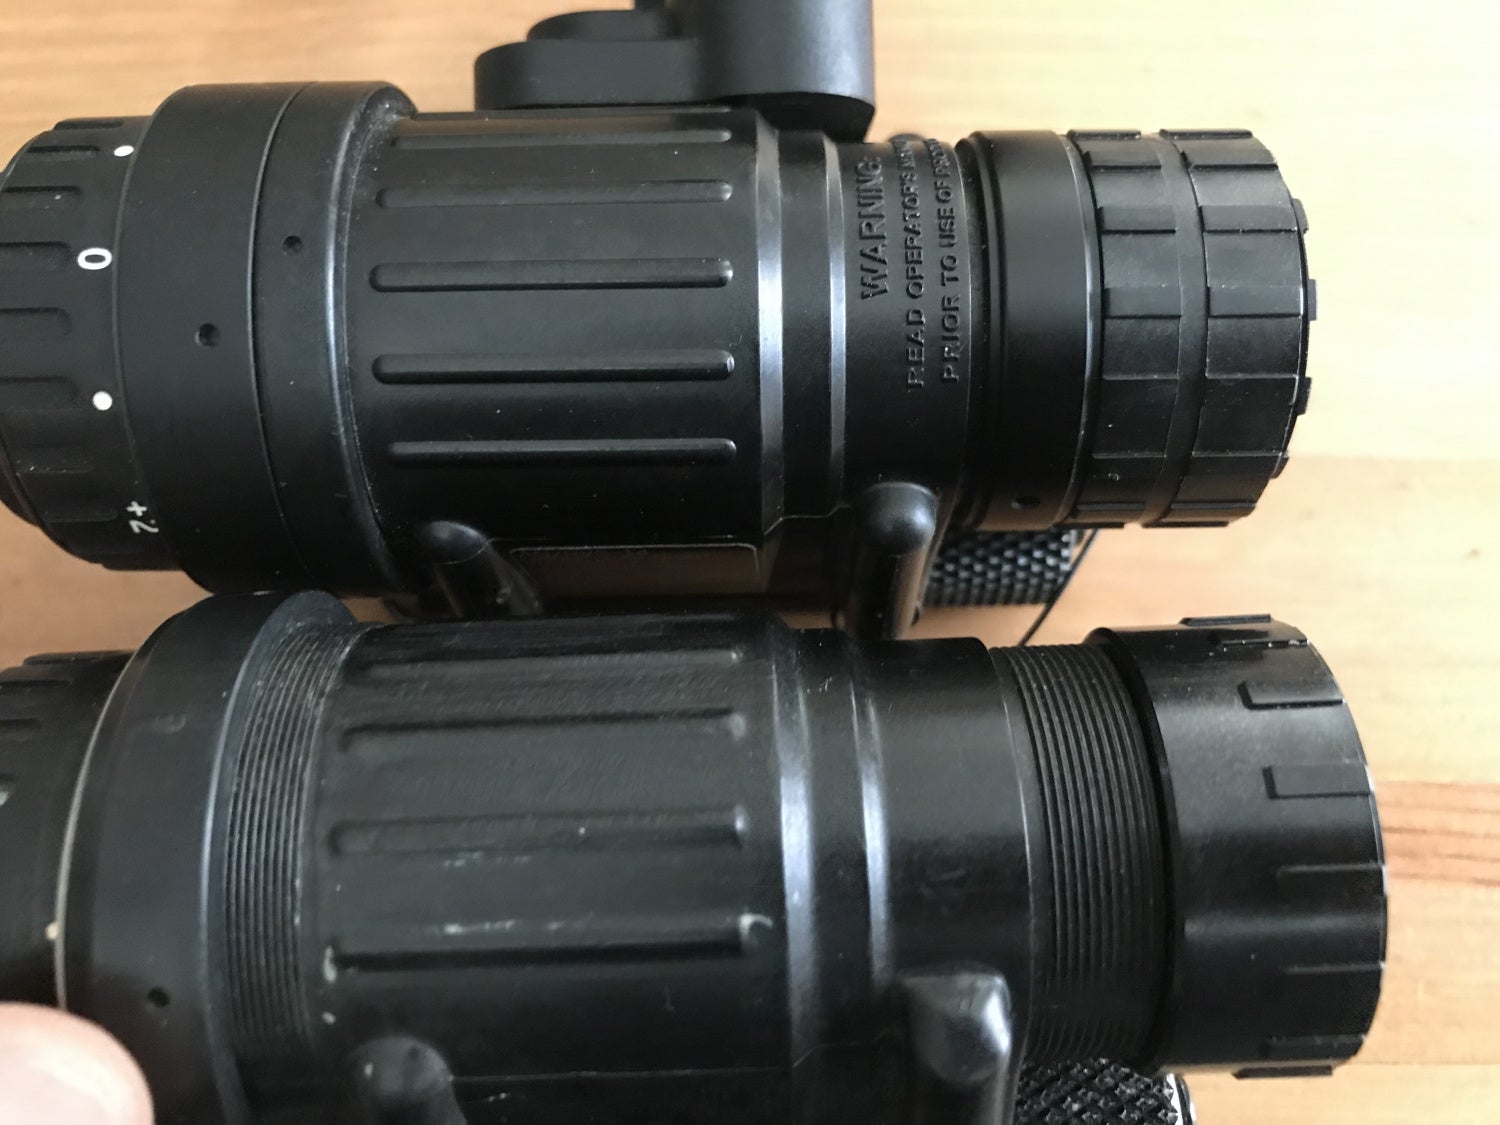
This is what an objective lock ring looks like. The top one has it and the bottom one does not.
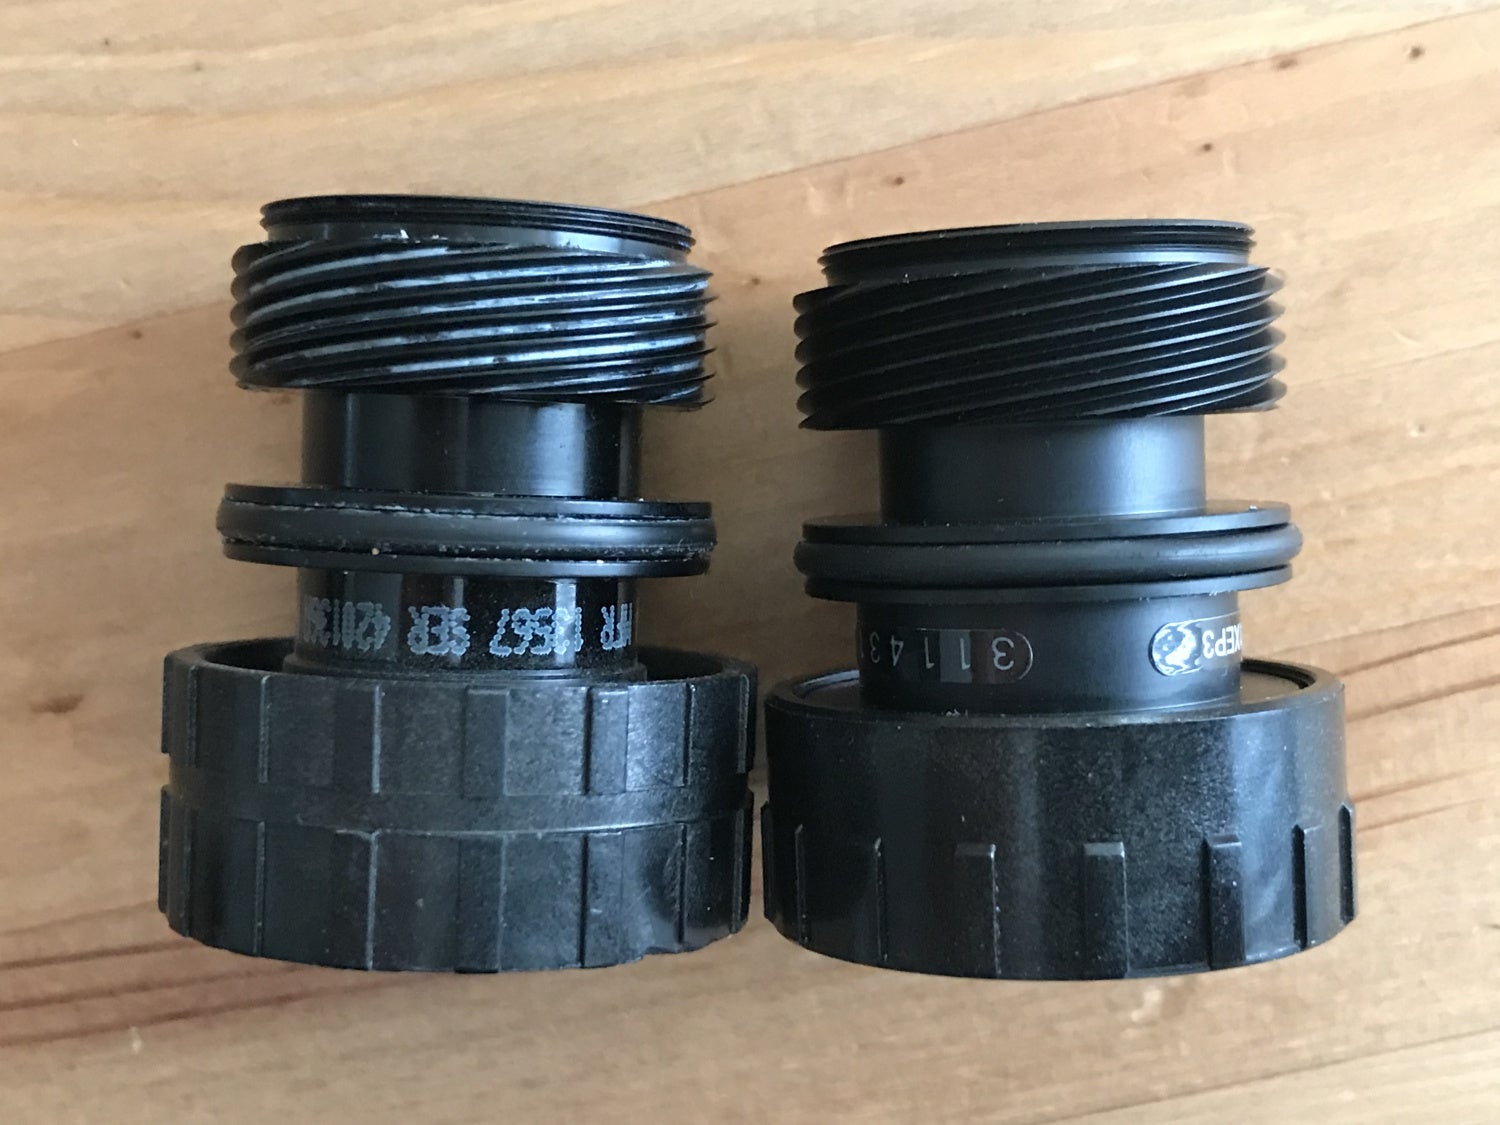
Some PVS-14 objective lenses are different than others. Here are two different objective lenses I have come across. The one on the left is the type I see the most on PVS-14s. Not sure where or who makes the one on the right. The lens on the right is extremely tight and I should use some silicon grease to make it smoother.

Plug the battery housing into the monocular housing. If you look inside the monocular housing there are two small pins sticking up. They correspond with external contacts that are on either side of the threaded hole for attaching a J-Arm. The battery housing has a pigtail with two leads that need to be plugged onto those two pins.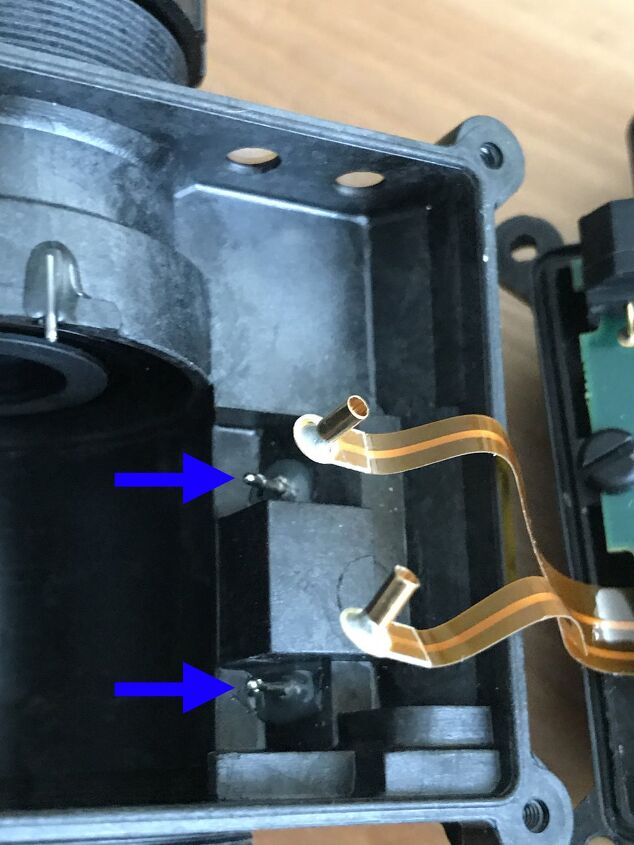
I use a small flat head screwdriver to push the brass/copper looking cylinders onto their matching pins.
See that small metal pin epoxied into the monocular housing? That is an anti-rotation pin to keep the image intensifier tube from spinning once installed inside the housing.
Next step in build your own PVS-14 is to install the image intensifier tube. If you are using a 11769 tube with a pigtail, make sure the pigtail goes in first. Then insert the tube. There will be a small notch at the bottom edge of the tube. Line this up with that pin in the monocular housing. Before you seat the tube all the way in, spray the tube with the canned air duster.

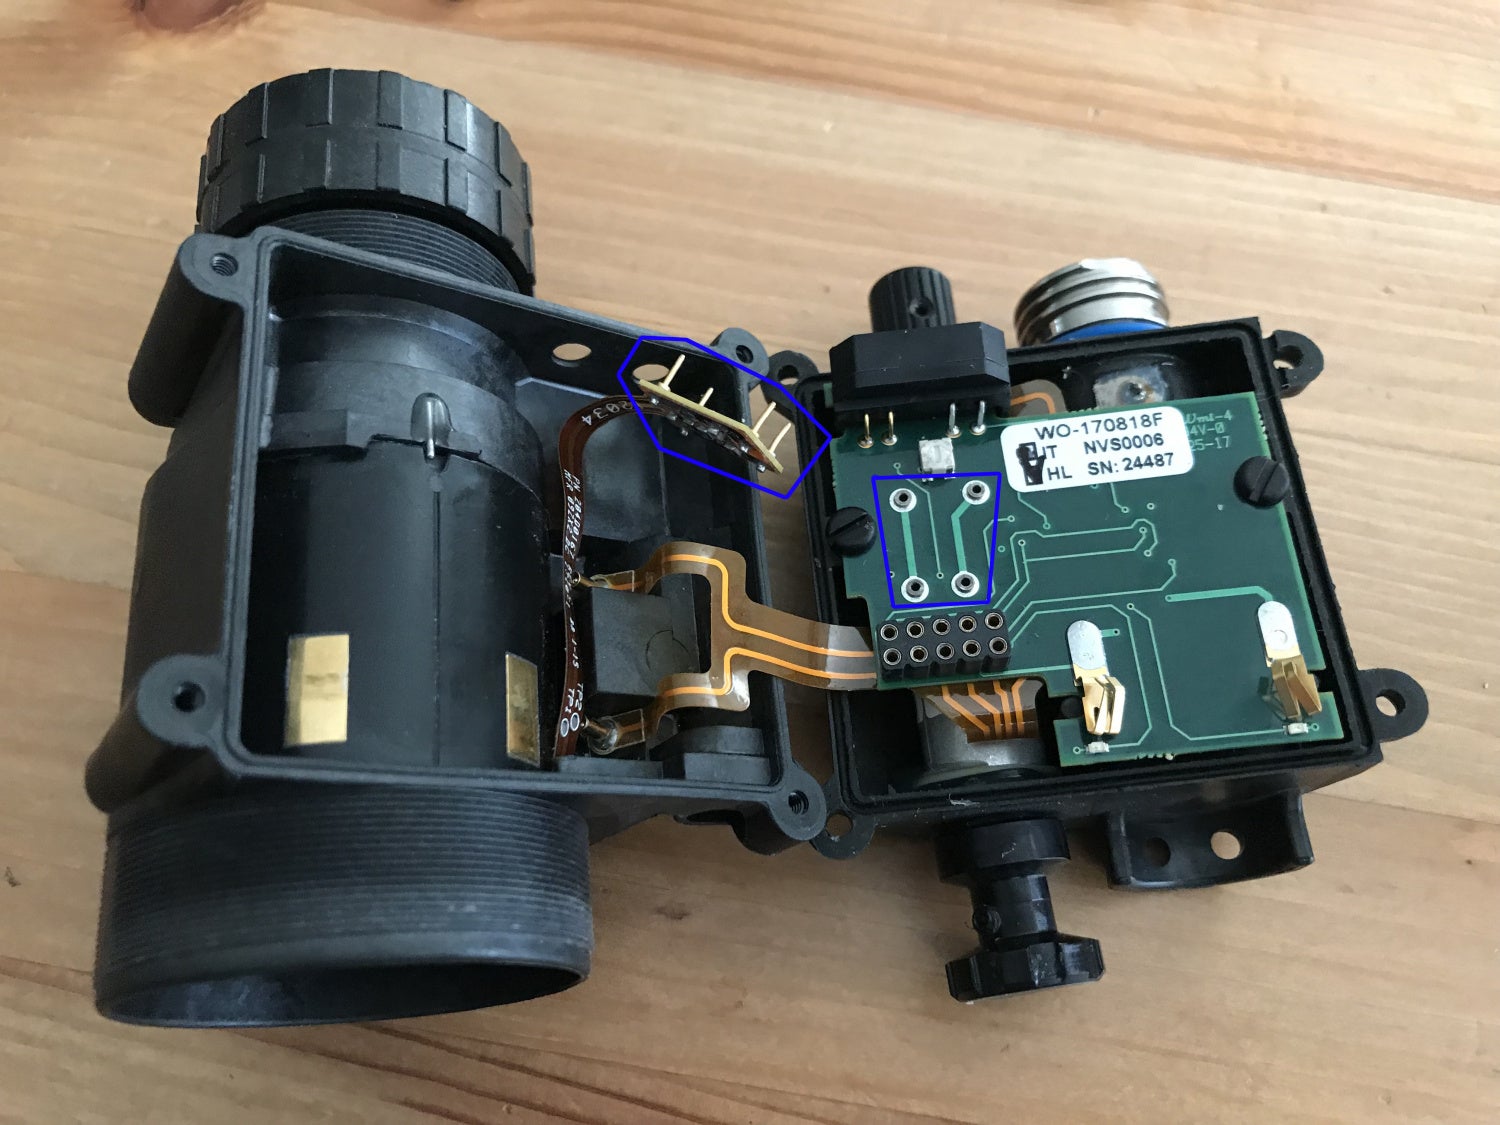
If you have a 10160 tube you can ignore this next step. If you have a 11769 tube then read on. The 11769 pigtail has a small chip with four pins. Those correspond with holes in the battery housing board. I circled them in blue. Plug them into the board. See the photo below.
Here is the chip partially installed. Just press down gently until the chip touches the board.

Now you carefully fold the battery housing over the monocular housing watching the ribbon cables fold in on themselves.
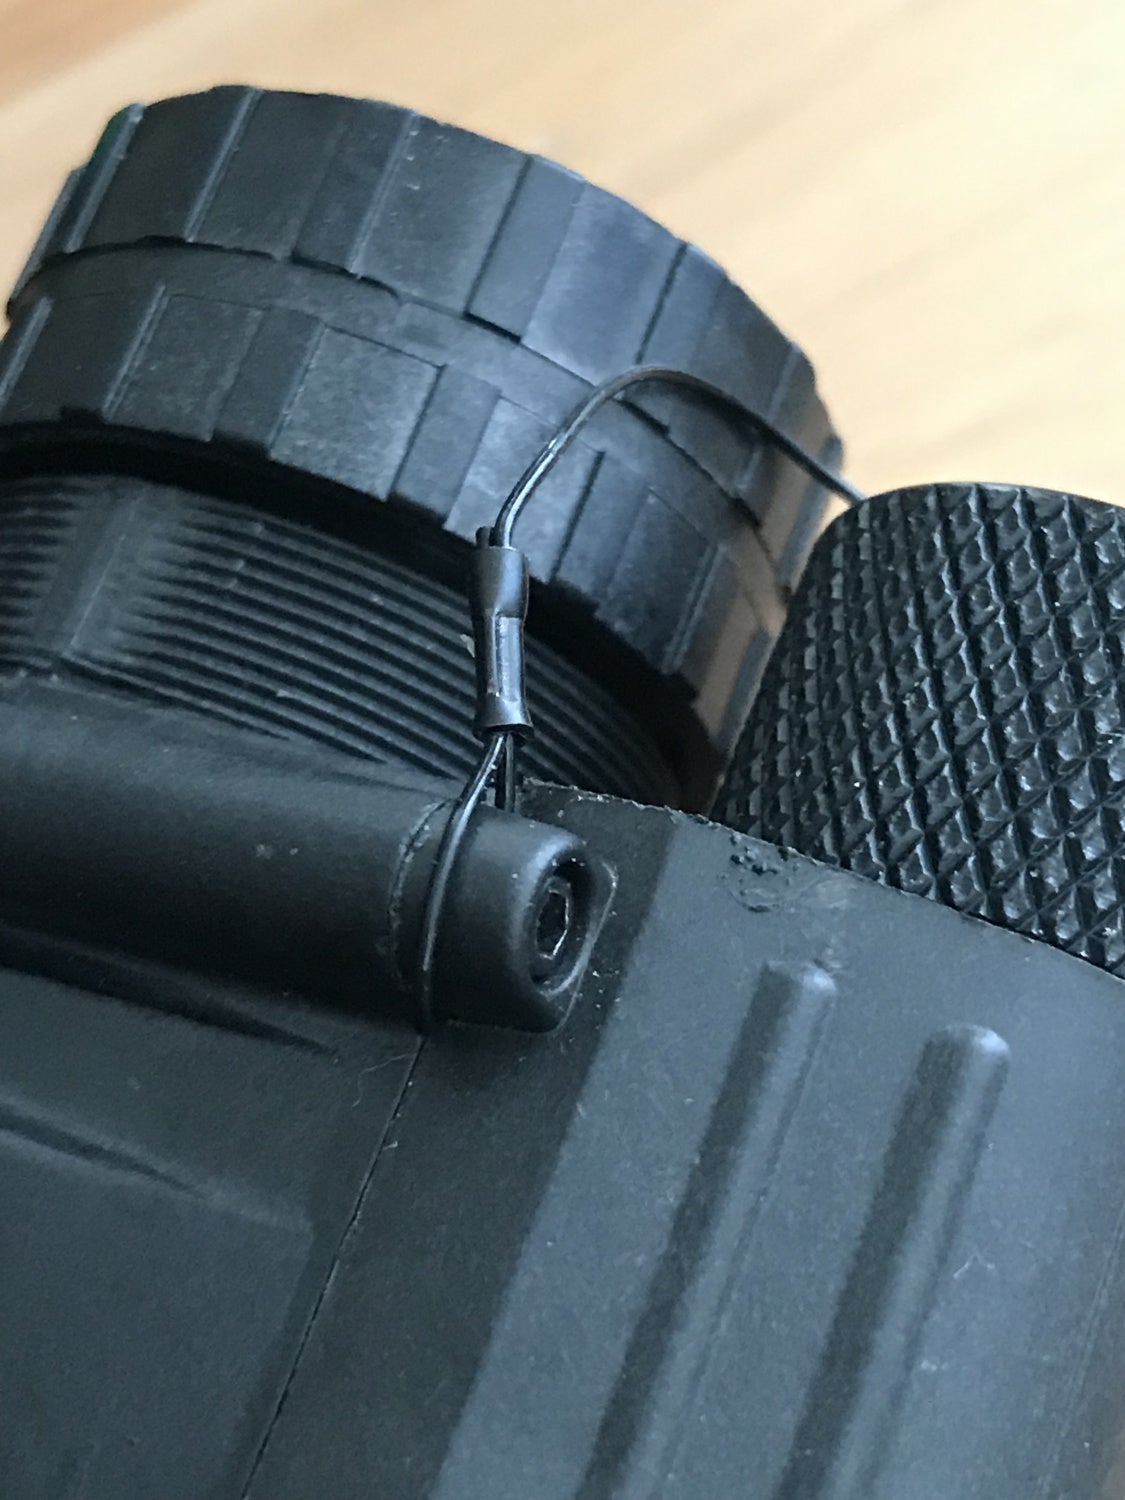
If you look at the AA battery compartment side of the housing, one of the screw ears has a notch molded into it. This is for the battery cap tether. You need to loop the tether over this little part before you screw the housings together.

Then you take your 5/64 Allen wrench and screw the four battery housing screws.

Now you need to set the image intensifier tube in its place. Otherwise, it will slide back and forth and miss the contact points of the battery housing. If you tap the housing downward into your hand it will reset the tube and turn back on. Ask me how I know. LOL
For a less bubba budget solution, you simply drop the light pipe on top of the image intensifier. There is a small rectangular protrusion that you place over the spot where the 11769 pigtail goes into the tube.
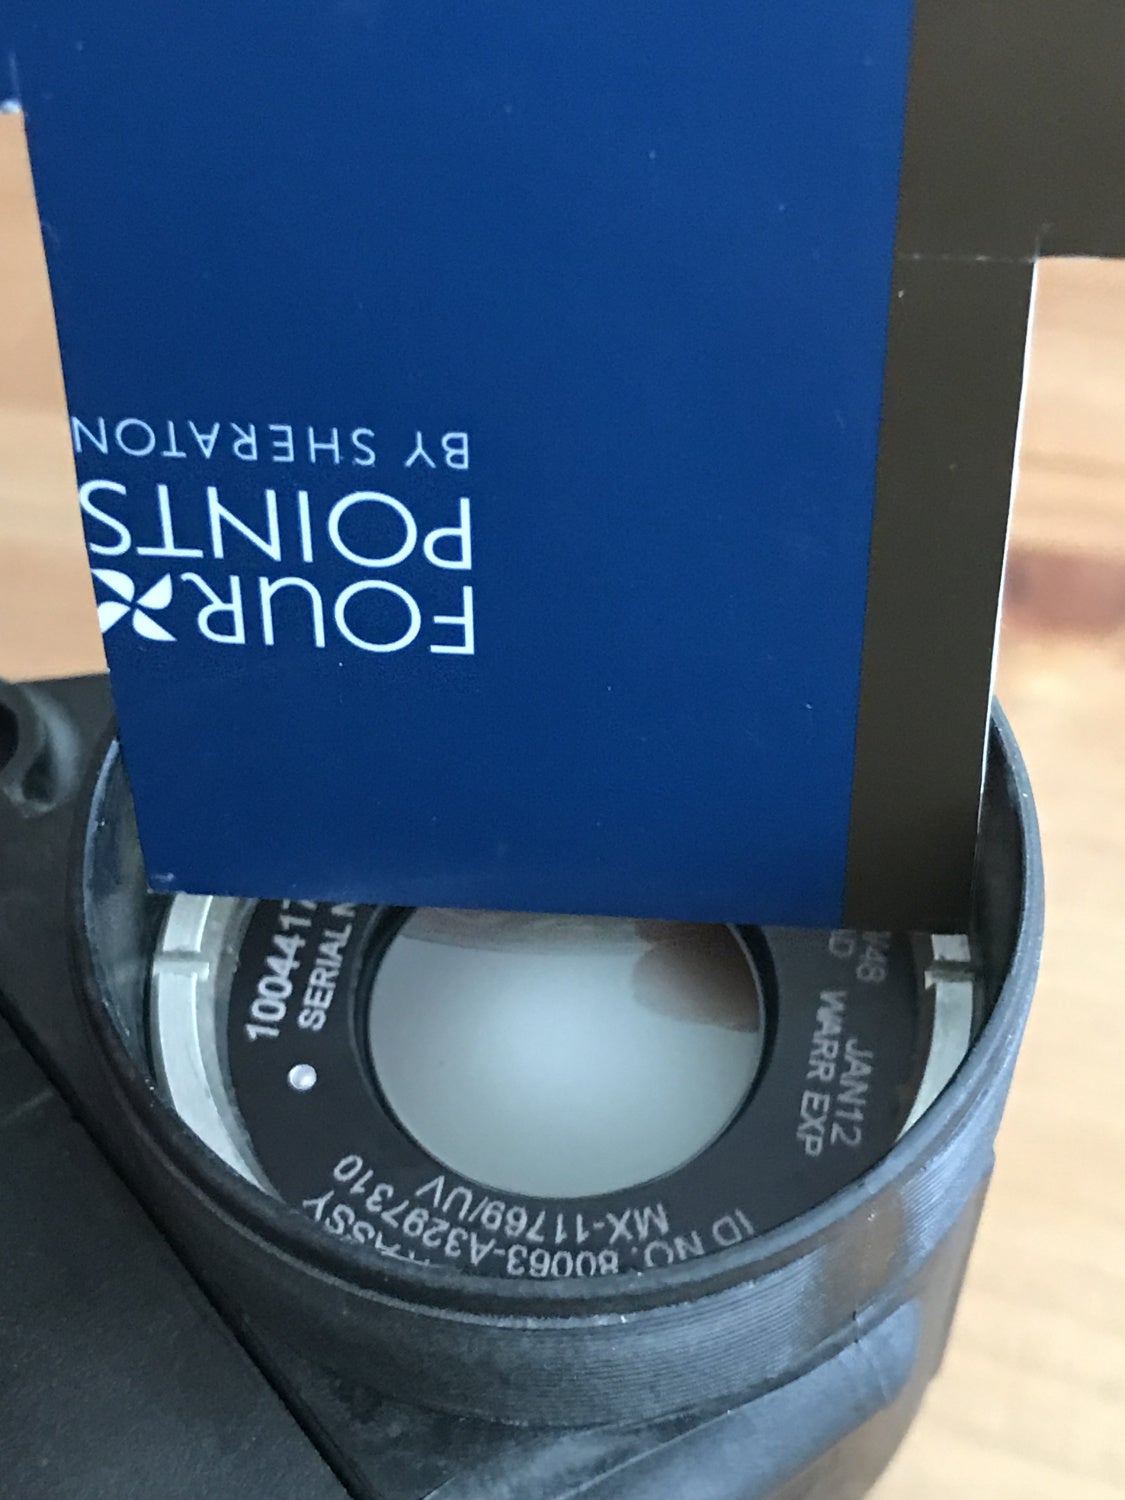
The last step in setting the tube is to install the tube retaining ring. This is where you need the old credit card or hotel keycard. Cut it so it is as wide as the retaining ring. You could use the small flat head screwdriver for this but the card makes it easier to press down evenly and tighten the ring.

Now you install your eyepiece lock ring and the eyepiece. Be careful screwing the eyepiece on as the threads on the monocular housing are very fine and made of polymer. So cross threading is really easy. Spray the tube and the eyepiece clear of any dust with the canned air duster or use the lens cleaning pen.

Then the last part is to install your purge screw and o-ring. Typically factory night vision is purged and some will tell you that you need the proper equipment to do so. It certainly makes it easier to purge the PVS-14 if you have the right equipment but it is up to you if you need to do it. If you live in a dry weather environment then you don’t need to purge the night vision. If you live in a humid environment then it is possible that your night vision can fog up inside. There are some DIY methods of purging but I have not tested them to see if they are viable. The first method is to use a can of air duster.
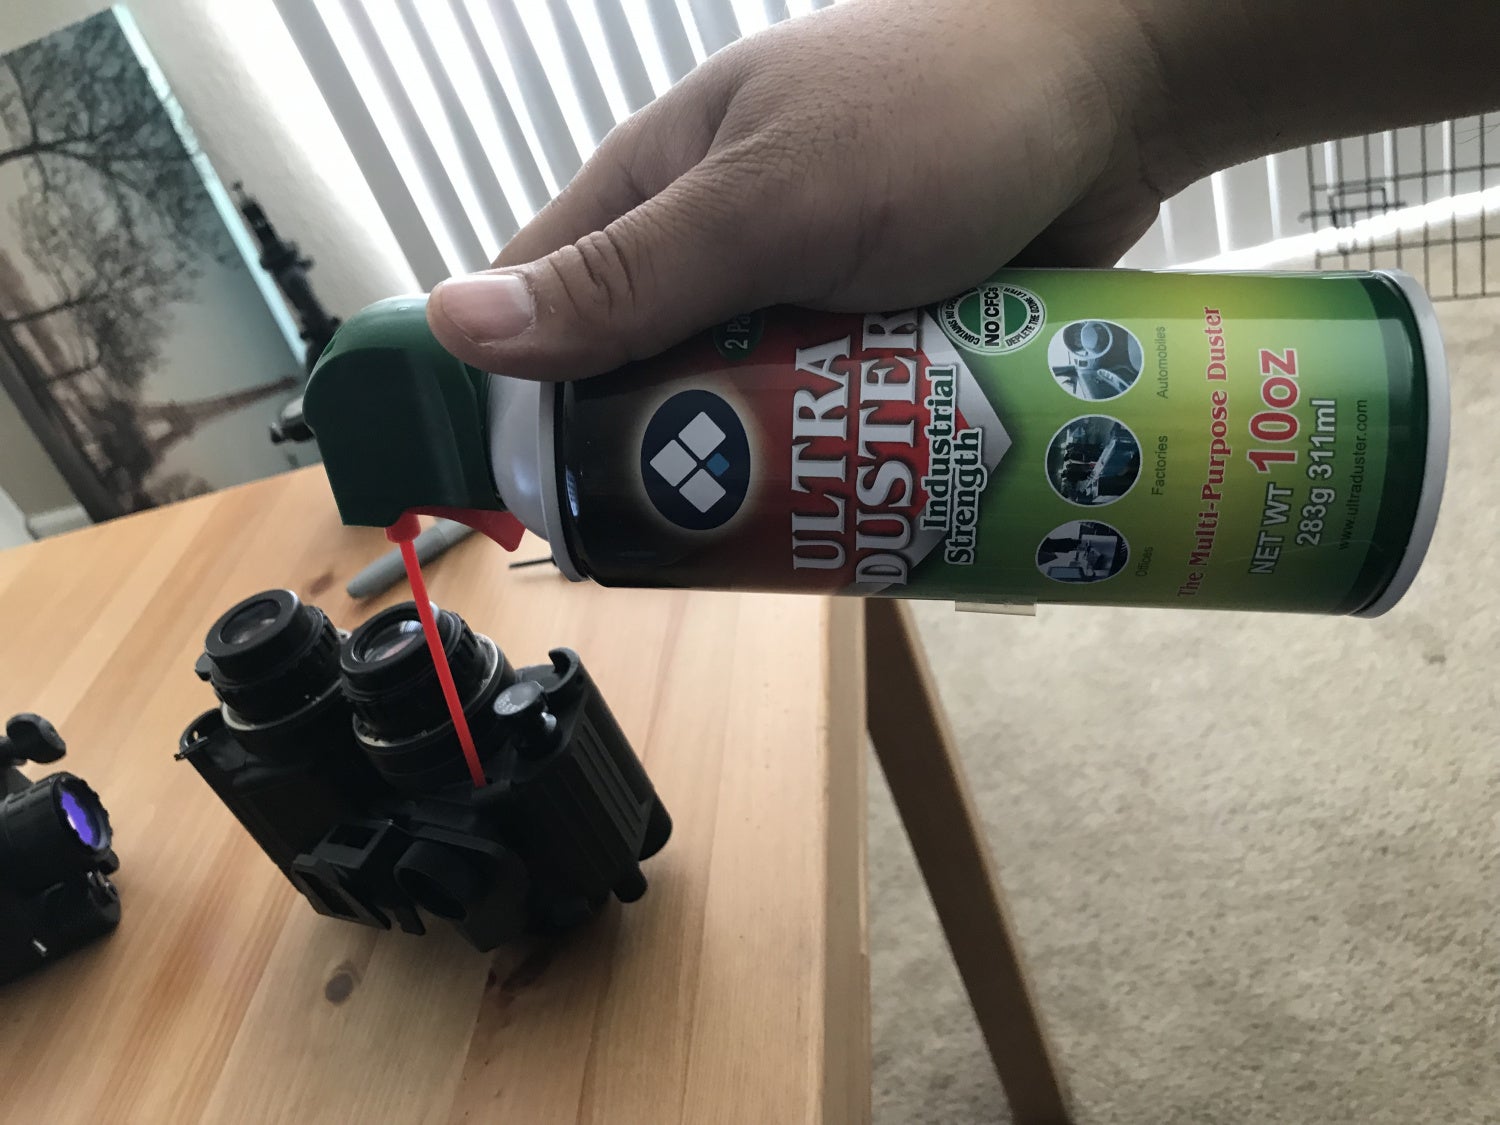
Carefully spray canned air into the purge hole and then quickly install the purge screw. Supposedly this will replace the air inside the housing and reducing its susceptibility to fogging. The other method, which I have not heard of anyone trying, is to use nitrogen purging kits for wine bottles.
Once your PVS-14 is complete you need to set the focus to your eyes. Look through the eyepiece and rotate the objective lens to focus on something about 10 feet away. Ideally, look at something that has large words or fine detail. Then adjust the rear eyepiece, it has a built-in diopter. Get that rear focus as crisp as possible. Then readjust the front lens to focus at infinity.
Final Costs To Build Your Own PVS-14
Is it cheaper if you buy brand new components? Not really. I know that isn’t what you want to hear but the image intensifier tube is the most expensive part of the build. The retail price of the tubes can be $2,000 – $3,600 depending on the specs and if you want white phosphor price is on the higher end of the spectrum. However, just like used firearms, you can find diamonds in the rough. You need to shop around. There is no singular place to buy such gems. But if you shop around for used aka “blem tubes” you can occasionally find good deals.
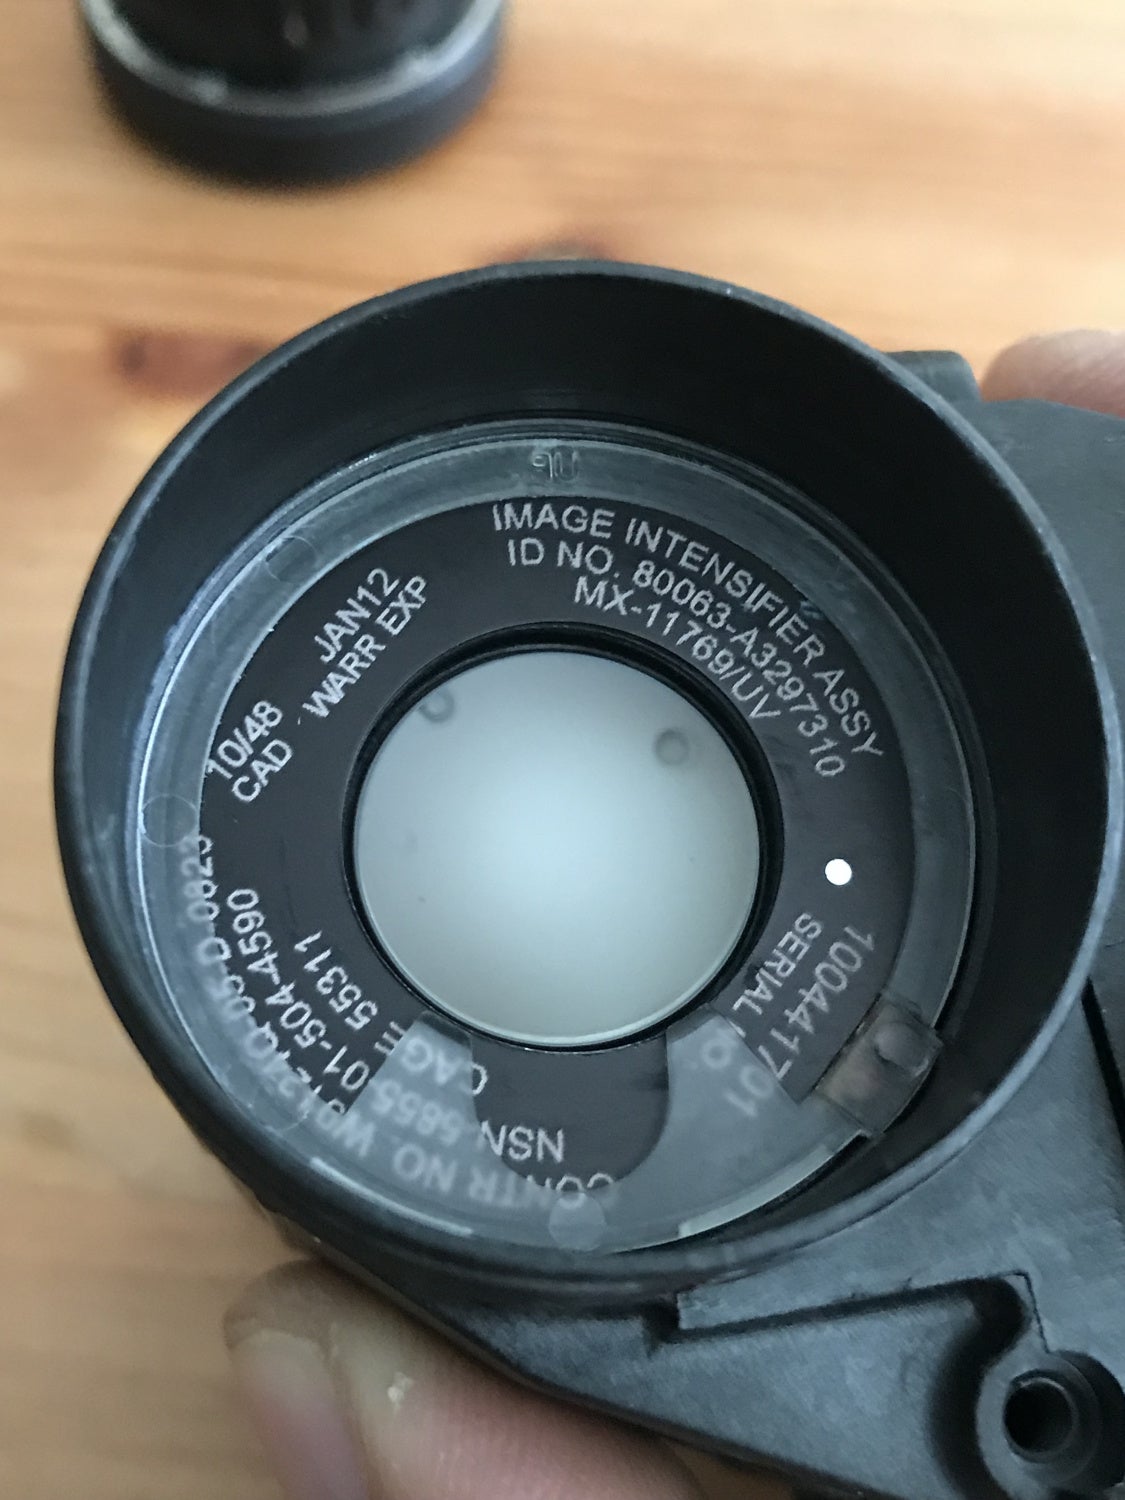
Below is what I call “blemtastically cheap”. This tube is not very desirable and looks like it has contracted a deadly disease. But if you actually look where the blems are, they are in the outer edge which is called Zone 3. There is a small blem in Zone 2. Zone 1 is the area in the center and that is relatively clean. You can actually use this tube for shooting at night at a flat range.

You can actually press an intensifier tube into the battery housing to test the tube before you install it. Obviously, do this somewhere dark. Most gen 3 intensifier tubes are autogated so you should not have to worry about burning them out. Just don’t have them look out into daylight.

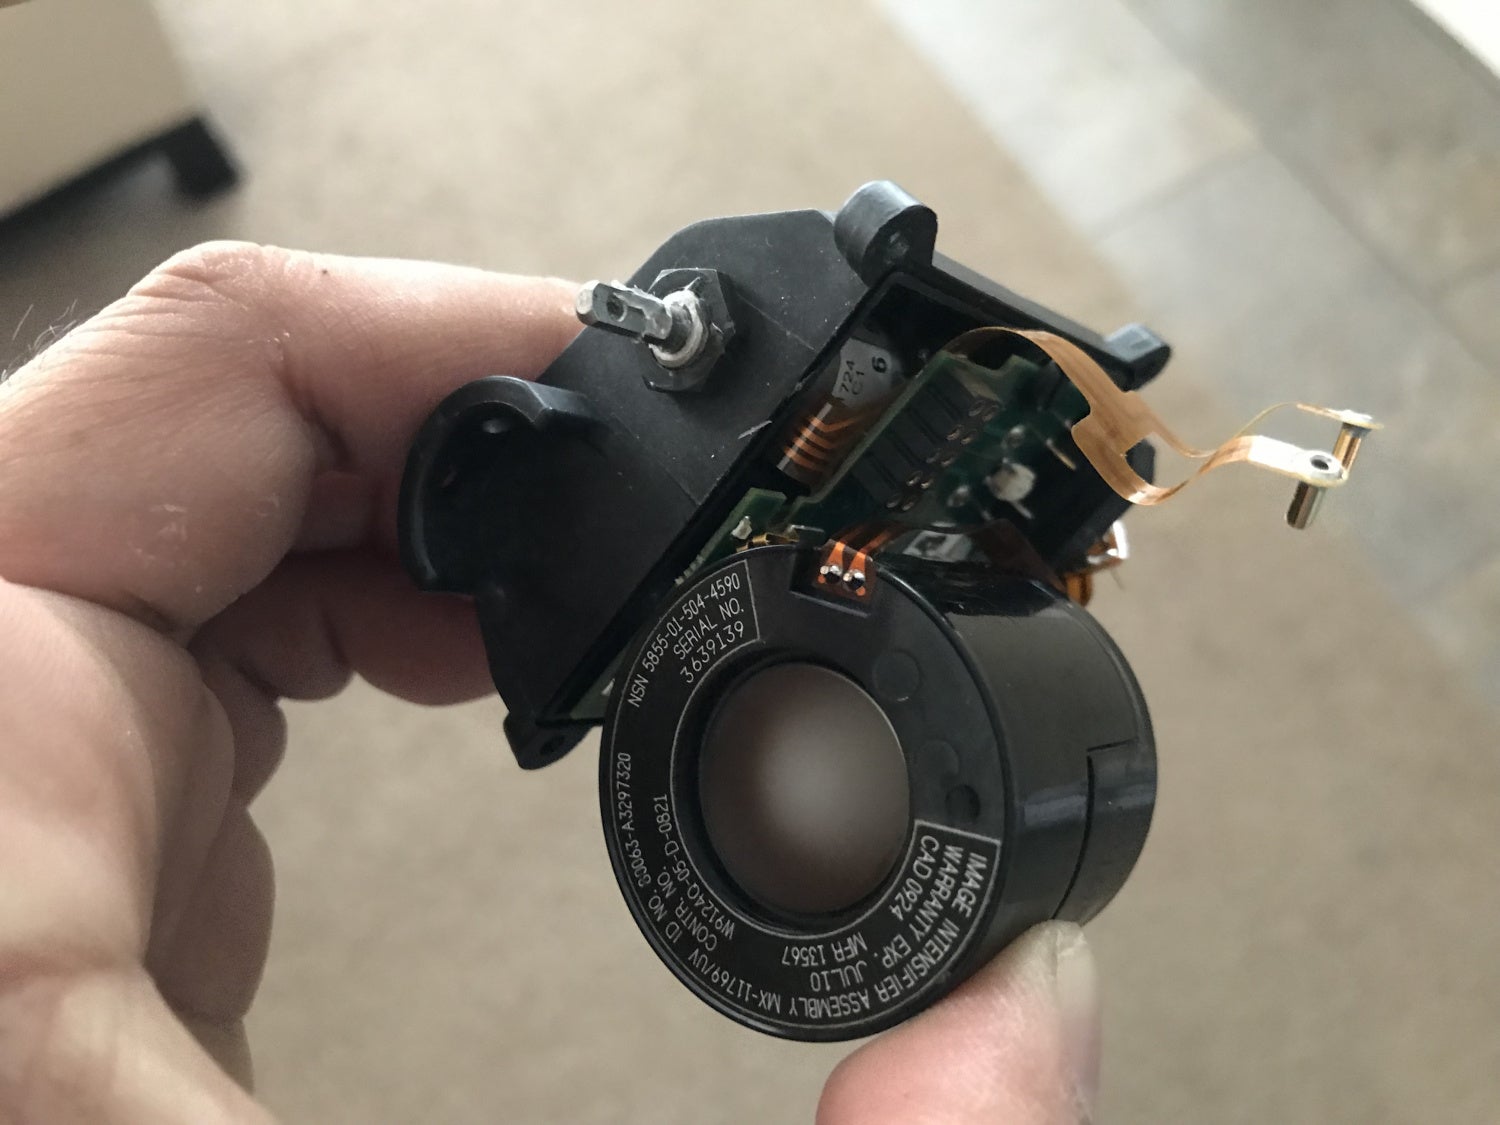
There are two contacts on the board in the battery housing. Turn the power to on and touch the battery housing to the corresponding contacts and the tube should turn on. I did this to take a picture of the blem in the photo above. 
Here is a video I did showing how ANVIS lenses cannot see green dots. The first two tubes you see are blem tubes inside PVS-14s. The green phosphor cost me only $500 and the white phosphor cost me $1,000. That was just for the tubes, no housings or optics. If you can overlook a small blemish you can find some really good deals.
You can also look at less popular image intensifier tubes. like Photonis. When I built my ANVIS9 goggles I came across a pair of Gen2+ commercial Photonis green tubes a guy had and he only wanted $900 for the pair. Blem free!!. They are not quite as good as my Gen 3 L3 tubes but they work. I can see in the dark and I can shoot in the dark. If you manage your expectations and build your own PVS-14 with compromises for the sake of cost you can find a happy medium and enjoy the darkness more often.