 Your Privacy Choices

The SiOnyx Aurora is a rather capable night vision camera. Read my review of it here. While the Aurora night vision camera was never intended to be helmet mounted I was able to cobble something together to see if it could be done. The popularity of the Aurora camera has driven individuals like Lucian of Lion’s Gear Solutions to make accessories like his Aurora bridge Hyperion Mount.
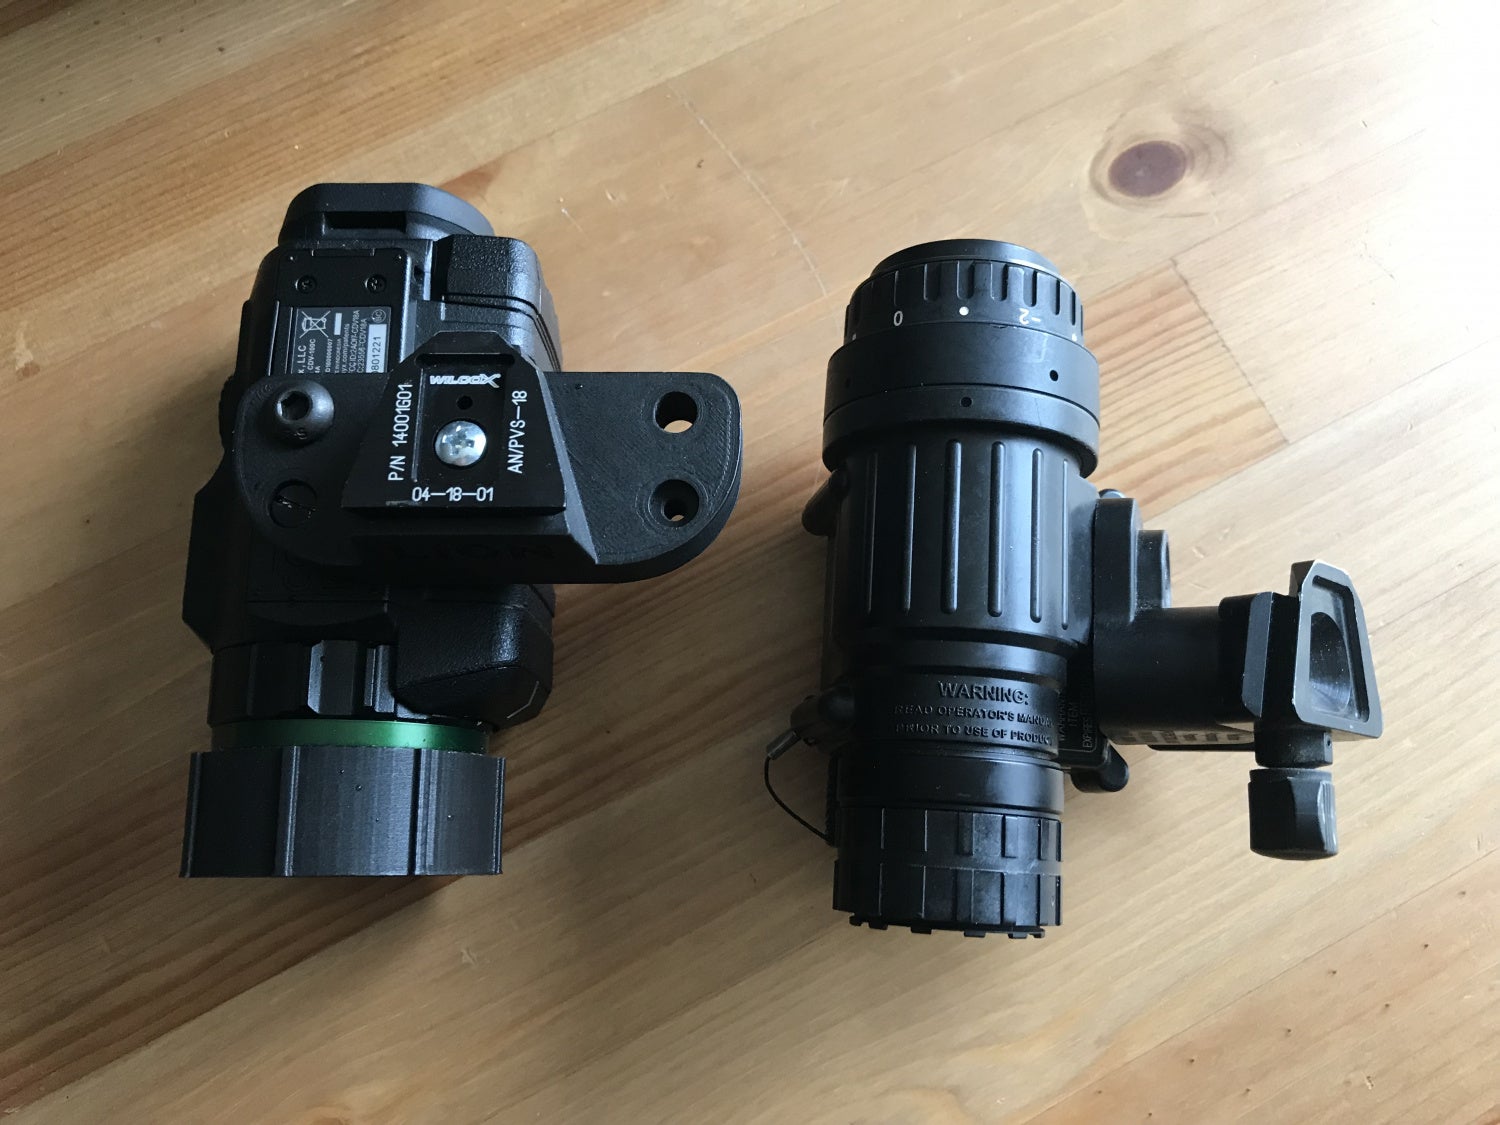
The Aurora and Hyperion mount is not that much larger than PVS-14.
When talking about night vision, if you have a monocular like the ubiquitous AN/PVS-14, you can mount it to your helmet using an arm and a mount. If you can buy a second PVS-14 then you can use a bridge to join them into binocular night vision. Well, Lucian designed something similar to mount the SiOnyx Aurora to a helmet.
Before Lucian’s design, the only way to mount the Aurora to a helmet was to fabricate something custom. My friend modified a replica ANVIS goggle set. The housing has built-in adjustability for interpupillary distance if you use twin Auroras.

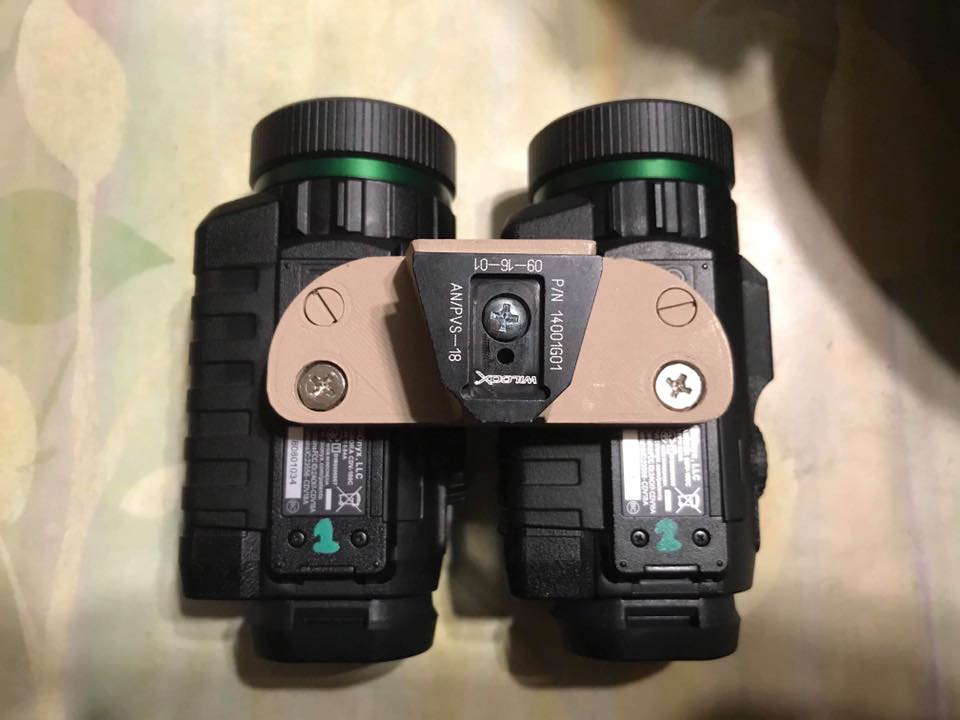
The Hyperion Mount is actually a bridge to join two Aurora cameras and attach them to a helmet. Below are all the parts except for the Wilcox dovetail. You need to buy that separately.

When you order a Hyperion mount, you need to get your pupillary distance (PD) measured. This is the distance measured in millimeters between the centers of the pupils of the eyes. Each person is different and you need to know this so when Lucian makes his mount for you, the Auroras will line up with your eyeballs. If the PD is wrong, you won’t be able to see clearly through the Aurora electronic viewfinder.
I went to a local optometrist in Walmart. PD is measured when making corrective glasses but I do not wear or need glasses. In order for them to measure my PD, they would have to perform an eye exam. When the optometrist actually came to talk to me I explained what I was doing and she wrote the PD that her assistants had measured in a preliminary eye exam before the full eye exam. So I did not have to go through a full exam nor have to pay for it since I just wanted something simple. However, there are apps you can download to measure your PD using a bathroom mirror and your smartphone. I tried this but it never worked.
There is a little assembly required with the Hyperion Mount. As you can see there are a number of screws and parts.
The fatter domed screws are what you use to bolt the Aurora tripod mount. The smaller countersunk screws act as anti-rotation pins to keep the Aurora camera from spinning around the larger screw. The silver wood screw is for affixing the Wilcox dovetail to the top of the Hyperion mount.

My name and PD was printed into the bridge.
Once the Aurora and dovetail are installed you can attach it to your helmet mount. I am using a Norotos AKA2 mount.


Since the Hyperion mount is technically a bridge for dual Auroras, you can mount the Aurora on either side. It is personal preference but mounting it over your dominant eye will allow you to see and shoot through an optic.
Here is a photo of dual Auroras. Obviously, if you have a small PD number you may not be able to use the Hyperion mount with dual Auroras. If the PD is too small then the two Aurora cameras could interfere with each other.
Depending on the mount you are using, you have more options for attaching the Aurora camera. Below I am using a replica Norotos INVG mount. It was designed for use with a single PVS14 so it can fold up and rotate away. This allows the Aurora to fold in closer to the helmet which is more comfortable if you need it out of the way for extended periods of time.

Here is the Aurora mounted on the right side of the Hyperion mount so I look through it with my dominant eye.

I am also using a custom 3D printed lens cover that holds a laser cut piece of acrylic to protect the front lens of the Aurora.


The Hyperion mount is solid even though it is 3D printed. The Hyperions Bridge is painted with a high temp paint. This protects the bridge from becoming brittle from UV exposure. Granted this is a night vision camera and you will most likely be using it in the dark, however, the Aurora is a decent digital video camera and can be used in the day time. I can use the Aurora for POV recording in the day time.
I would prefer the Hyperion mount to have PD adjustability rather than a fixed position bridge. Lucian is looking into redesigning a newer version but no idea as to when it will be available. Adjustable PD is only important if multiple people are going to be using the same bridged twin Auroras. Like this setup below.

Photo from Lion’s Gear Solutions Facebook page
I would also like the bridge to have a way to attach a lanyard in case the mount fails and the Auroras drop.
Here is the information from Lion’s Facebook page.
The LION Hyperion Dual SiOnyx Aurora NVG mount helps you mount the camera on some Night Vision mounts/arms (see compatible mounts section and these awesome photos).Customised for your Pupillary Distance 👀
The LION Hyperion mount will be built customised for your pupillary distance. The pupillary distance (PD) or interpupillary distance (IPD) is the distance measured in millimeters between the centers of the pupils of the eyes.Based on your PD, the mount might or might not accept 2 SiOnyx Auroras. Please check below to confirm whether or not, if you will be able to mount 2 SiOnyx Auroras. See here how to measure your PD or try this app on the iPhone.PupillaryDistance & Dual SiOnyx Aurora compatibility
- PD < 64mm/2.51969” – Not compatible ❗️
- PD = 64mm/2.51969” – Tight fit ⚠️
- PD > 64mm/2.51969” – Compatible ✅
Compatible Mounts (tested) 🦏
- WilcoX L4G24
- Norotos Long Arm TATM (with dovetail accessory attachment)
- Norotos Rhino II Titanium (with dovetail accessory attachment)
Contents 🔩
- 1 x 🦁LION Hyperion Dual SiOnyx Aurora NVG mount
- 2 x ¼ screws that will screw in the cameras (and 1 spare)
- 2 x screws for camera alignment (already fixed in the mount and 1 spare)
- 1 x screw for the dovetail shoe (and 1 spare)
- 0 (ZERO) x NVG Interface Shoe for the AN/PVS-18/18A (you will need to order this separately)
WilcoX NVG Interface Shoe for the AN/PVS-18/18A
The compatible NVG Interface (dovetail) shoe is the following: http://www.wilcoxind.com/NVG-Interface-Shoe-for-the-ANPVS-1818A-P19C33.aspxPlease order it separately to this package.How to assembly & steps 🧰
Required parts
- A helmet (with an NVG shroud).
- A NVG arm/mount (I tested and I can recommend the WilcoX L4G24 or the Norotos TATM with the dovetail interface). ⚠️ Make sure the NVG arm is compatible with the shroud on the helmet
- A WilcoX NVG Interface Shoe for the AN/PVS-18/18A – not included in the package.
- A 🦁Hyperion mount.
Installation steps
- Mount the NVG arm on the helmet shroud.
- Mount the WilcoX NVG Interface Shoe on the 🦁Hyperion using the included main screw.
- Mount the SiOnyx Aurora/s on the 🦁Hyperion using the included ¼ screw/s.
- Mount the 🦁Hyperion (that now has the camera attached) on the NVG arm.
- If you haven’t already, make sure to flip the image on the SiOnyx Aurora as the camera is sitting bottoms up.
- Enjoy 😎
How to mount video: https://youtu.be/4hL8GaX0wOM
Price and Order of the Hyperion mount 💵
The price of the Hyperion mount is $89 or €79 (shipping included 📦).Before ordering please measure your PD (pupillary distance). See here how. Have the value that you measured ready when you order.Please order by PayPal at https://paypal.me/lionscustom (if the link doesn’t work please contact me).Important ⚠️
In the description add the previously measured PD value and your desired colour for the Hyperion mount (Tan – RAL1019/Black).Also, please make sure the shipping address is correct. Thank you for considering my products!