 Your Privacy Choices
Firearms have been a source of entertainment, providing food and self-defense since their invention. They’ve also provided an avenue of hands-on exploration of science and engineering. Being able to understand the physics and mechanics of what’s taking place while shooting can help us be more consistent and efficient to be able to place rounds on our intended target.
Last summer, Eric Higgins was helping a fellow shooter diagnose an issue with his rifle. Eric noticed a wide variation in muzzle velocity for a hand load that the shooter had previously found reliable. Eric recalled the Sniper’s Hide article that asserted the position in which a rifle is fired can have effects on muzzle velocity and wondered if it would be of help to the fellow shooter. In reviewing that article, he questioned the results of the article and wanted to explore that theory for himself.
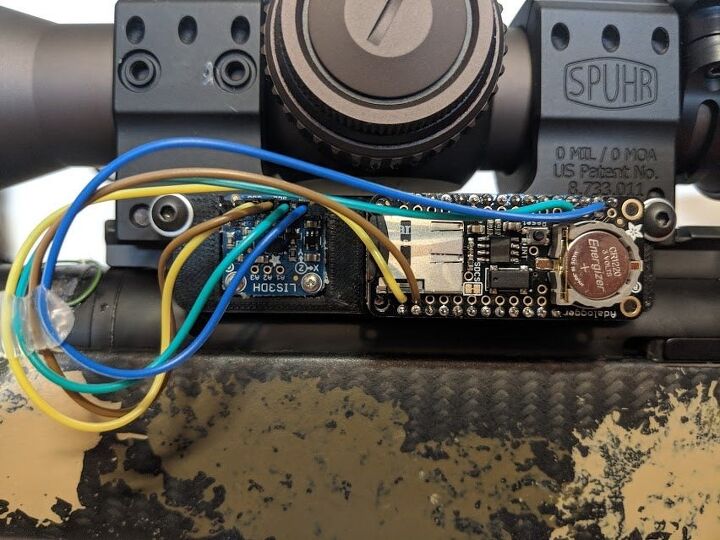
Eric decided to use some sensitive but affordable instrumentation that he built himself to see if there was a difference between mitigating his own rifle’s recoil and allowing the rifle to recoil freely. Click here to see his article on his homemade accelerometer to measure how the rifle was moving under recoil. For the test, Eric used 25 rounds of handloaded 6.5mm Creedmoor.
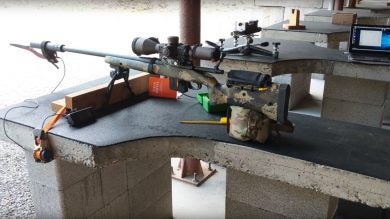
Eric’s set up for pre-loaded bipod set up.
FREE RECOIL VS. RECOIL MITIGATION
For testing how the rifle moves under free recoil, Eric opted for an F-Class front rest, a good example of which can be seen here and here. The rifle rest allows for a stable platform, but is only held there by gravity and allows the rifle to jump from the recoil impulse with only the shooter’s shoulder to absorb the rearward movement.
For recoil mitigation, Eric used the method of “pre-loading” his bipod. This means that he would push the rifle forward, causing the bipod legs to have a slight rearward cant instead of a 90-degree angle. It also helps keep the rifle from excessive jumping during recoil and having to re-position after each shot. The video below shows a good explanation of the proper technique and you can see the rifle doesn’t jump or lose position.
Eric’s article provided graphs to be able to discern the data that his instruments were recording on the recoil and velocity. Some of the graphs are interactive, which is helpful to pinpoint what was happening for each shot. The following pictures are screen captures of Eric’s graphs. All photos were used with permission. I highly recommend checking out his whole article on Ammolytics.com to see the interactive graphs and to see what his observations and conclusions were.
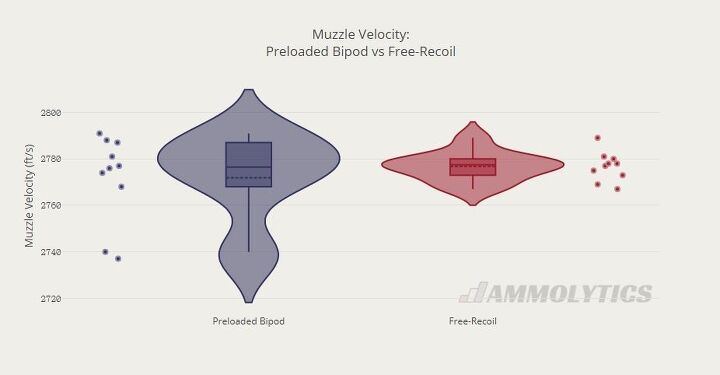
Graph of pre-loaded vs. free recoil velocities

Recoil acceleration graph for the pre-loaded bipod. The graph is interactive at Eric’s blog.

Recoil acceleration of free recoil. The graph is interactive at Eric’s blog.
Have you experienced big shifts in velocity when shooting? What do you think about the theory that shooting stance has an effect on bullet velocity?