 Your Privacy Choices

Here is a Do It Yourself Challenge if you want to improve your Sako TRG bipod. The cost of this mod is basically zero.
The original bipod made by Sako for the TRG rifle has been copied by several aftermarket companies, and it’s not without reason.
It is simply very good for various types of field shooting. However, due to wear & tear and perhaps changes in tolerances, some are not as good as they could be. The tilt in some bipods can become too loose, and here is a DIY to fix these issues.
Sako uses two flat spacers to fill the empty space between the bipod pedestal and the leg parts.
These spacers are not completely flat but in fact slightly cup-shaped, hardened spring washers.
All the Sako TRG bipod tilting related parts are made of hardened steel, so modifying it by a drilled/tapped hole is a very difficult thing to do.
The department of research & damage, or “ruin it yourself” at Finnaccuracy came up with this simple modification. The purpose was to add just the right amount of friction to tilt. According to themselves this mod really works nicely. The tilt is firm, but not too tight.
You are going to need:
* O-ring, OD 10mm
* 4mm Allen key
* 10mm wrench
* Pliers (Leatherman does not work)
* Beer (optional)
* Cigarettes (optional)
* 5min…..4h working time, depending.. well, you know…
Instructions:
Several O-ring sizes have been tested so you don’t have to. The 10 mm worked best. Watch the images below and read the detailed instructions.

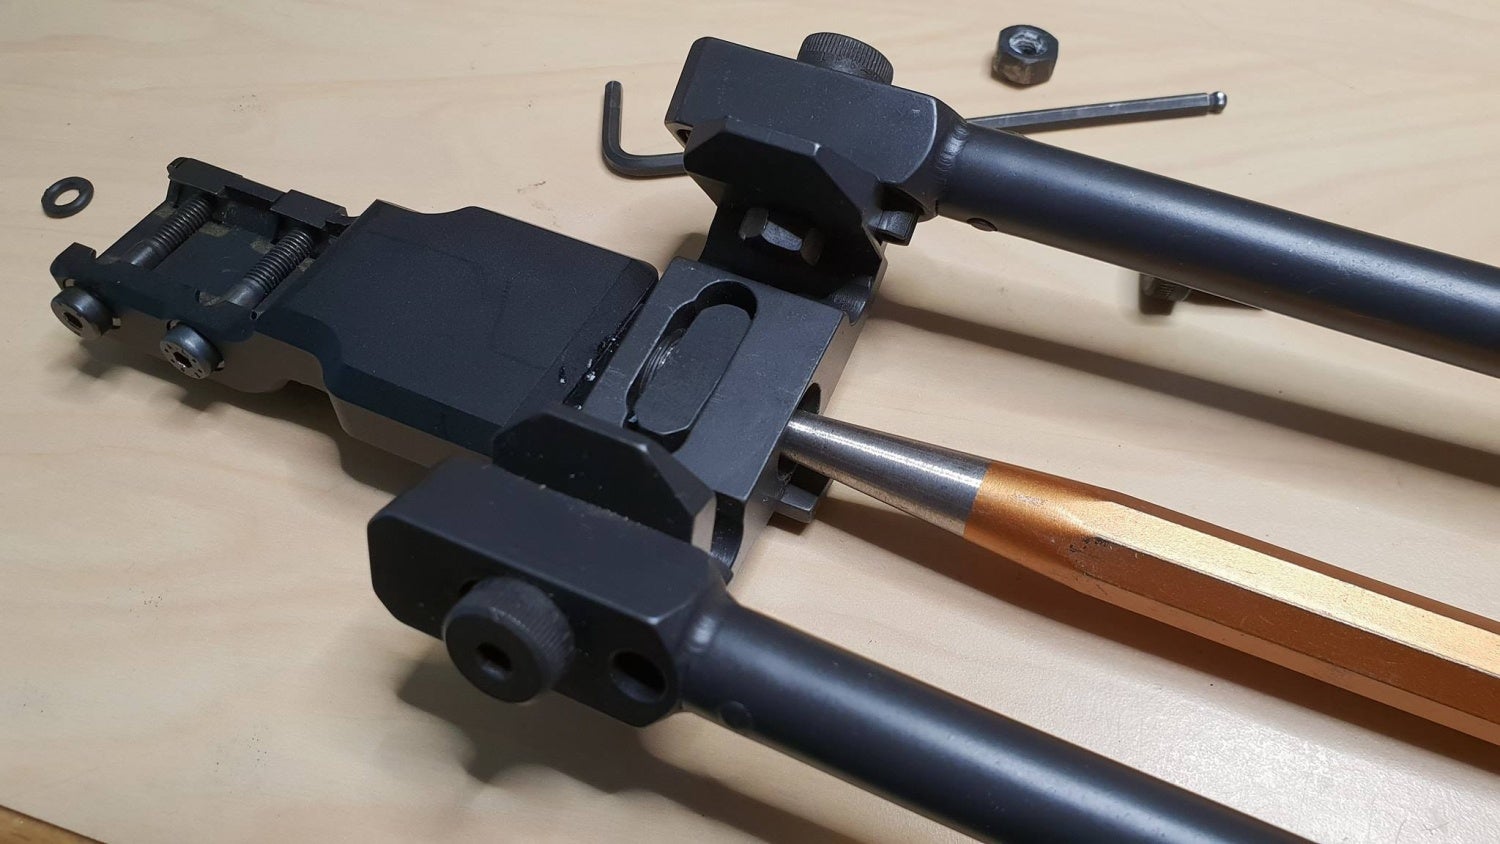
The has bipod disassembled to its main components. Finnaccuracy’s Picatinny bipod adapter is still attached to TRG bipod mount part. The adapter is available in their webshop.
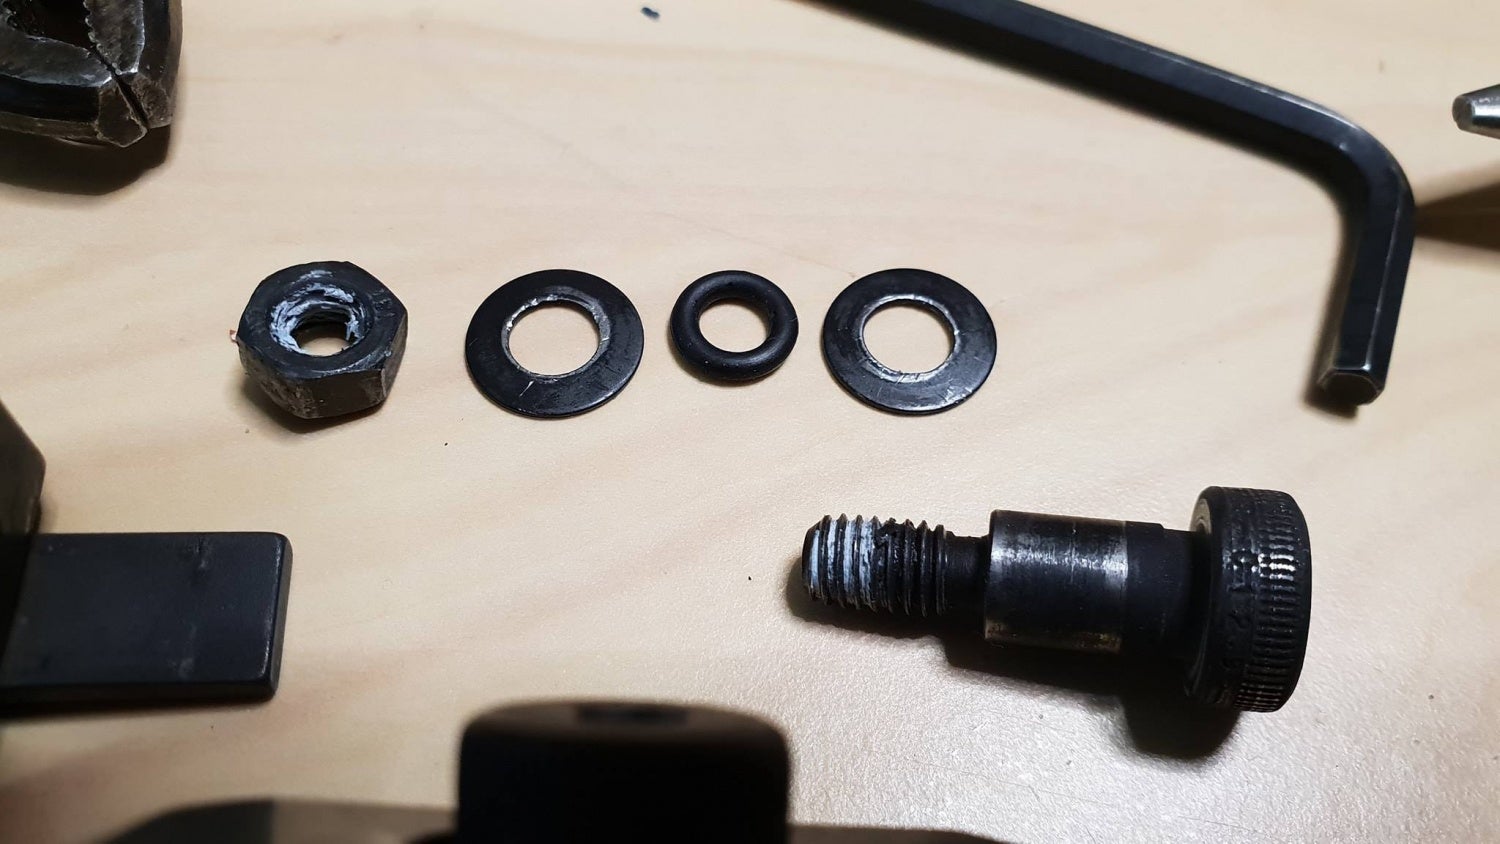
Original spring spacers, nut, and hinge bolt. O-ring between spacers. This was not final O-ring size I used but smaller, recall it was 8mm OD.

Original washers/spacers and O-ring sandwiched between them. NOTE the washer direction. The bottom of the washer “cup-shaped” must be pointing towards the O-ring. This is the only way as the spacers are squeezed hard with pliers during installation. The O-ring must have room to expand while it’s squeezed flat for installation.
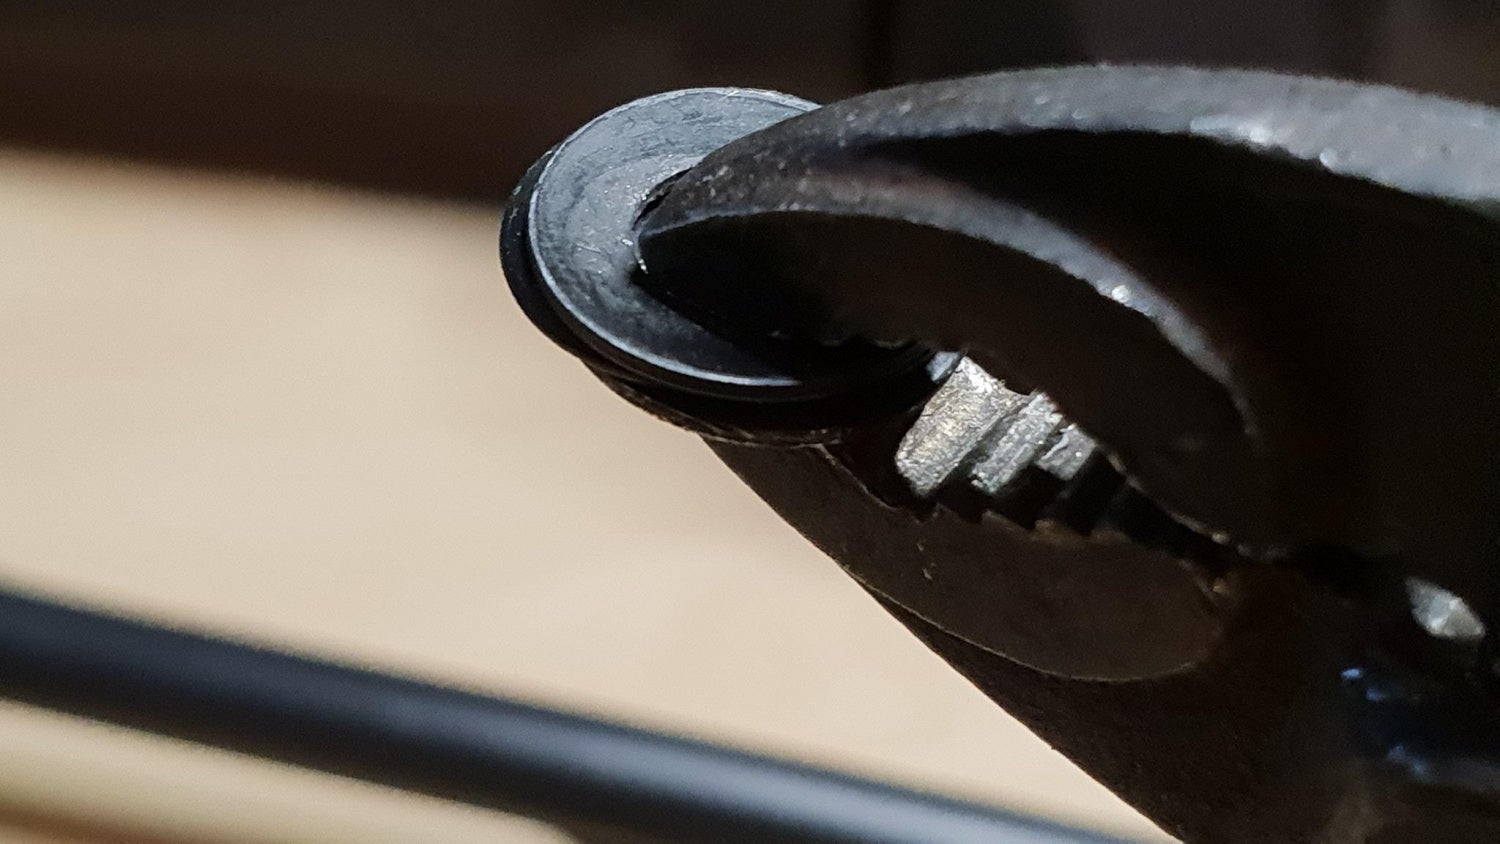
Center the O-ring carefully. When squeezing hard with pliers, the O-ring should expand uniformly between the washers. If the O-ring isn’t centered carefully enough, it will burst out unevenly to one side. NOTE the plier type. If you try to do it with Leatherman pliers (or similar), the pressing force will not be even on opposite edges of washers. Use a good quality plier!
DO NOT use grease. Some friction is needed to keep the O-ring in the right location between spacers.
This is the only part of the modification where you need to be careful. If the O-ring goes in unevenly after squeezing the washers hard, open pliers, fine-tune it and squeeze again.

Squeeze hard + press to get it in its place. Do not grease!
In the picture, the o-ring was not centered carefully enough. The side towards the camera is not correct between the spacers, and would probably be damaged if it was pressed in as it is.
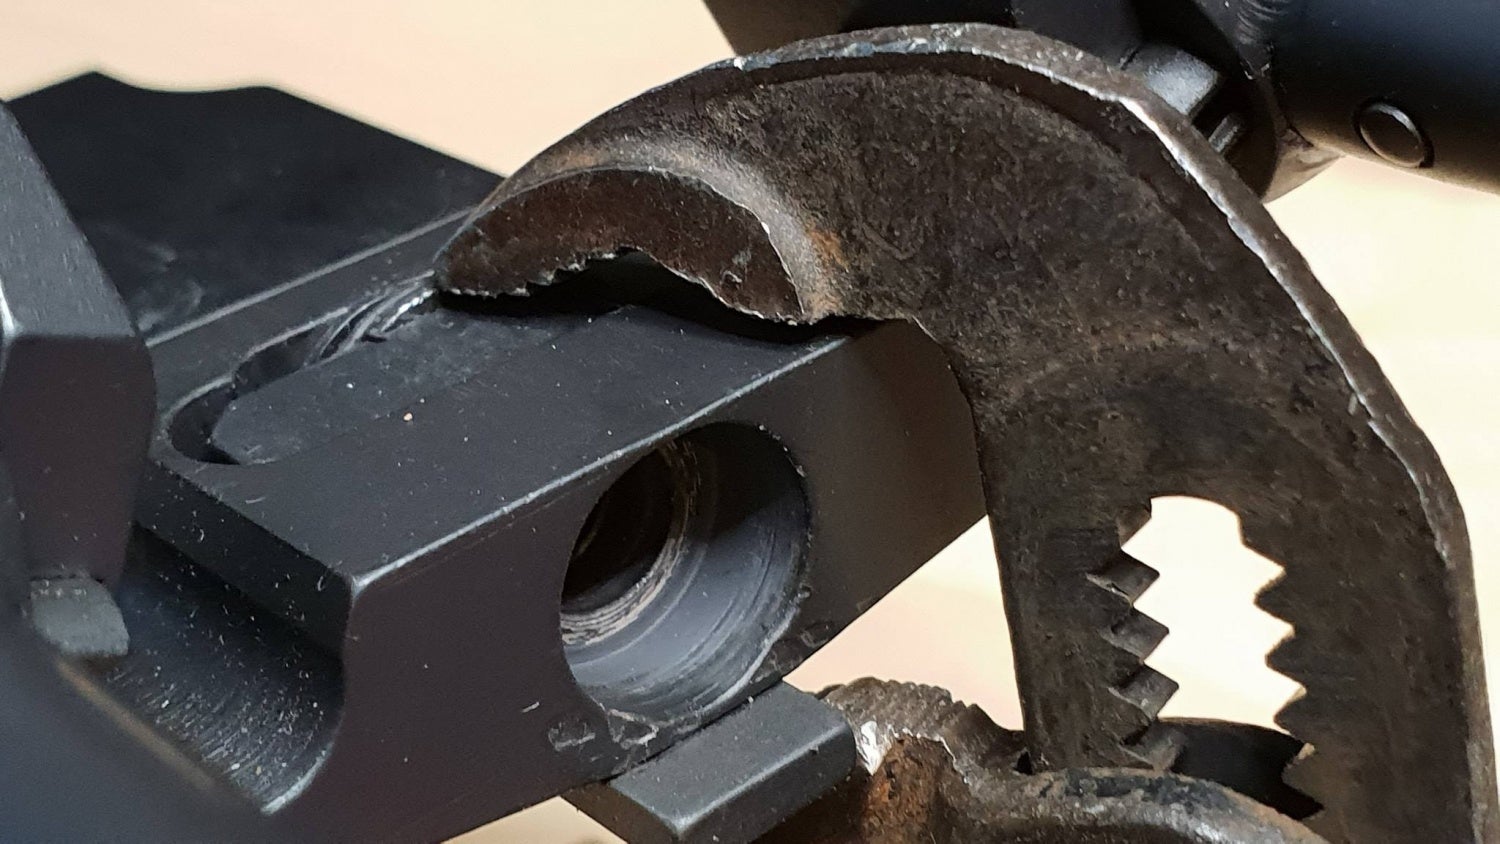
As soon as you get start right, press whole package down evenly
If needed, fine-tune washer alignment to get the hinge bolt back to the thread and its place.

Done! Squashed O-ring peeking between spacers.
The bipod tilt function becomes very nice after the upgrade. If the tilt feels too firm, probably few drops of penetrating oil will help… but beware as too much may make it slippery…

The latest M08 – type narrow-leg TRG 22/42 bipod comes in two versions. The earlier one does not have spacers.
This DIY modification comes from Finnaccuracy, used with permission. Good luck!