Your Privacy Choices

Welcome to another installment of Concealed Carry Corner. This week we’ll be discussing Trigger Guard Holsters and the variations within the concept as well as its strengths and limitations. Trigger guard holsters have also been called minimalist holsters because they use very little material and thus can offer a deeper level of concealment.
CONCEALED CARRY CORNER: TRIGGER GUARD HOLSTERS
There are several companies making trigger guard holsters these days, most of which are reasonably priced compared to other, more traditional style Inside the Waist Band (IWB) holsters and Outside the Waist Band (OWB) holsters. Typically, finding concealable holsters that fit your body style and choice of wardrobe can be expensive and it comes down to trial and error to find the holster that you like best. The affordable nature of the trigger guard holsters can bolster your options if you’re just starting to carry a concealed weapon, or if you have an environment that requires deeper concealment. If you have the right tools, trigger guard holsters are easily made and I hope to post a future article on just how easy it is.
The trigger guard holster at its base, is a molded piece of plastic or kydex that’s shaped to the contours of the trigger guard. The holster is retained on the gun with its resting shape, but when the gun is needed, a firm grip and quick pull will force the plastic to expand enough to release from the trigger guard. There are a few variations of how these can be worn.
One method is to have a clip attached to the holster itself, which is secured onto your belt. Cook’s Holsters has such an example they list for $29.95. https://www.cooksholsters.com/inside-waist-band-trigger-guard-carry/ .
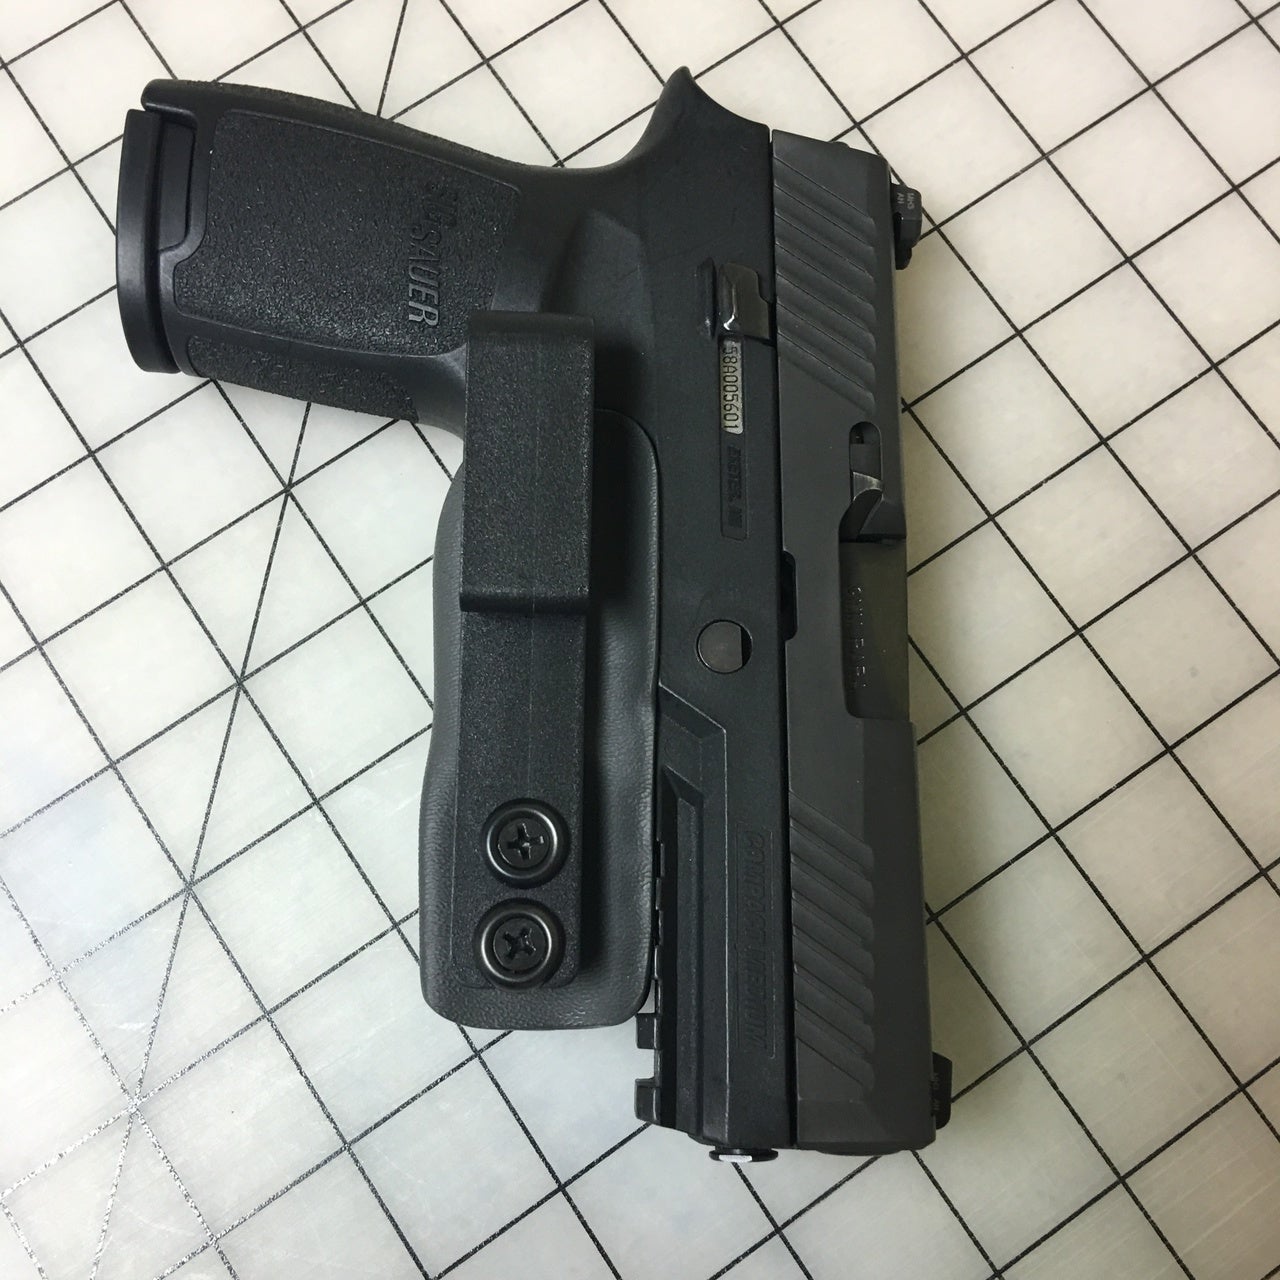
Photo from Cook’s Holsters’ website. Inside the Waist Band Trigger Guard Carry with attached belt clip
Another method is to have a clip attached directly to the gun, while the trigger guard holster is secured to the belt using a length of paracord. When the gun is drawn, the lanyard retains the holster as the drawing motion releases the gun from the trigger guard holster. Clipdraw is company that offers both products either bundled together or you can buy just the trigger guard holster or just the clip. The price does vary based on the make and model of pistol, but for most Glock models, for example, they list the bundle at $44.90 or $19.95 for just the trigger guard holster. You can see the concept in motion in Clipdraw’s video below posted on their YouTube channel. The demonstrator chose to attach the lanyard to his belt loop, which I would advise against. Belt loops don’t like lots of direct force and can rip, while the belt is sturdier. After the draw and presentation of the gun, you can see the trigger guard holster patiently waiting at the shooter’s side for when the shooting is done.
Yet another method is to forego any clips and simply rely on the holster to keep stuff out of your trigger guard, while your belt and waist band keep your gun where you want it. The lanyard is still attached to the belt to facilitate the release of the holster when the gun is drawn. Alex C. did a review of this concept, as did Tom R. Both companies from the reviews seem to have gone by the wayside, but the concept is still viable. Raven Concealment is a company that offers the lanyard method listed at $19.99, but they also have clipped versions available.
When I decided I was going to carry my Glock 22/27 instead of the revolver I’d carried for quite some time, I settled on the concept of the trigger guard holster and made one out of kydex. For the last three years, I’ve been carrying it using the latter method of attaching the lanyard to my belt and letting my belt hold the gun at my 4 o’clock position. There are times I need to adjust the gun a little, but overall I really like this method. I’ve carried this way while hiking, walking, canoeing, biking and on short runs while playing with the kids. This has been my every day carry in every type of extreme Midwestern temperatures. Since I have the full size barrel of the Glock 22, I’ve found that I can have a quicker draw if I first push up on the muzzle from the outside of my pants or shorts, which puts the smaller Glock 27 size grip higher above my waist line with more to grip when drawing. Drawing the weapon can be done one handed, but moving clothing out of the way with the weak hand makes it much faster. Re-holstering does take two hands, although depending on how tight the retention molding is, it’s probably possible to do one-handed in a pinch.
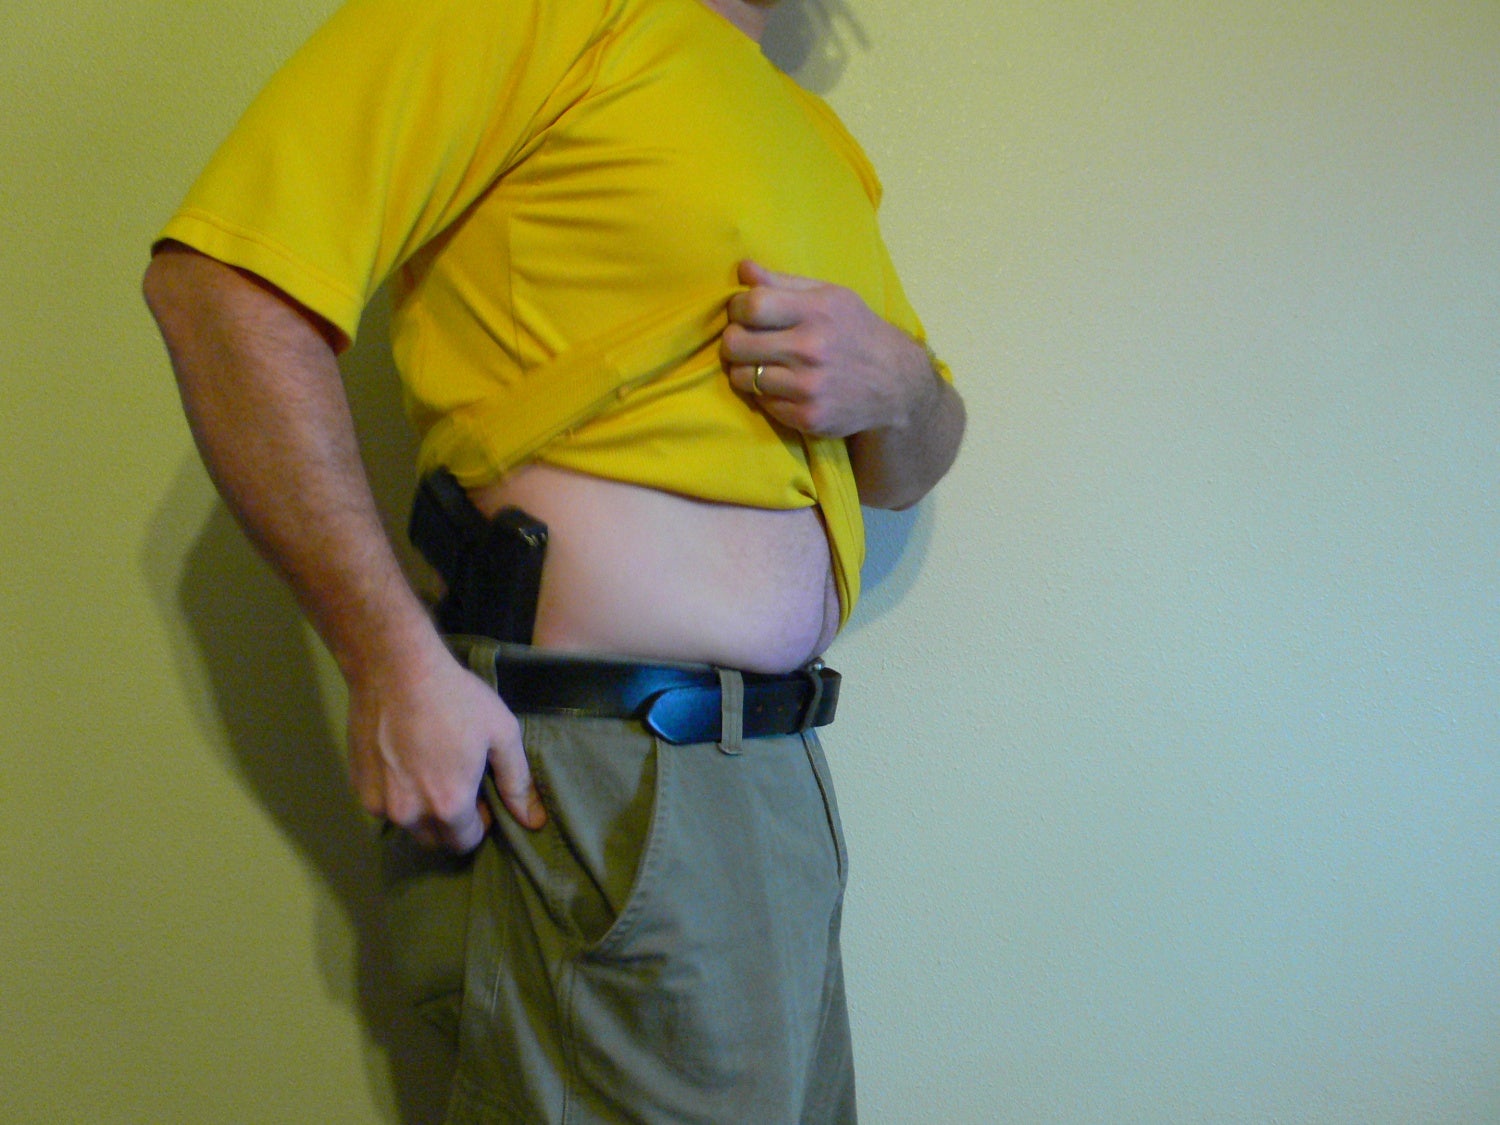
Author pushing up on muzzle from outside the pants to raise the grip higher above the belt line. Last summer’s “farmer tan” still evident.
The lanyard-only method, and some of the clipped variations (such as the Cook’s Holsters example above) also allow for shirts to be tucked in between the gun and the waist band for deeper concealment with only a bit of the para-cord showing looped around the belt. The para-cord is easily changed if you have different colored belts you wear throughout the week. A visit to the public restroom is a breeze since you don’t even have to remove the holster from your belt. As you unbuckle your pants or shorts, you only need to push your weapon further down into the pants out of sight before lowering the trousers. Again, the only visible part of the rig is the bit of para-cord attached to the belt. I prefer to keep the length of the lanyard just long enough that I can loop the holstered gun through the lanyard to secure it to my belt as shown above.
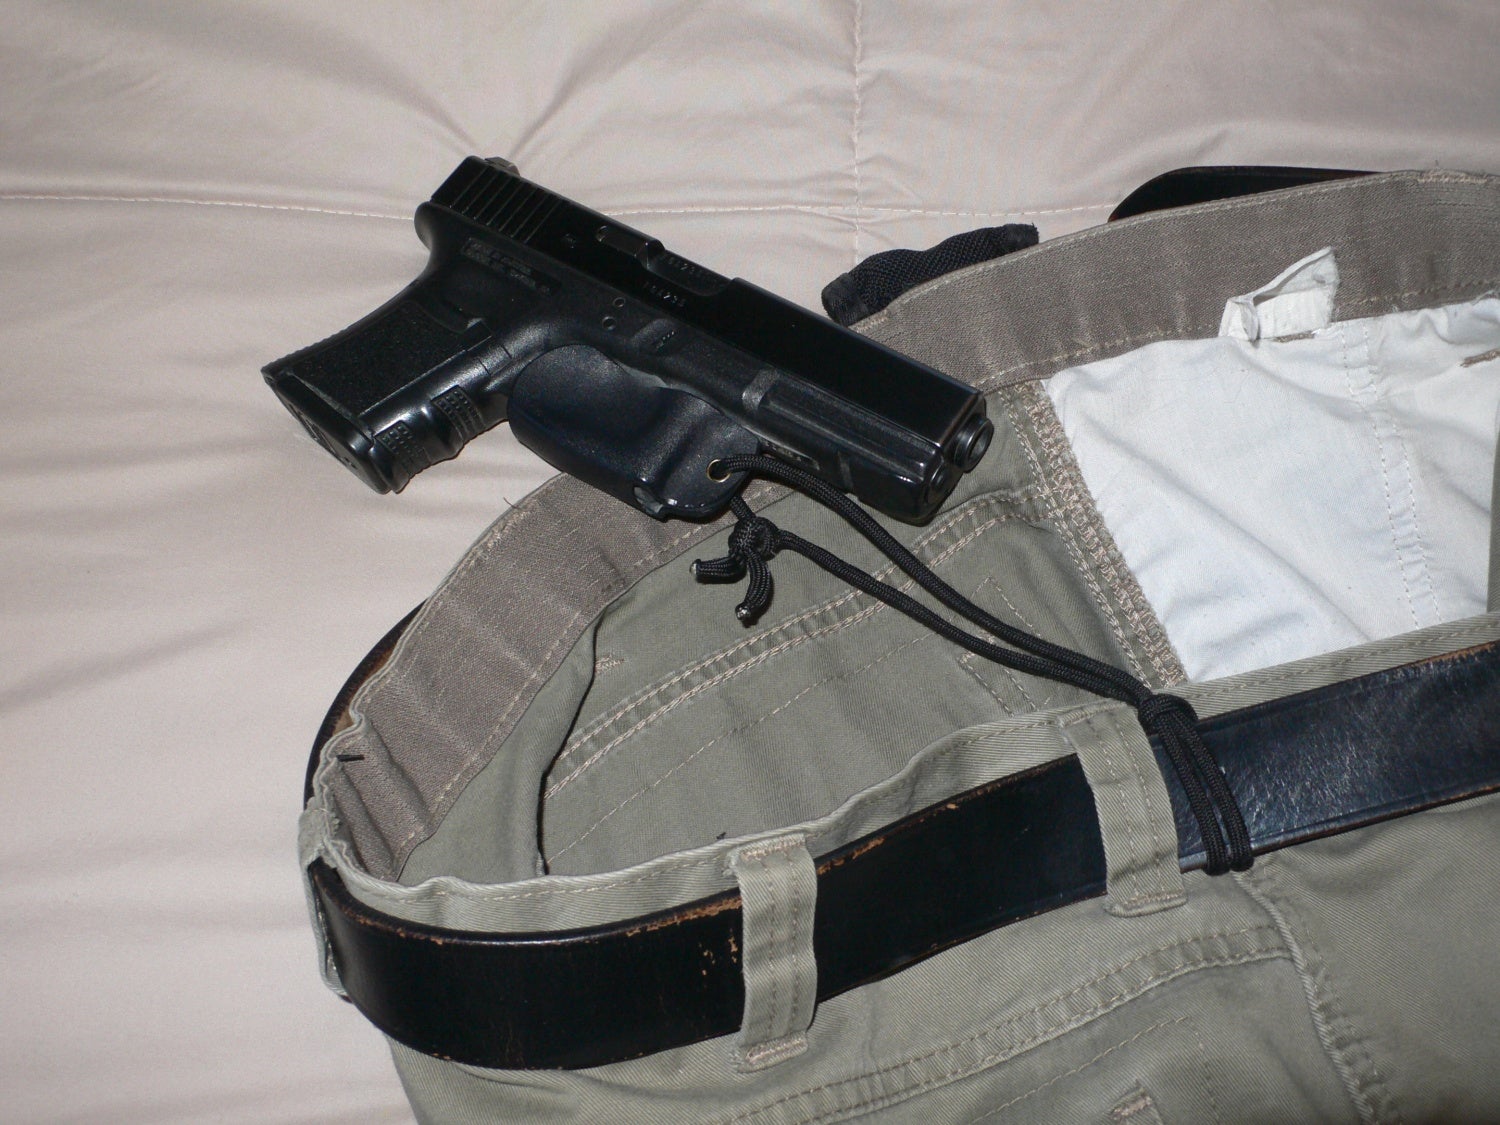
Author’s every day carry and homemade Glock trigger guard holster.
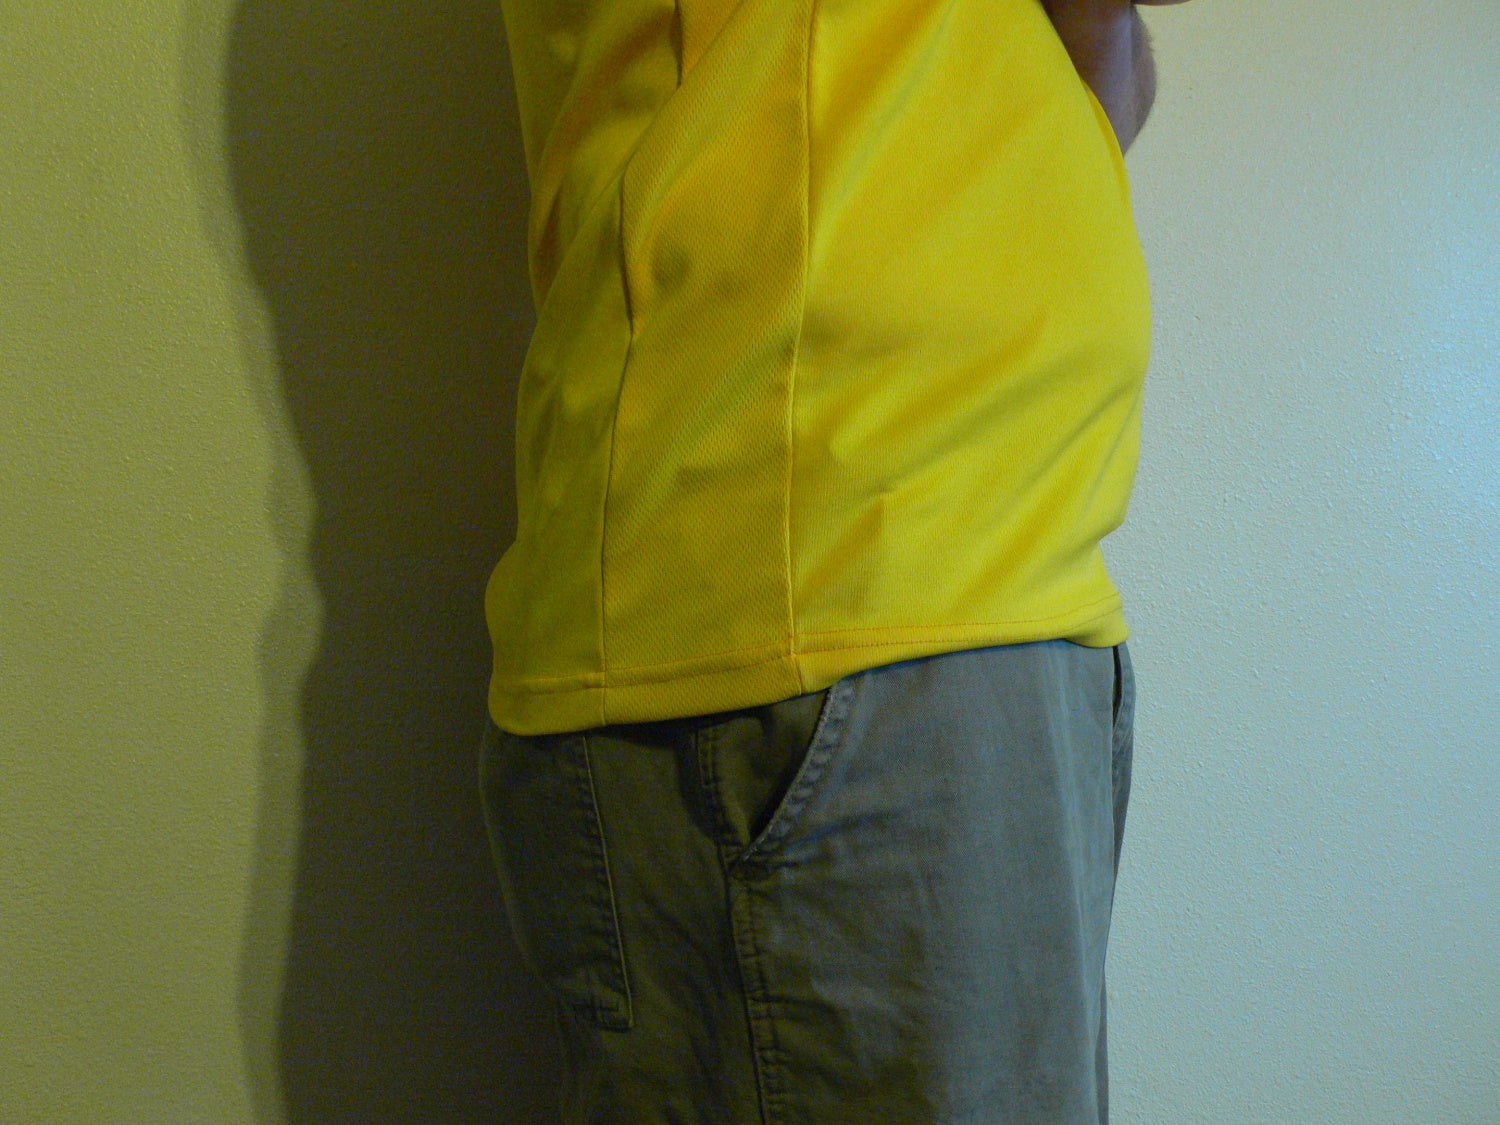
Author intentionally chose a thin shirt. Note that even with the shirt stretched the Glock 22/27 has little to no printing. I usually have my shirt ride a bit higher to provide more bunching of fabric around the belt line.
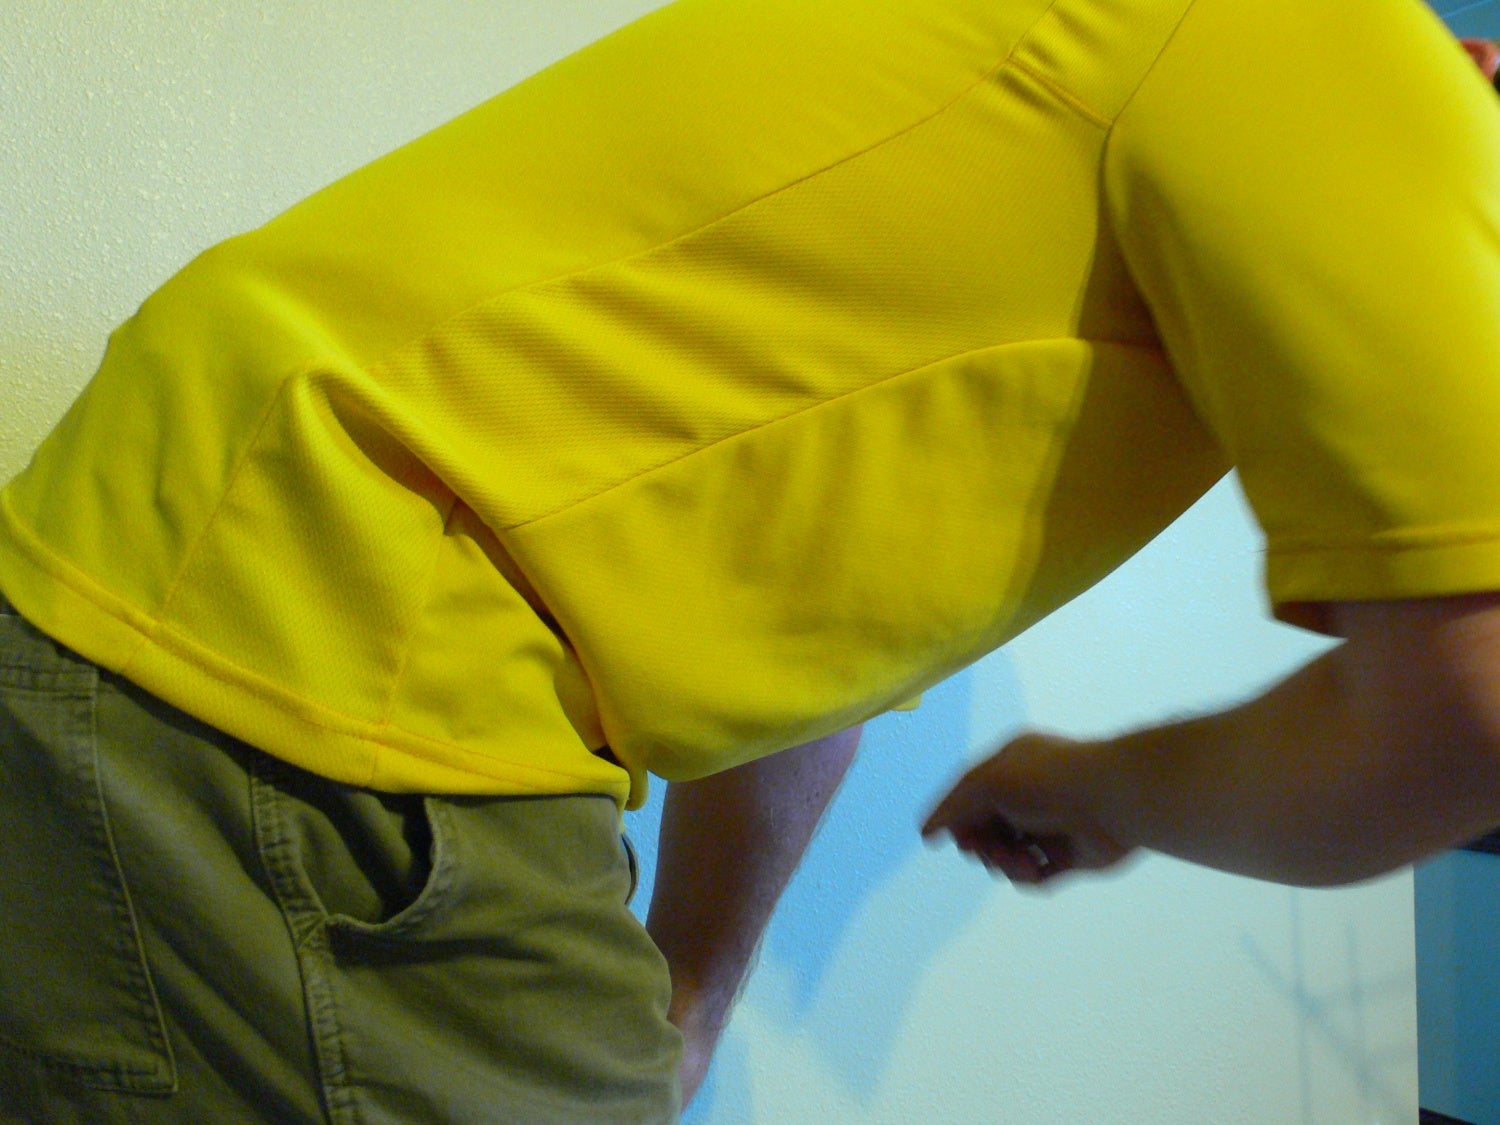
Author bending to show printing. If worried about printing in public, squatting down instead of bending can reduce or eliminate printing.
The less mentioned method of carrying with this type of holster is pocket carry or purse carry. I’m not a big advocate of purse carry or off-body carry in general, but I’m not knocking those that do. I recommend one simple change to the holster if you carry a gun in which the lanyard isn’t tied to, or looped around something solid. Simply changing the para-cord color from that of your daily belt to a very bright color that can assist in finding the lanyard easily without even looking directly at it when it’s pulled from a pocket or purse. Just make a fist around the bright lanyard and yank it away from the gun as you present it to your threat. The downside to this method is that it requires two hands to make the gun functional.
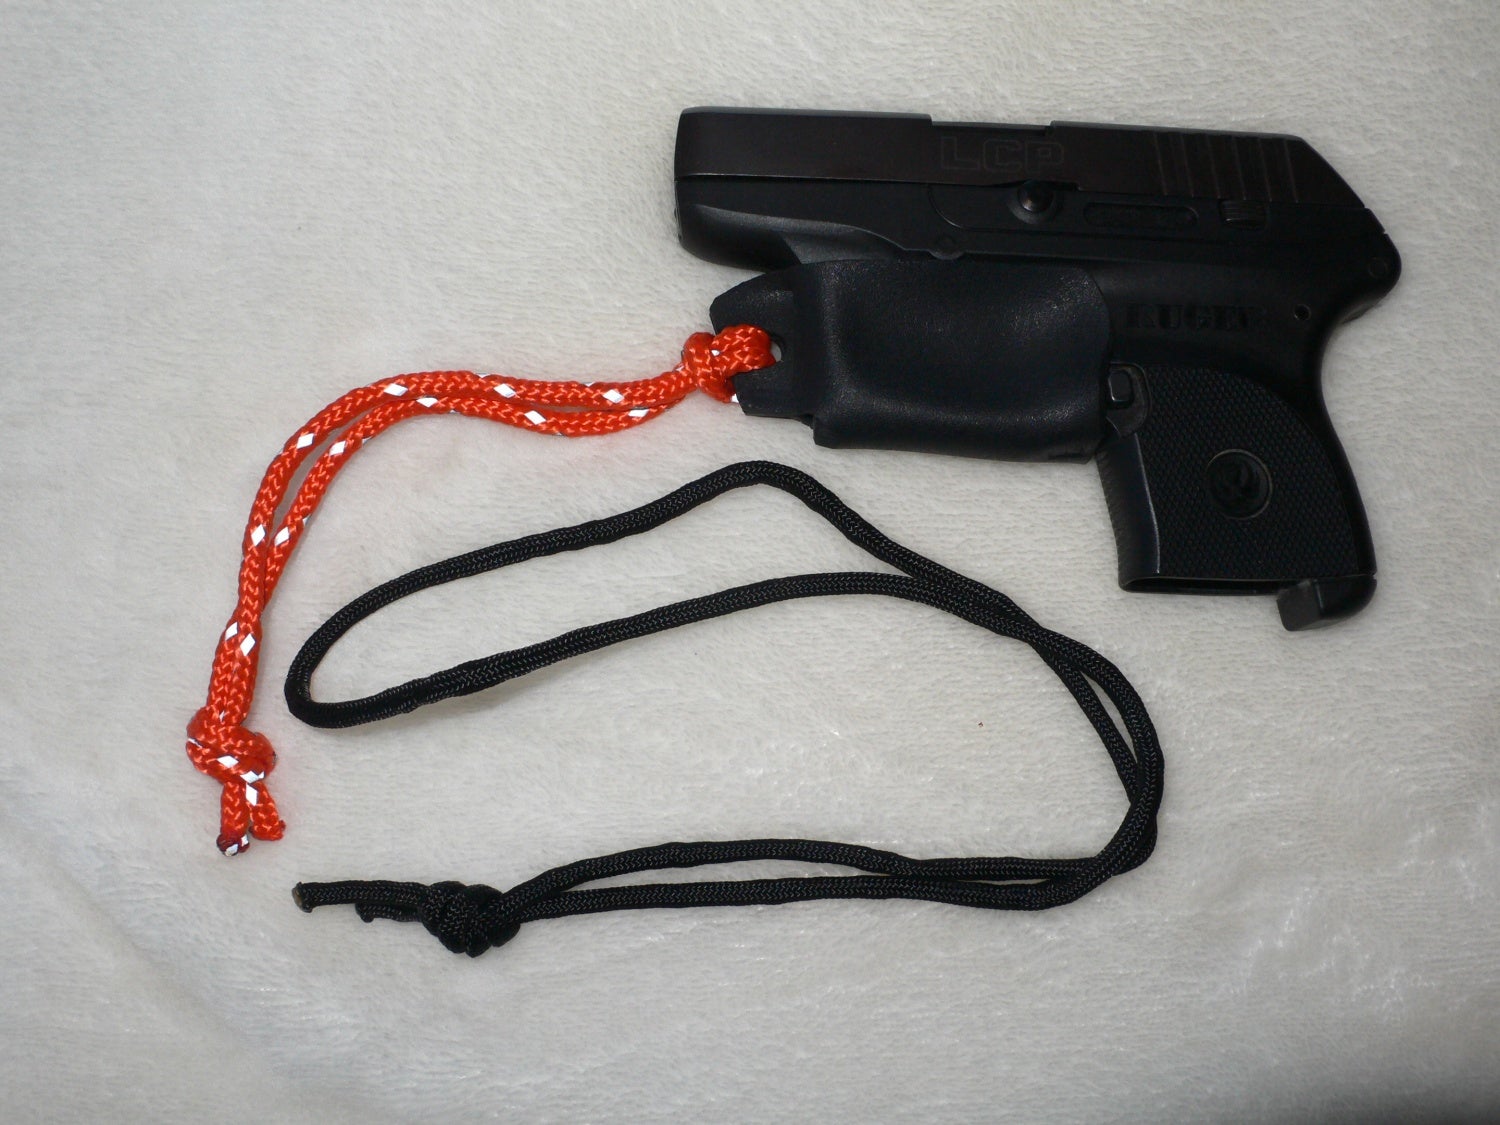
Author’s homemade trigger guard holster for Ruger LCP. Note the bright lanyard for easy sight acquisition if pulling from pocket or purse
I’ll leave you this week with the list of pros and cons that I’ve come up with for the concept of trigger guard holsters. For those that have carried one or more of the variations listed above, tell us what you like or dislike about your setup. What type of occasions and dress did you wear it with?
PROS
1.Allows for deeper concealment, including tucking in shirts.
2. Inexpensive (especially if you do it yourself), but not cheap quality.
3. Safely allows for loaded chamber carry.
4. Can be used in a variety of different carry methods, on and off body.
5. Intentional force is required to remove the holster from the trigger guard.
CONS
1. Requires two hands to re-holster.
2. Unless the lanyard is attached to clothing, a second hand is needed to remove the holster.
3. IWB method creates direct contact of gun to sweat (some finishes may hold up better than others, although my Gen 3 Glock hasn’t had any rust issues).
Have a safe week and don’t let your guard down!
TFB’s Concealed Carry Corner is brought to you by GLOCK