 Your Privacy Choices

Zeroing a rifle can be a long and tedious process. Without a proper zero, capabilities are significantly diminished. When zeroing an IR laser it can be even more difficult as visibility is reduced throughout the process due to the process requiring night vision. When zeroing with NODs, shooting position is different than when using a red dot or scope. The shooter must look over the rifle to find where the laser is pointed and cannot rest their chin on the rifle.Telluric Group designed targets to help make the ir laser zeroing process easier.
Telluric Group Zero Target
The Telluric Group Zero Targets are each designed for a specific laser and laser orientation on the firearm. The targets are available for the ATPIAL-C, CQBL, DBAL A2/A3, DBAL I2, DBAL D2, OTAL, PEQ-2, MAWL, PEQ-16, and the new DBAL-I2 with illuminator. Each of these models are available in 3, 6, 9, and 12 o’clock variants. Quantities of 10, 50, and 100 targets are available.

The Telluric Group targets do all the math for you by simply having the user purchase the target for the correct laser and placement on the rifle.
Laser Zero Theory
There are two predominant theories to zero an IR laser. These are the converging laser theory and the parallel zero theory. The converging theory is very similar to how red dots are zeroed.
Converging Laser Zero
Using a converging theory, the point of aim will directly meet with the point of impact at the decided zero distance. The converging method is commonly used with red dot sights and magnified optics.

While exaggerated for illustration the barrel angles up so that the path of the bullet (blue line) will intersect the path of the red dot (red line). The distance where this intersection takes place is the zero distance.
As you can see from the picture, the line of the red dot and the line simulating the path of the bullet from the barrel meet in two places. Normally the closest intersection is considered the zero distance. When zeroing lasers this can be somewhat different, as lasers are often not directly in line with the 12 o’clock position on the barrel and are offset as seen in the photo below.

Here we see a B.E. Meyers MAWL mounted at about the 1 o’clock position.
To obtain a converging zero, simply look through a well zeroed red dot and adjust the laser to meet with the red dot. Fine tuning can be done after testing point of impact in relation to the laser, but meeting the laser with the red dot is a good way to ensure the shooter is on paper.

As you can see from the picture, the height over bore shrinks until the zero point, but when traveling past the zero point the distance between the point of aim and point of impact grows. If the engagement happens close to the zero distance this is not a major issue, but longer distances that are far beyond the zero make the converging laser zero method less effective. The converging method works well for those setting their weapons up for closer range engagements and is often used by civilians and Law Enforcement.
Parallel Laser Zero
Using a parallel laser zero sets the laser parallel to the bullet path. This presents some challenges when attempting to zero. The shooter must account for both the proper vertical holdover and the proper horizontal holdover. That is another great benefit of the Telluric Group targets as they have already done the math for each of the lasers to account for where the impacts should be in relation to the laser.

Here we see how the path of the bullet stays parallel to the path of the laser.
By using a parallel zero the bullet path follows the path of the laser as opposed to moving in opposite directions after the zero point. This makes shooting at extended ranges much easier and is often the zero used by the military.
Zeroing Process
Zeroing with the Telluric Group Laser Zero Targets makes the process easier. The targets require the shooter to aim the IR laser at the center of the target. The center is a reflective square. Often when zeroing a laser it is difficult to tell where the center of the aiming laser is due to the bloom. The Telluric Group targets utilize a small reflective tape that is ½” squared. This reflector makes it obvious when the aiming laser is on target and then the user simply adjusts their point of impact to the colored circle that represents their preferred zero distance. The colored circles correspond to the proper offset for the aiming laser model and include proper point of impact for a 100, 200, or 300 meter zero.

The reflective square makes it easy to tell when your laser is on target. Also notice the different colored circles, each referencing a particular zero distance.
Dusk is the best time to zero outdoors. As lighting conditions are very important when using night observation devices, it also will reduce the bloom of the laser on the target. Just like when zeroing other optics it is important to get a stable shooting position to ensure the most reliable zero.
Prone can still be used for a good stable position for zeroing IR lasers.
While I achieved my zero using the magazine as a monopod, having a bag to rest my rifle on would have likely resulted in a better zero.
Adjustments and Confirmation
Zero in 3 to 5 round groups. The 5 round groups allow for more data and better confirmation. Utilizing proper shooting fundamentals will be essential. After each group, make adjustments as needed. The target has 1 centimeter squares that translate to 1 click adjustment at 25 meters. Telluric Group recommends once a good zero has been achieved to try a clean target and verify with 4-7 rounds. Ballistics can change based on ammunition, barrel length, and numerous other factors. It is important to confirm the zeros at the distance chosen such as 100, 200, or 300 meters. Issues hidden when shooting at 25 meters are more obvious when shooting at distance.
Final Thoughts
So far the Telluric Group target has proven to be the best option I have found for achieving a parallel zero. The reflector can be somewhat difficult to find at times, but the size is perfect for attaining the level of accuracy needed for a reliable laser zero.

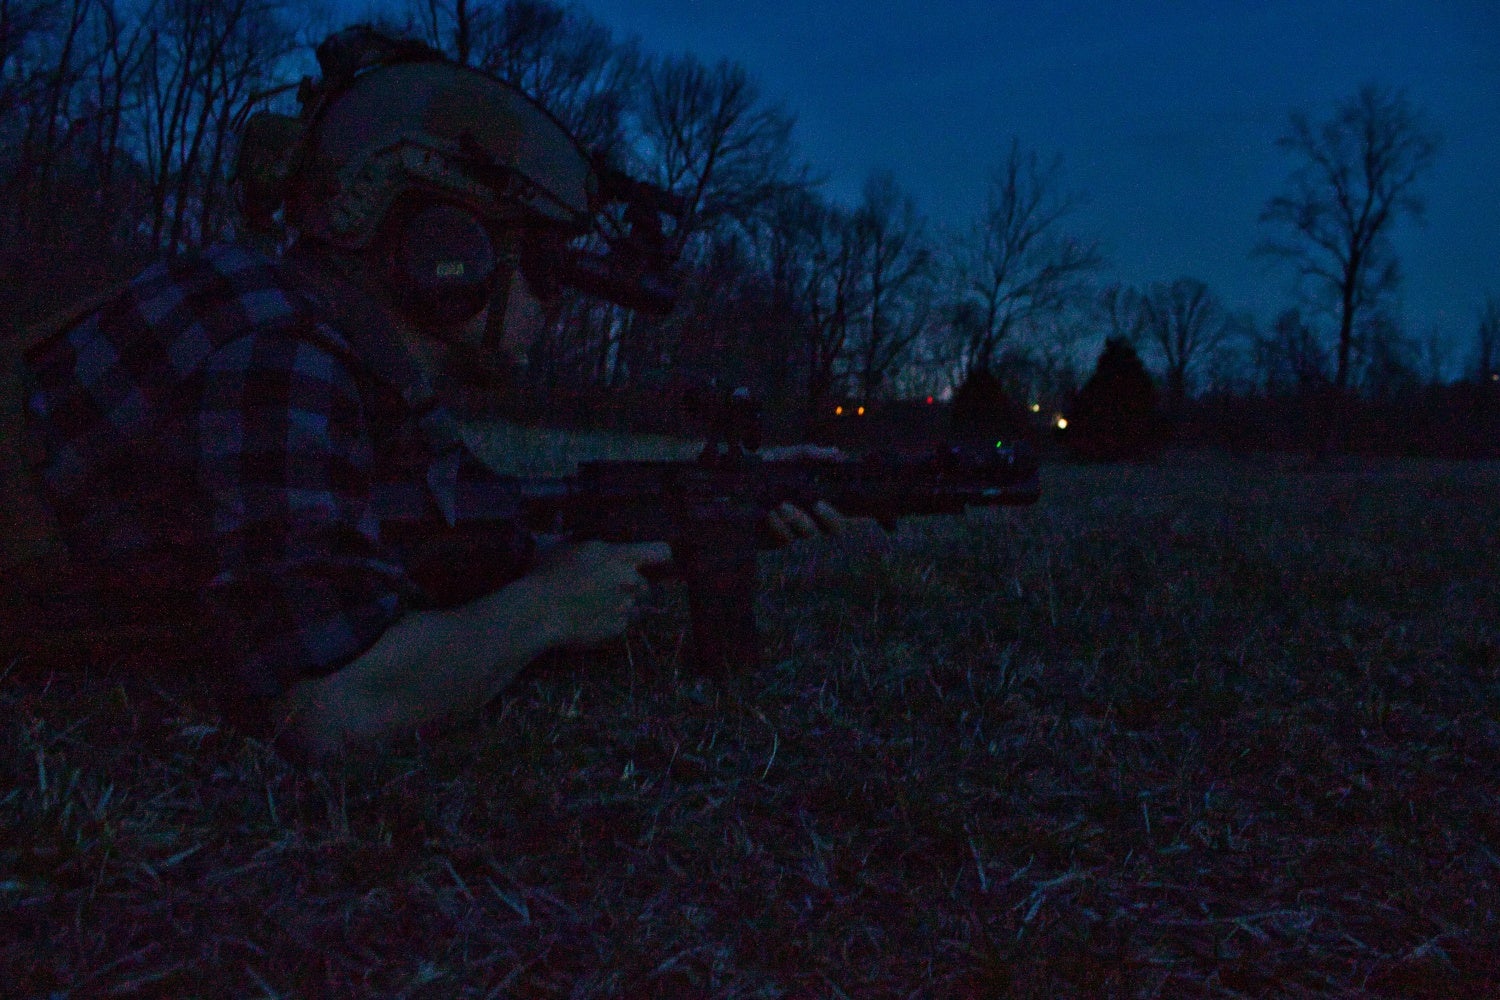
With a quality laser and illuminator it is possible to engage out to significant distances. The Telluric Group targets truly help refine the IR zero for greater precision. This photo was shot with a full spectrum camera allowing for the camera to pick up on the IR illuminator, normally invisible to the naked eye.
All the pictures in this article were contributed by Marlena Michael Photography