 Your Privacy Choices
Though I’ve been involved with shooting sports for a long time, Chronographs never really interested me before. When people were setting them up on crowded range days, it could be a big time-killer for everybody else while the user tried to get the shades right, get their equipment in line, and check and recheck the spacing. Moreover, they were very sensitive to light, could be knocked over by wind, could be thrown off by bright light reflecting off the range surface, the displays could be hard to read, and some models were useless indoors. I also didn’t compete frequently enough to require reloading equipment, and didn’t need to download ammunition close to velocities that might be borderline in order to stay competitive at my level.
Around the same time I heard of Magnetospeed, information emerged about a Radar-based chronograph that did not have to be attached to the firearm. Such a chronograph would fit my needs a bit better, as I didn’t want to attach something to my barrel that could be damaged by a brake or throw off my POI.
Recently, I’ve been trying to increase my own level of precision in known and unknown long range rifle shooting. I also want to provide more information in my articles in the form of ballistic data particular to the firearms I will be reviewing. Though I have a pretty well-developed DOPE book with lots of data for my various firearms, I was aware that the velocities stated by manufacturers can vary greatly depending on one’s individual firearm. The same can be said of reloading manuals. Some manufacturers like Buffalo Bore use actual firearms instead of ballistic test barrels to chrono their ammunition. Velocity measurement methodology varies greatly in the industry, however, so sometimes it’s hard to tell at what density altitude the measurements were taken or what barrel length they used.
Another issue I’ve run into a few times is that velocities can vary greatly round to round due to manufacturing errors. I’ve seen this happen primarily with initial production of a new load, even from major manufacturers. This can lead to accuracy problems downrange, or blown primers/cases. Thankfully, my business partner was able to diagnose the problems with his chronograph, and got the sloppily loaded ammunition swapped out for new product.
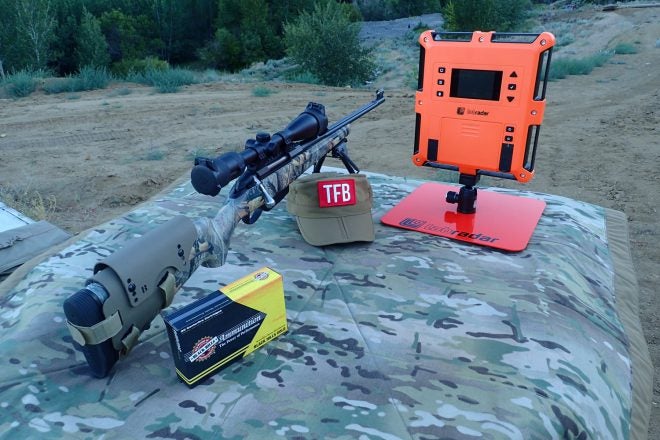
All these factors led me to finally seek out a chronograph. The LabRadar had recently become available, and I was very interested in trying one out. Here was a chrono that I could set up in seconds, record data, and review in the comfort of my own workshop. Before trusting the unit, however, I had to put it through it’s paces and test it out thoroughly.
SETUP:
I did give the LabRadar manual a read-over before heading to the range. It was well laid out, easy to understand, and brief at 23 pages. One area where the LabRadar really shines is it’s customization of data. There are many options one can adjust when setting the LabRadar up, listed here:
- Velocity Units
- Distance Units
- Weight Units
- Type of projectile (Rifle, pistol, archery)
- Offset from muzzle (6″, 12″, 18″)
- Measurement distances
- Projectile weight in grains or grams (In order to calculate power factor or kinetic energy)
- Arm Time of the Radar
- Screensaver
- Trigger source+sensitivity level (either microphone or with archery/slow moving projectiles, doppler)
- Transmission Channel (In case someone else is suing a LabRadar at the range)
- Transmission Power (EU models are permanently set to low)
Though the options are numerous, operation is pretty simple. There are only 8 buttons in the user interface. I’m not going to delve into the weeds on every single option one can dial-in, but I’ll run through setting up a normal use of the LabRadar.
- Align LabRadar to where it will be within 18 inches side to side of the muzzle and slightly rearward of the muzzle with a rifle, even with the muzzle if with a handgun. (A barrier is needed between especially vigorous brakes or heavy-caliber firearms and the LabRadar)
- Power on unit
- Press “Series” button to create new series
- Adjust distances at which you desire measurements (up to 5, not including at the muzzle)
- Adjust projectile weight
- Press “Arm” button twice to arm unit and commence fire.
The LabRadar can run on 6 AA batteries or an external USB power source. I used AA’s for all my tests, as they were only 3/4 depleted after 4 hours of range time. The whole setup tat the range took me less than 5 minutes for the initial setup, and 2 minutes to adjust between different firearms/loads.
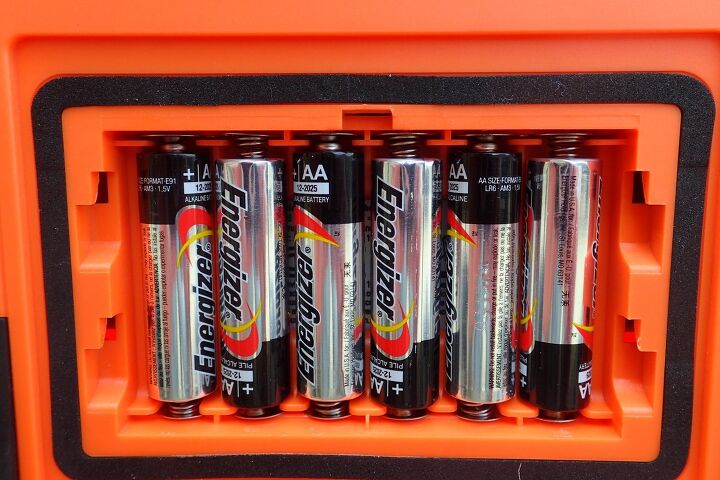
The AA’s worked great over 3 different range sessions for a total of 6 hours with 3/4 battery power remaining.
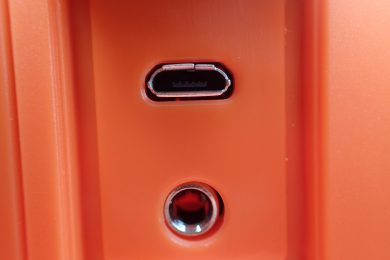
I didn’t end up needing the USB port, but it’s a nice option for power via USB power packs, solar-recharged batteries, etc.
RANGE TIME:
For testing, I used a wide selection of firearms and cartridges. The LabRadar also can measure velocities of slow-moving projectiles such as arrows, but in the interest of fun I used an XS-Products Can Cannon to test this function.

Clockwise from top: PKM 7.62x54R, Ruger LCP .380, Walther P22 .22lr, FN Five-seveN 5.7×28, Can Cannon 12oz, FN PS90 SBR 5.7×28
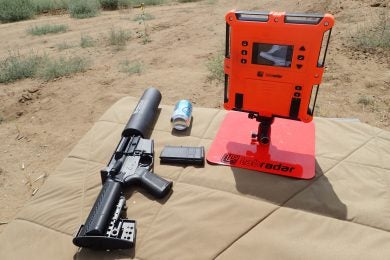
I placed the LabRadar on the bench next to the firearms and used the optional bench plate as a mount. One can adjust the position of the unit 4 different ways with the mount. The unit needs to be aimed at the direction as your target. When doing so, I found the LabRadar’s sight notch a bit lacking. I may have to attach a better sight in the future.
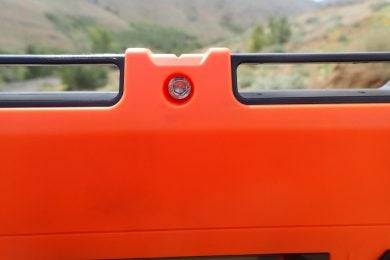
This tiny notch doesn’t function super great as the sight.
I used the LabRadar at the range on both clear and smokey days. The particulate matter from the smoke did affect the unit somewhat, as longer range measurements were not registering. The maximum measurement range per projectile diameter is as follows:
- 5.56mm: 60 yards
- 7.62mm: 100 yards
- 9mm: 130 yards
Using the LabRadar in “Archery” mode via the Can Cannon was hilarious. It did work as advertised. Those 12oz projectiles were screaming along at an average of 109fps!
Thanks to LabRadar, now I know the true ballistics of the Can Cannon!
I also used the LabRadar at dusk, where a photo-reliant chronograph would be useless. The unit functioned perfectly.
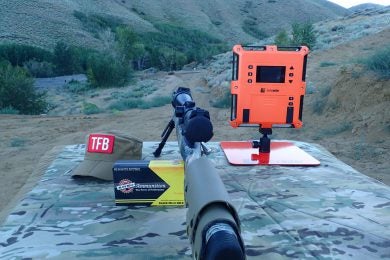
Setup for some dusk/low light shooting
OBSERVATIONS:
Small sample of data collected (average fps)
- PKM: 2784
- Can Cannon: 109
- PS90 w/SS192: 2384
- Five-seveN w/SS192: 2077
- Walther P22 w/subsonic: 901
- Ruger LCP .380: 1130
- Tikka T3 .300wm: 2932
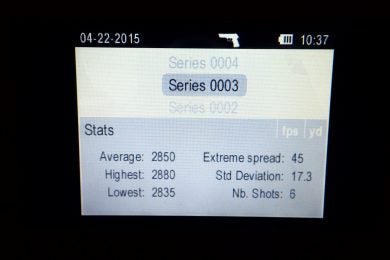
Display screen of the LabRadar. Yes, I didn’t bother to set the system time/date correctly yet.
Overall, I was very happy with the performance, ease of setup, versatility and ease of use of the LabRadar. I did, however, encounter some issues. When shooting the Five-seveN, I selected handgun mode, and got grossly incorrect velocities. For high-velocity handguns, the rifle setting is needed. I also noticed extreme spreads and standard deviations were higher than what they should be in some strings. I concluded that it was due to not having the muzzle in roughly the same spot relative to the chronograph for each shot, and corrected this error moving forward. Shots also failed to record if I shot too rapidly. Two seconds between shots seemed to work just fine. Overall, I had 5 out of 140 shots fail to record over 14 series. In my estimation, that’s a pretty good success rate.
One other potential shortfall of the LabRadar, especially if one shoots at a crowded range, is that the microphone can pick up other shooter’s shots if the sensitivity is not dialed in perfectly. The unit can also become confused on a crowded range by multiple projectiles downrange in the cone of the radar signal. Overall, it’s better to use it during slower range times.
CONCLUSIONS:
Despite a high investment cost (They were going for $560.00 on Midway as of writing this article), the LabRadar offers one of the quickest setups of any chronograph, especially when using multiple firearms. The user interface is also very easy to learn and stores a ton of data that one can review at one’s leisure. I’ve enjoyed applying the data, and have used it to make a DOPE card in .300wm for this fall’s hunting season. I’ve tested the data out to 800 yards, and it was dead-on. For my own purposes, I do believe LabRadar fits the bill quite nicely.
Pros:
- Quick and easy setup
- Stores a ton of data
- Good battery life
- Don’t need to go downrange to setup or take down
- Can use indoors or without direct sunlight
- 6 measuring points downrange for greater precision vs other chronos which have 2 or 3.
- Doesn’t affect POI
- Calculates KE and Power Factor
Cons:
- Expensive
- Emits radiation (when armed/measuring a fired projectile)
- Susceptible to some signal reflection/weather conditions
Thanks to Aaron Hughston Shooting School for range time