 Your Privacy Choices
[ Steve says: This is a guest post written by Josh ]
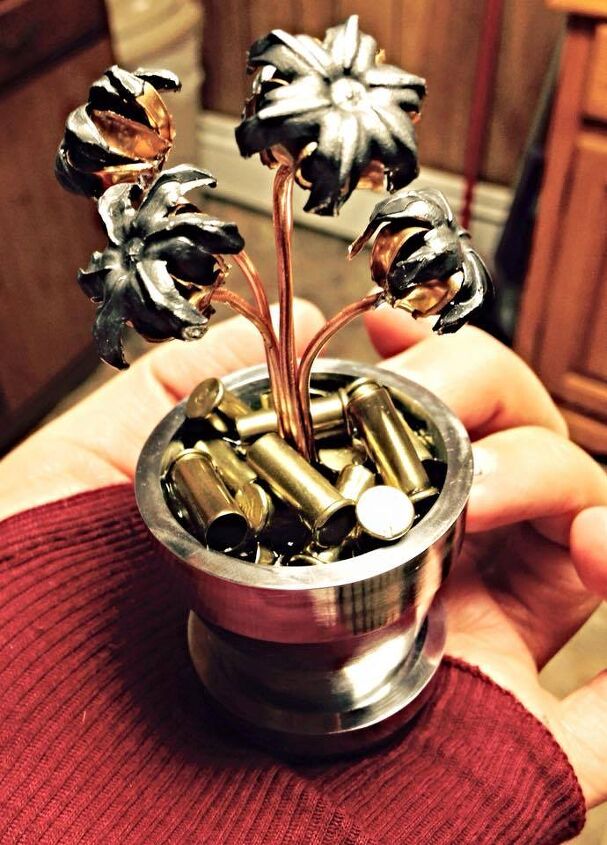
This is a Valentine’s day gift I made for the girlfriend, a miniature flower pot and flowers made from recovered Federal HST pistol bullets. The pot was turned from 6061 aluminum on the lathe at my gun shop.
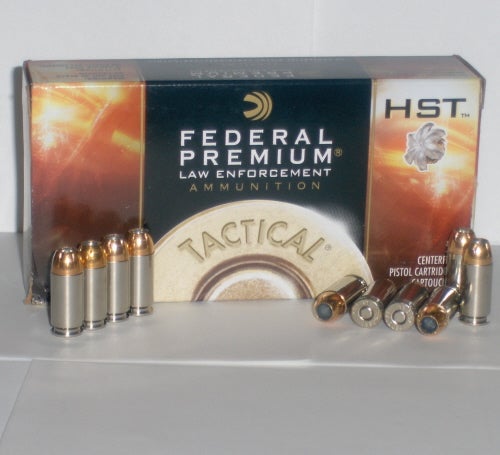
I started out with a box of Federal 9x19mm HST 147gr pistol ammunition. This was a box of 50 rounds purchased at the Gun Bunker in Shrewsbury PA for $35 plus tax. I fired 6 of these cartridges into a 30″ tall trash can filled with water. I did this from an elevated firing position, striking the water perfectly perpendicular. I used a Beretta 92FS Inox pistol with a 5” barrel, and a Freedom Armory Machine Works Grenadier 45 suppressor (as to not alarm the neighbors). This caused the hollowpoints to expend nearly perfectly, with nothing to deform them before they were fully decelerated by the water. One of the six did not expand, and was discarded. A firearm with a significantly longer or shorter barrel would have probably affected the expansion. I was about 10 feet above the trash can, but I still managed to get splashed from this.
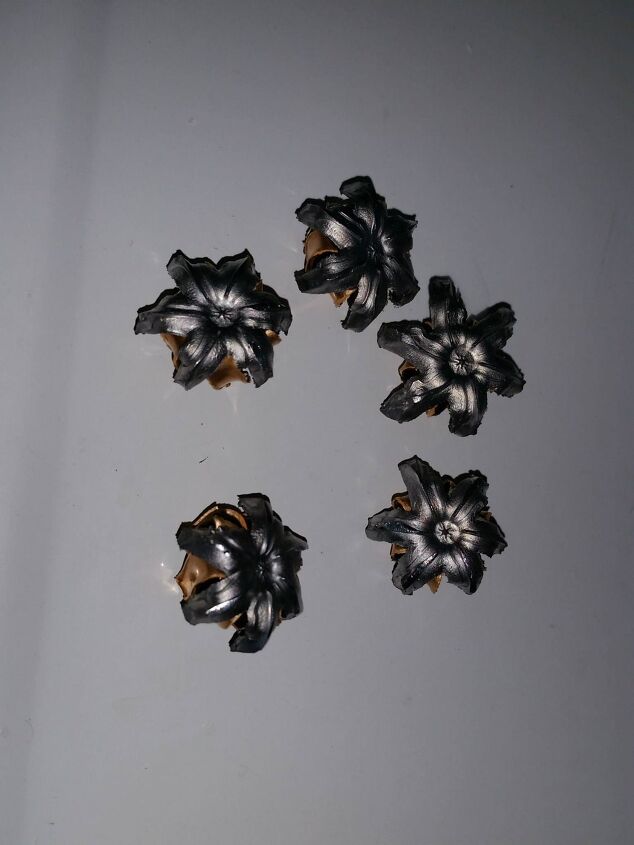
The recovered bullets were then left in a vibratory tumbler with Lyman treated corncob media for about 8 hours. This helped to brighten the copper some, and it also smoothed out the lead a bit. If you wanted the lead to look slightly more jagged and bumpy, then I would cut this time down to about 2 hours.
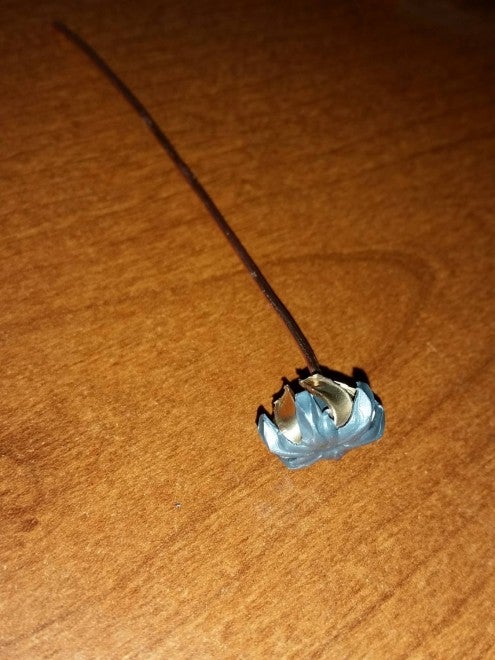
The bullets then had the “stems” attached by soldering. I used 12 gauge Romex household wire that I stripped the jacket off of. There was a considerable amount of metal to heat up here, and all the copper transferred the heat quickly. I had to use a 40W electric iron to do this, anything less would not have worked.
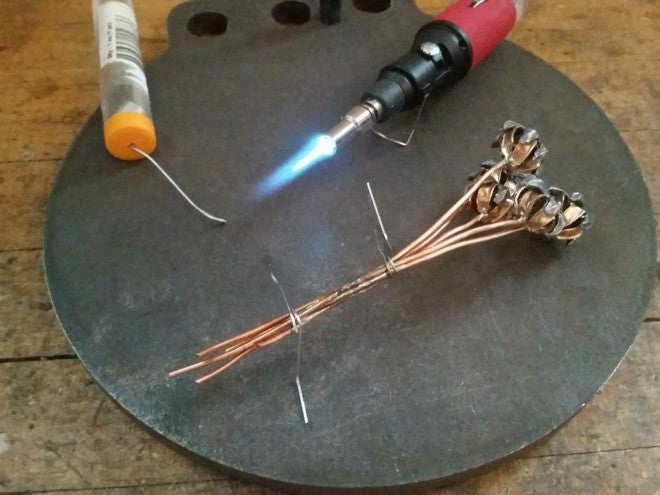
Once I had the 5 “flowers” completed, it was time to solder them all together. I used two small paperclips to tie the bundle of flowers together to prepare them to be soldered. I tried to use my 40W electric soldering iron, but there was just too much metal which was conducting heat too well, and I couldn’t get a good solder. However, my RadioShack butane soldering iron / torch did the job quickly and easily. After the bunch was soldered together, I trimmed the excess off with a Dremel and a cut-off wheel. The bunch of flowers were then articulated into position by bending the stems by hand. Lastly, the flowers were sprayed with clear gloss enamel, to prevent the copper from tarnishing over time.
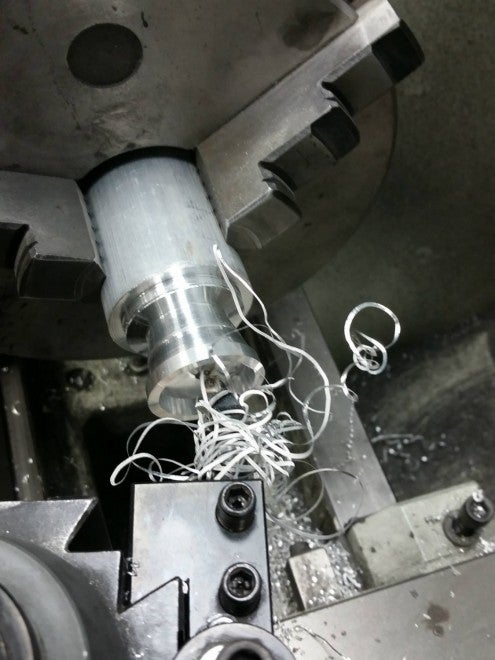
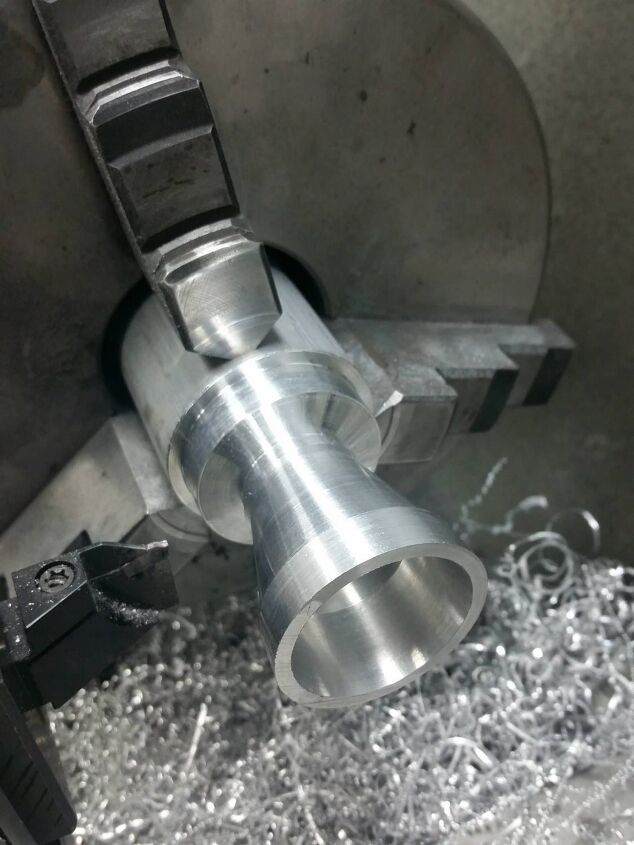
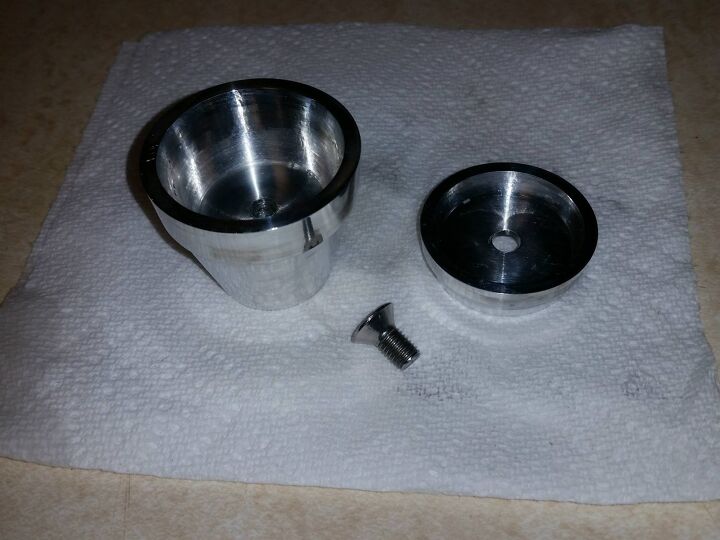
The flower pot and base was made out of 6061-T6 aluminum round stock. The cost of this would probably be about $4 worth of material. I tried to cut the parts out to similar ratios and angles as a common terra cotta flower pot would be. The pot is 1.75” in diameter at the widest point. There is a 5 degree taper on the rim of the pot and base, and a 15 degree taper on the bottom portion of the pot and base, as well as the inside of each. The two pieces are held together by a 5/8” long 1/4×28 stainless steel machine screw. The flower pot was drilled out with a #3 fractional drill bit (0.213”), and tapped by hand. The base was drilled out with a ¼” (0.25”) drill bit, and then counter-sunk at 45’ so the screw would sit flush. I used some medium strength thread locker when assembling it for good measure.
The flower put and base was de-burred with 2000-grit sandpaper. It was them polished with a Dremel 8000 rotary tool using Ryobi black emery metal polish at 25k RPM. This process took longer than any other part of the project, because of the need to stop frequently because of heat buildup in the pot and base. After a minute or so of polishing, I couldn’t hold onto the parts anymore, and had to let them cool. I sandwiched them between two other aluminum flats to draw the heat out quicker. After the material was sufficiently polished (it wasn’t perfect), I cleaned the polishing compound off with KleenBore Gunk-Out gun cleaner/degreaser.
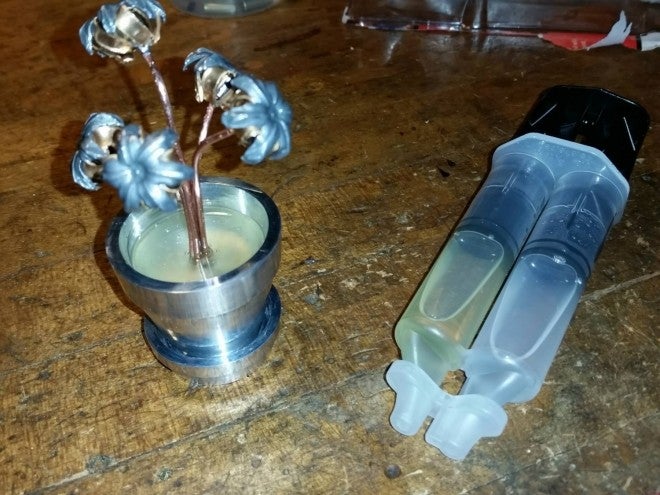
Next was to prepare the fired .22lr cases to be used as “gravel” or “soil”. There are 20 of them total used in this project. I cleaned the cases in the same rotary tumbler with Lyman treated corncob media. The cases were then placed on pieces of upright Romex wire, and sprayed with clear gloss enamel. This should keep them from becoming tarnished over time.
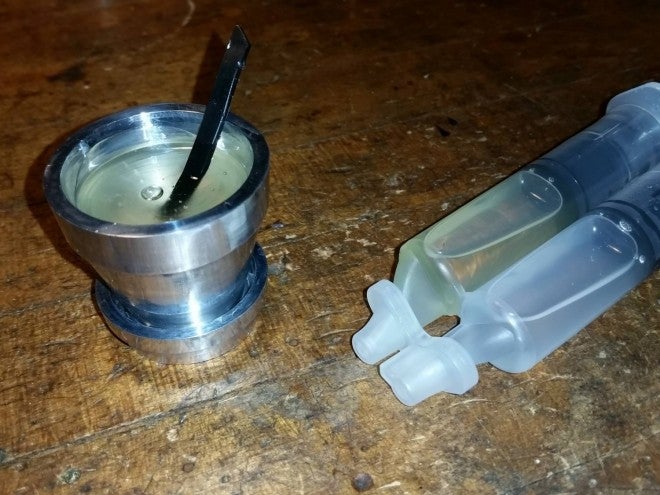
Now it was time for the final assembly. The flower pot cavity as mostly filled with clear two-part epoxy, and mixed. I squirted the epoxy directly into the pot prior to mixing, so that I would not drip any onto the pot when attempting to transfer it. The flower bunch was then sunk into the epoxy, and the .213” hole in the pot held it upright. I then added the polished and enamel-coated .22lr casings into the pot, trying to arrange them as I see it. There isn’t too much epoxy to be seen in the final product, the cases just barely cover it. The epoxy sets in about an hour.
There you have it!
Steve says: what a fantastic valentines gift. I wish I had half of Josh’s creativity!