 Your Privacy Choices
At the risk of starting a religious war, today I want to write about custom handgun modifications. I am of the mindset that once I have bought something, it is mine. I also believe that most things bought “off the shelf” are a great starting point, but rarely the final product I want to live with. That said, I like modifications to look “stock”, as if the product came from the factory that way.
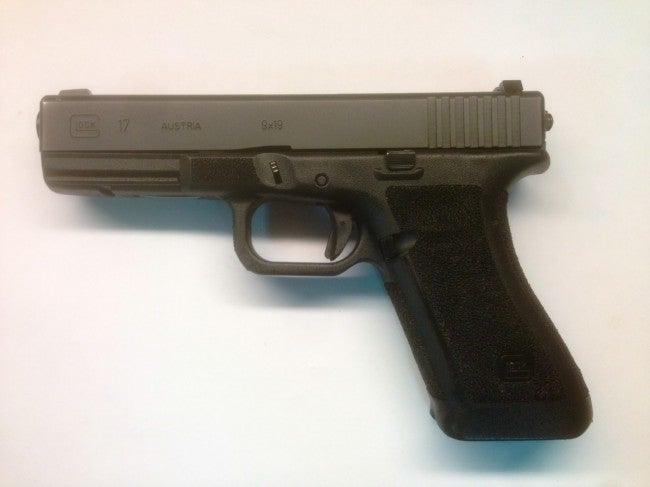
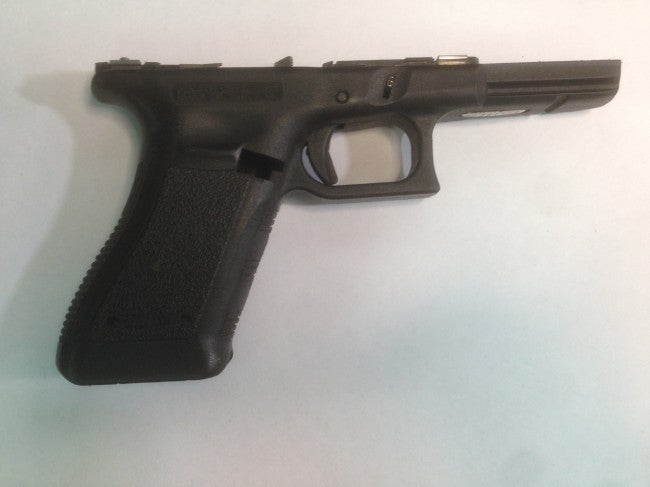
I love my Glock 17. I’ve had it since 1999. I have truly put countless rounds through it. Over it’s life I have replaced a couple of slide springs, added an extended magazine and slide release, and a Clipdraw. I can recall only one failure-to-feed (and that was after running it for somewhere around five thousand rounds without cleaning it). It has been the most reliable piece of kit I have ever owned.
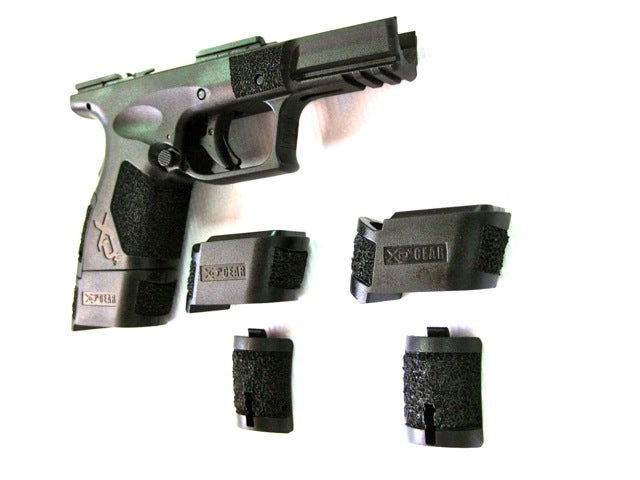
My one complaint is that the grip has always annoyed me just a little (which is something I’m sure many Glock owners can attest to; and a whole Glock-clone market has addressed). The one piece polymer frame is not something that can be easily modified with replaceable back-straps (until the Gen 4), and slip-on grip sleeves don’t really fix the problem either since they add more girth and mass. I am by no means a competition shooter, so shaving time off of drills is really not something that is a huge concern of mine. My interest is in improving functionality.
Enter the practice of stippling. I’ll admit that I briefly considered doing it myself. I read a bunch of articles on the web and watched some youtube videos. And then after a hearty laugh at myself I decided to consult an expert. Seriously, when you look at the sheer number of fails that people admit to (by taking and posting pictures), and some of the hideous things people have done to their firearms, you should immediately start questioning what it takes to do it. Sure you can do it with a soldering iron and some sandpaper while drinking your favorite chilled beverage and watching a YouTube tutorial, but your results will likely be as noteworthy as in the previous link.
Given the potential to ruin a $500 plus piece of gear, or spend countless hours practicing on scrap plastic laying around, paying someone seemed to be a much better choice for me. It turned out that we have a local shop, here in Albuquerque, New Mexico, that does a lot of custom work: BMC Tactical/Warrior Steel. They have a number of talented armorers and, quite frankly, artisans. Their services include anything from performance modifications to custom paint and enameling to, you guessed it, stippling. They also work on both local and out-of-state firearms. Their website really doesn’t do justice for what they offer.
So, taking a chance, I drove over to their shop for a visit and to inquire about stippling. I was referred to Luke Fraser, the guy that does the work. I let him know what I was looking for and I also voiced my concerns having seen warped frames, through-and-through holes, and general examples of poor work on the internet. He laughed and then invited me to come see the shop and some examples of his work–basically his artist’s portfolio, which he graciously allowed me to include below.
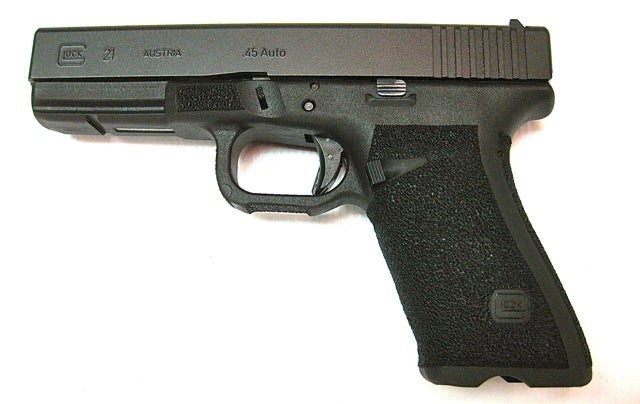
Glock 21
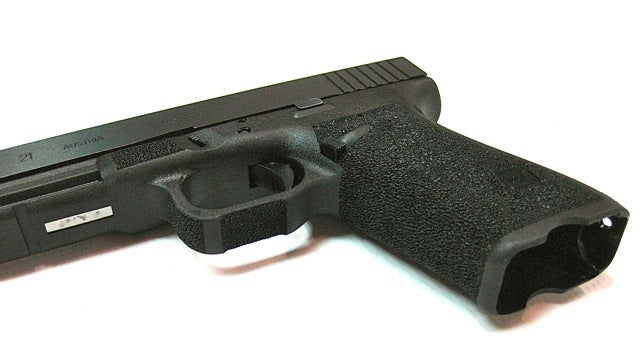
Glock 21 (Alternate)
Glock 36

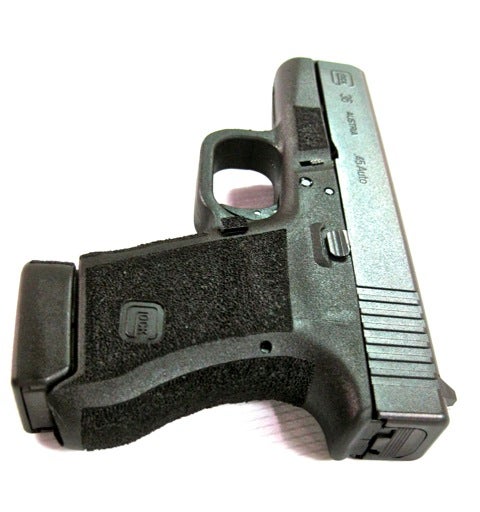
Bodyguard
Springfield XD
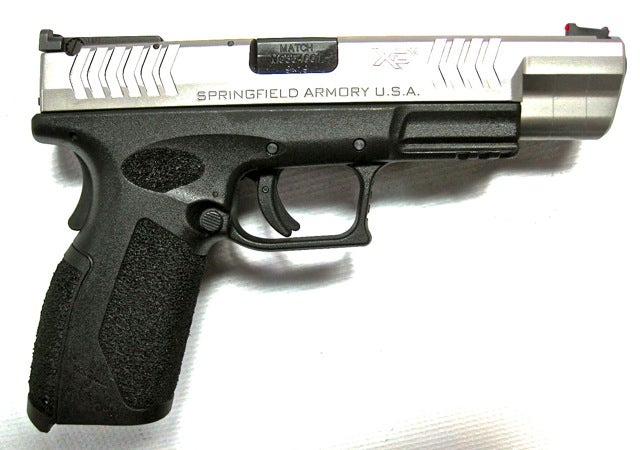
Springfield XD (alternate)
I asked Luke to explain the process and describe what set his work apart from DIYers. What he first explained was having a plan. Apparently you can’t just heat up a burner and start stippling away… Luke said that most of the work he does is to improve upon the frame while maintaining as “factory” a look as possible. A number of his standard modifications include removing edges and surfaces that interfere with holstering/unholstering, improving the ability to obtain a proper grip when drawing, and texturing surfaces to increase the friction of the grip.

Tips used with burner for stippling.
The next key to doing customizations is using the right tools. Luke uses a wood burner tool (with adjustable heat) with a set of tips that he custom ground, a straight edge, a dremel, various grit levels of sandpaper, and the ubiquitous sharpie. The adjustable heat tool allows for working on a variety of different polymers (since not all frames are made of the same material), and the custom tips allow for cutting different shapes and textures. The dremel is for doing gross grinding and smoothing, while the sandpaper is for doing the fine tuning (and working on areas where a slip with a rotary tool could remove too much material). A simple straight edge, Luke explained, is also key. A lot of people use tape to delineate the areas for stippling, but the problem is that tape burns and requires you to maintain much more control (since the tape is just a visual indicator–not a physical barrier).
The final thing that identifies a functional and clean stippling job (and the thing lacking from most stippling work) is patience. Luke says that most jobs take him 8 to 10 hours. And given the clean looks of his work, and the attention to detail he applies, you can see the hours of practice he put in working on PMags and scraps of plastic to refine his skills.
BMC Tactical/Warrior Steel does about 40-50 stippling and modification jobs a year (in addition to other armorer jobs). The majority of work they do is pre-Gen 4 Glocks. Most people get the trigger guard “horn” removed, the trigger guard “undercut” deepened, a magazine release relief cut, back strap angle reduced, grip scalloping removed, and full texturing.
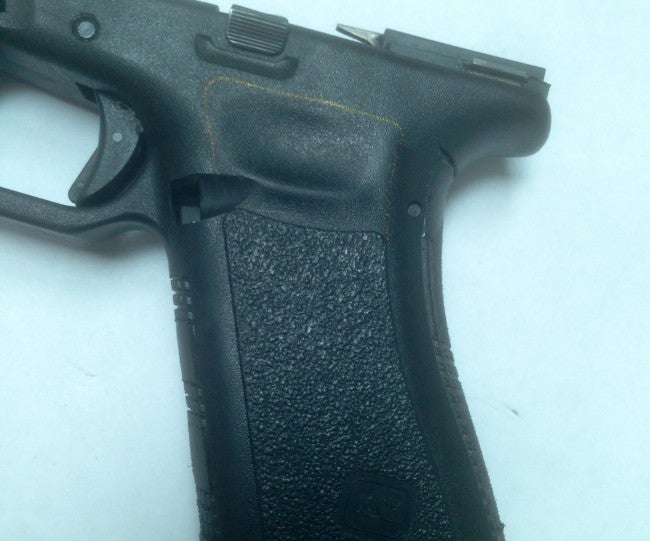
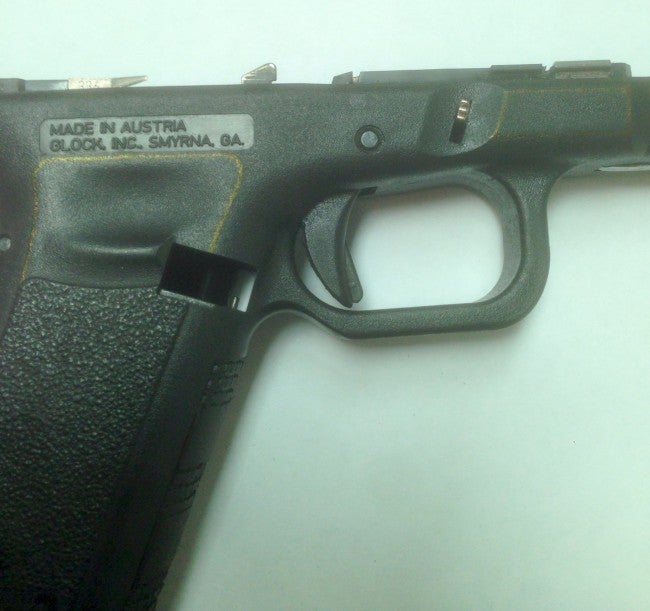
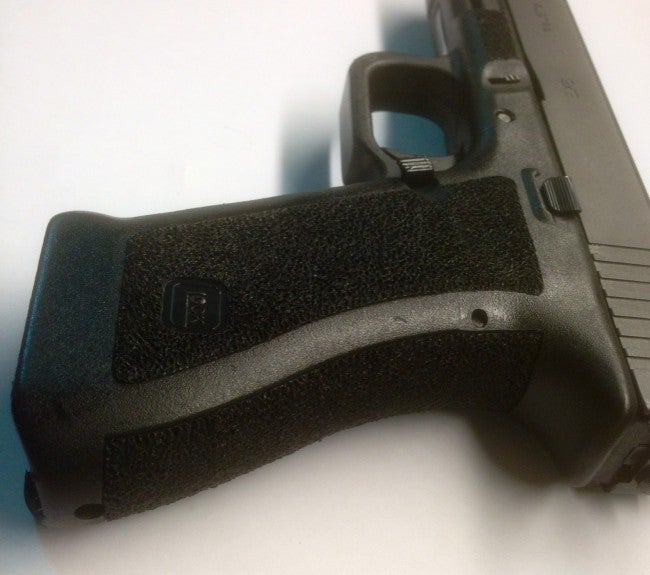
Luke’s openness and willingness to share his process and spend time discussing the rationale for why he makes the modifications he does convinced me to engage his services to modify my Glock. I have included the before and after photos.

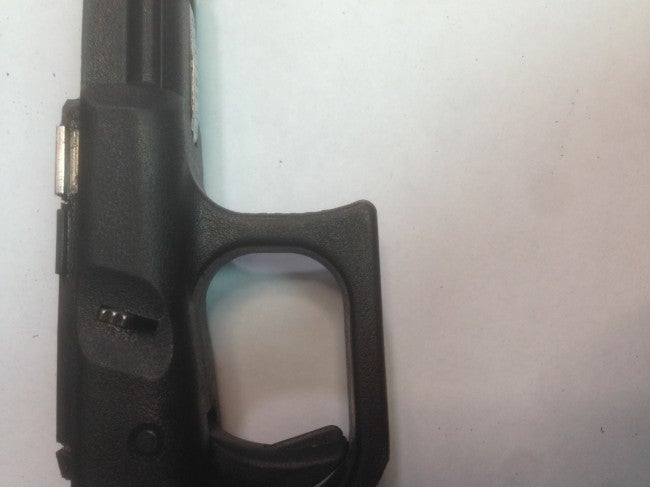
Trigger Undercut Before
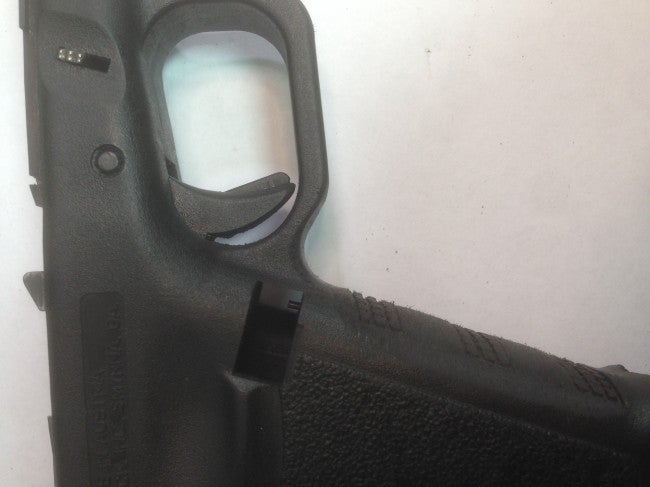
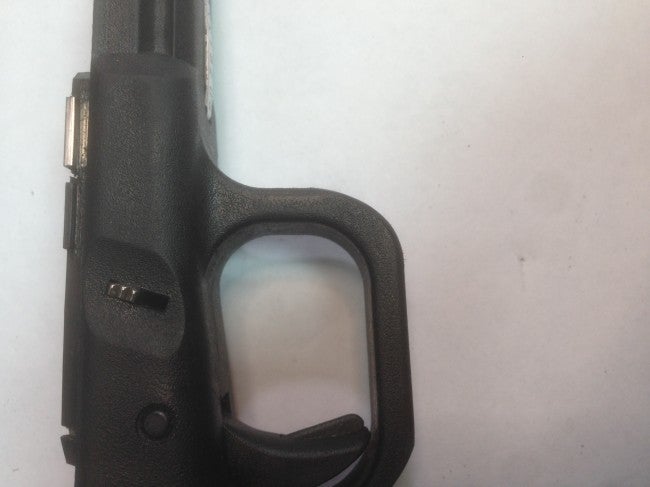
Trigger Undercut After
Trigger Guard Horn
Trigger Guard Horn Removed
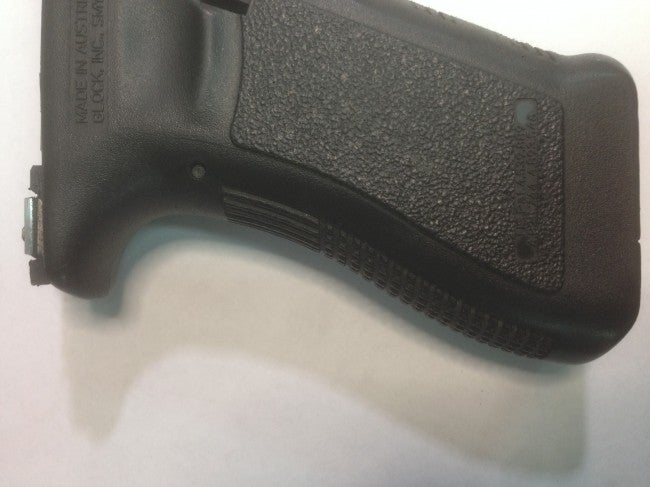
Backstrap Before
Backstrap After
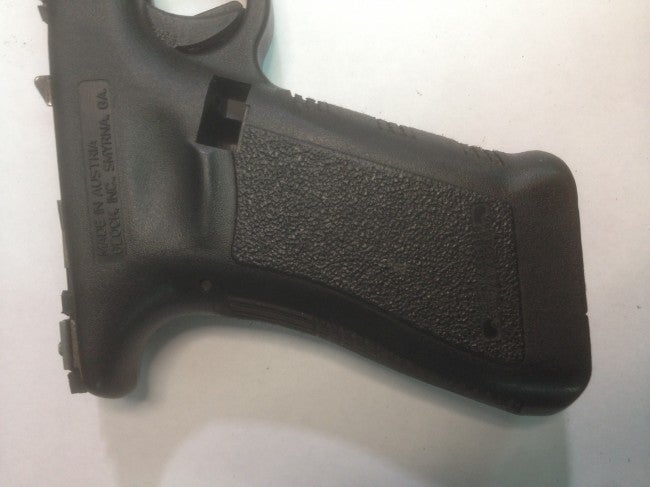
Finger Grooves Removed
Magazine Release Relief Cut
Work in Progress
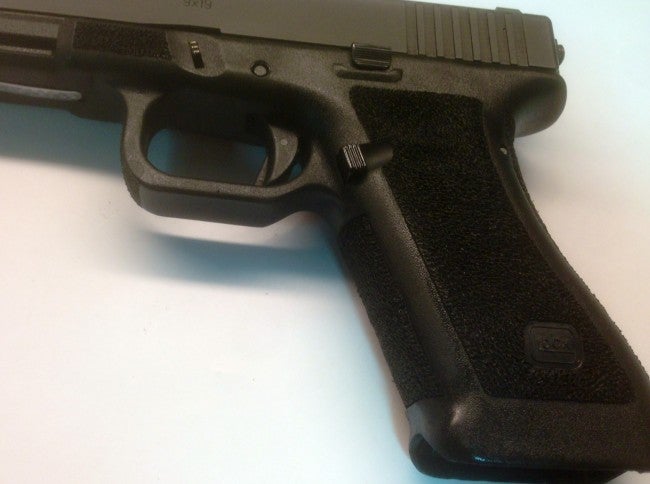
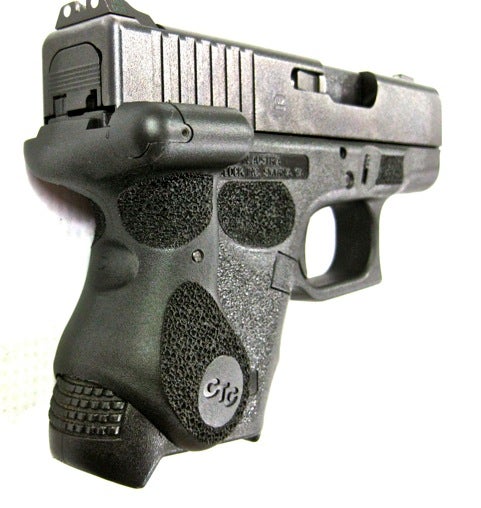
Completed Side View
Completed Back
Now the real question. Did it make a difference? I didn’t really have anything objective to measure before hand (like running a shooting drill in the rain before and after having the work done), so I will relay my subjective experience. The grip was definitely more positive. The texture was rougher than I was used to, but was in no way made unpleasant to shoot. I found the overall form factor to be more comfortable with the reduced backstrap and the higher undercut at the rear of the trigger guard. The removal of the scalloping on the front of the grip allowed my fingers to rest more naturally–before my fingers would rest on top of the projections, not in the grooves. The magazine release relief cut (along with an extended button) made it easier to find and engage (I used to have to break my grip ever-so-slightly to drop the magazine).
One of the other armorers at BMC is a competitive three-gun shooter and he told me that the modifications Luke did actually improved his performance. He said he suffers from a sweaty grip (really, who doesn’t in the Southwest during the hot summer months?) and the texturing has enabled him to maintain a better grip. The undercuts and magazine release also contributed to a slight reduction in manipulation time which is important for competitions.
So, the moral of this little story. Can you modify your polymer frame yourself? Sure. And it may actually be functional and meet your needs. But will you have a weapon that “looks” like someone took a soldering iron to it? I like the fact that the modifications done by BMC Tactical/Warrior Steel did not detract from the “look” of my Glock. If I ever decided to sell it (yeah, right), I don’t think I would lose any value from this customization, and may even be able to add a little to the asking price.
I would say that having this work done has overall improved my Glock. I have always enjoyed shooting it; now it has some new life breathed into it. If you are thinking of stippling (or making mods to your frame) I would recommend going to a professional rather than doing it yourself unless you have the time to put in perfecting the technique. Personally I’d rather spend that time at the range.
* Disclaimer: I paid for this work with my own funds (this was not a comp) without any assumption of the direction of this review by BMC Tactical/Warrior Steel.