 Your Privacy Choices

Introduction by Steve: This is a guest post is written entirely by Y-Man. He has shown incredible ingenuity in a country that severely restricts the firearms and ammunition civilians can purchase. I have previously blogged about Y-Man’s exploits.
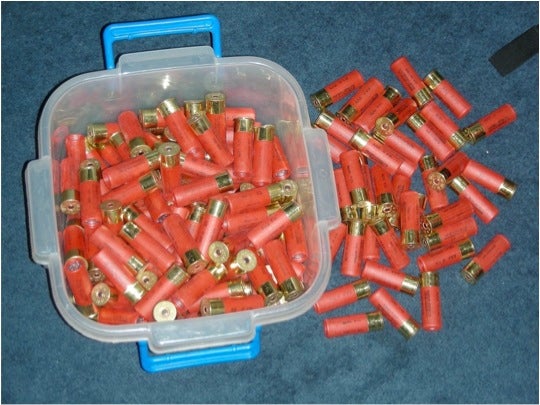
Imagine that all you could ever get in terms of ammunition is this:
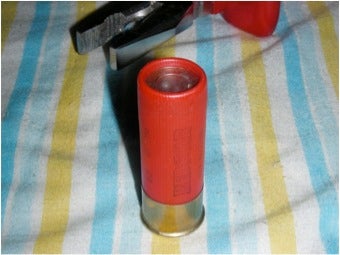
Ordinary 12 gauge, BB Birdshot.
Well, I got some of that, but was I satisfied? NO! I needed something I could really use to “Reach out and touch…” Something that would penetrate at range with some accuracy.
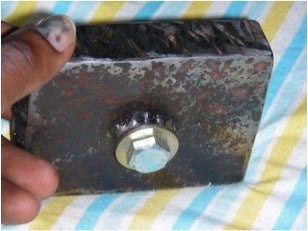
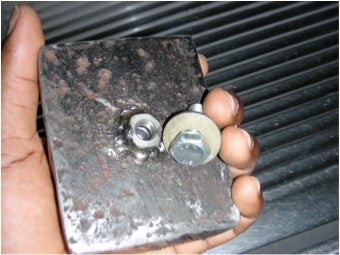
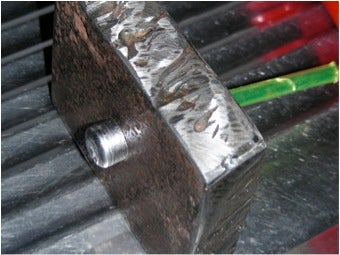
I got a mold fabricated: 25.3mm thick Steel, drilled through at 16.5mm wide, and drilled right through to the other side.
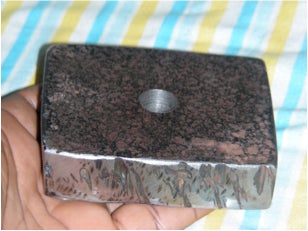
A nut was welded to the bottom carefully to take a 10mm bolt that would serve to create a hollow on the planned slugs.

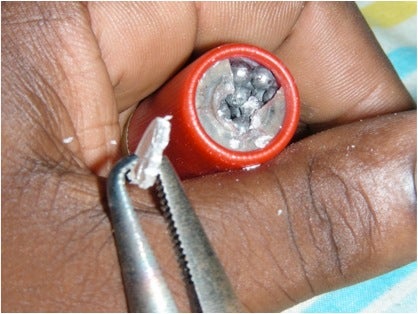
I opened up a 12 gauge BB shell using a basic knife to remove the lead shot.
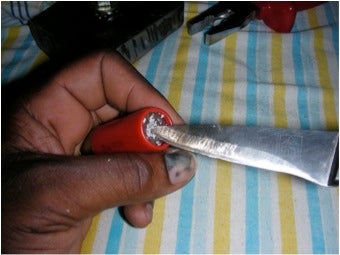

Using modified sharp-nose plies I removed the plastic cover of the Shell.

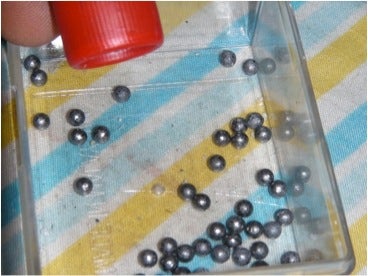
The lead shot is poured out and cleaned, and the plastic bits removed…
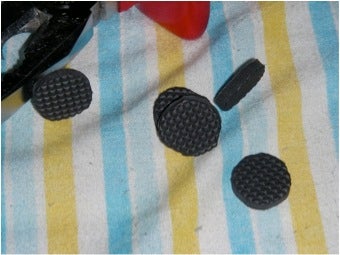
A felt wad is pushed into the empty shot-shell, seated very well into the shot-cup. The diameter of the wad is same with the Shot-Shell.

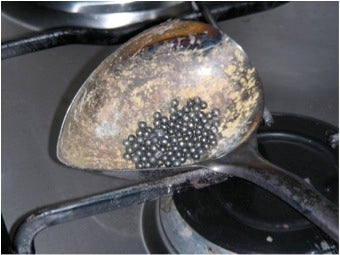
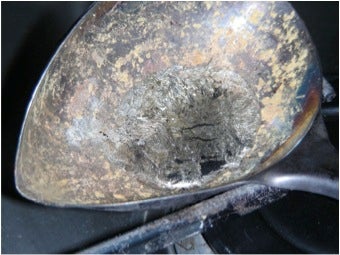
The Lead Shot is poured into a Ladle, and melted. Working with Lead is VERY hazardous: ensure eyes are protected, use safety gloves, ventilate properly!
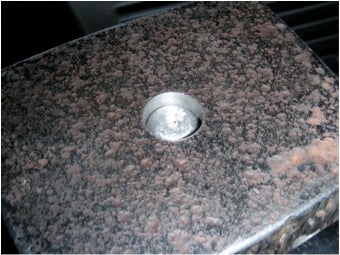
The Mold is carefully placed on a good flat surface.

Molten Lead is carefully poured into the mold.
The Bolt at the bottom is unscrewed carefully. NO wiggling it around!
Use a pointed item to push the cooled slug out…

You may have to knock it a bit to get it out…
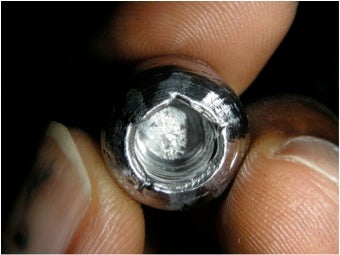
This is the produced Slug…

There is a correctly centered hollow. So centre-of-balance is forward, like a Shuttle-cock…
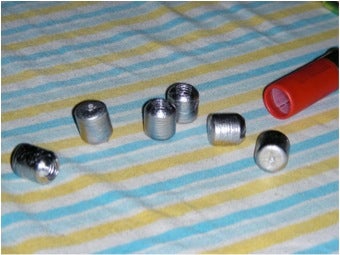
More pictures of the finished slugs. Nice factory-like finish…
Next: Insert the Slug into Shell case…

Some force is needed to get the Slug into the Shell-case. This is due to the Roll-crimp which was not touched originally…
You can see the Slug inside the Shell-case, centrally placed, snug against the crimp…

LAST STEP: Glue or epoxy is used to seal and waterproof the Shell-case properly. Left standing upright to dry/ cure.

Glue or epoxy is used to seal and waterproof the Shell-case properly. Left standing upright to dry/ cure.
Slug is ready to be FIRED!
I test-fired a few slugs today (16 August 2009)! Perfect performance (for what i had at hand…).
5 slugs fired at 30 metres (33 yards, 98.4 ft). Target was piece of metal plate about 1.5ft x 1ft, 2mm thick. 3” x 3” bullseye painted on.

Target taken at 30 meters distance.
Close up.
Distance Fired: 33 yards
Sights: Bead sight
Ammunition: 5 home-made slugs
5 shots on target. Not bad!
1 round high/ left
4 rounds in/ near the bullseye.
This looks like a 2” to 3” group at 33 yards!
I couldn’t wish for better from home-made foster slugs!

MASS PRODUCTION COMMENCES! LET THE ZOMBIES COME!! 🙂
—
Y-man
16 August 2009
Steve says: I big thank you to Y-Man for the excellent howto. His ingenuity is amazing and is an inspiration to me!