 Your Privacy Choices

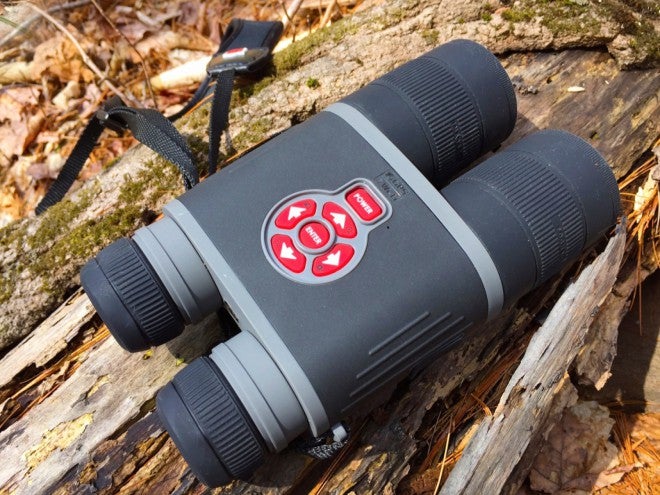
If you research traditional night vision devices online, you typically walk away with the impression that unless you spend upwards of $2,000, you are wasting your time and money. The problem with this theory is that, for currency-challenged people like myself, high-priced imaging devices are basically out of reach. And if you settle for an affordable Generation 1 (“Gen1”) monocular, you are buying a single purpose piece of kit that, at its best, can only give you a basic look of your surroundings at night. Here’s where the ATN BinoX-HD binoculars come in: you get a multi-function device that includes Gen1-style night vision at an affordable price.
ATN BinoX: In The Wild
Ok, before we talk about the features of the BinoX, let’s get a few things out of the way:
- The BinoX is not your typical night vision equipment. Although it has day and night capabilities, The BinoX use a charge-coupled device (CCD) digital sensor instead of an image intensifier tube (Gen1), micro channel plates (Gen2) or high sensitivity and improved frequency response (Gen3). All of these technologies enhance existing light and/or use an IR source to allow the user to see in the dark, but traditional night vision devices typically have better resolution (and a higher cost). The different generations of night vision technologies are complicated, so try not skewer me if I have messed up the explanation.
- The BinoX are not typical binoculars. Whereas binoculars use a series of lenses to magnify light, the BinoX use a sensor similar to one in a digital camera to zoom between 4 to 16 times the original image size – digitally rather than optically. What this also means is that the view using the BinoX eyepieces looks more like looking into a digital camera viewfinder rather than an edge-to-edge view seen in optical binoculars.
- The BinoX is advanced consumer-grade technology, but it has it’s limitations. If you want to zoom in on a coyote 600 yards away at night, you are out of luck. Professional-grade products that are capable of that type of enhancement start at $3,000 and go up from there.
So now that we’ve adjusted our expectations, let’s dig into the features:
- 4-16x Digital Zoom
- 1080P Digital Video/Image capture
- Day/Night Use
- WiFi Connection to iOS and Android Mobile Devices
- Accepts 4GB – 32GB SDCards
- Rangefinding
- Compass, Altitude, Velocity Readings
- Micro HDMI, Micro USB Connections
- GPS image tagging
- IR Illuminator
I have to admit, I came into this review slightly skeptical. Not because of ATN’s reputation – they are respected makers of serious night vision and thermal gear – but because I don’t usually care for multi-function devices. Pick one task and and do that task well. However, after carrying around the BinoX for a few weeks, I can definitely see the draw. Instead of packing my 10x monocular, night vision monocular, range finder and digital camera, I only had one device that also added WiFi and compass functionality. Pretty cool.

ATN Bino-X: NIB
Unboxing and Initial Start Up
The BinoX come nicely packaged in a protective display case that uses the tripod mount to hold it securely to a plastic base. Inside there are three C123 Lithium batteries, lens covers, a basic case and a padded neck strap. For better or worse, no microSD card is included with the BinoX (normally, when memory cards are included with a camera for example, most manufacturers choose a 1GB card, which is nearly useless). However, you are going to need to purchase a microSD card (for firmware updates and extra storage), which are reasonably priced these days – opt for at least a 16GB.
Installing the batteries is a simple task, just slide the protective cover to one side and line up the batteries in the correct orientation. Also, this is where you will find your device’s serial number when you are ready to register online with ATN.
The first thing you should do is update your firmware. As I mentioned above, you’ll need a microSD card to accomplish the update. Start by formatting your card with the BinoX – insert the card, power on your device and use the menu to find the ‘format SD Card’ function. After this is done, power down the BinoX, remove the card and using your laptop download the latest firmware to your microSD card. Replace the card into the BinoX, cycle the power and follow the instructions on the screen. Future upgrade request: allow users to upgrade the firmware using the mobile app over WiFi. More on the app functionality below.
Here’s my blanket notification for all newly-purchased equipment: Read the manual. ATN made the online manual for the BinoX easy to navigate. So use it.

ATN Bino-X: Batteries and Lens Covers
Display
Looking through the BinoX is similar to a heads-up display, with compass direction, tilt, angle of elevation, time and current magnification laid out on the sides of the display. The on-screen readings are both responsive and easy to read.
To get to the menu for settings and configuration, just press the round ‘Enter’ button in the middle of the arrow buttons. Use the arrows to scroll through the options, the last being the configuration screen for making changes to image and video resolution, formatting the microSD card, low light settings and other options. The menu is easy to navigate. Personally i would prefer to have a larger menu that took up more of the screen, but maybe my eyes are just getting old.
The display itself is crisp and clear with no lag between movement of the unit and movement on the screen. It’s not a high definition viewfinder, and some colors might have a slight bloom effect, but the BinoX screen is on par with digital cameras in the same price range.
Use the right objective adjustment to focus the image at different distances. Use the eye piece adjustments to focus the image to your eyesight.
Digital Zoom
At it’s core, the BinoX are digital binoculars. At the base magnification of 4x, the display is sharp, like a high quality digital video camera. To zoom in, just press and hold the top arrow. To zoom out, press and hold the bottom arrow.
As I mentioned above, the BinoX use a sensor to digitally magnify the image rather than an optical magnification using a series of lenses. Distortion is a fact of life with all forms of digital enhancement, and the BinoX zoom magnification is not immune. Once the user increases the magnification past 10x, the on screen distortion is noticeable – the image is both pixelated and blocky. If I had to pick only one criticism for the BinoX, the resolution of magnified images leaves something to be desired. However, I think this is a common issue with any device that uses digital magnification rather than optical magnification (like in Single Lens Reflex (SLR) cameras).
Image and Video Capture
Pressing the left arrow button takes a still image. Pressing the right arrow button starts a video recording. There is a small amount of lag between the time the user presses the button to take either an image or video. The lag can be distracting, but it’s not a deal breaker.
In the configuration menu, the user can change the image settings from a single picture for each press of the left arrow to a burst of pictures with each shot. I found the burst setting helpful, especially when trying to take pictures unsupported and trying to keep an object in frame.
Users can also change the video settings to take 1080P video at 30 frames per second (fps) or 720P at 60fps.
By default, the microphone is disabled for video recording to eliminate capturing noise from the area around the user when focusing on a subject at distance. If you want to record sound with your videos, such as narration or ambient natural sounds, navigate to the configuration menu an enable the microphone.
Here’s a short video I took of a Plover at about 60 yards on 6X:
Night Use
Using the menu, switching between day and night use is done using two clicks. At 4x, between 10 and 100 yards, the low light or night capability is impressive. Using either the green or white setting, the images are clear and detailed. Adjusting the left objective focuses the IR illuminator from narrow to wide, depending on the distance of your subject and your field of view.
Increasing the magnification past 10x at night the clarity of the image becomes challenging. The combination of low light with the digital enhancement creates distortion. Images in the viewfinder lose their clean edges and the distinctions between black and white areas become averaged-out grays. Although it would be easy to blame the BinoX for the poor image quality at these settings, remember, this is a digital image, magnified and enhanced at night. Devices that cost twice the price of the BinoX with less features will suffer similar results.
I preferred using the white setting for Night Mode. Everything seemed more crisp and defined.
WiFi Connection to Mobile Apps
I was particularly impressed with the WiFi and Obsidian App functionality of the BinoX. A connection is made between the BinoX and the mobile device by connecting via a direct WiFi network in your iOS (or Andorid) device settings. After entering the WiFi password, the mobile device is directly linked to the BinoX. Open the App and you are presented with three choices: Gallery, Viewfinder and Settings.
- In the Gallery view, the user can browse all the images and videos on the BinoX. Use the ‘Select’ feature to export one or more images from the BinoX to your mobile device. This process saves you the time of removing the microSD card and using a computer to copy your media.
- In the Viewfinder tab, the user’s mobile device can live stream the view from the BinoX onto your mobile device. This allows you to share the view with friends or family, or set up the BinoX on a tripod and monitor the area remotely. While testing this feature, I was able to setup the BinoX in outside overseeing a section of the woods, walk inside the house and upstairs and still had a clear picture. Very cool.
- In the Settings view, the user is able to change your BinoX configurations from your mobile device instead of using the menu in the viewfinder. Changes made on your device happen immediately on the BinoX similar to a remote control.

ATN BinoX: Settings on the device itself can be changed on the fly using the ATN Obsidian app.
Range Estimation
The BinoX use a different technique for calculating range estimations from standard rangefinder devices. Using a preset measurement in the settings, or a measurement you input yourself, the BinoX uses an arrow to measure the height of a known object (similar to MOA range estimation). In my case, I input a one-foot measurement in settings. Then I used a 12′ steel target at different known distances to measure from top to bottom. Even though this function isn’t as easy as a standard laser rangefinder, the range estimations were fairly accurate (approx +/- 2%) out to 100 yards. Not bad.
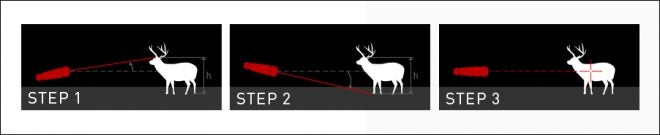
ATN BinoX: Rangefinding
Test Images
Let’s take a look at day and night image quality of the BinoX:
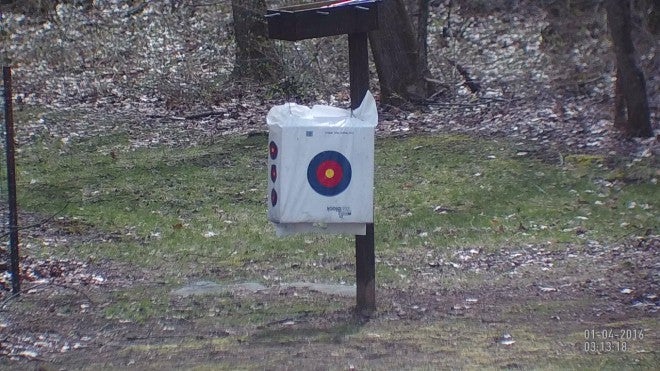
ATN BinoX: 4x with the archery target at about 80 yards. Mid-day.
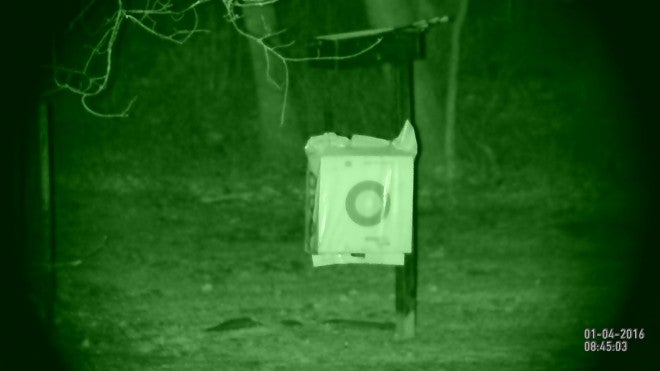
ATN BinoX: 4x with the archery target at about 80 yards. Night Mode in green. Some ambient light.
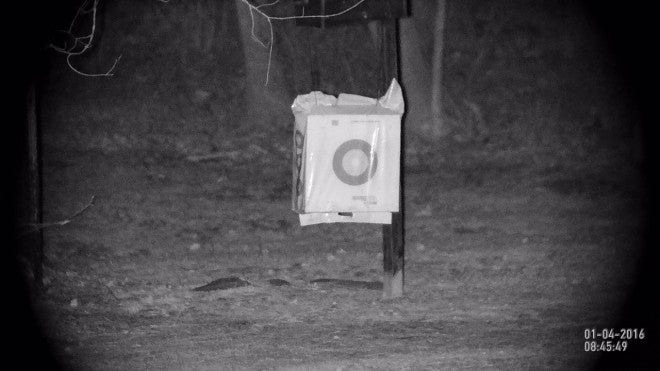
ATN BinoX: 4x with the archery target at about 80 yards. Night Mode in white. Some ambient light.
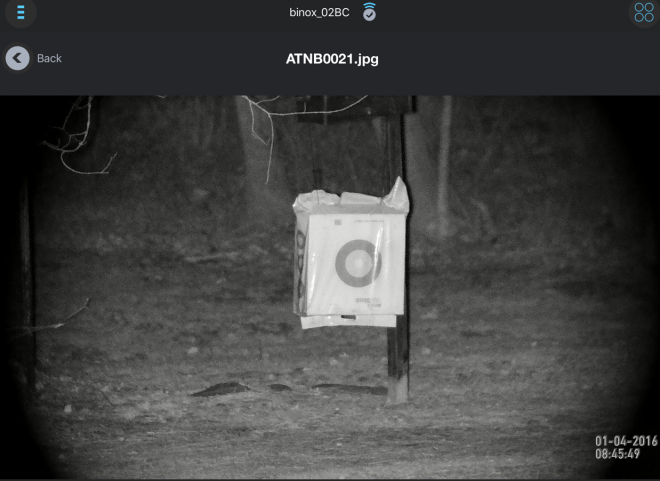
ATN BinoX: 4x with the archery target at about 80 yards. Screen capture from the ATN Obsidian iOS App.
Oh, I almost forgot: I had a few vistors. Hello ladies.
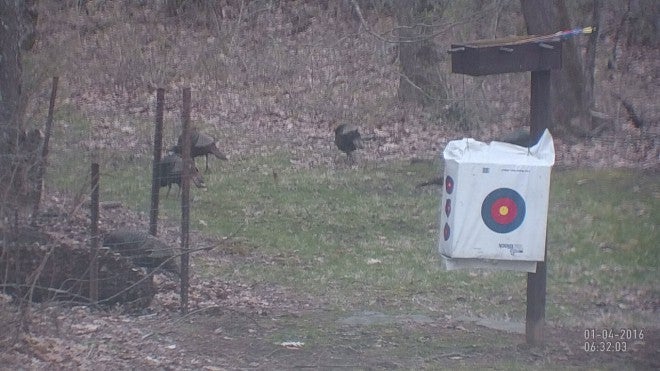
ATN BinoX: 4x with the archery target at 80 yards and the far turkey at about 100 yards.
And this big boy will make a nice roaster in a few weeks.
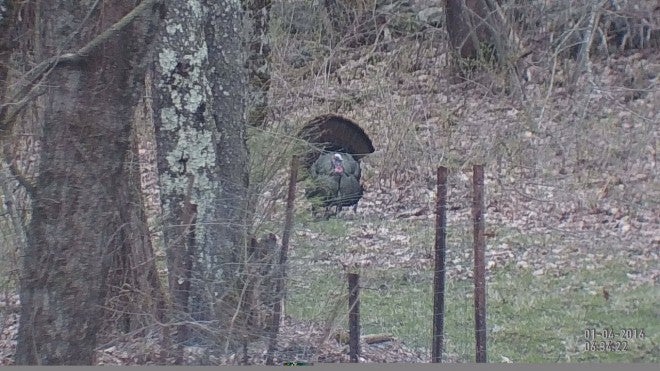
ATN BinoX: 8x with the Gobbler at about 100 yards.
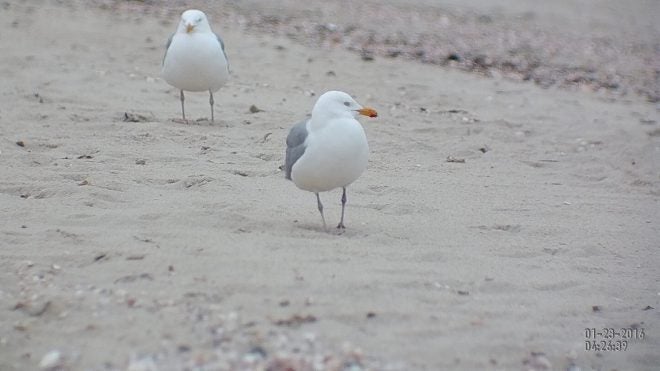
ATN Binox-HD: Seagull at 40 yards at 6X.
Conclusions
As I mentioned above, I had low expectations for the BinoX performance as an all-around recreational optic. However, the more I used them, the more I liked their versatility. The BinoX come with a set of features that are unmatched by anything else on the market.
They do have their limitations: images and video past about 10x are pixelated. There is some lag time when taking a picture or a video. There is a viewfinder feel as opposed to a full eyebox like from optical binoculars.
But, at a little over $400 you get a decent pair of digital binoculars, night capability, a digital compass, GPS tagging, WiFi attached mobile apps, rangefinding and image and video recording. That’s pretty awesome.
Pet Peeves:
- Batteries. I know almost all electronic makers do it, but the batteries that come in the box are off-brand. Mine lasted for about two hours of light use before they were completely dead.
- Non-slip surfaces. The rubberized parts of the BinoX are great for gripping and protecting against knocks and bumps. But they are magnets for lint, dust and dog hair. A bit annoying at times.
- Cables. There should be at least a micro USB cable included. A micro HDMI cable would also be a nice.
Nice Touches:
- Lens covers. Most optics, including high-grade options, come packaged with cheap lens covers that you replace with an aftermarket solution within the first week. ATN did a nice job designing functional and sturdy covers that work.
- Neck strap. Similar to the lens covers, even high priced binoculars can come with a thin, uncomfortable neck strap. ATN includes a nice padded strap that is well made.
- User Menu. Well designed and easy to use.
Final Recommendation
At this price point, if you are in the market for a jack-of-all-trades digital optic, I’d rate the ATN BinoX-HD as a ‘buy’. It’s not perfect, but you really do get a lot for your money.
ATN BinoX HD – http://www.atncorp.com/atn-bino-x-hd-4x-super
MSRP: $479
Street Price: $420 (approx.)
Online Manual – http://manual.atncorp.com/binox/#unpacking
Firmware Update – http://www.atncorp.com/firmware
ATN Obsidian App (iOS) – https://itunes.apple.com/us/app/atn-obsidian/id931990224?mt=8
ATN Obsidian App (Android) – https://play.google.com/store/apps/details?id=com.atn.obsidian&hl=en
Contact and Support – http://www.atncorp.com/user/login
Address: 1341 San Mateo Avenue South, San Francisco, CA 94080
Phone: 800-910-2862
Email: info@atncorp.com