 Your Privacy Choices

In part one and part two of the beginner’s series we walked you through the process of researching, buying and finally transferring a new suppressor from a dealer. We even gave you assignments along the way, like getting barrels threaded, buying a booster or picking out muzzle devices. So, let’s fast forward four to six (six to nine?) months when your paperwork comes back approved and start talking about the fun stuff: suppressor ownership and shooting suppressed weapons. Chances are that once you experience the world of suppressors, you won’t be able to go back to your old (loud) ways.
Thank you for your comments and questions so far; I’ve updated the previous two parts wiith user information and experiences and I’ll address some additional comments here in Part 3.
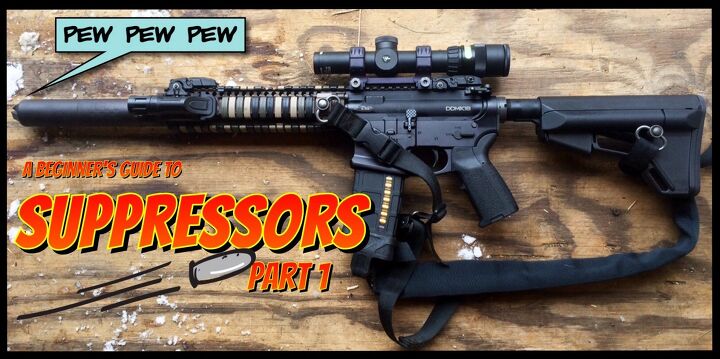

Part 3
- Picking Up From Your Dealer
- Ammo, Shooting And Cleaning
- Storage
- Final Thoughts

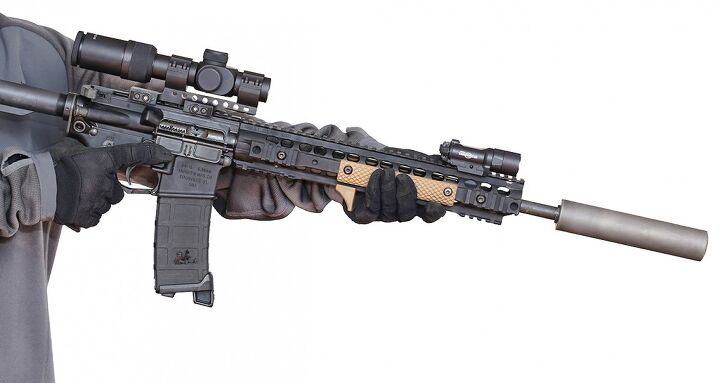
Courtesy: ModernRifleman.net
Picking Up From Your Dealer
More than likely you just got a call or text from your local NFA dealer (or sensed a disturbance in the Force) that your Bureau of Alcohol, Tobacco and Firearms (BATFE) Form 4 transfer paper work was approved and you can pick up your new suppressor. As all your spouse/roommate/dog hears are the sound of tires screeching out of the driveway, there are only a couple of things you need to remember on delivery day: Bring your drivers license and be prepared to fill out a Form 4473 – Firearms Transfer Record.
Now, I know what your are saying, it just took six months of patience waiting for the BATFE to review and approve all that paperwork your filled out after you bought your silencer and now you have to fill out even more forms? Yes, but the good part is that you don’t have to wait around for your dealer to call in the National Instant Criminal Background Check System (NICS) check like you would with other firearms; once you fill out the form, answer the questions and sign, you are good to go. But the whole process does seem like a duplication of efforts.
Additionally, if you have not already done so, you will pay your dealer their transfer fee for storing and transferring your silencer. And, with any firearm (yes, silencers are considered firearms) make sure you have a good way to store and lock your new purchase in your car if you aren’t going directly home or to the range to shoot. After all of this effort and time you have invested, it would be heartbreaking to loose your new suppressor to a smash and grab.
We’ll talk about keeping copies of your approved Form 4s in the storage section below.
Takeaway: On pickup day, bring your drivers license and be prepared to fill out a Form 4473.
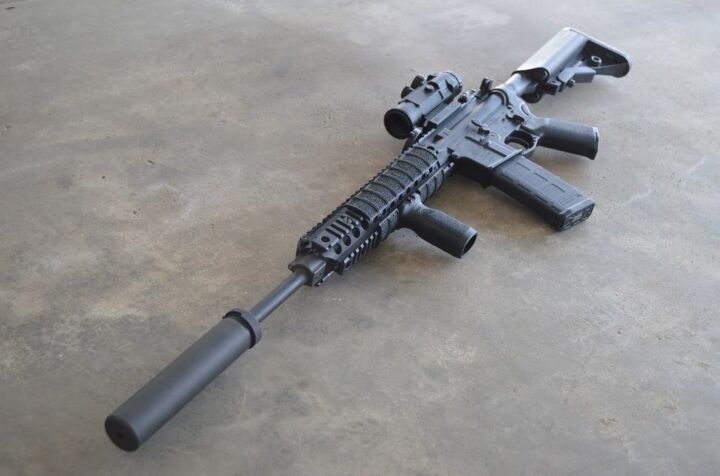
Courtesy: vdmsr.com
Mounting Your New Suppressor
Writer’s Note: It should go without saying, but you must follow all of the safety rules when handling firearms.
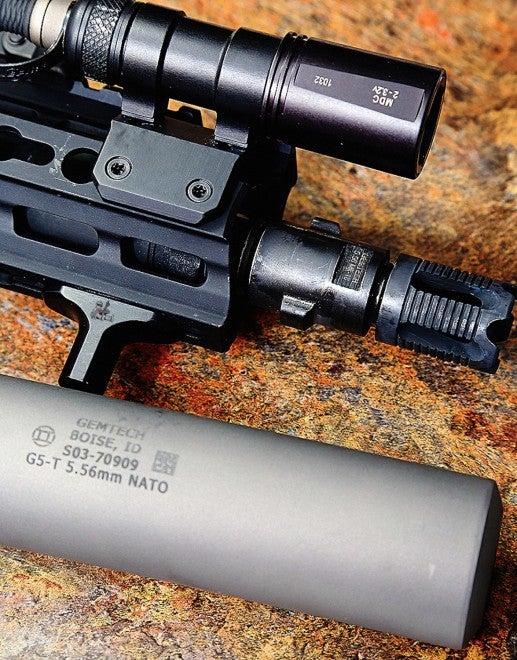
By now, all the hosts you plan on suppressing should be threaded, possibly with mounts, or if you bought a centerfire pistol suppressor, you should have picked up a new barrel and if it is not already included, a booster assembly. Even though you might be a master gunsmith or have installed a hundred flash hiders, make sure you read all the directions that came with your mount assembly. For example, the crush washers that come with standard flash hiders should not be used when installing your suppressor mount. These washers can crush unevenly, tilting the mount and silencer, increasing the probability of baffle strikes – damage that occurs when a bullet makes contact with your silencer’s internals. Brake mounts (and some flash hider mounts) will come with peel washers or shims to properly “time” the muzzle device in the correct orientation. So I’ll repeat, read the instructions that came with your mount and follow them exactly. When in doubt, contact the manufacturer for clarification.
Concentric To The Bore
Last time we talked a little about barrel threading. An essential part of suppressor ownership is making sure that your host and suppressor are in proper sync with each other. One piece of this process is checking that the silencer threads precisely with proper bore alignment: ensuring that the suppressor is ‘concentric to the bore’ can be achieved in several ways.
The first, and easiest, is a visual inspection – remove the barrel, upper and/or bolt so you can sight down the breach/chamber and through the barrel. Now mount your silencer. Hold the whole assembly up to the light or a white background and look down the barrel. If your suppressor is properly installed, you should only see a crisp circle of light or white background. If not, you may see a fuzzy or hazy sliver of your suppressor’s internals on one side of the white exit hole.
You can also achieve the same results by doing this process in reverse: In a dark room, place a bright flashlight up against the chamber, shining through the barrel and out the silencer. Now move the muzzle of the silencer near a wall or the floor. The light coming out should be a perfectly sharp circle. Again, if part of the circle is fuzzy, you may have an alignment issue.
Lastly, you can use a length of drill rod that is just slightly smaller than the bore diameter of your barrel. Slide the drill rod down the breach, if it touches the baffles of your suppressor, there’s a problem somewhere in your system.
In the unlikely event that you have alignment issues, clean the threads (of the barrel and the suppressor) and the barrel shoulder and try it again. The same thing goes for mounts or boosters. If you are still getting inconsistent results, contact the manufacturer of you suppressor or your new barrel; otherwise you may need to see a gunsmith to check your barrel’s threading.
Mounting
There are so many different quick-detach (QD) mounting solutions on the market, it would be unrealistic to go over them all here in this starter’s guide. My only advice is to read your owner’s manual and practice using your new setup.
For direct thread suppressors, most indexing occurs at the shoulder (the shelf before the threads) of the barrel. This means when you tighten your silencer on to your barrel, it should seat evenly and completely on the shoulder itself. Still other suppressors are designed to index on the crown of the barrel, meaning even when it’s fully installed, you may still have a gap between the shoulder and the adapter of your silencer. Other companies, like SilencerCo’s rimfire line, are designed to use a proprietary thread pattern for an o-ring seal engagement. I can’t stress this enough: familiarize yourself with the instructions that came with your suppressor.
Fast forwarding to shooting suppressed – as you shoot, you’ll want to check that your setup remains tight and properly mounted. This is especially true for pistols since the recoil action and rifling twist direction can loosen your booster assembly. Some users prefer left-handed (reverse) threads for barrels with a right-handed rifling twist so that the rotational force of the bullet tightens the booster assembly against the barrel’s threads with each shot. Failure to keep your suppressor tight on your barrel’s threads can cause damage to it’s internals (baffles) or end cap.
It all sounds like a lot of information, but after your first range session it will become second nature to ensure proper mounting of your new silencer and to keep it that way as you shoot.
Takeaway: Mount your suppressor properly and check for tightness intermittently when shooting.
Courtesy: vdmsr.com
Ammunition
Your new suppressor is excellent at suppressing the noise made by hot expanding gases exiting the muzzle. Instead of all that unburnt powder and gas exploding after leaving your brake, flash hider or bare muzzle, the silencer traps and contains them, suppressing the resulting noise that otherwise would have made it to your ears.
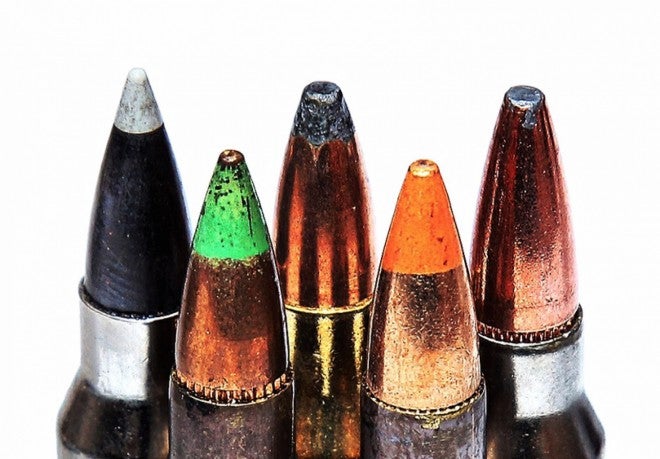
Subsonic vs Supersonic
What can’t be suppressed, however, is the sonic crack that is created if and when your projectile goes supersonic, a speed around 1100 feet per second (fps). Supersonic velocities can fluctuate depending on atmospheric temperatures, altitude and humidity, so the 1100fps figure is not a hard-and-fast value. Also, depending on your environment – indoors vs outdoors, under cover or in an open field, etc – the sound of a bullet breaking the sound barrier can still be loud and damaging to the human ear. Which is why you still should wear hearing protection, even when shooting suppressed. We’ll talk more about hearing protection a little later.
Point being, even with a suppressed weapon, you still have to deal with the noise of a bullet’s supersonic flight. If you bought a suppressor for a high-powered (high-velocity) rifle, your choices for ammunition are pretty straightforward. Buy and shoot what is accurate for your gun because every shot will still be (relatively) loud due to both the expanding gases and the sonic crack created when the bullet goes supersonic.
If you bought a rimfire, pistol or subsonic rifle caliber (300BLK) suppressor, you have some ammunition choices to make. Most likely, you want to shoot as quietly as possible which means you will be buying, or reloading, subsonic rounds that don’t create a sonic crack. However, just buying subsonic rounds isn’t the only variable you need to consider. Since barrel length effects the muzzle velocity of your bullet, you are going to have to do a bit of research on your host in combination with the ammo you plan to use.
One website I’ve found very useful in calculating bullet velocity is Ballistics By The Inch (BBTI). Here you can find common cartridge/bullet/loading combinations at different barrel lengths. I highly suggest starting with BBTI when starting to look at ammo choices.
Many ammunition makers will print muzzle velocity markings on the boxes or on their websites, but just be aware that these are calculated with the Sporting Arms and Ammunition Manufacturers’ Institute (SAAMI) specifications – if your barrel is longer than the specs for that caliber, your muzzle velocity will be higher and it might push your bullet to supersonic speeds, creating that loud crack we talked about. And don’t forget about the environmental variables: rounds that are subsonic in July may not be subsonic in January since the speed of sound is lower in cold weather.
For rimfire ammunition, any barrels under four inches in length will keep ammunition marked ‘standard velocity’ subsonic, so there is no real need to buy subsonic loads. Anything above four inches and your best best will be to shoot subsonic ammunition.
Relax, none of this is as complicated as it sounds. Most likely you have a standard setup that will keep subsonic ammunition, well, subsonic. And if your suppressor sounds louder than you think it should, your first check should be your ammunition – your bullets are probably going supersonic. Lastly, don’t forget to double check your silencer manufacturer’s specifications – some suppressors are only rated for the subsonic versions of ammunition (like 300BLK) and not full powered/high pressure loads.
Takeaway: For high powered rifle hosts, your choice of ammunition is pretty easy. For hosts designed for maximum noise reduction, barrel length and ammunition choices should focus on keeping bullets subsonic.
Courtesy: ModernRifleman.net
Shooting
So, it’s finally time to pull some triggers.
Blowback Mitigation
As I mentioned above, suppressors only reduce the sound, gas and blast exiting from the muzzle of a discharged firearm. For semiautomatic guns, gasses can also escape from other places like a gas port and the ejection port as the cycling of the action begins. Although this isn’t a deal breaker for suppressing these hosts, it’s a fact of life when shooting suppressed semiautomatic weapons. And a condition known as “blowback” can sometimes exacerbate the problem as the silencer pushes all that gas that would have exited the muzzle, back down the barrel and out the gas port and/or action.
Heavy blowback can be annoying at its best and near nauseating at its worst. Not only does the extra gas create unwanted noise but it also brings gunpowder residue into the action and towards the shooter. For lefties, the blowback situation on rifles like ARs can be unbearable since the shooters face is right up against the ejection port.
As if that wasn’t enough, suppressing a direct impingement (DI) gas system like in standard AR-15s, extra gas can create reliability problems because the cyclic rate can increase up to 30% more than normal depending on both the host and suppressor. This can cause failures to feed, stove-piping or the inability to lock the bolt back on an empty magazine.
Luckily, there are several easy fixes for an over-gassed AR. Some of them involve using heavier buffers and stiffer buffer springs, which, although they can be effective, is akin to treating the symptoms and not curing the disease. These heavier/stiffer components work to slow the action by placing greater force on the bolt carrier group, keeping the action closed longer, forcing gases back down the barrel rather than out the ejection port.
A much better solution is to restrict the gas before it gets to the action by replacing your standard gas block with an adjustable gas block like the MicroMOA Govnah, the SLR Sentry 6 or one of several other options from a host of quality manufacturers. Other gas regulation solutions include an adjustable bolt carrier from Gemtech and an adjustable gas upper receiver from Innovative Arms. Controlling the gas in a DI system allows you to fine tune your gun to run efficiently either suppressed or unsuppressed.
Because every barrel manufacturer (and gas port size) is different, my personal suggestion is to shoot your suppressed AR before making any changes to your components. After a few magazines, you will have a better idea on what, if anything, needs to be changed. Important note – most of these gas issues only apply to the 5.56 platform. Most 300BLK loads are optimized to be run suppressed without worrying about additional blowback.
Takeaway: Gases escaping from your gun’s action can be a source of loud noise and gas blowback. For semiauto guns like 5.56 AR-15’s, consider regulating your gas system with devices like an adjustable gas block.
“Running Wet”
Some rimfire and pistol suppressors are designed to be “run wet” which means the user can add an ablative solutionn before shooting. The ablative, a vaporized liquid or gel that cools hot gases and further suppresses noise, is added in very small amounts to the suppressor’s blast chamber before mounting it on your barrel. The blast chamber is the first section inside your suppressor before the blast baffle that contains the initial and largest increase of temperature and pressure.
Most people use water, wire pulling gel or synthetic grease, but almost any non combustible/non toxic liquid or gel can be used as an ablative. I’ve seen both soda and coffee used with good results. When “running wet” only use about a teaspoon (5 mL) of liquid – using too much can increase internal pressures enough to damage your can. The benefits of using a gel or grease is that it won’t run out of the silencer like a liquid. And your liquid or gel of choice will only last about 15-20 rounds before completely burning off, so be prepared to refill often.
Takeaway: In many silencers, “running wet” is a way to get an additional increase in performance, albeit messy and somewhat inconvenient.
Hearing Protection.
Let’s talk about protecting your hearing from long term damage. I know it seems counterintuitive, but even with a suppressor shooters should be wearing some form of hearing protection for anything above rimfire and some subsonic pistol rounds. I was prepared to post charts from the Occupational Safety and Health Administration (OSHA), decibel (dB) level comparisons and recommended exposure levels.
But, I’d rather just keep it simple: again, at a minimum, wear some foam ear plugs for anything over suppressed subsonic rimfire and some pistol cartridges. Be careful; some manufacturers will tout “hearing safe” rifle silencers which is misleading – the sonic crack of high velocity ammunition alone can cause long term damage to your hearing. So unless you like tinnitus (which I have and I don’t like it), protect your ears.
Takeaway: For anything other than subsonic rimfire and some subsonic pistol rounds, you should be wearing hearing protection when shooting suppressed.
Sights
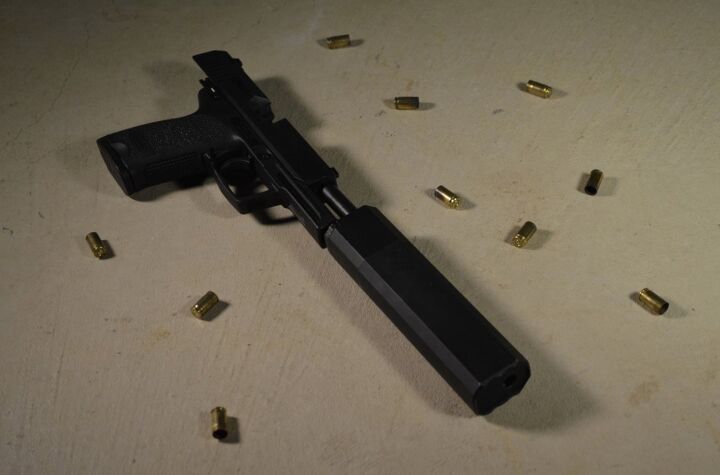
If you bought a pistol suppressor, you may have noticed that your sights are now obscured. One option is to leave the sights as they are and use a proper sight picture even though the are blocked by the silencer. This technique, commonly called “shooting through the can” is widely used and perfectly accurate. Another option is to install suppressor-height sights that are tall enough to clear the body of the can. Either technique is easy and intuitive with practice.
Heat
Rifle suppressors can get hot after only a short string of fire. Really hot. Like scalding hot. Many shooters use an oven mitt or a welder’s glove if they have to check their suppressor’s tightness while shooting. Another option is to use a suppressor cover (also known as a mirage cover) that is made of heat resistant materials that can protect you from contact with your hot silencer. I prefer Cole-Tac, but companies like Rifles Only and Griffin Industries, also make high quality covers. If you are a precision shooter, a suppressor cover will also help mitigate the mirage effect, a phenomenon where rising heat from your silencer can cause visual distortions when using high magnification optics.
It’s also important to note, even if you use a welder’s glove or heat resistant cover, don’t install a hot suppressor on a cold barrel or mount. Metal contracts as it cools and by mounting your hot silencer on a cold mount, you may not be able to remove it later by hand. If this happens, don’t worry, warming everything up by shooting a string of fire will usually free up the suppressor.
‘Point of Impact’ Change
The suppressor you are now shooting with reduces the report of the firearm, but can also effect the bullet’s trajectory. However, if installed correctly, the suppressor will have no effect on your weapon’s accuracy. And it’s important to recognize the difference.
A change in Point of Impact (POI) or trajectory can be caused by the additional weight of the suppressor pulling down on the muzzle of the barrel. Most likely, your Point of Impact (POI) change will be minimal, and as with some brands of suppressors designed for precision guns, almost non existent. Make sure you know and understand your host and suppressor combination’s POI change, which is especially important if you are planning on switching from suppressed to unsuppressed or using this setup as a defensive gun.
A change of accuracy is a measurable increase in group size (not group position) in comparison to shooting unsuppressed. An accuracy change usually a result of a poor ammunition choice (trying to use too heavy/long bullets in an attempt to get subsonic velocities), improper installation/mounting where your bullets are contacting your suppressor’s internals or a change in your barrel’s harmonics.
Takeaway: Suppressors can change your point of impact compared to unsuppressed shooting, but will only effect your host’s accuracy if not properly installed. Know and practice with the resulting offset POI changes when shooting suppressed or unsuppressed.
Courtesy: vdmsr.com
Cleaning
Because rimfire ammunition is notoriously dirty, most modern-day rimfire and pistol suppressors are designed to be taken apart for cleaning. Rimfire rounds are either bare lead, copper washed or otherwise coated rather than jacketed, the heat from shooting can melt the lead which gets deposited in you silencer. These lead deposits, often called “leading” can slowly fill up your silencer making it heavy, reduce suppression levels and make it impossible to take apart.
A recommended cleaning schedule for rimfire ammunition is approximately 500 rounds or after each range session. Most cleaning can be done with a wire brush and a solvent, but heavy deposits can be tackled with an ultrasonic cleaner or a reloading tumbler with the appropriate media. Just be advised, that not all metals can be put into a ultrasonic cleaner, so do your research before you drop in your baffles. Don’t forget to take safety precautions like wearing gloves and a particulate mask when cleaning your lead buildup.
“At minimum, it is a good idea to take rimfire cans apart after each range trip. Many companies have worked to develop easy takedown silencers with isolated cores and interlocking baffles, but lead buildup can practically weld a suppressor solid,” says Nathan Thornton from ModernRifleman.net.
There is a homemade solution called “the dip” that will actually dissolve lead very effectively. The problem is that “the dip” mixture is extremely toxic and must be treated as hazardous waste. For this reason alone, I can not recommend the dip as a method for cleaning your suppressor.
Like rimfire cans, most pistol silencers can be broken down for cleaning. This is especially important if you shoot lead cast bullets since lead buildup can occur similar to that of rimfire cans. Just use the same procedures, and take the same precautions, as you would when cleaning your rimfire suppressors.
“While most silencers feature no moving parts that need cleaning attention, pistol suppressors are an exception. Failure to keep the can’s booster assembly clean might turn your handgun into a single shot sidearm,” says Thornton. “This is especially important for those who plan to use one of the popular, adaptable handgun suppressors on dirty rimfire hosts.”
On the flip side, rifle suppressors rarely need cleaning and most aren’t designed to be taken apart anyway. The one exception is your mounting device: take the time to clean, inspect and lubricate the moving parts in your mount adapter after each range trip. If you are having attachment issues, using a quality high-heat anti-seize product can be the solution. “Even after having a few thousand rounds through them, the [rifle] cans I’ve sampled haven’t gained significant weight as a result of buildup,” says Thornton from ModernRifleman.net
Takeaway: Rimfire cans need to be cleaned frequently. Pistol cans that shoot unjacketed bullets also need to be cleaned. Centerfire rifle suppressors rarely, if ever, need to be cleaned.
Courtesy: ModernRifleman.net
Storage
Since you are a responsible gun owner, you already own a secure solution for storing your firearms. If you have the room, your silencers will be fine housed in your safe. What gets tricky is trying to secure a suppressed gun that you plan on using for home defense. Unfortunately, there are only a few quick-access options available, like the FAS1 Safe.
There are a lot of myths surrounding NFA ownership, one of which surrounds the storage of NFA firearms. Without dragging this discussion out, restrict access to only those allowed to possess your suppressor: you (if you transferred it to an individual) or your trustees/officers/employees* (if you filed as an entity).
*Review your entity documents, with an attorney if necessary.
As for your paperwork, keep the original Form 4 copies in a secure spot, preferably in a fire resistant safe. As a backup, either scan or take a picture of your forms, encrypt them with a password (either PDF or a compressed zip file) and email them to yourself. I also suggest that you keep a paper copy of your forms with your suppressors when you leave the house to go shooting and/or a digital copy that you keep hand on your mobile device.
Legally, only a BATFE agent has the right to request to look at your approved forms to verify proper ownership and possession. However, in the unlikely event that a local law enforcement officer, range master or property owner wants proof that your silencers are legal, it’s probably easier to produce your form and be on your way.
Takeaway: Restrict access to only those who are specifically allowed to possess your silencer as listed on your approved Form 4. Keep copies of your Form 4’s handy in case someone questions your legal ownership.
Courtesy: vdmsr.com
Final Thoughts
As with any process, the first time is the hardest and most daunting. With one purchase and transfer behind you, all future purchases get exponentially easier.
The only job you have now is to introduce others to the world of silencer ownership. The only way this process gets simplified is to support manufacturers, distributors and dealers by buying more suppressors, Join the American Suppressor Association. Dispel any harmful rumors of silencer ownership and practice safe gun handling so that we all look good.
Have fun. Quietly.
Comprehensive Review:
- Check the NFA laws for your state.
- Decide on the host(s) you want to suppress.
- Research the specific types of suppressors.
- Research suppressor manufacturers and their models.
- Pick a silencer that best fits your needs.
- Decide to buy either locally or out of state through a online retailer.
- Pick a local SOT to handle your transfer and discuss terms.
- Buy your silencer.
- Wait for the Form 3 transfer to occur (if necessary).
- Complete the Form 4 transfer paperwork and send your package to the BATFE.
- Wait.
- Thread and mount barrels. Buy boosters and barrels. Research thread pitches for certain calibers and guns.
- Wait.
- Pickup your new silencer from your SOT after your Form 4 is approved.
- Confirm proper threading and mounting of your host and suppressor combination.
- Shoot suppressed. Decide never to shoot unsuppressed again.
- Inspect and clean your silencers after each range trip.
- Properly store and restrict access to only those specifically allowed to possess your NFA item.
- Contribute to expanding legal silencer ownership by introducing shooters to the new world of suppressor ownership.
- Repeat the process to buy other silencers and help others buy their first silencer.
Courtesy: ModernRifleman.net
Definitions of Commonly Used Silencer Terms:
- Ablative – A substance, usually a liquid or gel, added to some suppressors to increase performance.
- Adapter – The threaded end or end cap that threads a silencer onto a barrel.
- Blast Chamber – The first section inside the silencer that takes the brunt of the heat and gases while firing.
- Booster or Nielsen Device – An inertia device that uses the force of the trapped gases in the silencer to cycle the action of a semiautomatic pistol.
- Baffle – The cone-like sections inside the suppressor that work to slow and cool gasses.
- Baffle Stack – All of a suppressor’s baffles together acting as one sound-reducing system.
- Baffle Strike – When a bullet damages a silencer’s baffle.
- Blowback – Gases that would have normally exited the muzzle are redirect back through the barrel towards the shooter.
- Dealer – A Federal Firearms Licensee (FFL) that has paid a Special Occupational Tax (SOT) for the year, allowing them to sell National Firearms Act (NFA) controlled items like suppressors.
- Decibels (dB) – a unit used to measure the intensity of a sound by comparing it with a given level on a logarithmic scale.
- “Dedicated Can” – The theory of buying a suppressor that will be specifically dedicated to one host.
- “The Dip” – A highly toxic and hazardous mixture that is used to dissolve lead deposits when cleaning suppressors.
- Direct Thread – A type of suppressor that mounts directly on to a barrel without the need for a mount or adapter.
- End Cap – The muzzle end of the silencer.
- End Cap Strike – When a bullet damages a silencer’s end cap.
- Form 3 – BATFE transfer paperwork used by dealers, distributors and manufacturers to transfer NFA controlled items like suppressors.
- Form 4 – BATFE transfer paperwork used to transfer NFA items like suppressors from an FFL/SOT to unlicensed individuals or entities.
- Instructions – The manufacturer’s documentation that comes with your silencer that you will read and understand before mounting and shooting with your suppressor 😉 .
- Integral Suppressor – A type of suppressor designed to only be used on one barrel, upper or host.
- Markings – The Manufacturer, Model Number, Location and Serial Number engraved on the main part of a suppressor as required by law.
- Mirage – Visual distortions seen when using optics, caused by heat rising off the suppressor.
- Monocore – A type of one-piece baffle structure found inside some types of suppressors.
- Mount – The part of the suppressor that attached to the barrel of your gun.
- Over-The-Barrel – A type of silencer that uses proprietary mounts that starts before the muzzle of the barrel to increase a silencer’s volume.
- Peel Washers – Very thin washers used with some brake or flash hider mounts to properly time (orient) the mount’s porting
- Porting – A technique commonly used on Integral suppressors to bleed off gases by drilling holes (ports) in a barrel, slowing bullets to subsonic velocities.
- Shims – Very thin washers used with some brake or flash hider mounts to properly time (orient) the mount’s porting
- Subsonic Ammunition – Ammunition designed to have muzzle velocities below the speed of sound, preventing the sonic crack heard when a projectile would break the sound barrier.
- Thread pitch – A variety of different thread patterns on the muzzle of a barrel that are usually specific to a caliber.
- Tube – The body of the silencer.
- Volume – The amount of space inside a silencer that is available for gases to be trapped, slowed and cooled.