Your Privacy Choices
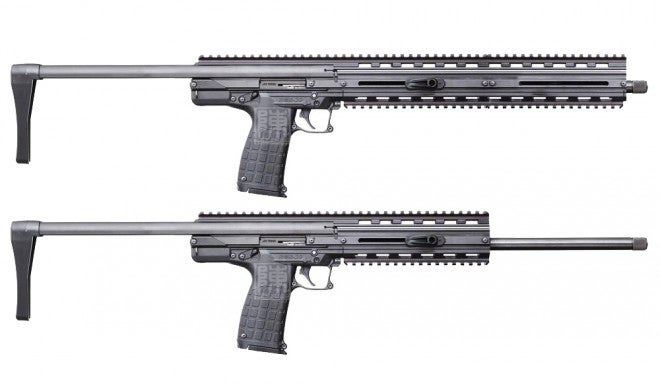
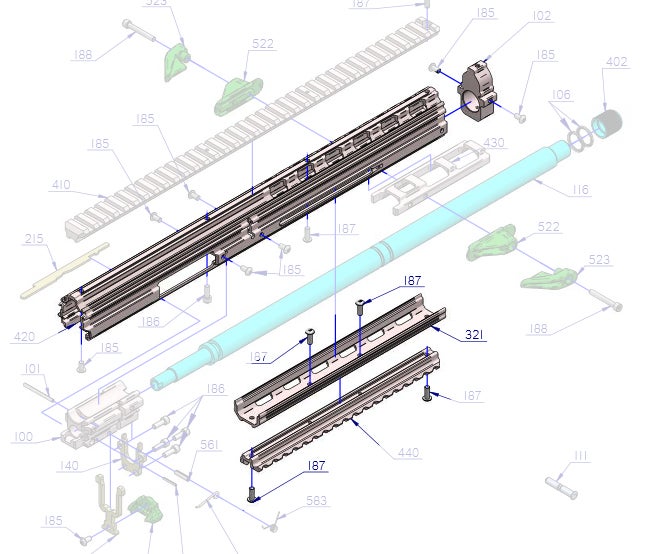
Last Halloween I managed to pick up a Kel-Tec CMR-30 during my first ever trip to Grice’s Gun Shop. I was in the area for a 2Gun match in Mifflin County and decided to finally visit the famous store. They had one CMR-30 in stock so I swooped it up. On the 2 hour return trip home I started thinking of ways to modify the CMR-30. I knew I didn’t want to SBR it. In fact I wanted to cover up the barrel. Upon looking at the exploded diagram in the CMR-30 manual, I figured out a simple DIY solution to making a rail extension. The only problem would be getting the spare parts from Kel-Tec.
I reached out to the Customer Service Manager that helped tune up my KSG when I was down in Florida for Big 3 East back in early October. Sean Turpin helped me get most of the parts I needed. The parts list is small but CMR-30s are in high demand so spare parts are scarce. I was lucky to get what I did. Here are the parts I needed:
1x Extruded Top Cover
1x Extruded Bottom Cover
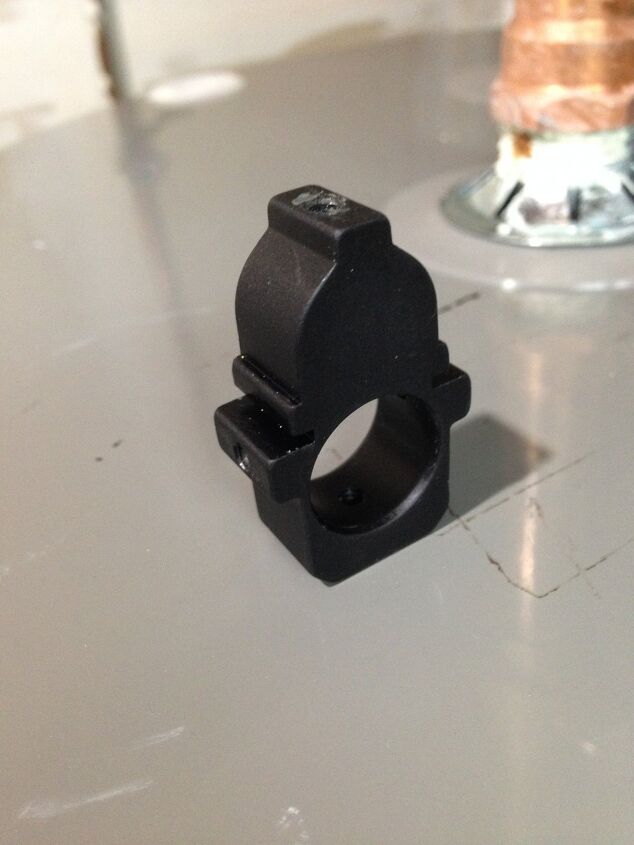
2x Barrel Blocks
2x Bottom Rail
4x short screws
4x long screws
I got everything except the two extra barrel blocks. That put my project on hold, they did not have any to spare. I waited hoping they would be back in stock. Unfortunately they weren’t so I asked my friend Brian Miller for help. He is the one who made his own muzzle brake for his new 3Gun project Vepr12. Anyway I sent him a picture of the barrel block and he said he could make it with his mill.
My concept was to cut down the extruded top cover to the same length as the bottom rail and cover. Then drill new holes for barrel blocks at each end. Next I would slide this extension over the barrel and bolt the rear barrel block to the block already on the gun. It would not be free floating but that is fine for what I will use this for.
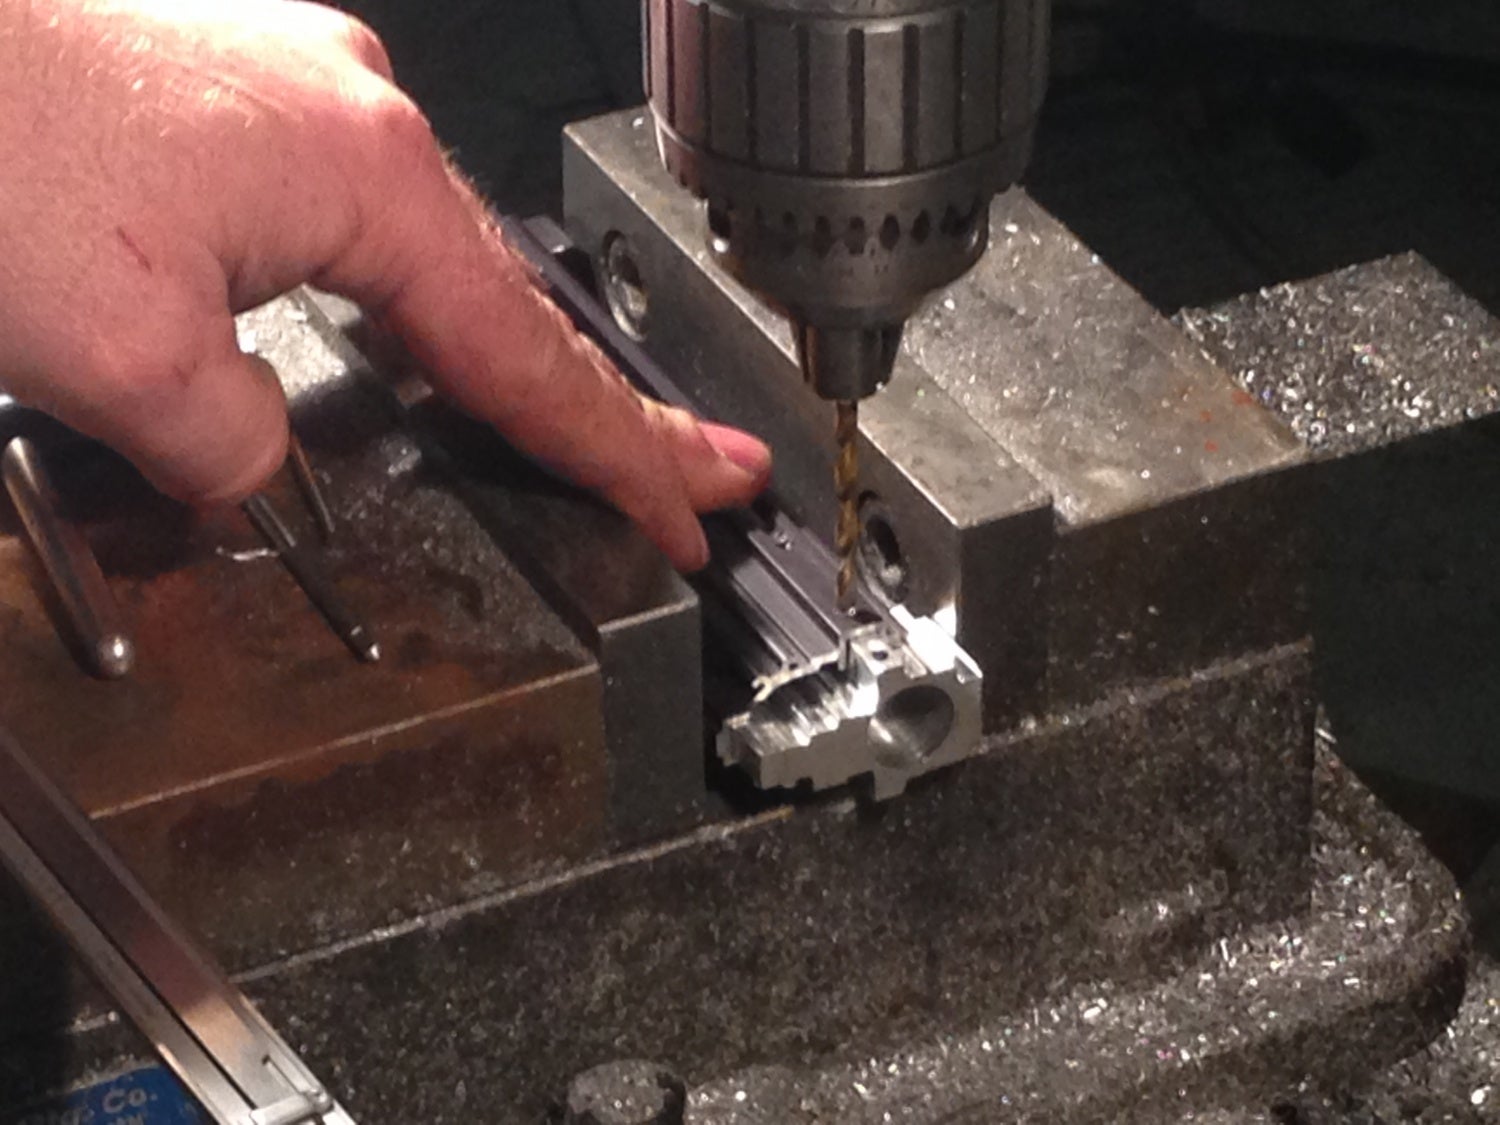
We tried to use my friend’s CNC Mill but it has been a while since he used it so we decided to just make the barrel block with the manual mill.
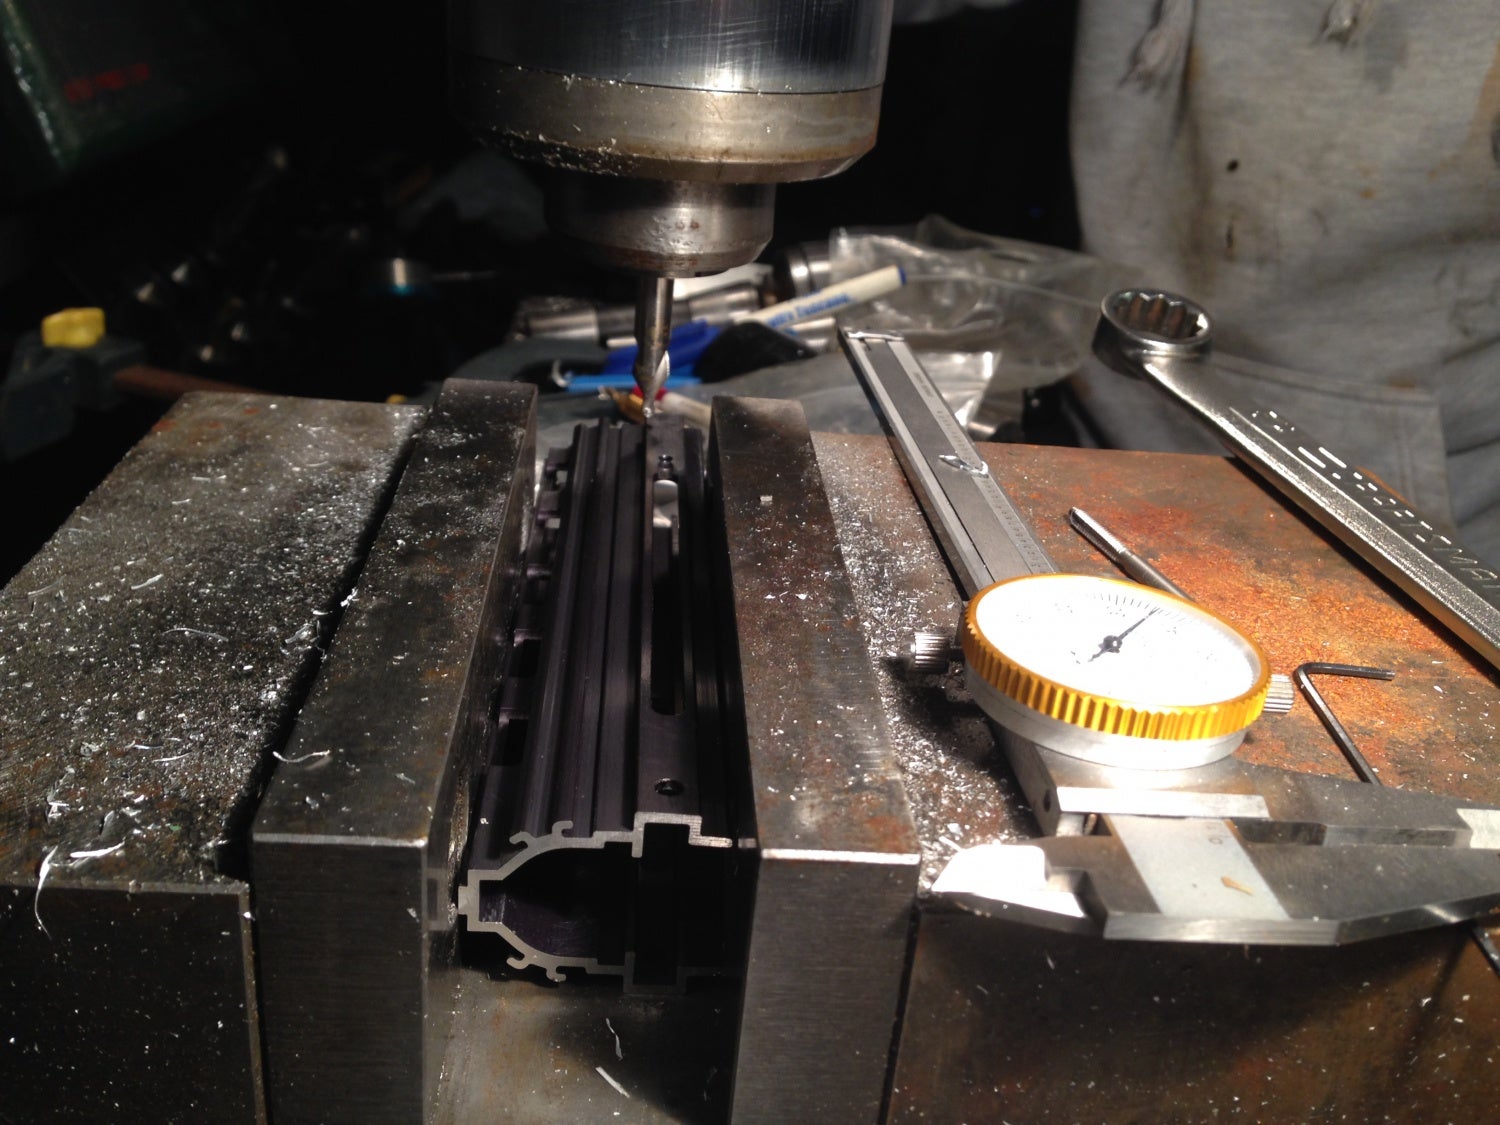
Brian has a 10 ft long piece of 3/4″ thick aluminum. He cut off a piece of it and we traced the factory barrel block onto the raw brick of aluminum. The he cut the barrel block out of the aluminum with his mill.
You can see below the raw aluminum barrel block he made is wide enough to bridge the seam between the two rails. Next up we had to drill and tap the holes for 6-32 screws.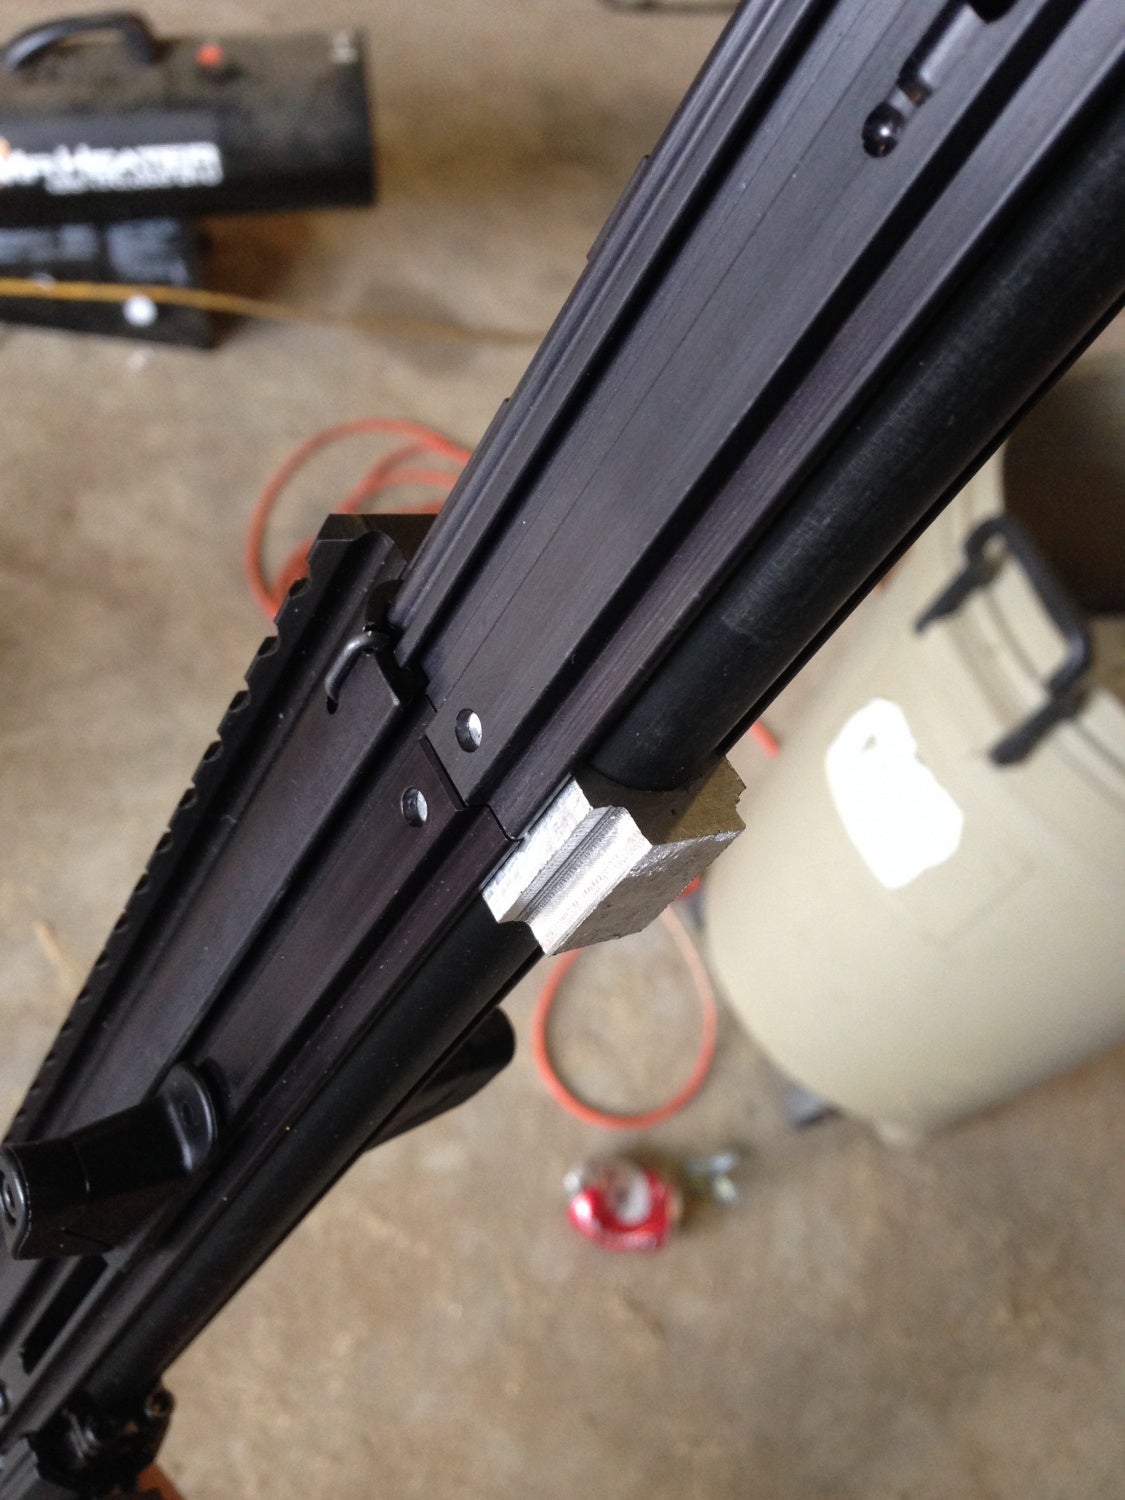
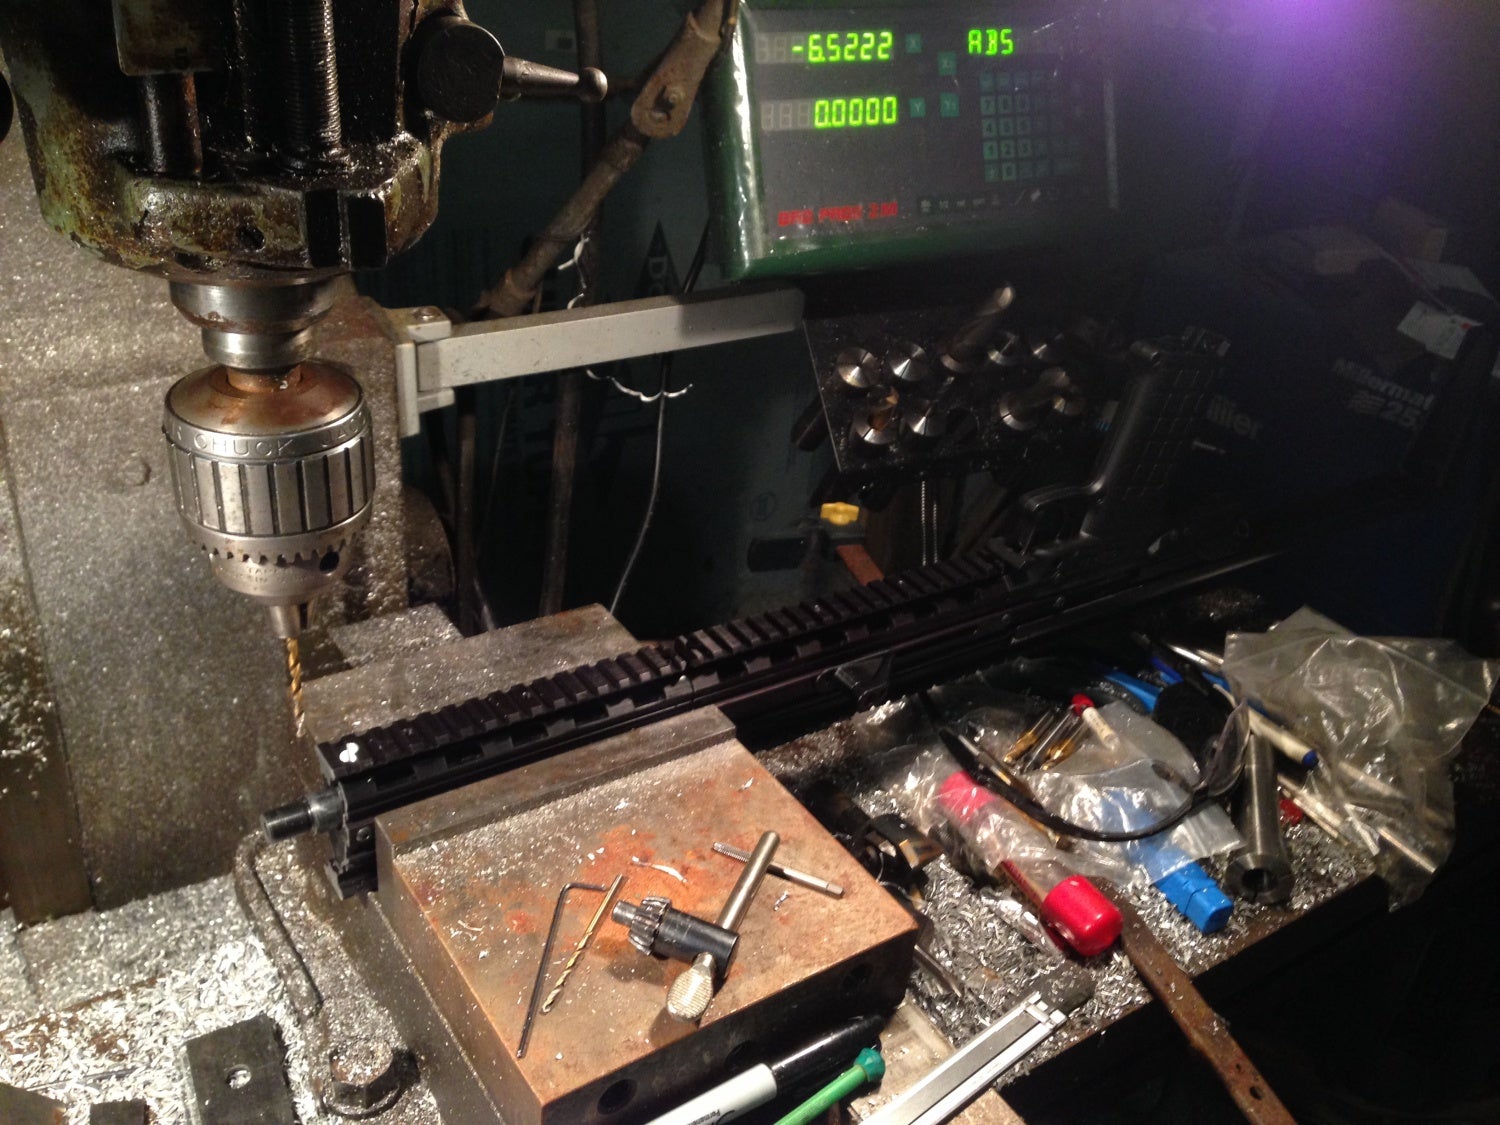
The next step involved using a metal band saw to cut down the extruded covers. Originally I thought it would be easy to use the bottom cover length as the length of the extension. That way I only have to cut the top cover once. However this would make the rail extension too long and cover up the threaded barrel. The inner width of the handguard is too narrow to fit a flash hider, so the threads would have to protrude out the front. Another issue is the slot for the charging handle. If cut the rail only once, then the cut will go across the charging handle slot and I would not be able to screw the rail to the sides of the barrel block. So we had to make two cuts and we milled them to make sure they were flat.
The final step was to cut down the two bottom rails to the right length. One will go on the top cover and the other will go onto the bottom cover. Then we had to drill and countersink the holes for the 6-32 screws that will hold them to the barrel blocks.
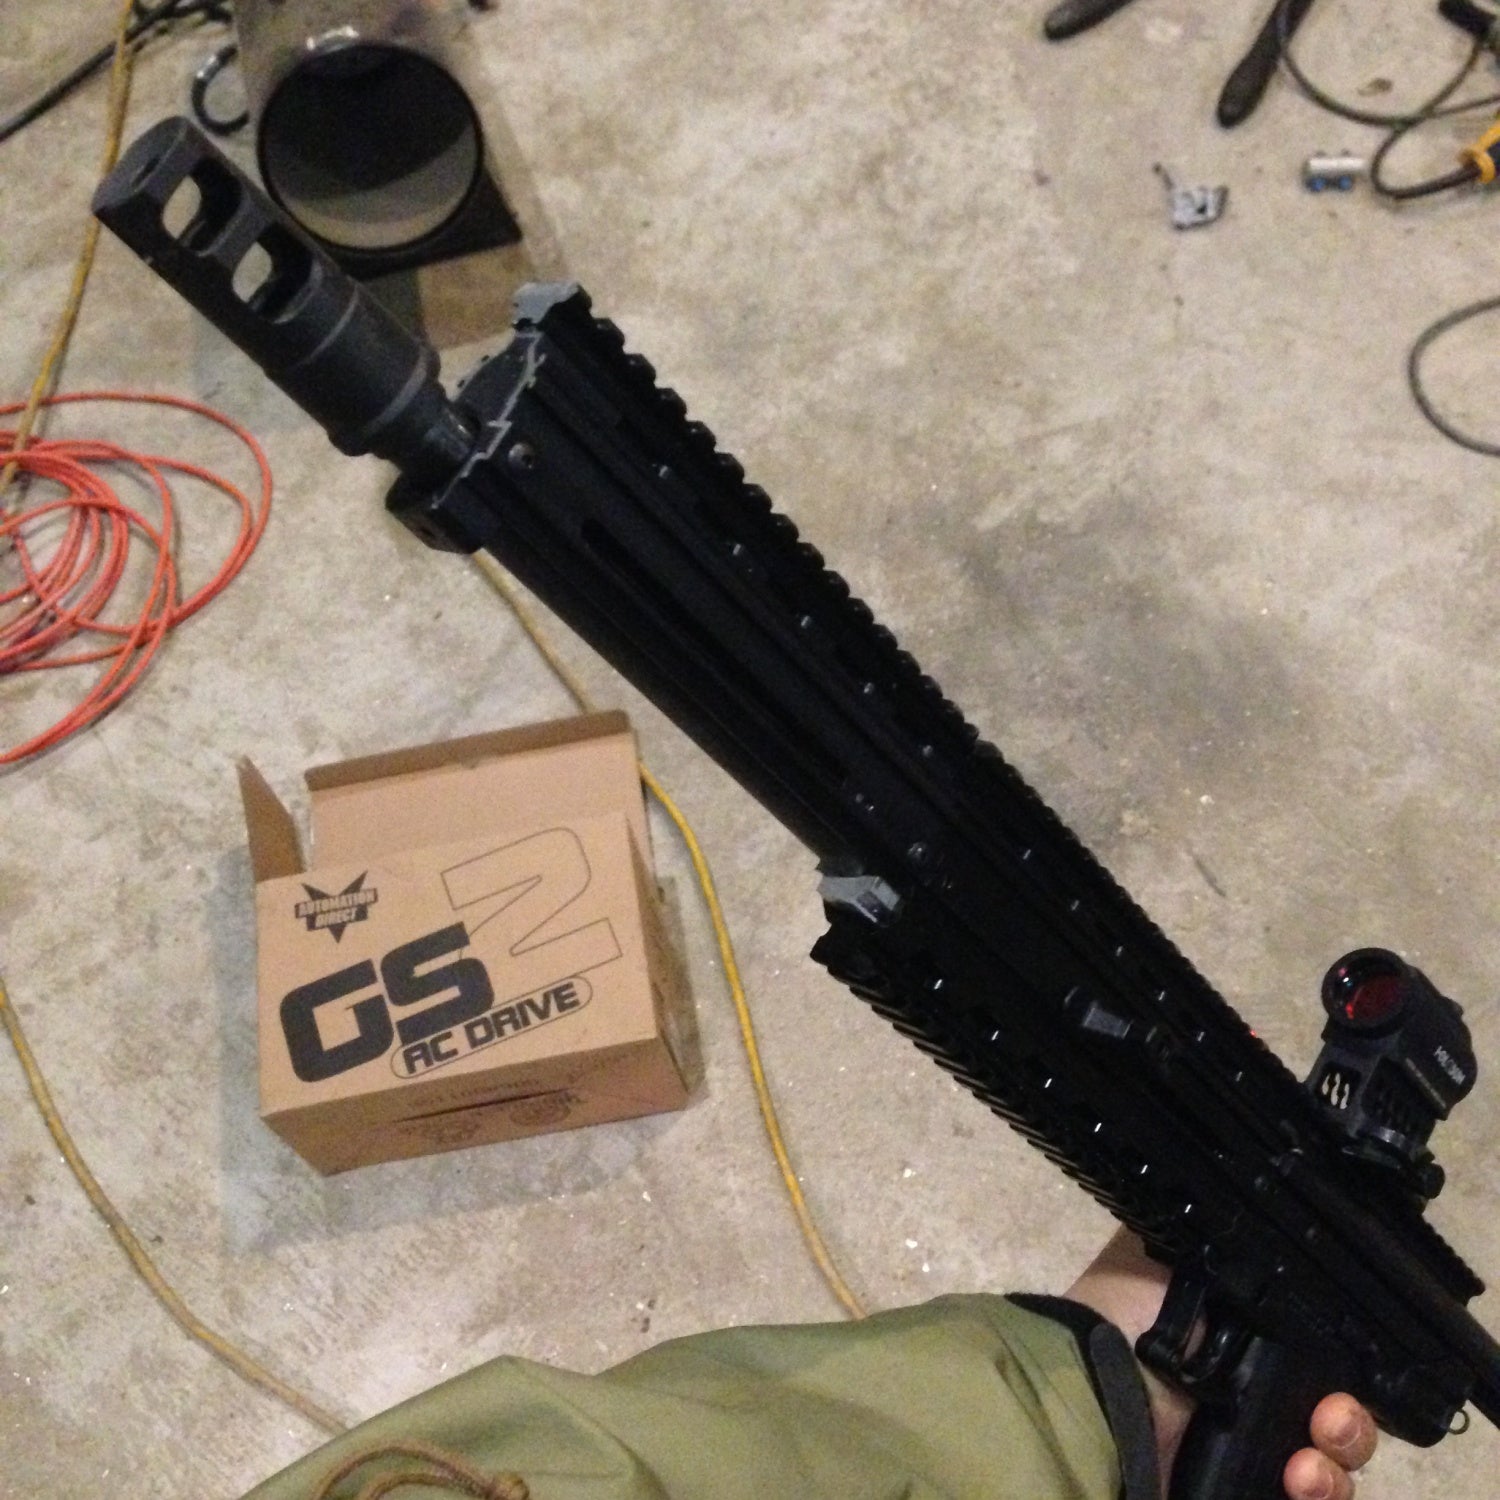
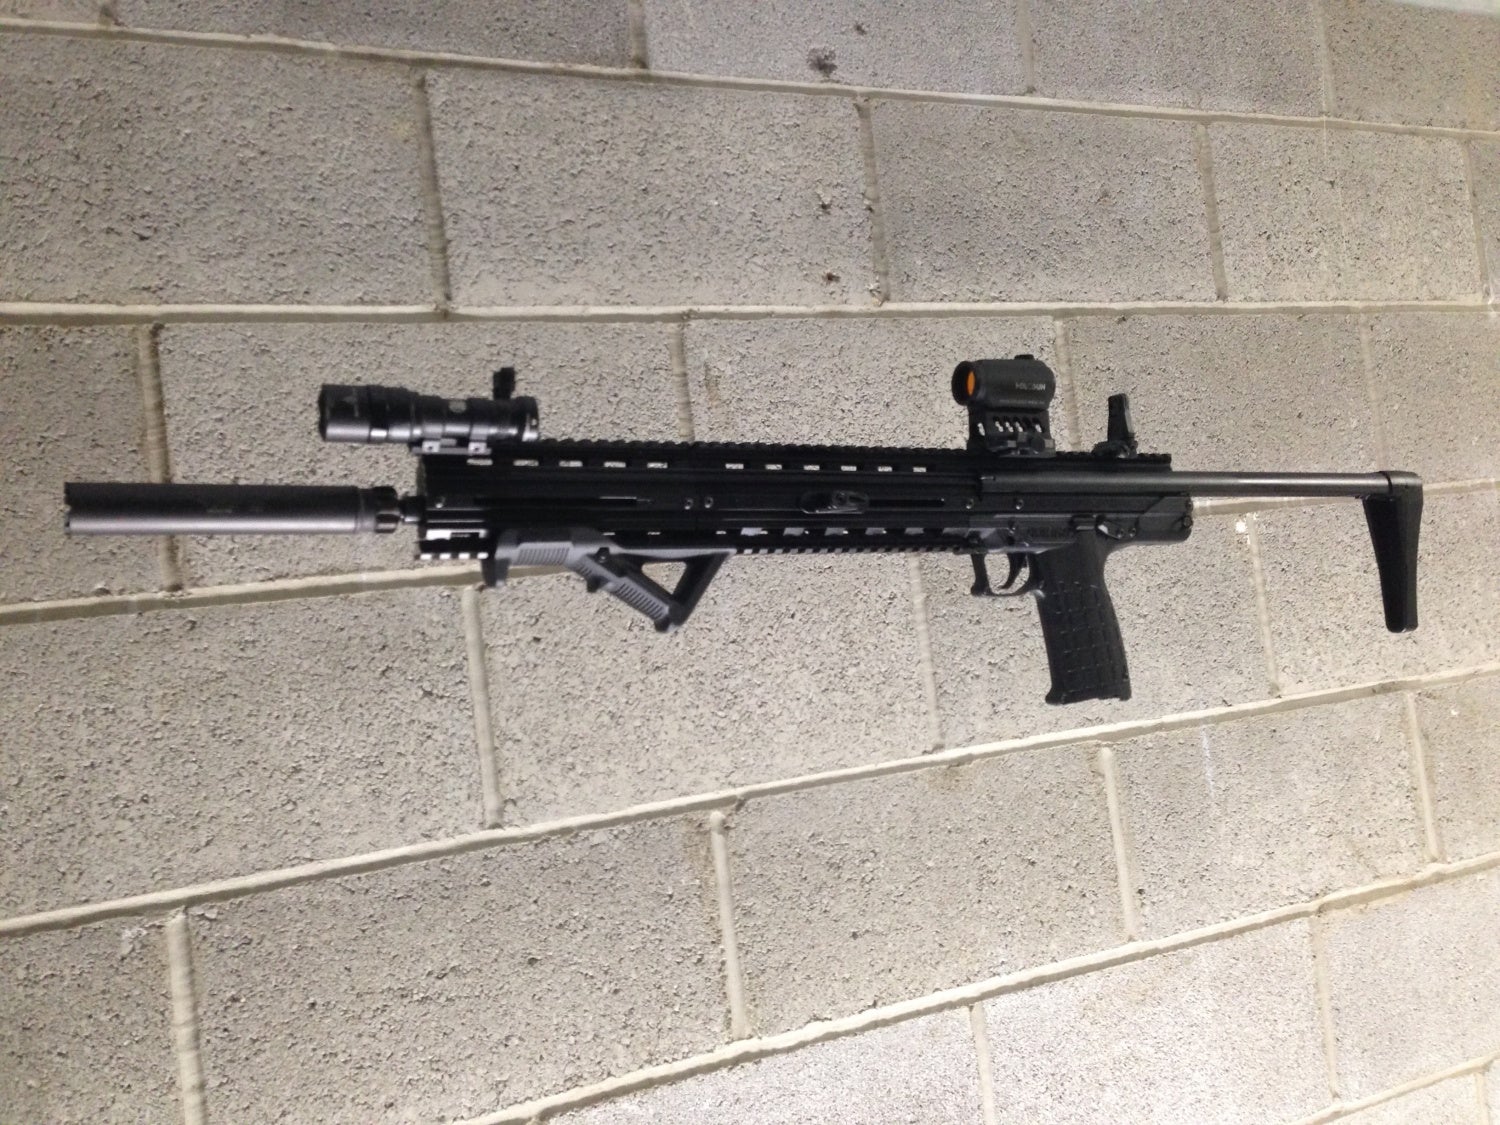
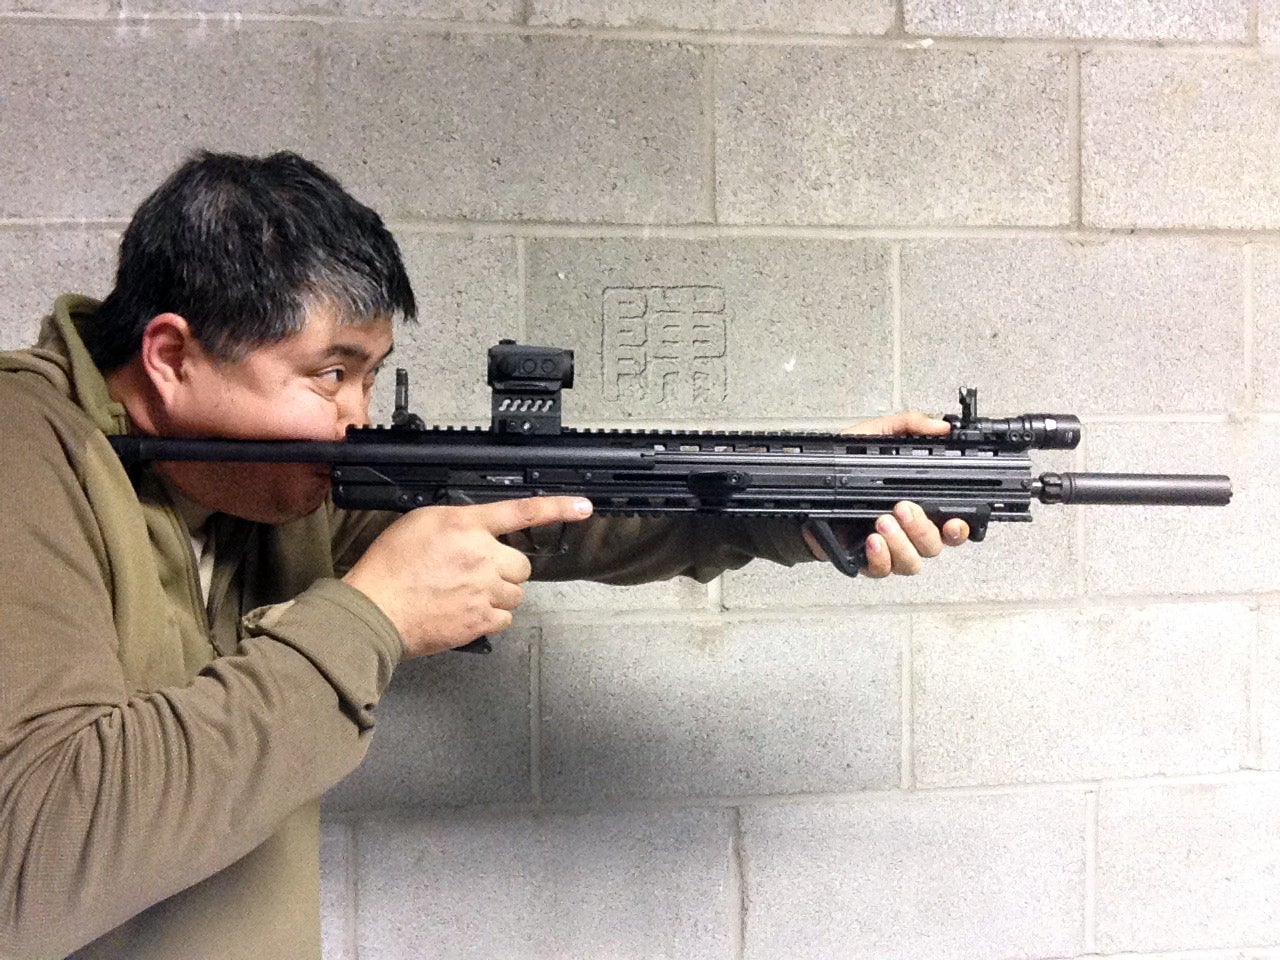
Here is the fruit of our labors.
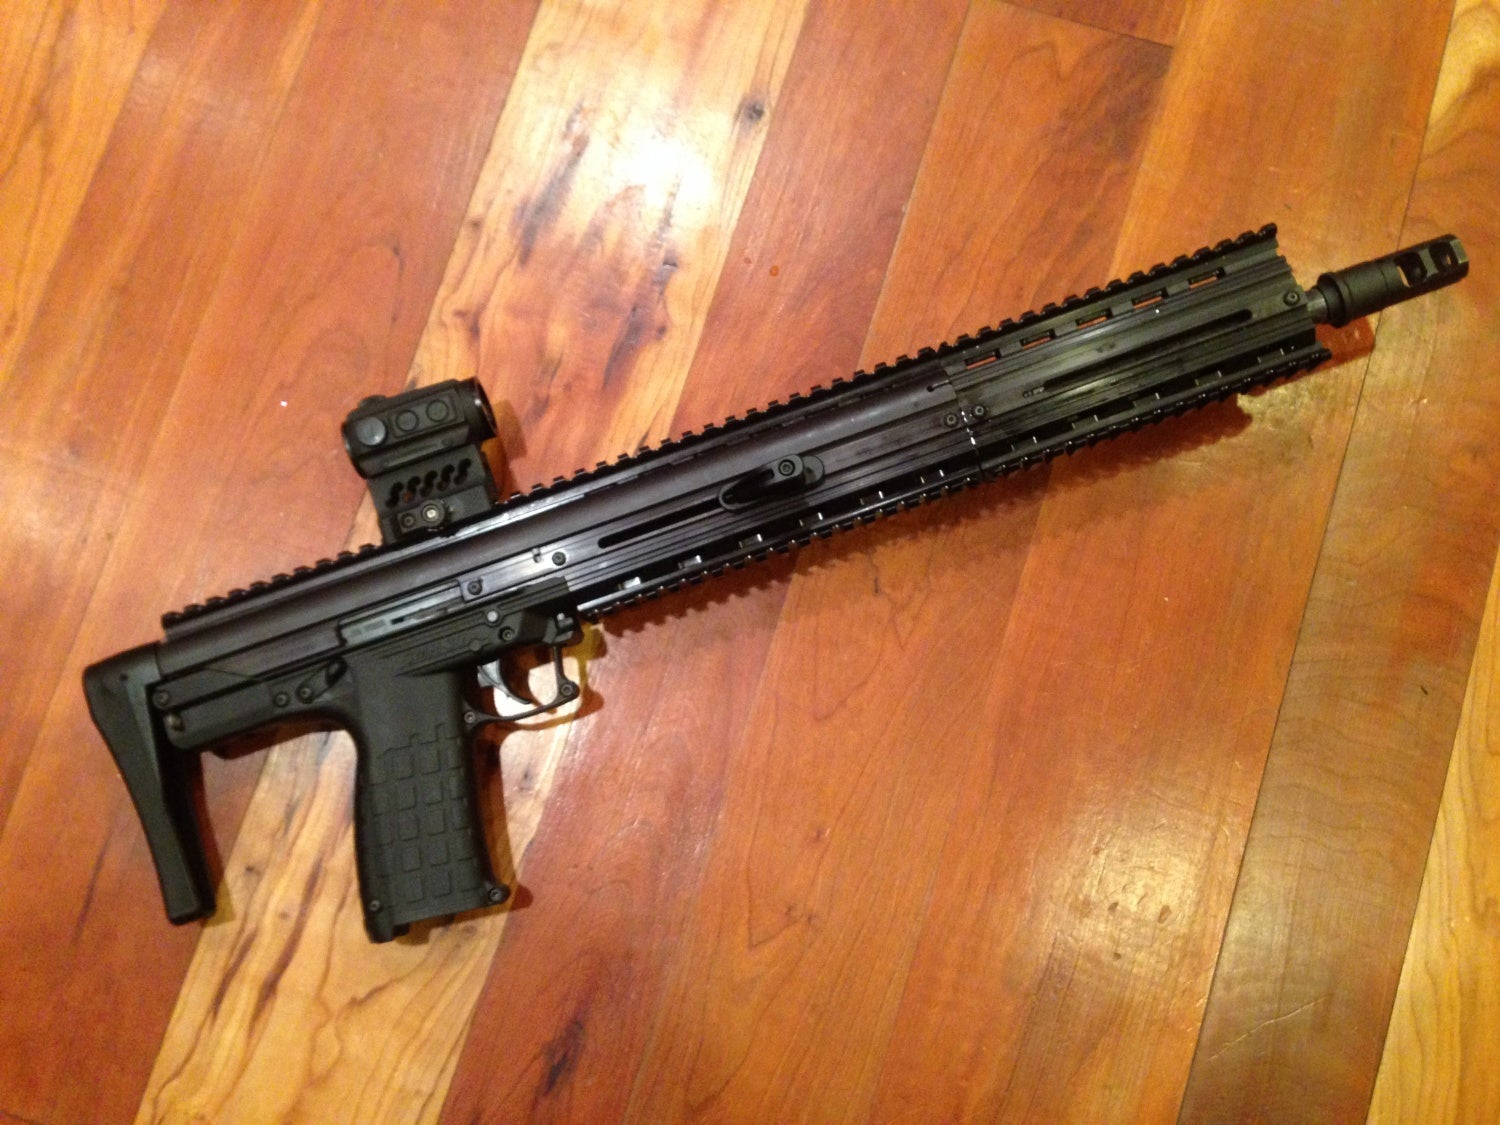
And here it is with a couple of accessories. I may remove the bottom rails. Grabbing the extension without a bottom rail is surprisingly comfortable and will eliminate the need for the AFG.