 Your Privacy Choices

Middle of June we posted about AutoTargets, a new company bringing some innovation to our beloved hobby/sport/profession. I tend to be somewhat of a tech geek so this particular product was definitely something on my radar.
AutoTargets finally completed their research and development cycle and got their product to the point where they could open up their Indiegogo campaign (which is how they intend to bootstrap initial sales).
The tl;dr is this: While they are obviously more expensive than shooting on paper, AutoTargets brings a very useful and powerful tool to the shooting industry. One that can benefit individual shooters, competitors, classes and groups by providing unique training scenarios and entertaining challenges.
AutoTargets worked with me to get the units in prior to my local club’s 3-Gun match. I really commend them for going above and beyond to get me the units and targets. My starting care package included five lift units, a bunch of targets, two CO2 bottles, somewhere near four kilometers of tubing (kidding it was only like five hundred feet), and a parts kit. They also hooked me up with $10 to get the CO2 tanks filled (which was super thoughtful). Basically I was ready to go out of the box with the exception of charging the batteries and filling the tanks (which they made super easy by even sending me a list of local places that could do the fills——how is that for customer service?)
Again, I did not do an unboxing video, though I really should have. Whoever did the packaging (all done in house) had each of the boxes perfectly packed and organized (as in an OCD level of packaging). I’m going to have a hard time getting the boxes reassembled when I have to send them back…
Construction
You should really think of AutoTargets as a target system. Sure you could have a single one (and there is still some training value from that), but the power of AutoTargets is in the magical network of units.
The heart of the system is the CO2 driven pneumatic lift unit. A surprisingly compact metal box, painted in a dark orange, houses the brains and actuators. The top is a molded plastic that can easily be removed for accessing the internals. The unit utilizes a LiPo battery (rechargeable) that during testing provided about 8-9 hours of “on” time. Wireless communications is provided via a USB wireless adapter that jacks into the brain.
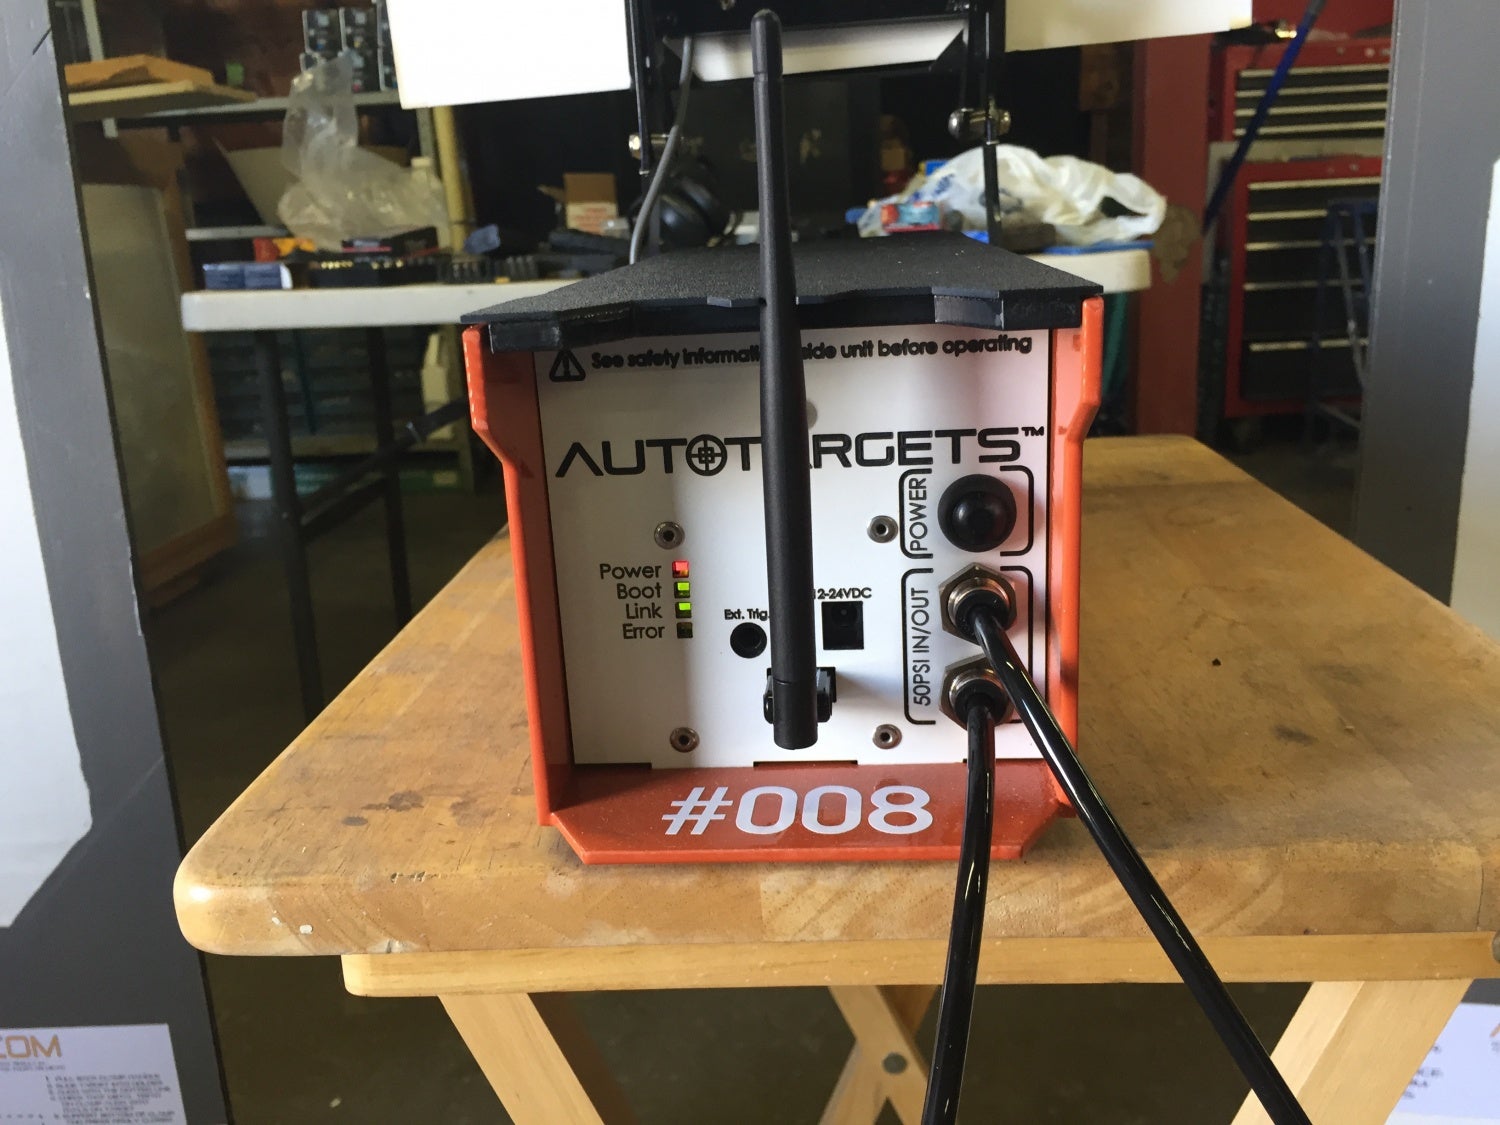
AutoTargets Lift Unit
Next you have the targets. The targets are basically a multi layer cake of foam board and metal foil. As the round passes through the target it simply completes a momentary circuit and registers the hit (it should go without saying, you do not want to staple paper targets over these). There are three primary zones and they are painted on the front in a pretty typical silhouette (though not specific like IPSC, etc). There is additionally a “hostage taker” zone (though my targets did not come pre-painted with them).

AutoTargets standard target. (hostage taker would be in upper right)
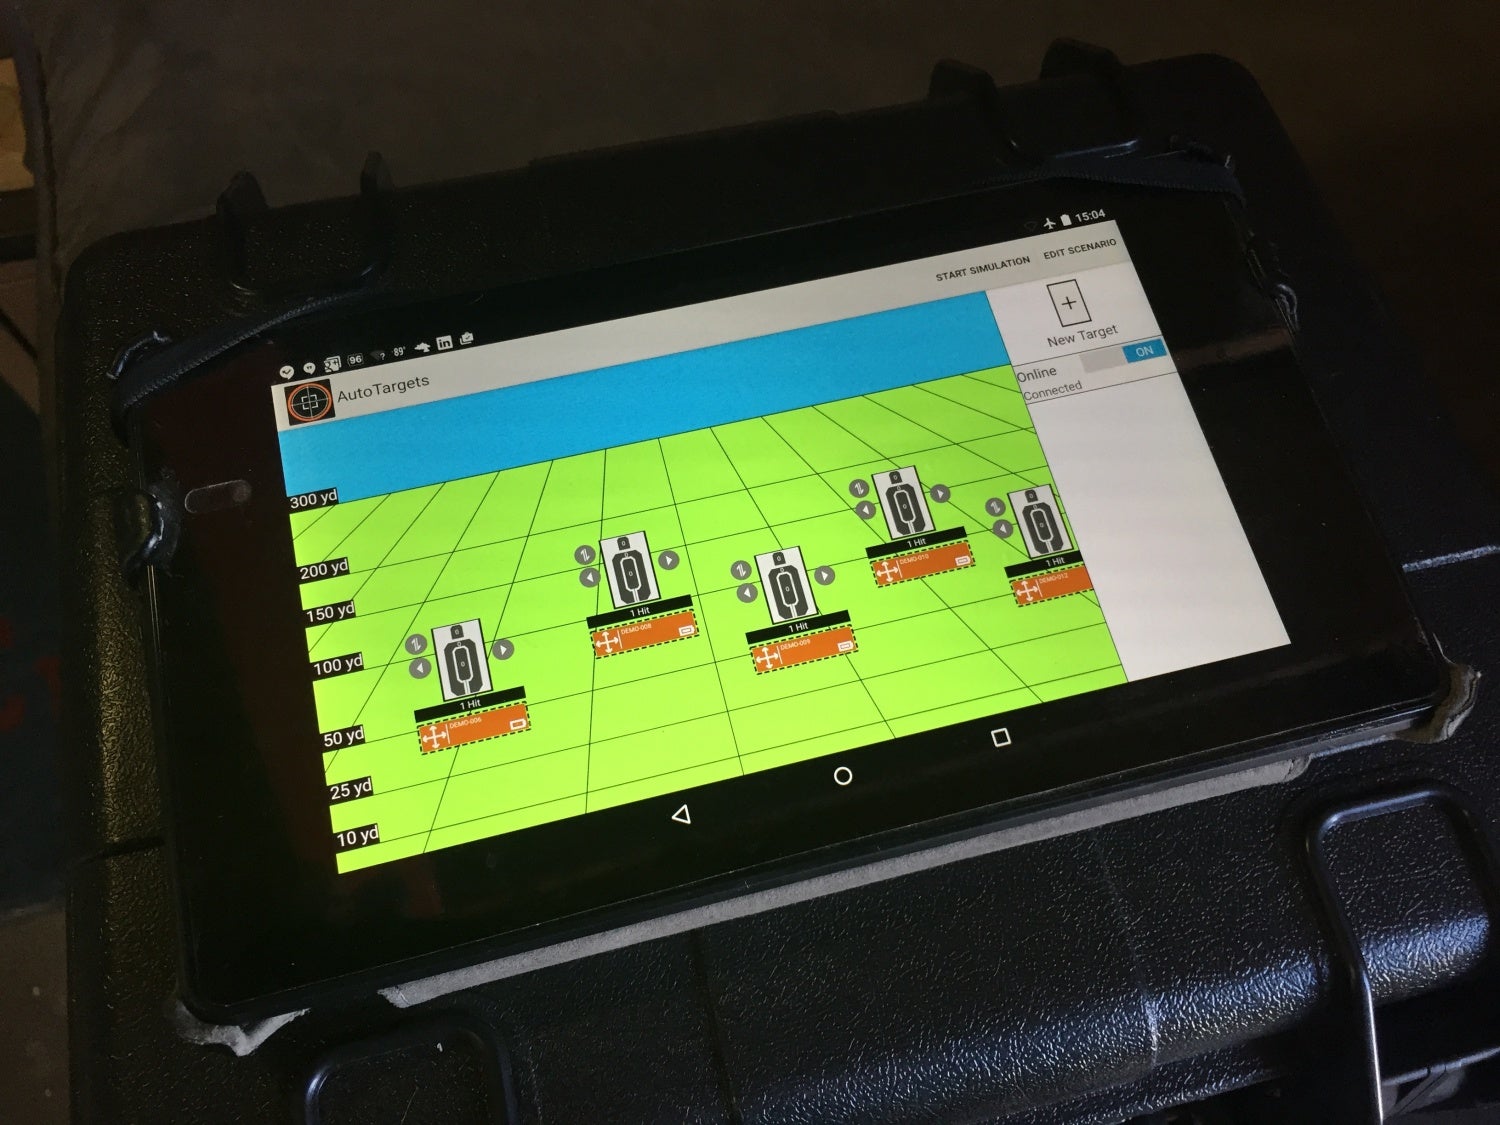
Finally you have the app. The almighty app that glues the system together. The app allows you to configure pretty much every aspect of the units, and how they interact with one another. Some settings are app specific and some control the scenario as a whole. The individual settings let you configure what impacts “kill” the target and allow it to drop. Everything from a single hit anywhere to complex point systems. There is even an unlimited mode which will allow you to practice as you would on paper, albeit with hit tracking (complete with metal pinging noise and/or vibration) and shot timing. Scenario settings include things like delayed start, target randomization (time and number), overall duration of the scenario, etc. They even helpfully include a Quick Start Guide that details the setup for some different games and drills.
Currently the app is only for Android, but AutoTargets has indicated that the IOS version of the app will be out very early next year (in time for the first production units to reach the public).
How It Works
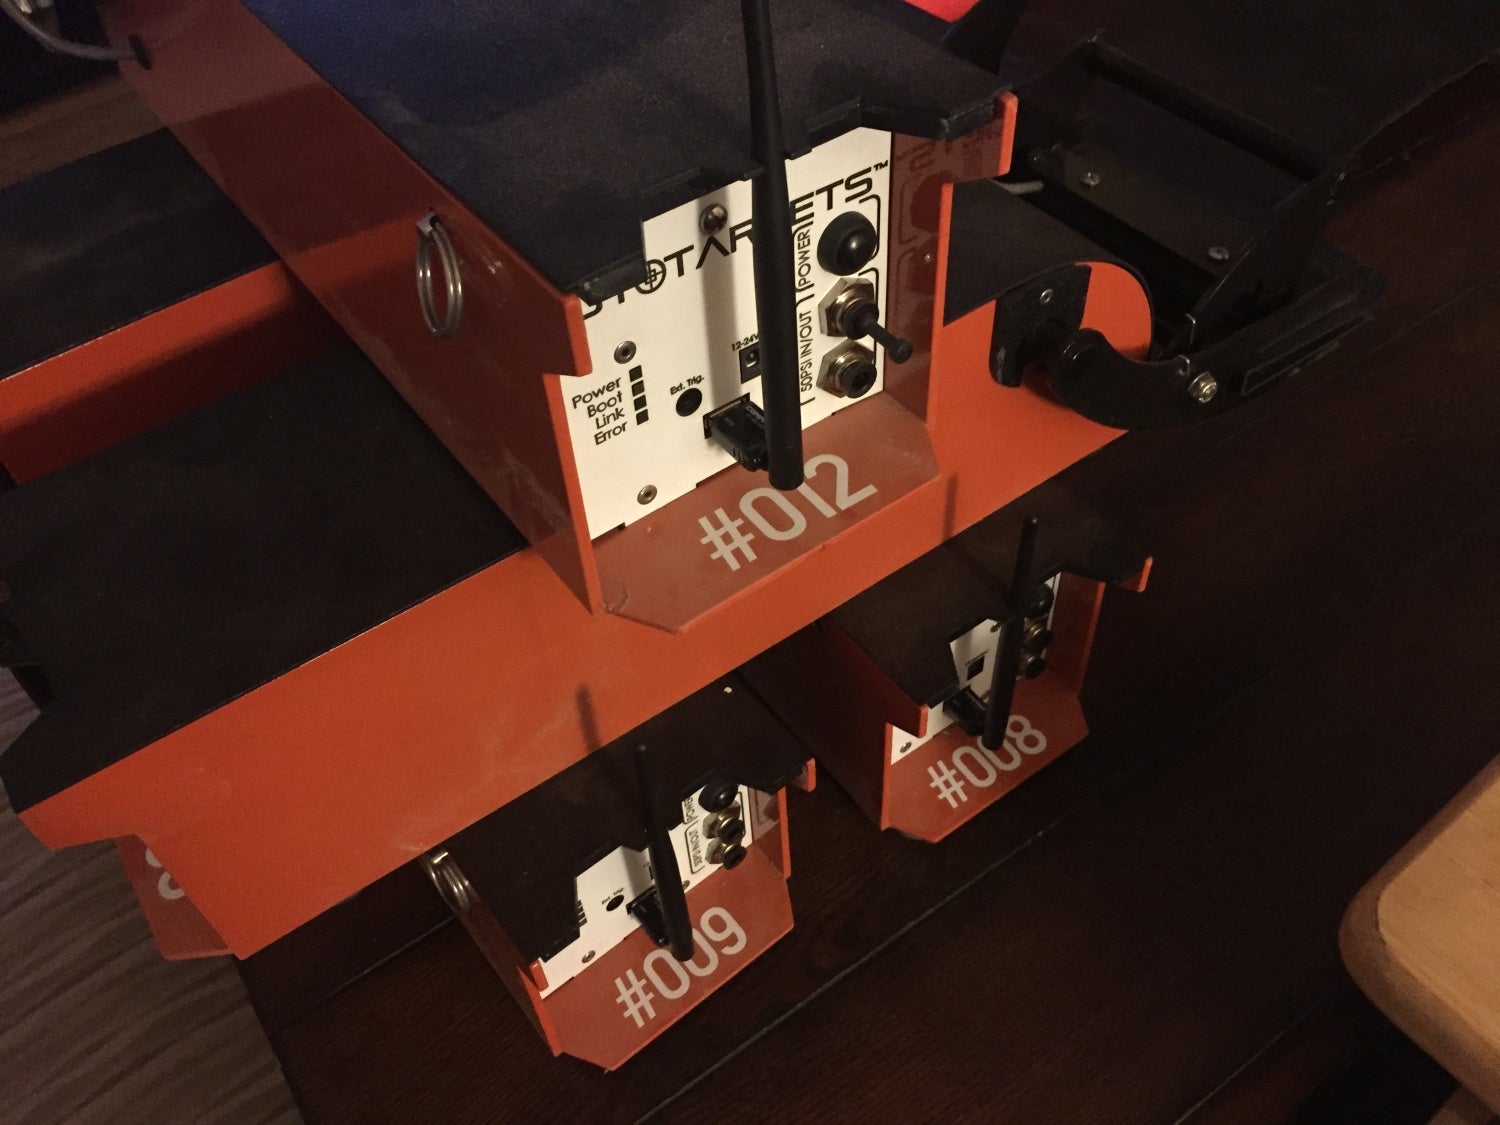
The first lift unit that you boot up sets up a wireless LAN (local area network). We will call that guy “alpha” for now. As you boot up additional units, using some sort of dark magic, they each locate and attach themselves to the alpha, and additionally configure themselves as range extenders.
After the first unit is broadcasting, you can open the app on your Android device, which will then begin searching for the lift units. Be aware though if there are other wireless networks in range and your device has joined one of them it will not find the lift units. You have to be on the same network; easy enough to fix by opening your network preferences and joining the network created by the alpha. The alpha unit has to be within about 100 yards of the controller tablet (I would recommend syncing at a closer range). The additional units can have up to 250 yards between each other (since each one acts as a booster and repeater). Obviously terrain features and general RF interference can impact this distance.
I imagine if you had thirty-two of these units and clear line of sight, you could string them out for thousands of feet. Currently thirty-two is the max number of lift units that AutoTargets suggests is “reasonable” to network together; assuming that having a Beowulf cluster of reactive target systems could be considered “reasonable” that is.
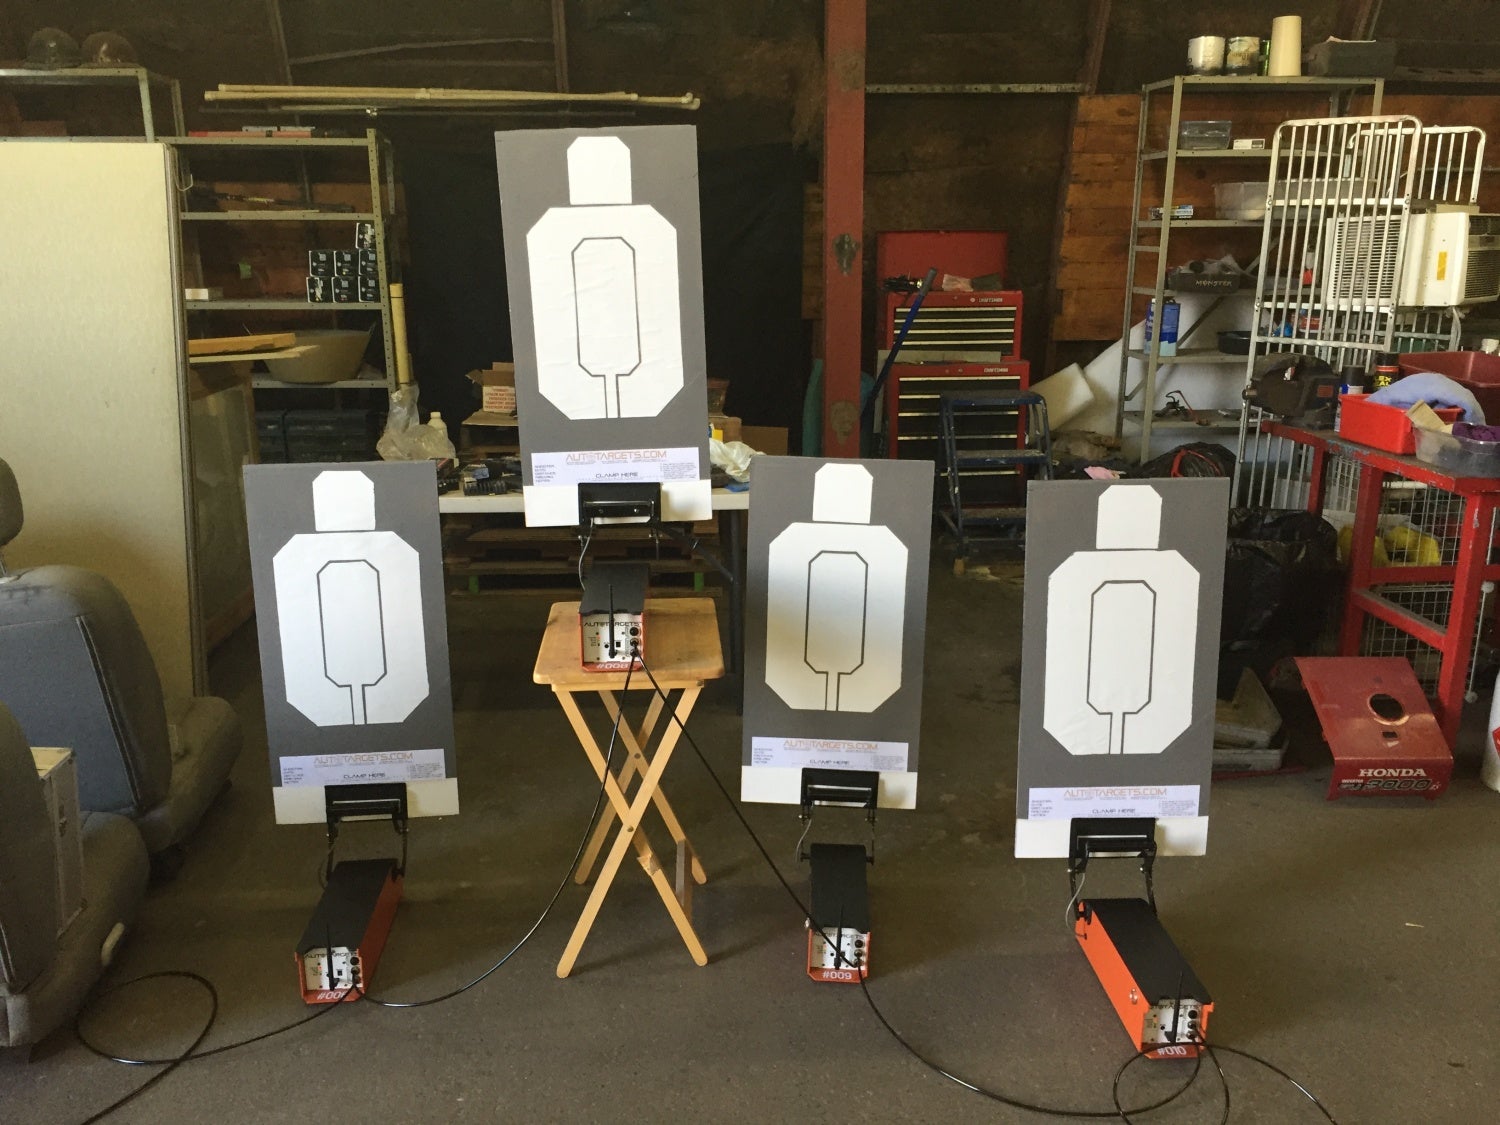
AutoTargets set up and linked in BMC Tactical’s workshop.
You also have to physically connect each unit to CO2 which is what drives the mechanical lifter. You can do this one of a couple ways. You can either give each unit it’s own dedicated bottle (which is probably how you would set up units that are far apart), or you can chain them together with tubing. Each lifter has an in and out port. The last unit in the chain needs a “terminator” in it’s “out hole”. A twenty ounce CO2 bottle should provide about 1,000 to 1,500 lifts. Based on my testing this is accurate. We did have a couple of leaks while setting up the system, mainly due to hoses we cut poorly, which lost some of the CO2 to the atmosphere. I think you could technically use another gas system (like HPA) so long as you can get 50-55 PSI (though that would need to have a blessing from AutoTargets).
Observations
Overall, the units are super easy to setup. The first thing is make sure the batteries are charged and that you have a good fill on your CO2 tank. After that, place your units out where you want them. Clamp the targets in place. Connect them with tubing and the tubing to the CO2. Turn the units on, and open the app on the tablet. Then have fun.
I did find it was easiest to turn one unit on well ahead of the others and let it establish the network. Then connect the app, then bring the other units online.
The targets that AutoTargets is currently shipping with the units is the tip of the iceberg, methinks. The easiest customization is that you can paint them to match whatever you want (paying attention to the zones, of course). Want a zombie target? No problem. But since the targets are really looking for a momentary completion of a circuit in four separate zones, really you could have a variety of inputs (think IR sensors, etc). I think this product will see some interesting upgrades and hacks over time.
Just for testing the connection range I was able to place two units near 150 yards apart, and I was back about 50 yards from the alpha unit. It worked fine and the app saw both units and both units responded to control without problem. I only used two since I hooked each unit to it’s own CO2 tank; probably something you would want to do with units that are widely separated in distance.
Target life is obviously a concern, though targets are not going to be horrible to replace at around $20 per target. They are rated to take five hundred or more rounds. If you are super accurate, and bore out a hole in the middle of a target, and rounds are just passing through without touching the target at all, it won’t register a hit. In reality this is probably not going to happen all that often unless you run the target in unlimited shot mode. During testing none of the targets failed to register a hit, even shots that were overlapping.
Another interesting feature of the targets is that they can indicate a fault (or a “short”). Basically what happens is that sometimes a round will cause a little part of the metal foil to remain in contact with the other side, keeping the connection constantly on. The app will indicate the zone where this occurs; all you need to do is take a pencil or a stick and poke it through the offending hole (or put another shot in nearly the same place) to clear the short. That only happened a couple of times during all of my testing.
One important thing to keep in mind is that the targets do sit pretty low to the ground, so you really need to pay attention to your angles (you can see this in the third video where we had rounds skipping off the ground back into the berm–we really should have had the targets further back).
AutoTargets During a 3-Gun Match
I had previously warned Jared Milinazzo, the club organizer and ranked competitor, that I was going to have the opportunity to test out AutoTargets and that I wanted to work them into a match. He was totally amenable and welcoming to the idea. Originally we were supposed to meet up a few days before the match and run through some sample scenarios, but we were not able to connect. I showed up to set up the morning of the match a little earlier and Jared indicated where they should go. We just did a simple setup using them with a single firing position. Each target was to start in the up position and would drop with two hits anywhere in the silhouette.
The first run was definitely a learning experience. I had mistakenly set the scenario to run “unlimited presentations” which effectively left the targets standing after they were correctly and effectively neutralized. I quickly corrected that and set the scenario to “5 presentations”. Much better!
Three of us ran through the set before Jared had his turn. Did I mention he is nationally ranked? I mean, I’d seen him run courses before, and run them quickly and accurately. But now I could see the reactions and splits (on the AutoTargets anyway). A little under a second and a half to place two hits center of mass on five targets. He was so fast that he was shooting the third target before the first had begun to drop. And he was exiting the bay, to the next set of targets, as the fourth was dropping. Sigh. Someday perhaps I’ll be able to run a quarter of that speed… Anyway, here is a short video showing him take on the AutoTargets. I was demo’ing the basic units but AutoTargets is going to be offering an upgrade kit to drop the units much faster.
For my second run, I decided to have some fun with the system and introduce some randomness. I don’t “compete” for the competition. I use the match as a monthly test to vet gear and confirm practice (which sadly it confirms that I do not dry fire nearly enough). For my scenario I set the system to only have two targets visible, and to randomize the presentation order. Here is a short video demonstrating that:
Fun Shoot
In addition to trying them out in a competition match I also wanted to do a fun shoot with them to just play around with the features.
We took them out to some BLM land designated for shooting, and set them up at a variety of distances with the intention of shooting mixed rifle and pistol. We ran a bunch of scenarios and also had the opportunity to assess the durability of the units.
The lifters operated flawlessly for both the rifle and pistol shoots (.223 Rem, 9mm, and .45 ACP), and the app registered all hits appropriately. In total we shot somewhere north of two hundred fifty rounds in the limited time we had out there. Some of the video from the shoot:
So, what about durability of the units you may ask? Well, during our “fun shoot” three of the lift units took rounds. One was just a “flesh wound”, the other two took heavier hits (though none of the shots were on the body where the electronics and hydraulics sit).
You can see, in the following pictures, the damage:
Round to one of the side struts; will likely only need some paint.
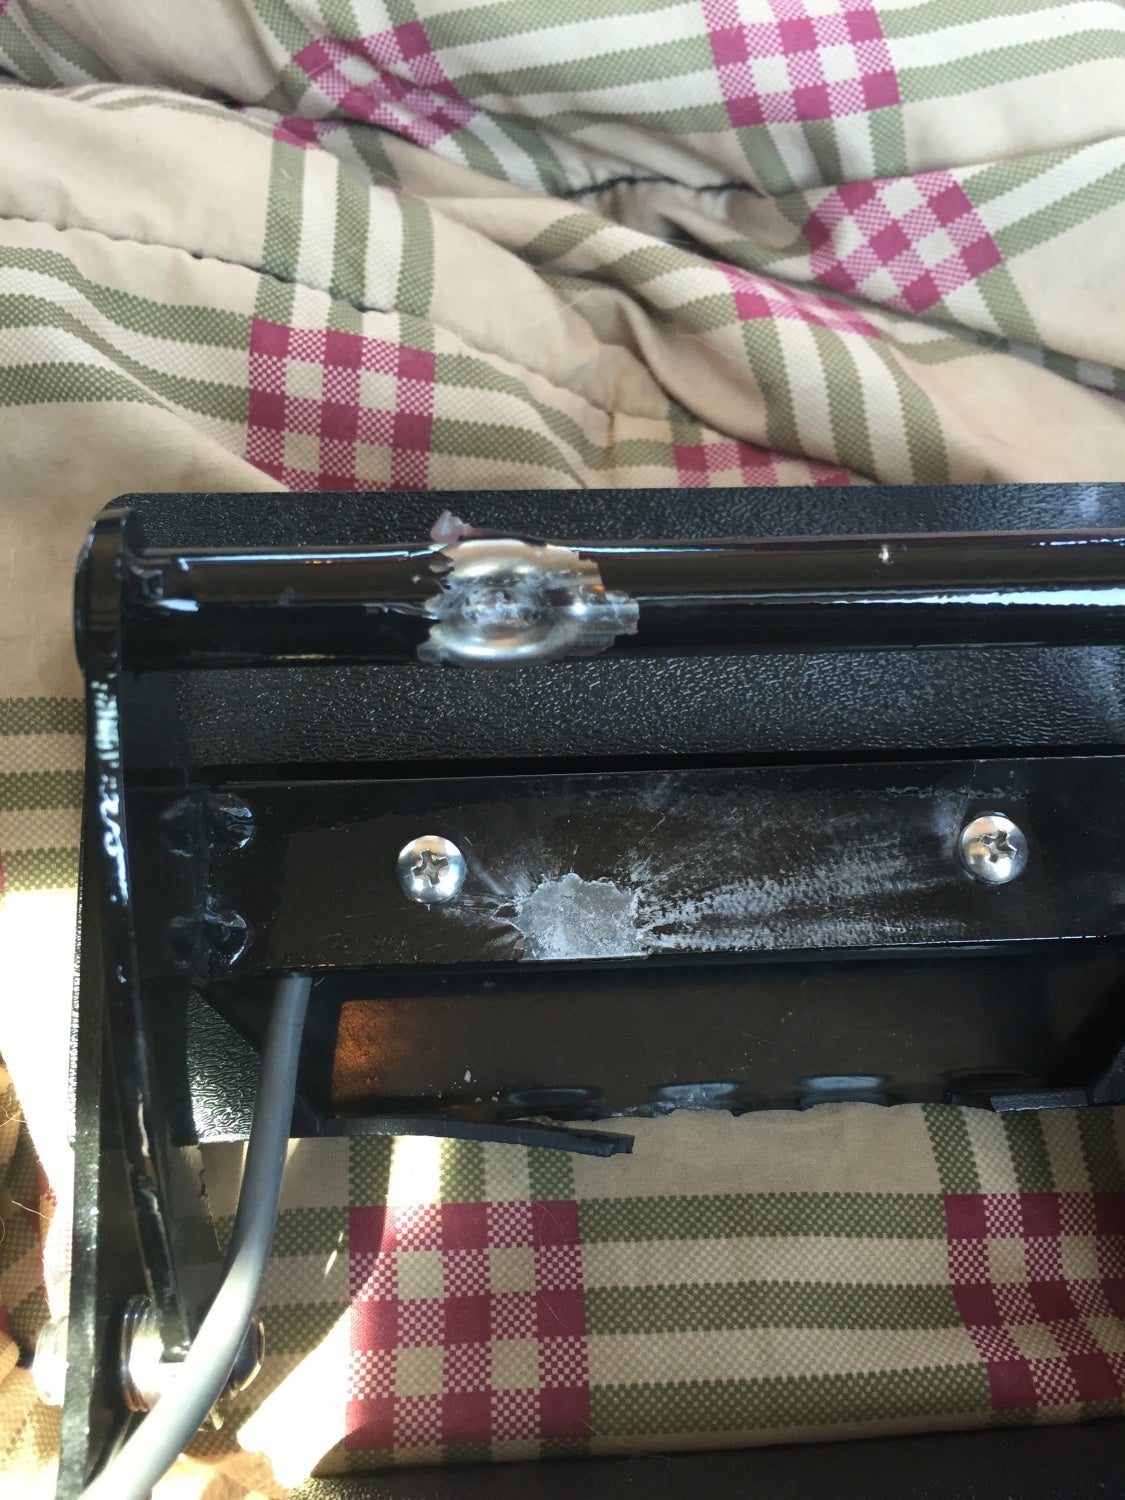
Shot to the carry handle, with a deflection to the terminal bar.

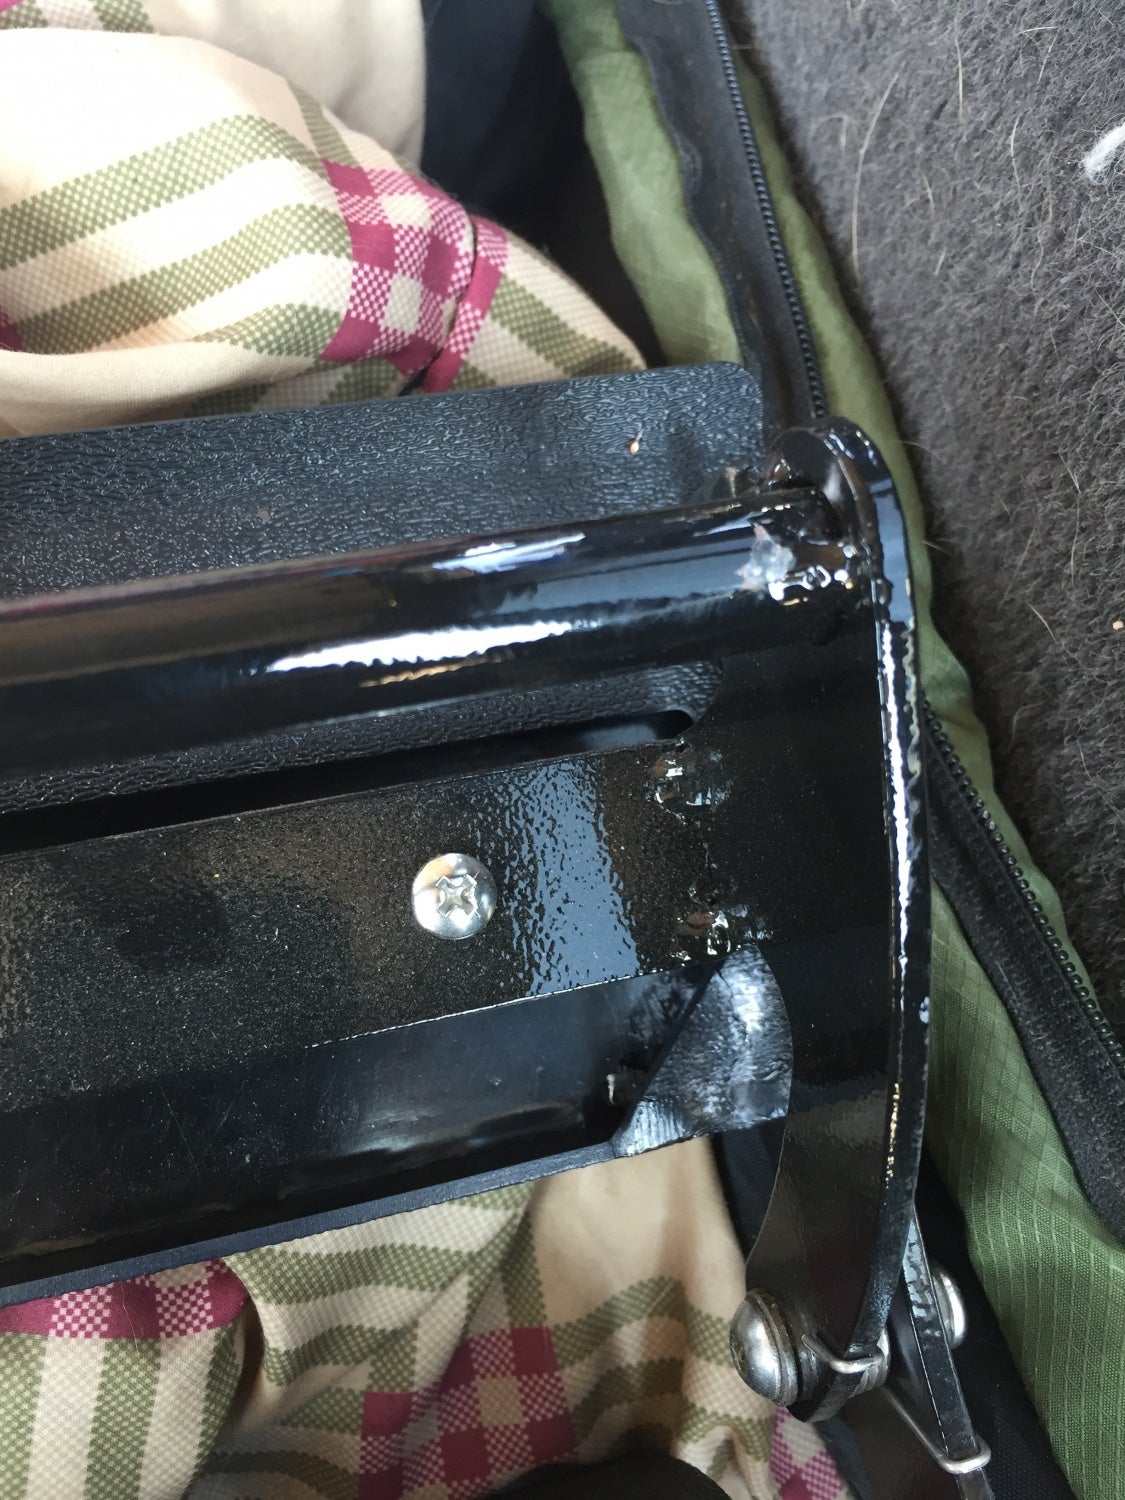
Impact of round partially broke the weld, and bent the terminals on the other side. Target continued to work without fault.
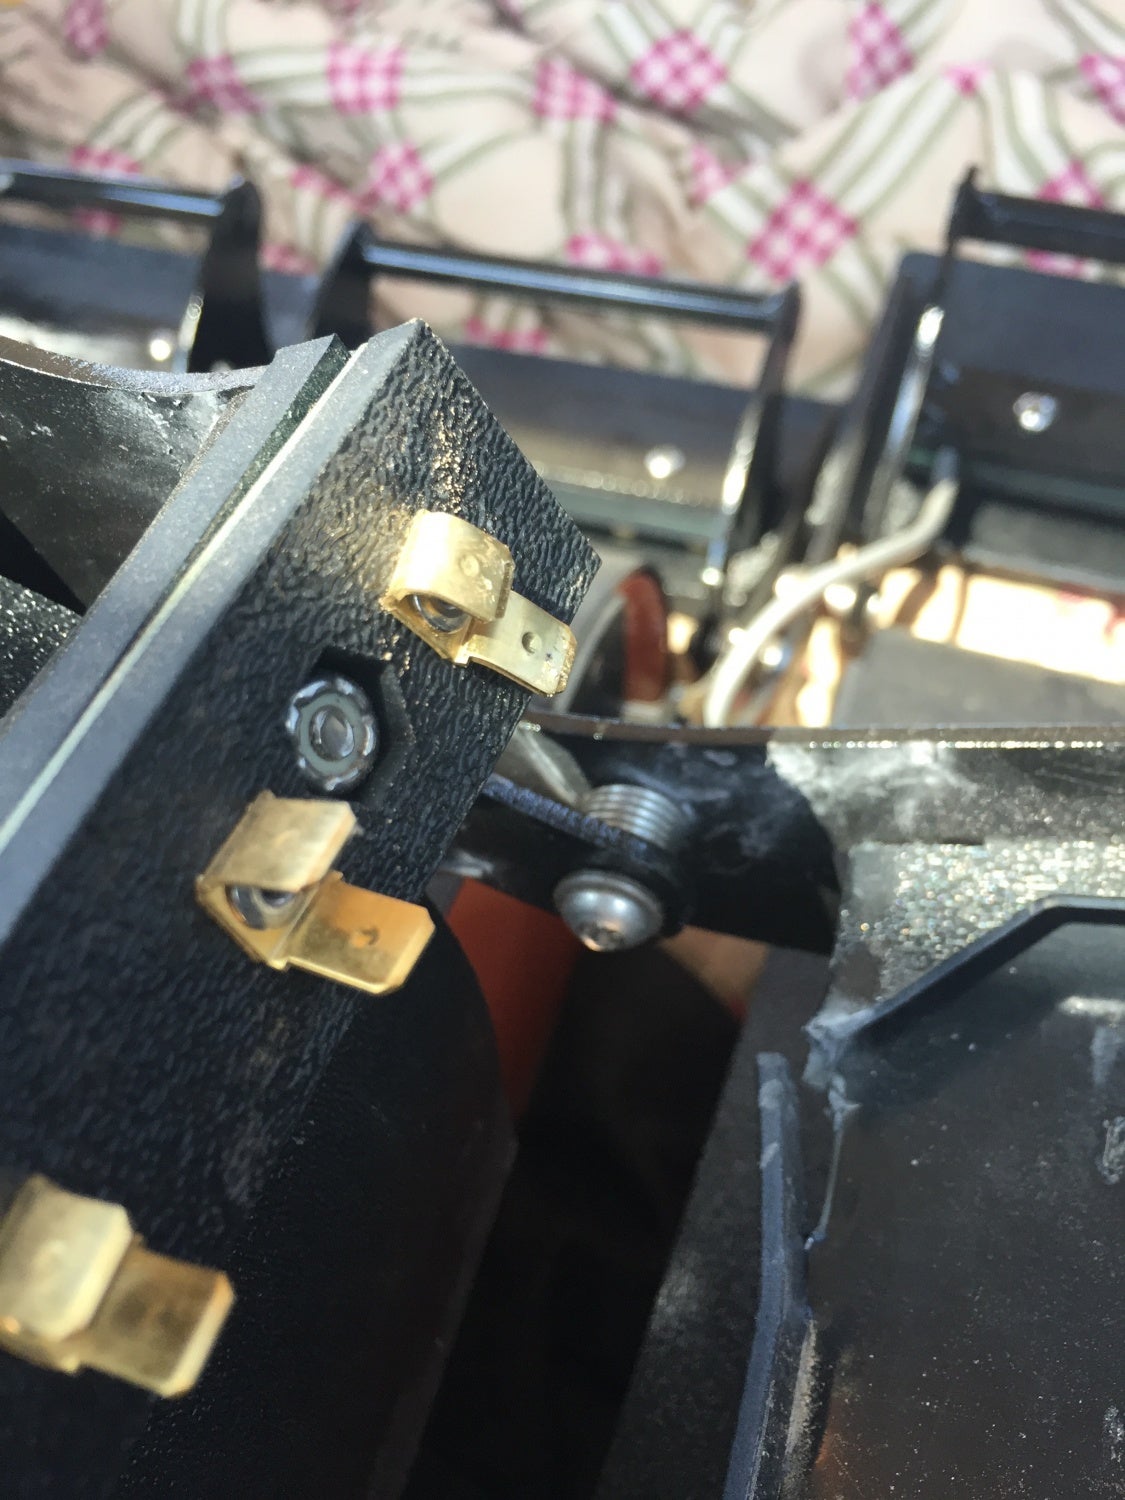
Terminals bent from impact of round.
The worst hit took a round directly on the terminal bar (where the lift unit clamps to the target). That shot actually cracked the weld and transferred enough energy to deform the connectors.
The interesting thing to note is that we did not discover any of the damage until we were breaking the units down. They all continued to function even with the damage. In fact, none of the units even showed a “short” condition to any of the zones.
I would assume a round to the main body would disrupt the unit. To mitigate this, AutoTargets has an armor plate system in development for those that want it. Though more bulky, you can certainly use sandbags both in front of the unit and laying over the top of the body in front of the lift arm (which would have stopped the damage our test units took).
AutoTargets for Training
Paul Howe of CSAT is one of my favorite instructors. I met him back in 2003 when I was in Texas and working in executive protection and he taught some courses at our company’s range. He has some published standards that he requires for his instructor courses and I think they form a good baseline.
Why I find them relevant for this target system is that they compliment one another. If we review his pistol standards we see that we can easily set these drills up using AutoTargets. I’ve cleaned up the items to be a little more readable.
- From the Ready Position, fire 1 shot at 1 target from 7 yards in 1 SEC
- From the Holster, fire 1 shot at 1 target from 7 yards in 1.7 SEC
- From the Ready Position, fire 2 shots at 1 target from 7 yards in 1.5 SEC
- From the Ready Position, fire 5/1 shots at 1 target from 7 yards in 3 SEC (this drill you do 5 dry fire shots, then load a live round and fire it; repeat drill 5 times)
- From the Ready Position, fire 4 shots at 2 targets from 7 yards in 3 SEC
- From the Ready Position, fire 4 shots (2 from weak side/2 from strong side) at 1 target from 7 yards in 5 SEC
- From the Ready Position, fire 1 shot starting with a Malfunction drill at 1 target from 7 yards in 3 SEC (I use a snap cap)
- From the Ready Position, fire 4 shots (2 in each magazine requiring a reload) at 1 target from 7 yards in 5 SEC
- Start with Rifle Up, fire 1 shot dry then transition to pistol fire 1 shot at 1 target from 7 yards in 3.25 SEC
- From the Holster, fire 1 shot Kneeling at 1 target from 25 yards in 3.25 SEC
Sure, there are plenty of other standards and training scenarios, but this one gets it done pretty effectively in 24 rounds and can be a good confirmation of the mechanics you are encoding while dry firing.
The AutoTargets system could easily be used here with two lift units (or even one; if you modify drill #5) to complement your training. In fact I did the above drill with a buddy of mine (Mike) just to try it out and it worked really well!
One of Mike’s observations was the introduction of anxiety and stress into the shooting. He and I generally shoot weekly, and we work the basics against paper targets. If we want to get a little froggy, sometimes we will do an el Presidente drill. After a few weeks of this, though, you know what to expect. You can “game” the drill. And with that gaming comes complacency. In the following video, the first two segments are us running through Drill #6 (from above). The next two show a couple of random shoots. The first of those was a basic shoot with randomized target presentations; each target requiring one shot. The last was the same as previously but with the exception that the center target required a failure drill (two to center mass and one to head). As you will see, I kept hitting center of mass, but was not shooting the head. As soon as I did, the target dropped.
What the AutoTargets helps engineer is the “uncertainty” factor in the drill. If you set up the scenario to randomize targets (both presentations and delays of lift), you can really test (and tune) your basics. It makes you think.
The other benefit is that the app gives you immediate feedback on where and when the shot occurred. So you can go back and “hot wash” your run. “WTH, Why didn’t it go down?… Oh… I see, I needed to put two in center of mass and one in the head, but I actually put one center of mass, one in the outer torso, and one in the head.”
But What About Repairs?
So, as I mentioned before, our demo units took some damage… I called up Chip, and he immediately put some replacement components in the mail to me. That’s right, the units are (for the most part) user serviceable. You don’t have to send the full unit back. Not only are they user serviceable but they are intended to be very modular. AutoTargets has a host of upgrades that are already planned: faster lift unit, armor kit, and external triggers to name a few.
Anyway, I got the replacement lift arm units and set about doing the repairs. I was a little nervous at first, but after reading through the instructions I realized it was pretty simple. The first unit took me about ten minutes to repair, and the other took a little under five minutes. Tool-wise, all I needed was a set of wire snips to cut the cable tie holding the terminal bar wires and a jeweler’s screwdriver to manipulate the rubber grommet that protects the wire penetration into the body. Everything else was done with fingers. I didn’t even get a chance to curse because it was so easy.
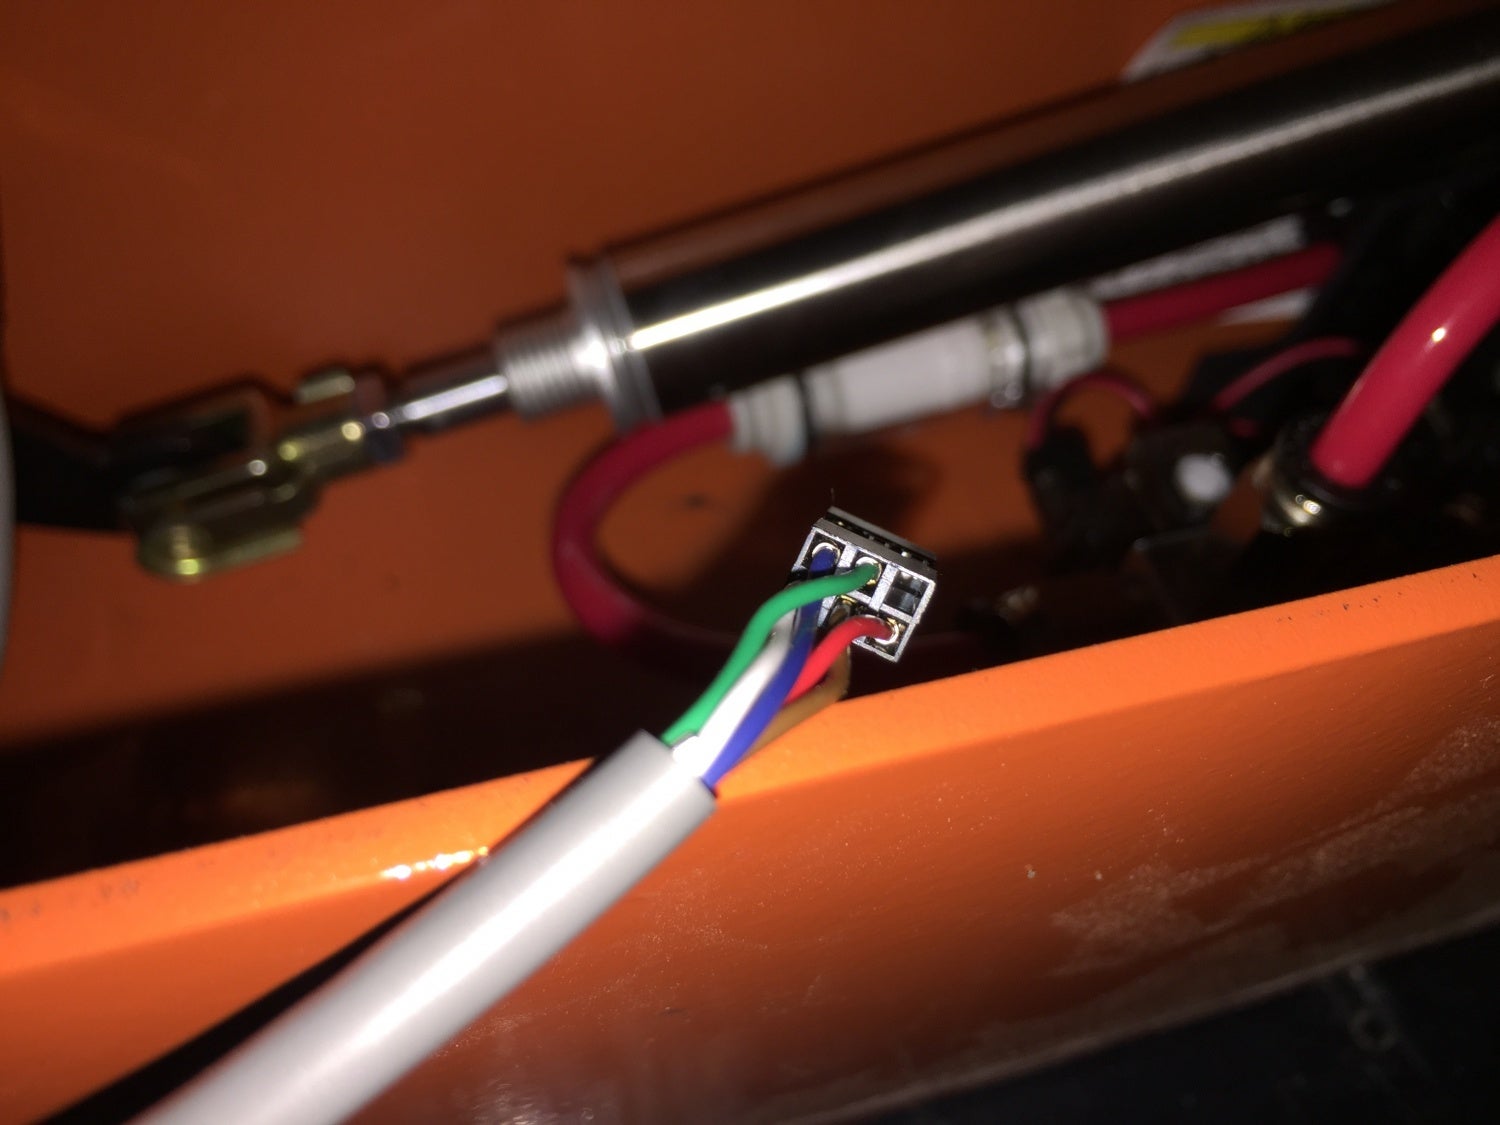
Disconnect the lift control cable

Pull the cable through
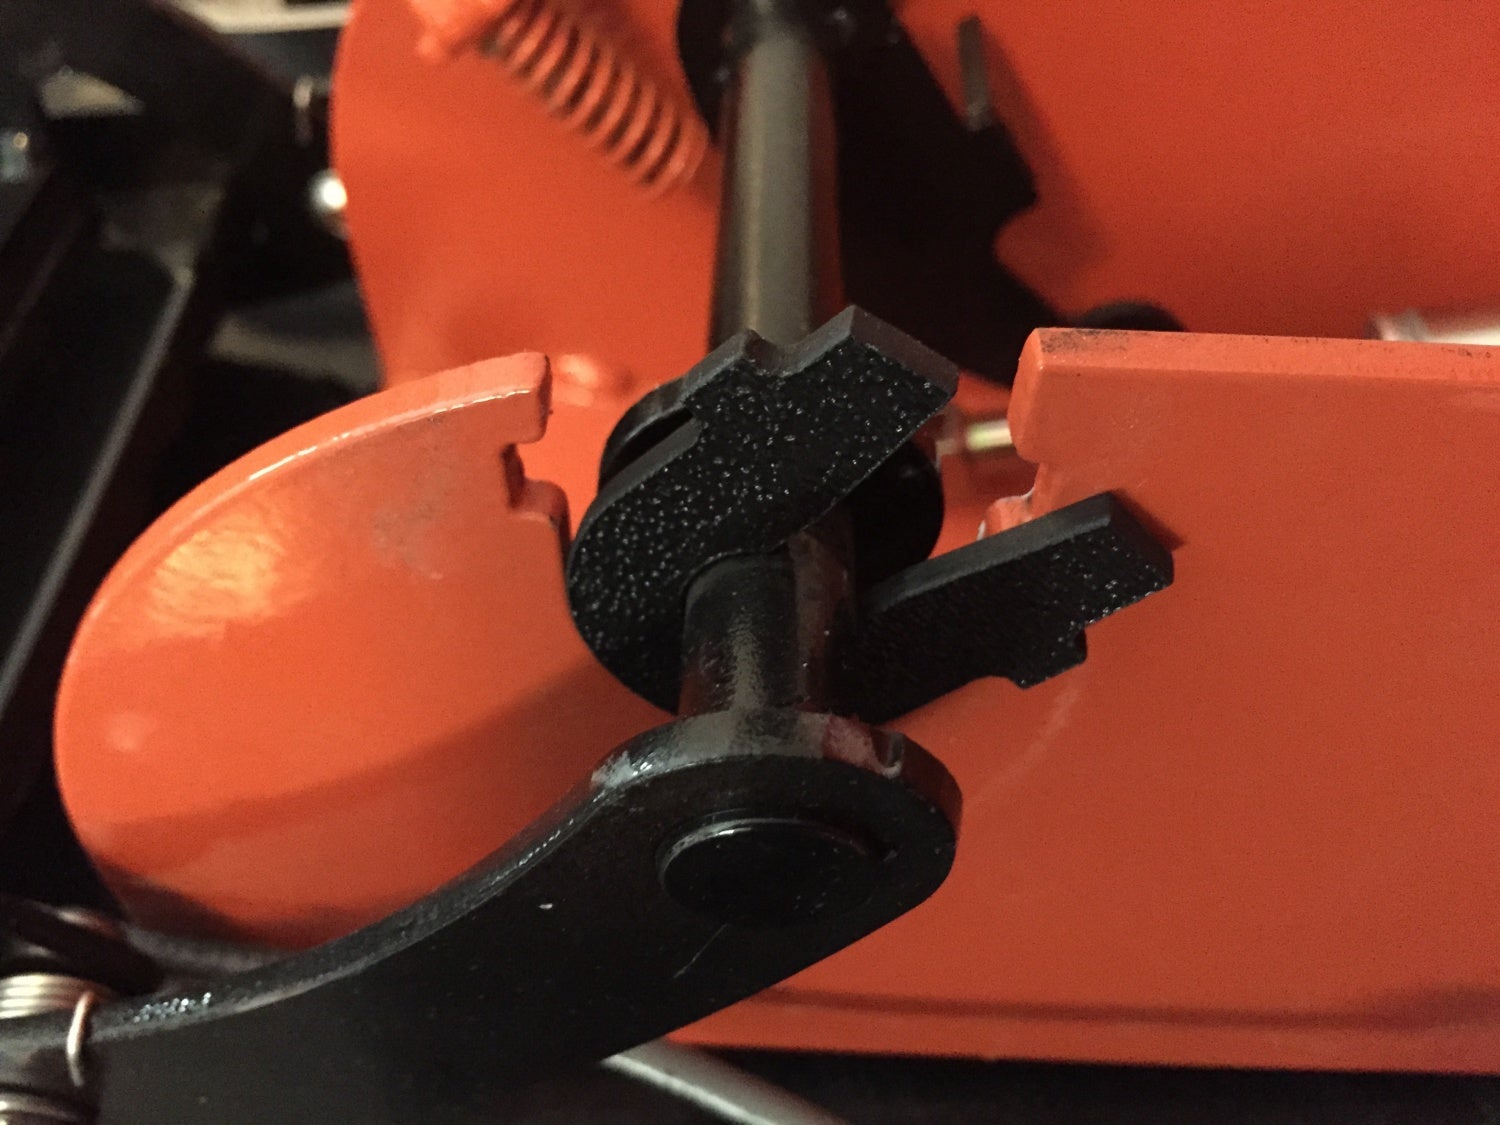
Disconnect the retaining clips
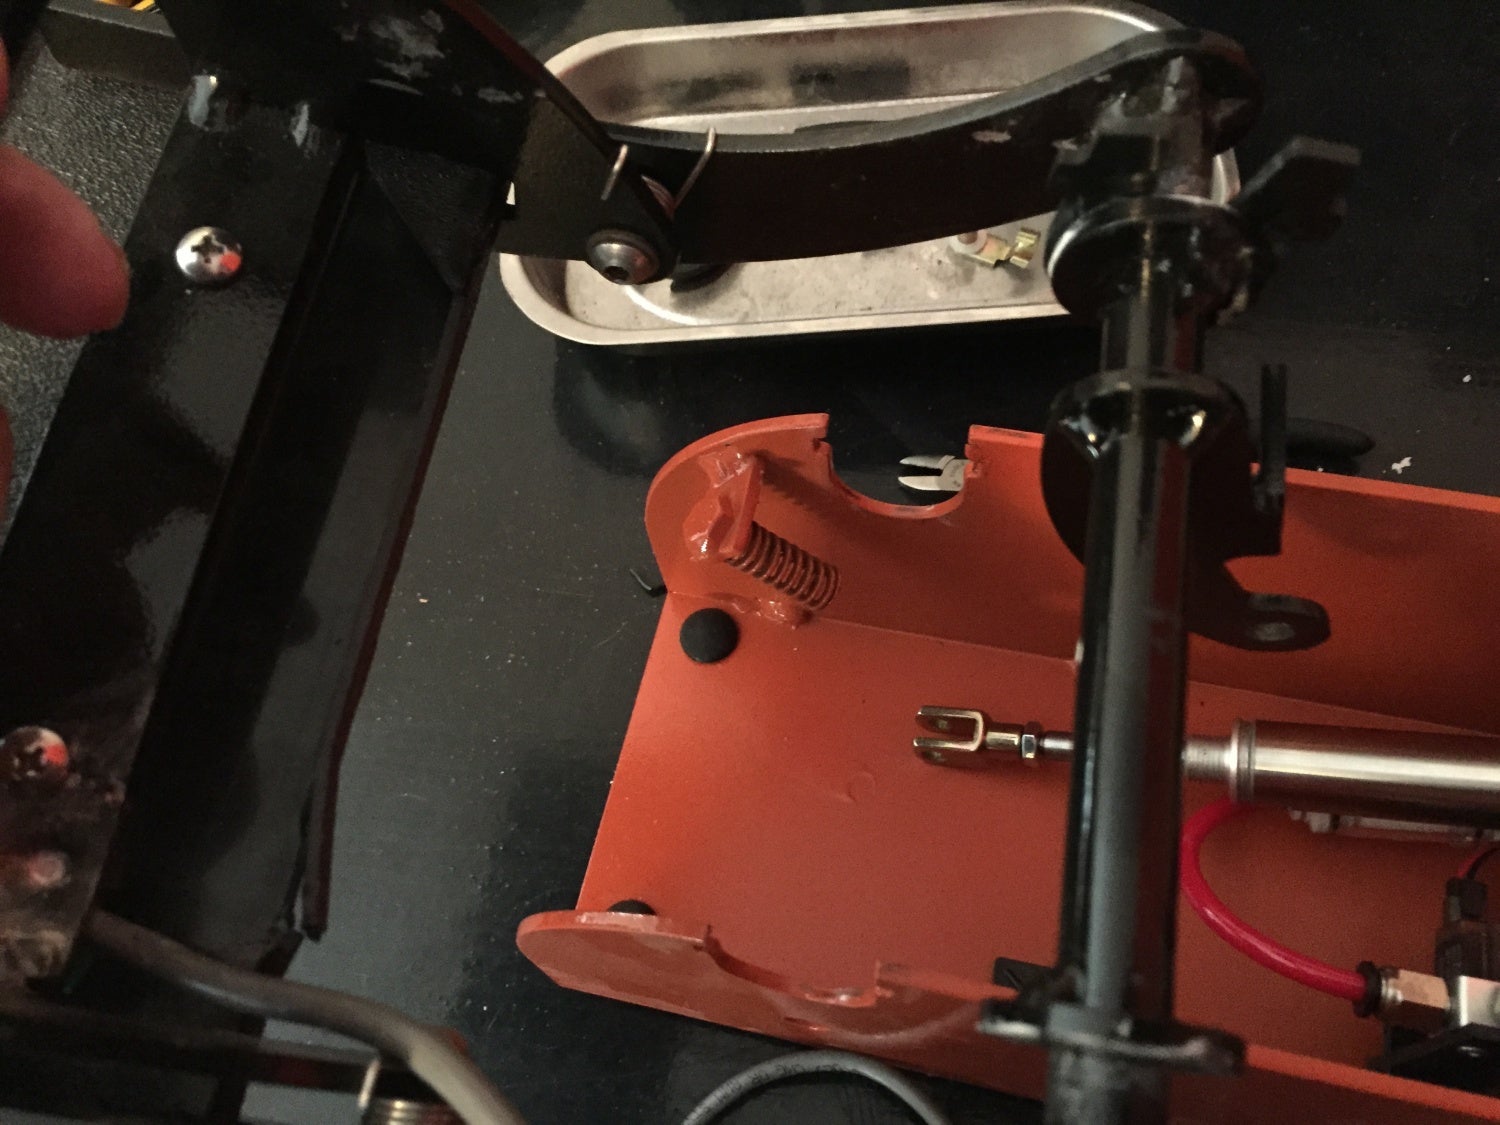
Swap out the unit
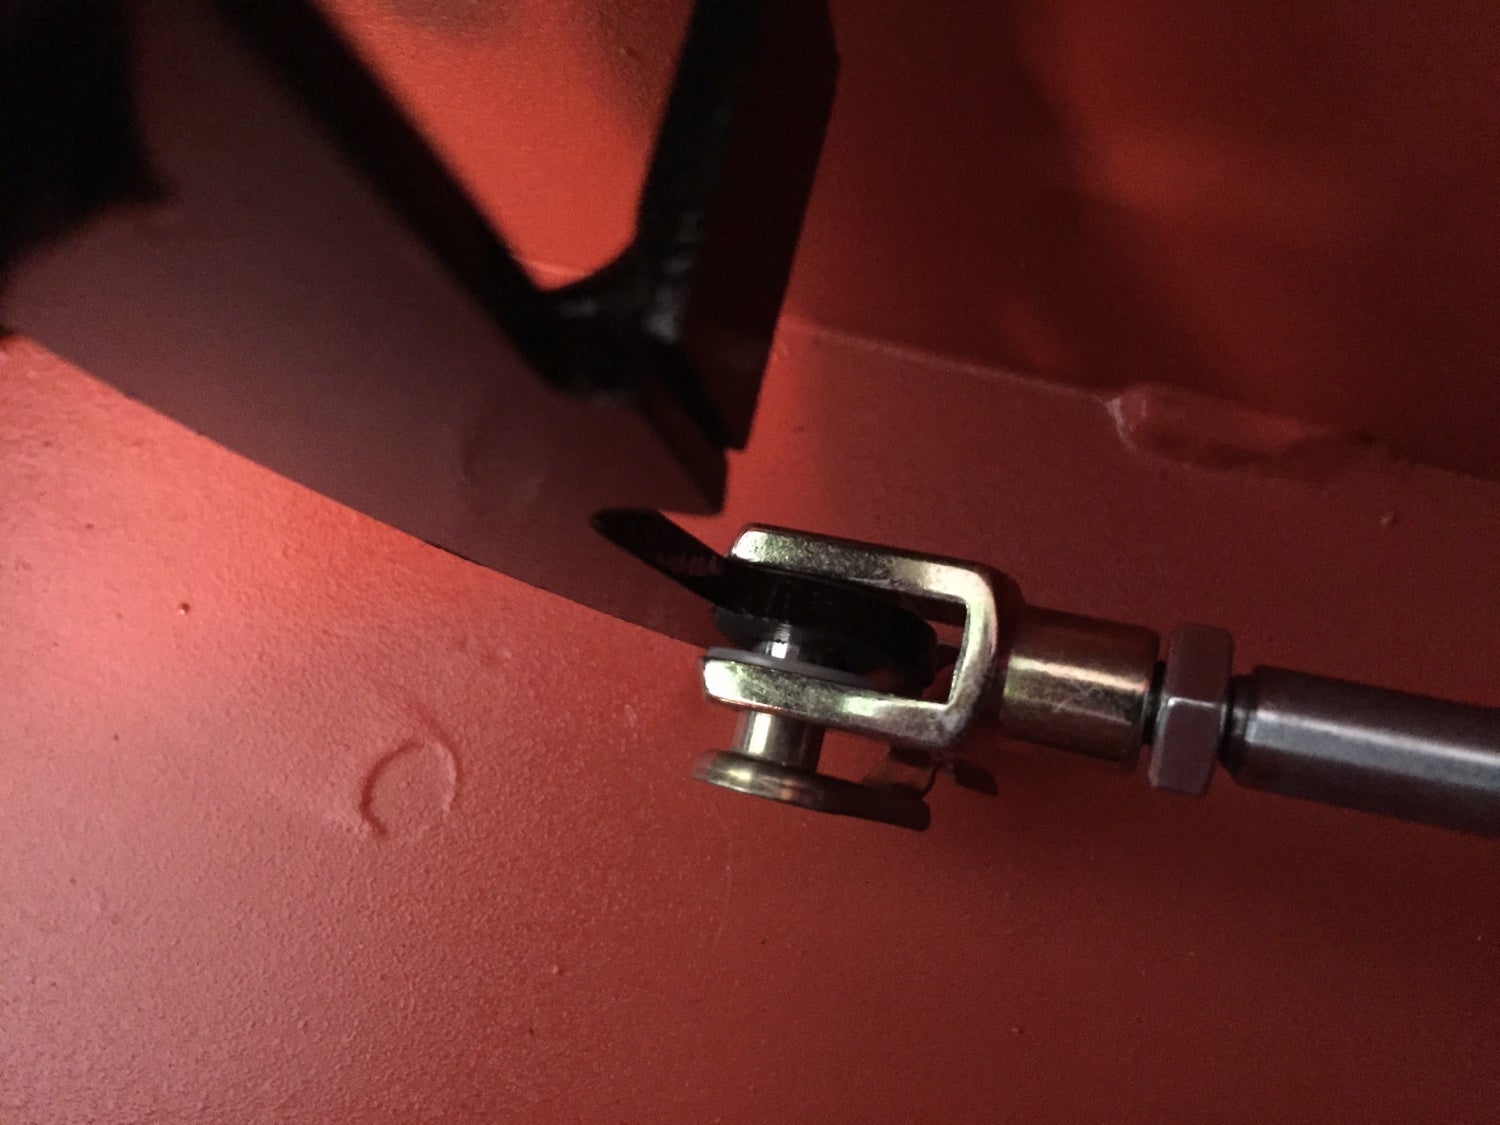
Reconnect the lifter arm and the pneumatic arm. (there are a couple of nylon washers that are important; and not really that hard to replace to my surprise)
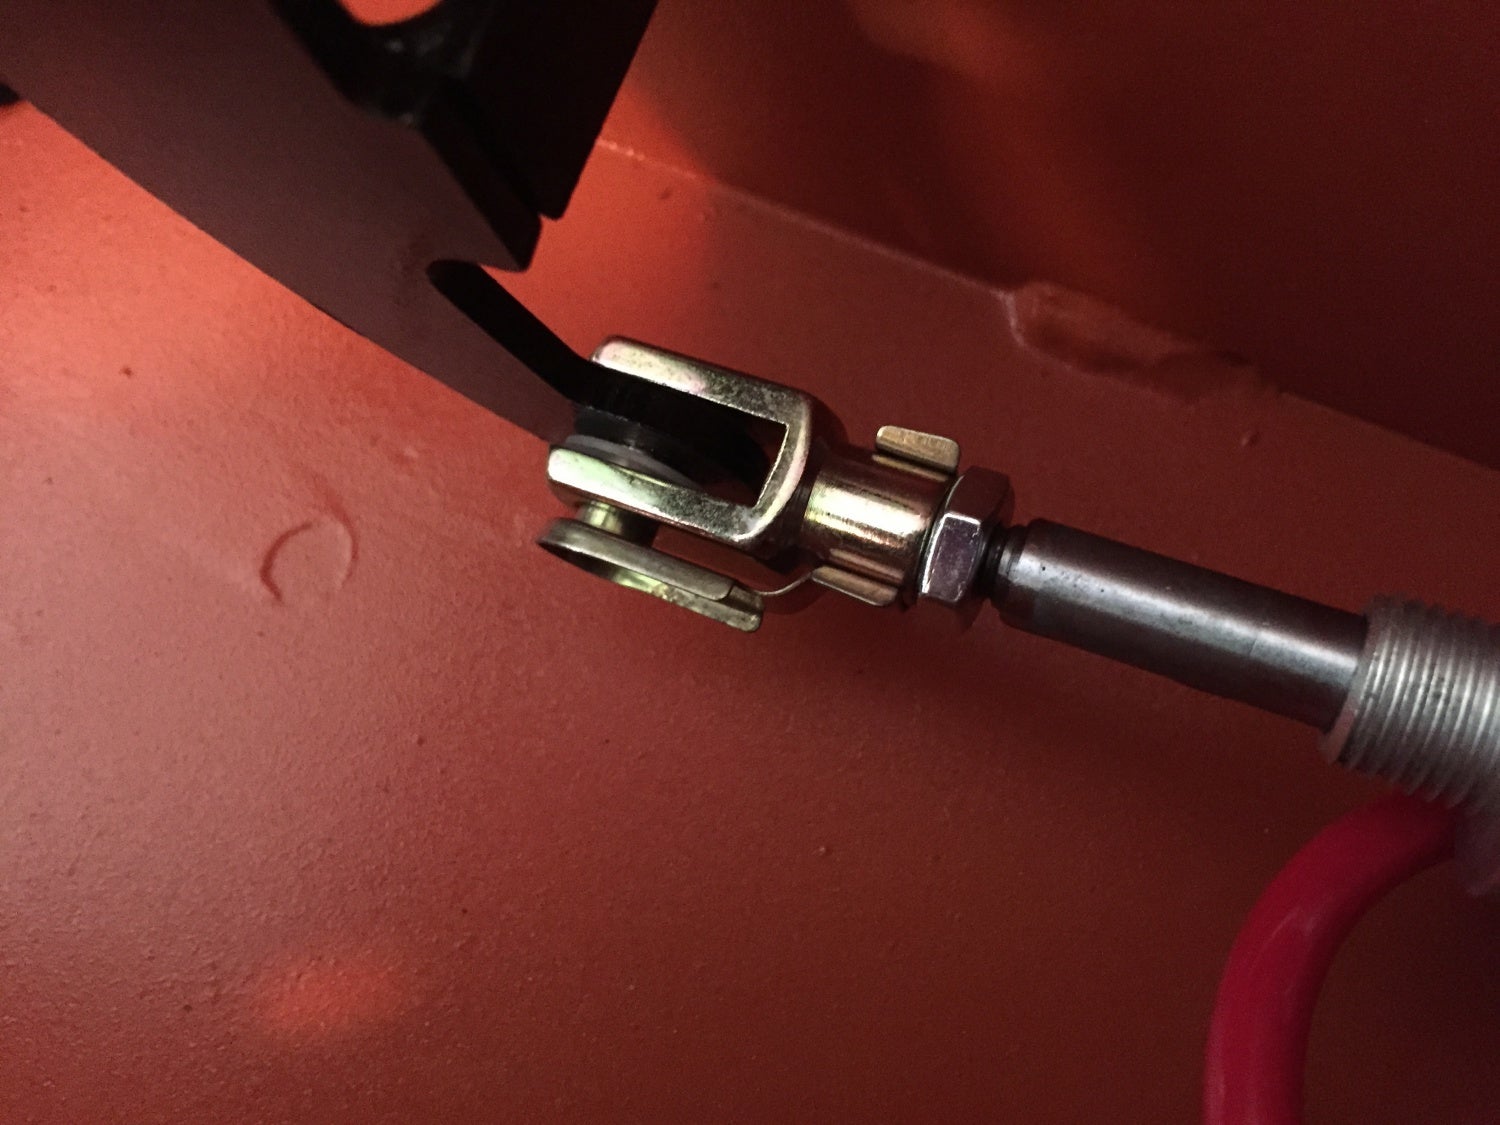
Lock the retaining pin back in place

Set the rubber grommet back in the pass through hole
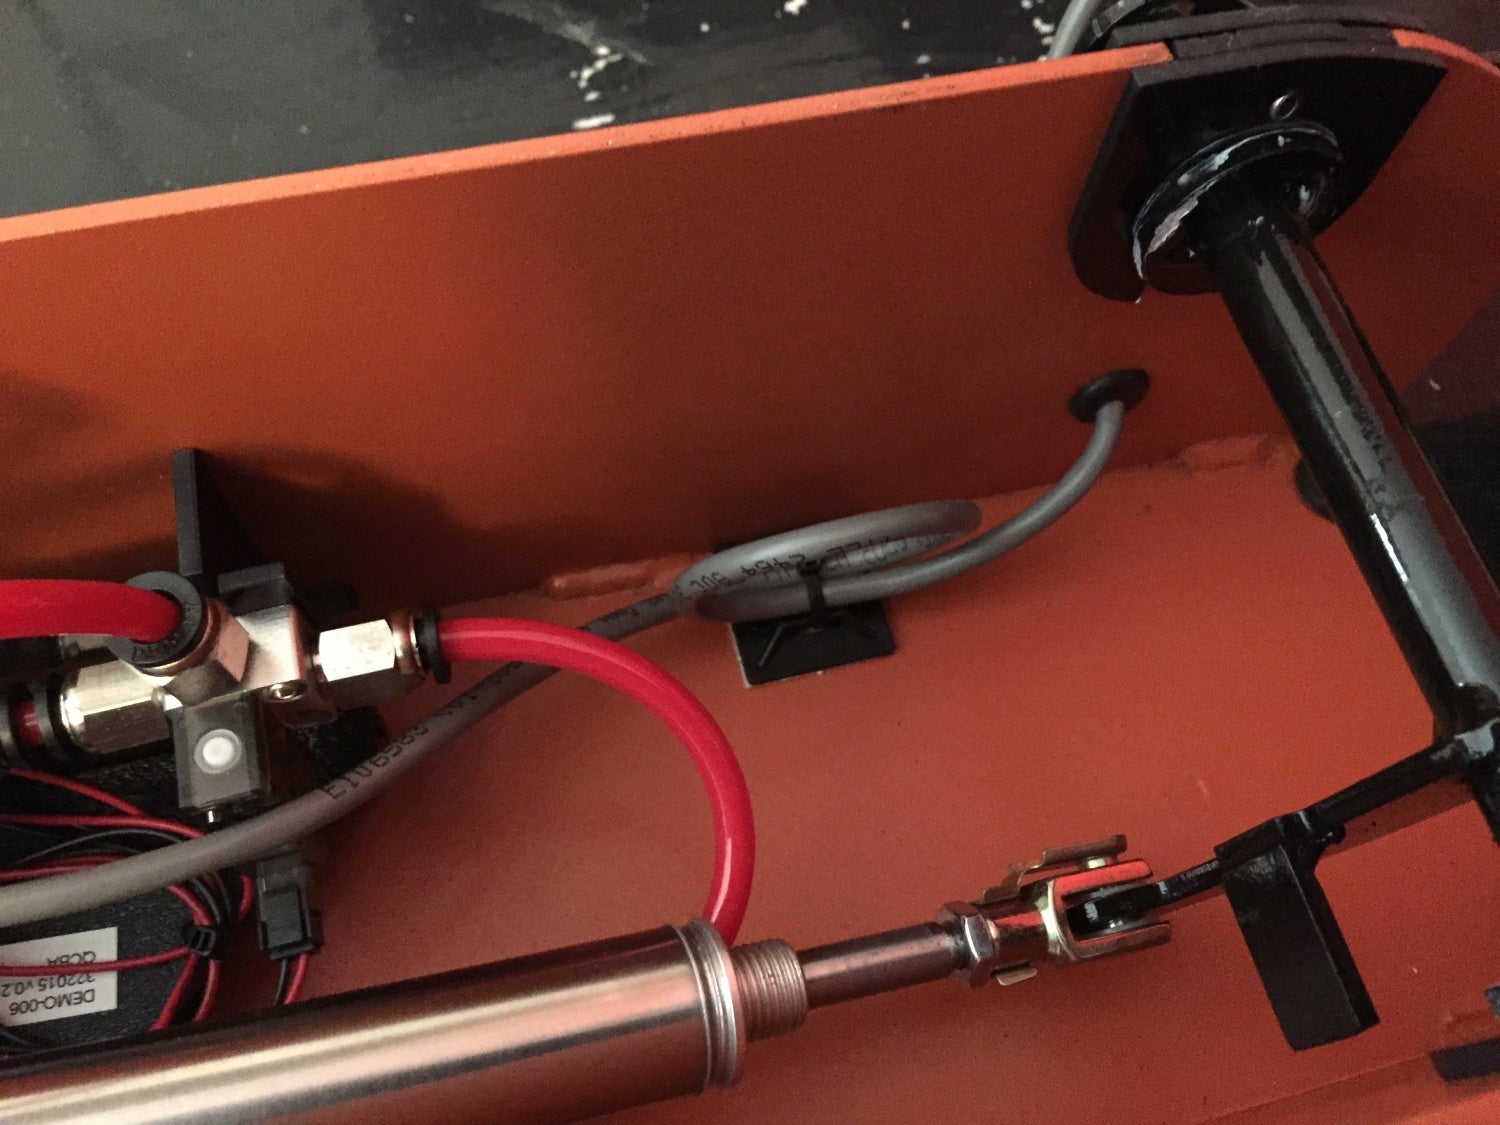
Clean up the wire on the inside (also a good view of the guts)
Conclusion
I can heartily recommend this target system. The worst thing about the targets is having to send them back. As of the time of publish for this review, I’ve had these out to a range eleven times, expended one thousand, eight hundred and fifty (or so) rounds (not all have been mine), and had to refill the CO2 tanks once (beyond the initial fill).
The biggest barrier for most people will be the cost. Individual units are going to be the cost of good firearm (I realize that is a very personal evaluation; I think they will be in the $850 range). Of course you can just shoot paper, but I think the value that this system can add to your training is something to consider.
I definitely foresee these being more heavily adopted (at least initially) by ranges and departments. Once the product goes fully live, I am going to have to have to buy a couple for myself—yes, I am willing to drop the cash for a couple of these (I’d love to have five, but I don’t know that my closet can contain the shoes I’d have to agree to my wife buying since she gets to spend an equivalent amount on things she wants).
One is good. Five is better… 🙂
If you are interested, AutoTargets is currently running an Indiegogo campaign for pre-ordering the units. They have already completed the research and development so their campaign is all about crowd sourcing the funding for the raw materials which should drive prices down. Basically this is not vaporware—this is a legitimate product that is tested and working and just needs a home… 🙂 And you can get units for at least $200 off the future MSRP.
You can find more information at their website, and follow future developments by liking their page on Facebook.